
Choosing the Right Paint and Tools
When it comes to painting your front door without brush marks, selecting the right paint and tools is crucial. Here are some factors to consider:
1. Paint Type: Opt for a high-quality, latex-based exterior paint. Look for a paint that is specifically formulated to resist brush marks and flow smoothly onto surfaces.
2. Finish: Choose a paint finish that suits your preference and the style of your front door. A satin or semi-gloss finish is recommended for durability and easy maintenance.
3. Brushes and Rollers: Invest in high-quality brushes and rollers designed for smoother application. Avoid using cheap brushes that can leave bristle marks or low-quality rollers that create an uneven texture.
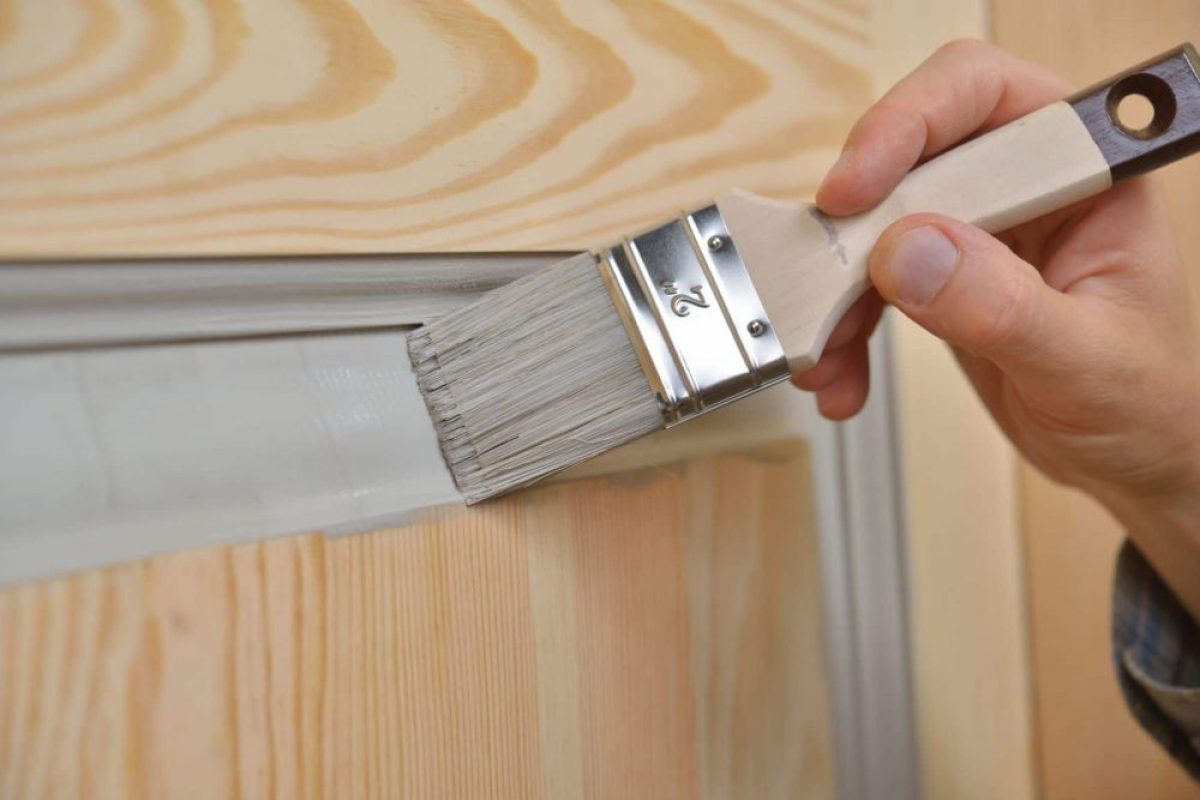
4. Angled Brush: For the edges and corners of the door, use an angled brush to ensure precise application and avoid visible brush strokes.
5. Foam Rollers: Consider using foam rollers instead of traditional fabric rollers. Foam rollers provide a more uniform application and leave behind fewer brush marks.
6. Paint Tray: Use a paint tray with a liner to prevent the build-up of dried paint on the surface. This will help maintain a smooth application throughout the process.
7. Paint Additives: To further enhance the flow and leveling of the paint, you may want to consider using paint additives specifically designed to minimize brush marks.
8. Drop Cloths: Lay down drop cloths or old sheets to protect the surrounding area from paint splatters or spills. This will make cleanup much easier.
9. Stir Sticks: Use stir sticks to thoroughly mix the paint before application. This ensures a consistent color and texture and helps prevent brush marks caused by uneven paint distribution.
10. Paint Strainers: Strain the paint before pouring it into the tray or roller to remove any debris or clumps that could potentially create brush marks.
By carefully selecting the right paint type and tools, you’ll set yourself up for success in achieving a smooth and brush mark-free finish on your front door.
Preparing the Surface
Properly preparing the surface of your front door is essential for achieving a flawless paint finish. Follow these steps to ensure the surface is clean and ready for paint:
1. Remove Hardware: Start by removing any door hardware, such as handles, locks, and hinges. This will make the painting process easier and prevent any accidental paint splatters on the hardware.
2. Clean the Door: Thoroughly clean the door surface using a mild detergent mixed with water. Remove any dirt, grime, or grease using a sponge or soft brush. Rinse off the soap residue with clean water and allow the door to dry completely.
3. Repair Damaged Areas: Inspect the door for any cracks, dents, or holes. Fill in these imperfections using a wood filler or epoxy putty. Smooth out the filled areas and let it dry as per the manufacturer’s instructions. Sand the repaired spots until they are even with the rest of the door surface.
4. Sand the Door: Using a fine-grit sandpaper or sanding sponge, gently sand the entire door surface. This helps create a slightly rough texture, allowing the paint to adhere better. Be sure to sand any rough edges or splinters as well. Wipe away any dust with a clean cloth.
5. Mask off Areas: Use painter’s tape to carefully mask off any areas that you don’t want to be painted, such as the doorknob hole, windows, or decorative hardware. This will create clean lines and prevent accidental paint smudges.
6. Prime the Surface: If your door has been previously painted with a different color or if the surface is bare wood, apply a coat of primer. Choose a primer that is specifically formulated for the type of paint you’ll be using. This will help ensure better adhesion and a more professional-looking finish.
7. Smooth any Rough Spots: After the primer has dried, inspect the door surface for any rough spots or imperfections. Gently sand these areas until they are smooth and blend seamlessly with the rest of the surface.
8. Clean the Surface Again: Before applying paint, clean the surface once more to remove any dust or debris that may have settled on it. Wipe down the door with a damp cloth or use a tack cloth to ensure a clean painting surface.
By properly preparing the surface of your front door before painting, you’ll create the ideal canvas for a beautiful, brush mark-free finish that will enhance the overall appearance of your home.
Removing the Door from Its Hinges
Before you begin painting your front door, it’s often easier to remove it from its hinges to ensure easier access to all sides. Follow these steps to safely remove the door:
1. Prepare the Work Area: Clear the surrounding area to create enough space for the door to be laid flat. Place a protective covering, such as a tarp or blanket, on the floor to prevent any damage to the door or the surface beneath.
2. Locate the Hinge Pins: Most doors have removable hinge pins on one side of the hinge. Open the door slightly and locate the pins at the top and bottom of the hinge. They may be secured by a small metal cap that can be easily popped off with a screwdriver.
3. Remove the Hinge Pins: Once you have located the hinge pins, use a hammer and a nail or a thin long object to tap the bottom of the pins upwards. This will loosen them from the hinges. Once loose, carefully remove the pins from the hinges and set them aside in a safe place.
4. Enlist Help: Removing a door can be a two-person job, especially if it’s a heavy or oversized door. Ask a friend or family member to assist you in lifting and maneuvering the door.
5. Lift the Door: With your helper’s assistance, lift the door upwards and away from the hinges. Take care not to damage the door or the surrounding area while lifting it.
6. Lay the Door Flat: Once the door is removed, carefully lay it flat on the protected surface. This will allow for easier access to all sides of the door for painting.
7. Secure the Door: If required, you can use wooden blocks or wedges to stabilize the door and prevent it from moving while you work on it.
8. Store the Hinge Pins Safely: Keep the hinge pins in a safe place as you’ll need them for rehanging the door later. It’s a good idea to tape them to the door or store them in a labeled bag to avoid misplacement.
Remember to take caution when handling the door, especially if it’s heavy or has delicate glass panels. By removing the door from its hinges, you’ll have a much easier time painting all surfaces evenly and achieving a professional-looking finish.
Sanding the Door
Sanding the door is a crucial step in preparing the surface for a smooth and long-lasting paint finish. Follow these steps to effectively sand your front door:
1. Gather the Necessary Tools: You will need a sanding block or sanding sponge, fine-grit sandpaper (around 120-220 grit), and a clean cloth or tack cloth to remove dust.
2. Start with the Edges and Details: Begin by sanding the edges and any intricate details of the door. Use a sanding block or folded sandpaper to reach these areas. Sand in a smooth, circular motion to remove any roughness or previous paint layers.
3. Sand the Flat Surfaces: Move on to sanding the flat surfaces of the door. Use long, even strokes in the direction of the grain. Be mindful of maintaining consistent pressure to ensure an even sanding job. Sand the entire surface of the door, including both sides and edges.
4. Smooth Out Imperfections: As you sand, pay attention to any imperfections such as scratches, dents, or uneven areas. Focus on smoothing out these spots by applying gentle pressure and sanding in a circular or back-and-forth motion. Take your time to achieve a smooth and uniform surface.
5. Check for Smoothness: Run your hand over the sanded surface to check for smoothness. If you feel any rough spots or inconsistencies, continue sanding until the entire surface feels uniform and free of imperfections.
6. Remove Dust: After sanding, use a clean cloth or tack cloth to thoroughly remove any dust or debris from the surface. This step is crucial to ensure proper paint adhesion and a smooth finish.
7. Clean Up: Dispose of the sanding debris properly and clean your work area to prevent any dust or particles from contaminating the paint during application.
Properly sanding the door surface is essential for creating an ideal base for paint to adhere to and ensuring a professional-looking finish. Take your time and pay attention to detail to achieve the best results.
Applying Primer
Applying primer to your front door is a crucial step in achieving a smooth and long-lasting paint finish. The primer helps to create a solid base, promotes better paint adhesion, and helps to conceal any imperfections on the surface. Follow these steps to correctly apply primer to your door:
1. Select the Right Primer: Choose a primer that is suitable for the material of your door, whether it’s wood, metal, or fiberglass. Look for a high-quality primer that is specifically designed for exterior surfaces and complements the type of paint you will be using.
2. Prepare the Surface: Ensure that the door surface is clean, dry, and free from any dust or debris. Remove any remnants of old paint or varnish if necessary, and sand the surface lightly with fine-grit sandpaper to create a slightly textured surface for better primer adhesion.
3. Protect Surrounding Areas: Use painter’s tape and plastic sheeting to cover any areas that you don’t want to be primed, such as windows, hardware, or glass panels. This step will ensure precise and clean application.
4. Stir the Primer: Before you begin applying primer, give it a thorough stir using a stir stick. This will help to distribute any settling pigments and ensure a consistent application.
5. Start with the Edges: Begin by applying primer to the edges and corners of the door using a brush. Use smooth and even strokes, following the natural grain of the wood. Take care to cover all exposed areas thoroughly.
6. Apply Primer to the Flat Surfaces: Once you have primed the edges, use a foam roller or brush to apply primer to the flat surfaces of the door. Work in small sections, applying the primer in even, overlapping strokes. Maintain a wet edge to avoid visible brush or roller marks.
7. Pay Attention to Details: During the application process, take the time to ensure that the primer is evenly applied and that no areas are missed. Check for any drips, runs, or pooling of the primer and smooth them out immediately to prevent an uneven finish.
8. Allow the Primer to Dry: Follow the manufacturer’s instructions regarding the drying time of the primer. It is essential to allow the primer to dry completely before proceeding with the painting process. This will ensure optimal adhesion and a smooth paint finish.
9. Sand the Primed Surface (Optional): If necessary, lightly sand the primed surface with fine-grit sandpaper once it is completely dry. This step will help to smooth out any imperfections or raised grain for a flawless paint application.
By applying primer correctly, you are creating a solid foundation for a professional and long-lasting paint finish on your front door. Take your time with this step to ensure a smooth and flawless result.
Using a Foam Roller
When it comes to painting your front door without brush marks, using a foam roller can be a game-changer. Foam rollers provide a smooth, even application of paint and help to minimize visible brush strokes. Here’s how to use a foam roller effectively:
1. Select a High-Quality Foam Roller: Choose a foam roller specifically designed for smooth surfaces and compatible with the type of paint you are using. Generally, foam rollers with a short nap work well for doors.
2. Prepare the Paint: Stir the paint thoroughly to ensure a consistent texture. Pour the paint into a paint tray and use a liner to make cleanup easier. Load the foam roller by rolling it evenly in the paint tray, making sure to distribute the paint equally across the roller.
3. Start with the Edges: Begin by painting the edges of the door using the foam roller. Use steady, even strokes and apply minimal pressure to avoid drips or pooling of paint. Roll the foam roller smoothly along the edges, ensuring full coverage.
4. Apply Paint to the Flat Surfaces: Once you have finished with the edges, move on to the flat surfaces of the door. Start at the top and work your way down in small sections, overlapping each stroke slightly. Apply light pressure and maintain a consistent rolling motion for a uniform finish.
5. Roll in a Single Direction: To achieve a seamless finish, roll the foam roller in a single direction. Avoid going back and forth, as this can create visible roller marks. If necessary, lightly feather the edges of each section to blend the paint smoothly.
6. Keep a Wet Edge: It’s important to maintain a wet edge while using a foam roller. This means rolling onto the freshly painted area while it is still wet to avoid any noticeable lines or uneven texture. Work quickly and efficiently to prevent the paint from drying in patches.
7. Check for Drips or Imperfections: As you paint, keep an eye out for any drips, runs, or pooling of paint. Smooth out any imperfections immediately using a brush or the foam roller itself. This will help maintain a consistent and smooth finish.
8. Allow the Paint to Dry: Follow the drying time specified by the paint manufacturer. Ensure that the paint is completely dry before applying additional coats or rehanging the door. Proper drying time will help prevent smudging or paint damage.
Using a foam roller can greatly contribute to achieving a brush mark-free finish on your front door. With the right technique and attention to detail, you’ll be rewarded with a beautifully painted door that adds charm and curb appeal to your home.
Applying the Paint
Applying the paint to your front door is the exciting part of the painting process. With the right technique and attention to detail, you can achieve a beautiful and flawless finish. Here are the steps to follow:
1. Stir the Paint: Begin by stirring the paint thoroughly to ensure an even consistency. This will help to distribute any settling pigments and provide a smooth application.
2. Load the Brush or Roller: If using a brush, dip just the tip of the bristles into the paint and tap off any excess. If using a roller, evenly coat the roller by rolling it in the paint tray.
3. Start with the Edges: Begin by painting the edges of the door using either a brush or a foam brush, applying smooth, even strokes. Take care not to overload the brush or create drips.
4. Paint the Flat Surfaces: Move on to the flat surfaces of the door. If using a brush, use long, even strokes in the direction of the grain. If using a roller, start at the top and roll down in small sections, slightly overlapping each stroke.
5. Maintain a Wet Edge: While painting, make sure to maintain a wet edge to prevent visible brush or roller marks. Work with a consistent pace, ensuring that each stroke blends smoothly into the previous one.
6. Use a Brush for Hard-to-Reach Areas: For any hard-to-reach areas, such as panel details or decorative carvings, use a brush to ensure proper coverage. Take your time and use precision to achieve an even finish.
7. Check for Drips or Runs: Regularly check for any drips, runs, or pooling of paint. If you notice any, gently smooth them out with the brush or roller to maintain a uniform appearance.
8. Apply Thin Coats: It’s best to apply two or three thin coats of paint rather than one thick coat. Thin coats dry more quickly and are less likely to result in brush marks or uneven drying.
9. Allow the Paint to Dry: Follow the recommended drying time specified by the paint manufacturer. Avoid touching or disturbing the door until the paint is fully dry to prevent smudging or damage.
10. Evaluate and Touch Up: Once the paint has dried, take a step back and evaluate the finish. Look for any areas that may need touch-ups or additional coats. Use a brush or roller to apply touch-ups as needed.
By following these steps, you’ll be able to apply the paint smoothly and evenly to create a flawless and professional-looking finish on your front door.
Correcting Imperfections
Even with careful preparation and application, it’s not uncommon to encounter imperfections when painting a front door. However, these can be easily corrected with a few simple techniques. Here’s how to address imperfections and ensure a smooth and flawless finish:
1. Sanding: If you notice any rough spots, drips, or brush marks, lightly sand the affected areas with fine-grit sandpaper. Sand in a circular motion to smooth out the imperfections and create a uniform surface.
2. Feathering: If you have areas with visible brush or roller marks, use a lightly dampened brush or roller to gently blend the edges of the paint. This technique, known as feathering, helps to create a seamless transition between the painted and unpainted areas.
3. Filling and Repairing: For more significant imperfections, such as deep scratches or dents, use a wood filler or epoxy putty to fill them in. Once the filler has dried, sand it down to match the surrounding surface and create a smooth finish.
4. Touch-ups: Take a close look at the entire door after the initial coat has dried. Look for any missed spots, thin areas of paint, or areas that require additional coverage. Use a brush or roller to apply touch-ups as needed, blending the paint seamlessly with the existing finish.
5. Correcting Runs or Drips: If you notice any runs or drips in the paint, it’s important to address them promptly. Use a brush or roller to smooth out the excess paint before it dries. If the paint has already dried, gently sand down the drips or runs and apply a thin coat of paint over the area.
6. Patience and Layering: In some cases, imperfections can be improved by applying additional coats of paint. Allow each coat to dry thoroughly before applying the next one. Multiple thin coats will result in a smoother and more professional-looking finish.
7. Final Inspection: Once all touch-ups and corrections have been made, step back and inspect the door from different angles and under different lighting conditions. This final inspection will help you identify any remaining imperfections and ensure that the door looks flawless.
Remember, addressing imperfections is a normal part of the painting process, and with the right techniques, you can achieve a beautifully painted front door that enhances the overall appearance of your home.
Applying Additional Coats
Applying additional coats of paint to your front door is often necessary to achieve a smooth and even finish. Multiple coats help to build up the color and ensure proper coverage. Follow these steps for applying additional coats effectively:
1. Assess the First Coat: After the initial coat has dried, evaluate the coverage and appearance of the paint. Determine if it is sufficient or if additional coats are needed for a more solid and uniform color.
2. Prepare the Surface: Before applying additional coats, check the surface for any imperfections, such as brush strokes, drips, or rough areas. Sand down these issues lightly using fine-grit sandpaper and wipe away the dust with a clean cloth.
3. Stir the Paint: Give the paint a thorough stir to ensure an even consistency. This is especially important if the paint has been sitting for some time since the first coat was applied.
4. Apply Thin Coats: When applying additional coats, it’s best to use thin layers of paint. Thin coats dry faster and are less likely to show brush or roller marks. Load your brush or roller with just enough paint to provide even coverage without excess dripping.
5. Maintain a Wet Edge: For a seamless finish, work swiftly and maintain a wet edge as you apply each coat. This means slightly overlapping each stroke and blending it into the previous one while the paint is still wet.
6. Follow the Same Application Technique: Apply the additional coats using the same technique as the first coat. If you used a brush or foam roller initially, stick with the same method for consistency. This will help achieve a uniform appearance across the entire door.
7. Allow Drying Time: Make sure to allow each coat to dry completely before applying the next one. Follow the manufacturer’s instructions for the recommended drying time. Rushing the process can result in uneven drying and potential damage to the finish.
8. Evaluate and Touch Up: After each additional coat has dried, step back and evaluate the door’s appearance. Look for any areas that may need touch-ups or additional coverage. Use a brush or roller to apply touch-ups as needed, blending them seamlessly into the existing layers.
9. Repeat if Necessary: Depending on the desired depth of color and the opacity of the paint, you may need to apply multiple coats. Repeat the process of assessment, preparing the surface, and applying thin coats until you achieve the desired result.
Applying additional coats of paint ensures a more consistent and professional-looking finish on your front door. Take your time and apply thin layers for the best results.
Allowing the Paint to Dry Properly
After painting your front door, it’s crucial to allow the paint to dry properly to ensure a durable and flawless finish. Proper drying time will help avoid smudging or damage to the paintwork. Follow these steps to ensure the paint on your front door dries effectively:
1. Follow the Manufacturer’s Recommendations: The paint manufacturer will provide specific drying time instructions on the product label. It’s essential to follow these guidelines for optimal results.
2. Create Adequate Ventilation: Proper air circulation contributes to quicker and more thorough drying. Open windows and doors, or use fans to promote airflow in the area where the door is drying. This will help the paint cure evenly.
3. Avoid Touching or Handling the Door: It’s crucial to resist the temptation to touch or handle the door until the paint is completely dry. Even light contact can leave marks or smudges, jeopardizing the final finish. Exercise caution and patience during the drying period.
4. Protect the Door from Dust and Debris: Minimize the potential for dust or debris settling on the drying paint. Keep the area clean and free from activities that may create airborne particles. If necessary, cover the door with a lightweight cloth or plastic sheeting to protect it.
5. Allow Sufficient Drying Time between Coats: If you are applying multiple coats of paint, make sure to let each coat fully dry before applying the next one. Rushing the process may result in uneven drying and negatively impact the final finish.
6. Consider Humidity and Temperature: Both humidity and temperature can affect paint drying time. Be aware of the climate conditions in your area and follow the recommendations provided by the paint manufacturer regarding suitable drying conditions.
7. Monitor Curing Time: Keep in mind that paint drying and curing are different processes. Although the paint may feel dry to the touch, it may still be in the curing stage. Plan accordingly and avoid any heavy use of the door until the paint has fully cured per the manufacturer’s instructions.
8. Evaluate the Finish: After the recommended drying time has elapsed, examine the door closely to confirm that the paint has dried properly. Look for any signs of tackiness, smudging, or unevenness. If you notice any issues, consult the paint manufacturer’s guidelines for corrective measures.
Allowing the paint to dry properly is crucial for achieving a durable and professional-looking finish on your front door. Ensure you follow the recommended drying time and take necessary precautions to protect the door during this critical stage.
Reinstalling the Door
Once the paint on your front door has completely dried and cured, it’s time to reinstall the door back onto its hinges. Follow these steps to safely and correctly rehang your front door:
1. Enlist Help: Reinstalling a door can be a two-person job, especially if it is heavy or oversized. Ask a friend or family member to assist you in lifting and aligning the door with the hinges.
2. Prepare the Doorway: Ensure that the doorway is clean and clear of any obstructions or debris. Check that the hinges are clean and in good condition, free from rust or damage.
3. Align the Hinge Plates: Line up the hinge plates on the door with the corresponding hinge pins on the door frame. With your helper’s assistance, carefully position the door into the frame, ensuring that the hinges align accurately.
4. Insert the Hinge Pins: Once the door is positioned correctly, insert the hinge pins into the hinge sleeves. Tap the pins gently with a hammer or a mallet to secure them in place. Make sure they are fully inserted but not too tight.
5. Test the Door: Open and close the door several times to ensure it operates smoothly and evenly. Check for any rubbing or sticking, which may indicate misalignment or tight hinges. Make any necessary adjustments to ensure proper functionality.
6. Reinstall Hardware: Once the door is properly hung, reinstall any door hardware, such as handles, locks, and hinges. Secure them tightly and ensure that they function correctly.
7. Finishing Touches: Inspect the door and surrounding area for any paint smudges or marks that may have occurred during the reinstalling process. Use a clean cloth or sponge to wipe away any blemishes and restore the door’s pristine appearance.
8. Test Security and Functionality: Double-check that all locks, handles, and other hardware components are working properly. Make sure the door closes securely and locks smoothly.
By following these steps and taking your time during the reinstallation process, you can confidently place your newly painted front door back in its proper position, restoring the functionality and beauty to your home’s entrance.