
Materials Needed
Before you begin making your own knife block with skewers, it’s important to gather all the necessary materials. Here’s what you’ll need:
- Wooden base – Choose a solid piece of wood that is thick enough to hold the skewers firmly in place.
- Skewers – Opt for wooden skewers that are long enough to accommodate your knives.
- Power drill – You’ll need a drill to create holes in the wooden base for inserting the skewers.
- Sandpaper – To smoothen the surface of the base and ensure a clean finish.
- Paint or stain – If you want to add color or enhance the natural beauty of the wood, choose a paint or stain of your choice.
- Brushes – Use brushes to apply the paint or stain evenly onto the base.
- Wood glue – It is helpful for securing the skewers in place.
- Measuring tape – To measure the spacing and ensure evenly spaced holes for the skewers.
- Pencil or marker – Used for marking the drill points on the base.
- Protective equipment – Safety goggles and work gloves are recommended to protect yourself during the construction process.
Having these materials on hand will ensure that you can complete the knife block project smoothly and efficiently. Once you have gathered everything, you can move on to the step-by-step process of creating your knife block using skewers.
Step 1: Gather Your Supplies
Before you begin creating your own knife block with skewers, it’s essential to gather all the necessary supplies. Here’s a breakdown of what you’ll need:
- Wooden Base: Choose a sturdy and stable wooden base for your knife block. It should be large enough to accommodate the desired number of skewers and the size of your knives.
- Skewers: Opt for wooden skewers that are long enough to hold your knives securely. Make sure they are thick and durable to prevent them from bending or breaking.
- Power Drill: Use a drill with an appropriate-sized drill bit to create holes in the base for the skewers. It’s important to choose a drill bit that matches the diameter of the skewers for a snug fit.
- Sandpaper: You’ll need sandpaper or sanding blocks to smoothen the surface of the wooden base. This will ensure a clean and polished finish.
- Paint or Stain: If you want to add a splash of color or enhance the natural beauty of the wood, consider using paint or stain. Choose a color or finish that complements your kitchen decor.
- Brushes: Use brushes to apply the paint or stain evenly onto the wooden base. Foam brushes or bristle brushes work well for this task.
- Wood Glue: To secure the skewers in place, you’ll need wood glue. Apply a small amount of glue to each hole before inserting the skewers to ensure they stay firmly in place.
- Measuring Tape: Use a measuring tape to measure the spacing between the holes accurately. This will help ensure that your knives fit well and are easy to insert and remove.
- Pencil or Marker: Mark the drill points on the wooden base using a pencil or marker. This will guide you when drilling the holes and help maintain the desired spacing.
- Protective Equipment: Remember to wear safety goggles and work gloves to protect yourself during the construction process. This is especially important when using power tools and handling potentially sharp objects.
Once you have gathered all the necessary supplies, you’ll be ready to move on to the next step: preparing the base for your knife block.
Step 2: Prepare the Base
Now that you have all your supplies ready, it’s time to prepare the wooden base for your knife block. Follow these steps:
- Measure and mark: Using a measuring tape, determine the desired size and shape of your knife block. Mark these measurements on the wooden base using a pencil or marker. Ensure that the size and shape are suitable for the number and size of knives you plan to store.
- Cut the base: Use a saw or appropriate cutting tool to carefully cut the wooden base along the marked lines. Take your time and make precise cuts to ensure a clean and professional-looking result.
- Smooth the edges: Use sandpaper or sanding blocks to round off the edges and corners of the base. This will not only enhance the appearance but also make it safer to handle and reduce the risk of splinters.
- Drill pilot holes: Before drilling the actual holes for the skewers, it’s a good idea to create pilot holes first. These smaller holes will guide the drill bit and prevent the wood from splitting or splintering when you drill the larger holes.
- Place the base securely: Place the base on a stable surface or secure it in a vice grip to prevent it from moving around during the drilling process. This will ensure accuracy and minimize the risk of accidents.
- Drill the holes: Using the appropriate-sized drill bit, carefully drill the holes in the marked locations on the base. Apply gentle and consistent pressure, allowing the drill bit to move smoothly through the wood. Be sure to drill straight and perpendicular to the surface for a neat and aligned result.
- Check the depth: As you drill each hole, periodically check the depth using one of the skewers. You want the holes to be deep enough to securely hold the skewers but not too deep that they protrude through the bottom of the base.
- Remove any debris: After drilling all the holes, clean out any wood shavings or debris from the base. You can use a soft brush or compressed air to ensure that the holes are clean and ready for the next step.
Once you have prepared the base, you’re ready to move on to the next step: drilling the holes for the skewers.
Step 3: Drill Holes for Skewers
With the base prepared, it’s time to drill the holes where the skewers will be inserted. Follow these steps:
- Select the drill bit: Choose a drill bit that matches the diameter of your skewers. It should be slightly smaller in size to ensure a snug fit and prevent the skewers from wobbling or falling out.
- Secure the base: Place the base on a stable surface or secure it in a vice grip to prevent it from moving during the drilling process. This will ensure accuracy and safety.
- Mark the drill points: Use the measuring tape and a pencil or marker to mark the locations where you want to drill the holes. Be sure to space the holes evenly for a balanced and organized arrangement.
- Begin drilling: Carefully position the drill bit on the first marked point. Apply steady and even pressure as you start drilling into the wooden base. Ensure that the drill bit is perpendicular to the surface to achieve straight and neatly aligned holes.
- Control the depth: As you drill, monitor the depth of the hole by periodically checking it against one of the skewers. You want the holes to be deep enough to securely hold the knives but not too deep that they protrude through the bottom of the base.
- Repeat for all holes: Continue drilling the holes following the marked points until you have drilled all the necessary holes. Take your time to maintain consistency and accuracy throughout the process.
- Clean up: After drilling all the holes, clean out any wood shavings or debris from the base. Use a soft brush or compressed air to ensure that the holes are clean and ready for the next steps of the process.
Drilling the holes is a crucial step in creating your knife block. It will provide the sturdy foundation for inserting the skewers that will hold your knives securely. Take your time and exercise caution to achieve the desired results.
Step 4: Sand and Finish the Base
After drilling the holes for the skewers, it’s time to sand and finish the wooden base. This step will not only enhance the appearance but also ensure a smooth surface for painting or staining. Follow these steps:
- Gather your sandpaper: Choose sandpaper with different grits, starting with a coarse grit (around 80 or 120) and gradually working your way up to a finer grit (around 220 or 320). This range will allow you to smoothen the surface effectively.
- Sand the entire base: Using the coarse-grit sandpaper, start sanding the entire surface of the wooden base. Apply even pressure and sand in the direction of the wood grain. This step will remove any rough spots, imperfections, or splinters.
- Switch to finer-grit sandpaper: Once the base feels smooth with the coarse-grit sandpaper, switch to the finer-grit sandpaper. Sand the entire surface again to further refine and polish the wood.
- Round the edges: To give the base a more finished and softened look, use sandpaper or sanding blocks to round off the sharp edges. This will also help prevent any accidental cuts or injuries when handling the knife block.
- Remove dust: After sanding, use a soft cloth or brush to remove any sanding dust from the surface and inside the holes. This will ensure a clean base for finishing.
- Choose your finish: Decide whether you want to paint or stain the wooden base. Paint can add a pop of color to match your kitchen or personal style, while stain can enhance the natural beauty of the wood grain. Select the appropriate finish and gather the necessary supplies.
- Apply the finish: Following the manufacturer’s instructions, apply the paint or stain evenly onto the wooden base using brushes. Make sure to cover all surfaces, including the inside of the holes. Allow the finish to dry completely before moving on to the next step.
Sanding and finishing the base will provide a polished and professional look to your knife block. It also adds a layer of protection and helps to seal the wood, prolonging the durability of your creation.
Step 5: Paint or Stain the Base
Now that the base is sanded and prepared, it’s time to add color and personality to your knife block by painting or staining it. Follow these steps:
- Choose your desired finish: Decide whether you want to paint the base with a vibrant color or stain it to enhance the natural beauty of the wood. Consider the overall aesthetic of your kitchen and personal preference when making this choice.
- Prepare the base: Ensure that the base is clean and free of any dust or debris. Use a soft cloth or brush to remove any remaining sanding residue. This will ensure a smooth and even finish.
- Protect the surrounding area: If you’re painting or staining indoors, it’s essential to protect the surrounding surfaces from accidental spills or drips. Lay down newspapers or use a drop cloth to cover the area.
- Apply the paint or stain: If you’ve chosen to paint the base, use a brush or roller to apply an even coat of paint. Start from one end and work your way across, ensuring full coverage. Allow the first coat to dry before applying additional coats if necessary. If staining, use a brush or cloth to apply the stain, following the wood grain. Wipe off any excess for a more consistent color.
- Allow for drying time: Depending on the type and brand of paint or stain, drying times may vary. Follow the manufacturer’s instructions to ensure that each coat has enough time to dry before moving on to the next step.
- Inspect and touch up: After the paint or stain has dried, inspect the base for any uneven spots or missed areas. Touch up these spots using a small brush or cloth. This will ensure a professional and polished appearance.
- Seal the finish (optional): If desired, you can choose to seal the painted or stained base with a clear topcoat. This will protect the finish and add an extra layer of durability. Follow the manufacturer’s instructions for application and drying time.
Painting or staining the base of your knife block allows you to customize the look and feel of the final product. Whether you choose a bold color or a natural wood stain, adding the finishing touch will bring your creation to life.
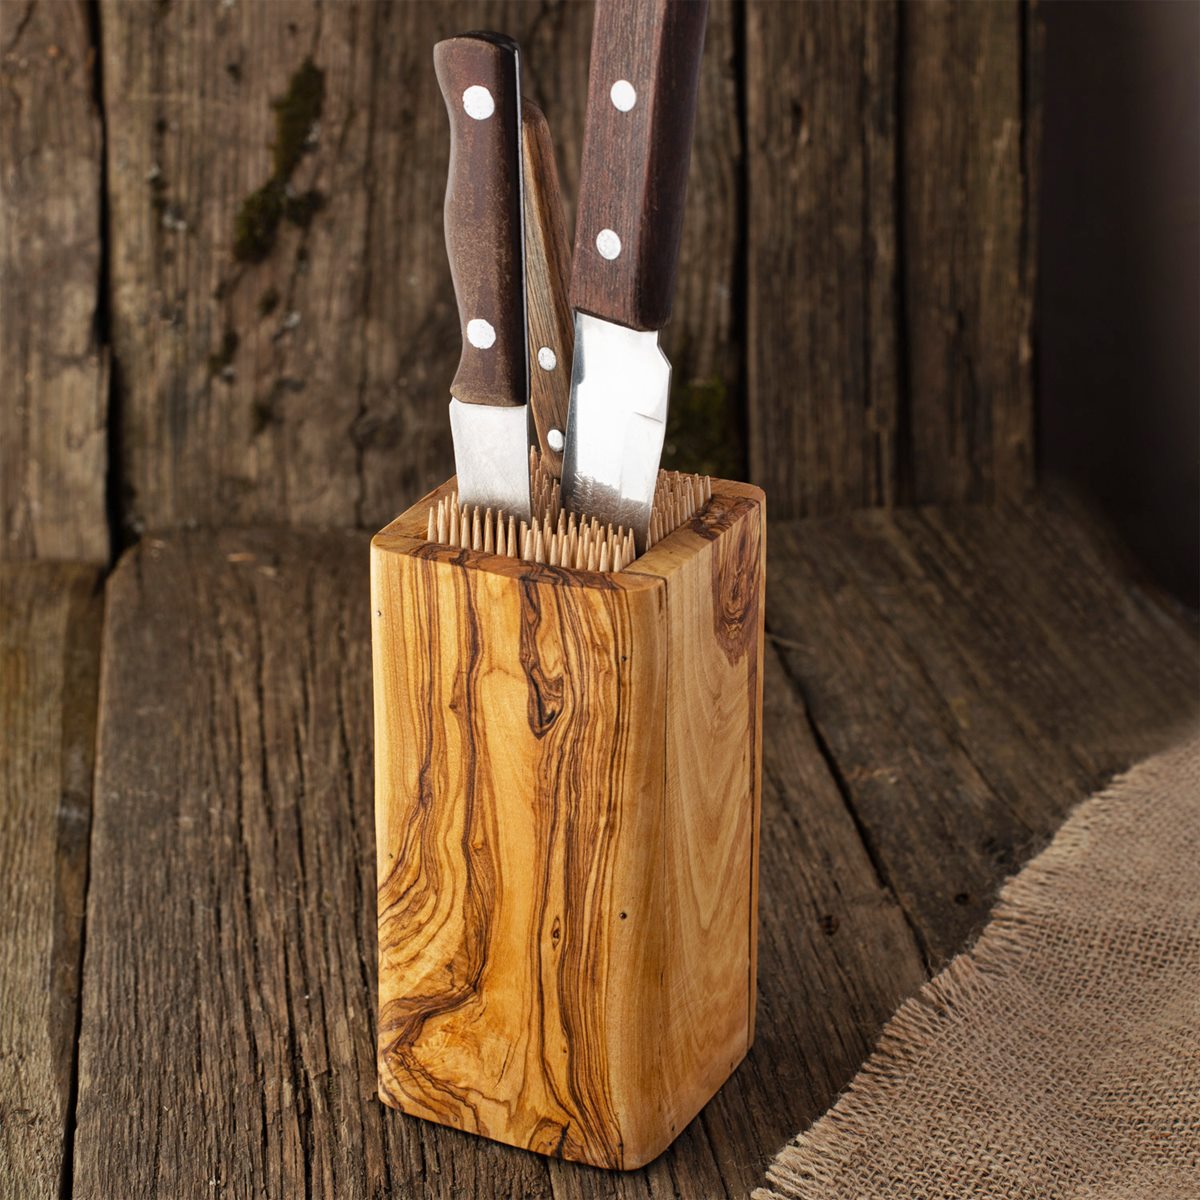
Step 6: Insert Skewers into the Holes
Now that you have prepared and finished the base of your knife block, it’s time to insert the skewers into the drilled holes. Follow these steps:
- Gather the skewers: Ensure that you have enough wooden skewers to accommodate the number of knives you plan to store. The skewers should fit securely in the drilled holes and hold the knives in place.
- Apply wood glue (optional): If you want to provide extra stability for the skewers, you can apply a small amount of wood glue to the bottom of the drilled holes. This will help secure the skewers in place and prevent them from wobbling.
- Insert the skewers: Carefully insert the wooden skewers into the drilled holes, ensuring that they are aligned and straight. Gently press them into the holes until they are fully inserted.
- Test the fit: Place a few knives onto the skewers to test if they fit securely and are easy to insert and remove. Adjust the depth of the skewers or reposition them if necessary to ensure a snug fit for your knives.
- Ensure even spacing: As you insert the skewers, ensure that the spacing between them is even. This will create a visually appealing and well-organized knife block.
- Check for stability: Once all the skewers are inserted, check that they are stable and firmly held in place. Gently wiggle them to ensure they do not move or come loose. If necessary, apply additional wood glue to reinforce their positioning.
Inserting the skewers into the drilled holes is a crucial step in creating a functional and secure knife block. Take your time to ensure that the skewers are properly aligned and firmly held in place. This will provide the foundation for safely storing and accessing your knives.
Step 7: Secure Skewers in Place
Once you have inserted the skewers into the drilled holes of your knife block, it’s important to secure them in place to ensure stability and prevent any wobbling or movement. Follow these steps:
- Apply wood glue: If you haven’t already applied wood glue during the previous step, now is the time to do so. Apply a small amount of wood glue to the bottom of each hole or along the sides of the skewers where they meet the base. This will help adhere the skewers firmly to the base of the knife block.
- Press down gently: After applying the wood glue, gently press down on each skewer to ensure a strong bond with the base. This will help secure the skewers in place and prevent them from shifting or coming loose over time.
- Wipe off excess glue: Carefully wipe off any excess wood glue that may have squeezed out from the holes or along the sides of the skewers. Use a damp cloth or sponge to do this while being mindful not to disturb the glue that has already begun to set.
- Allow glue to dry: Give the wood glue enough time to dry and set according to the manufacturer’s instructions. Avoid moving the knife block or placing any weight on it during this time to ensure a strong bond between the skewers and the base.
- Test stability: Once the wood glue has fully dried, test the stability of the skewers by gently wiggling them. They should be securely held in place without any significant movement. If you notice any loose skewers, reapply wood glue and press them down firmly once again.
Securing the skewers in place is a crucial step in ensuring the longevity and functionality of your knife block. By properly adhering the skewers to the base, you can have confidence that your knives will be securely held and readily accessible whenever you need them.
Step 8: Test the Knife Block
With the skewers securely in place, it’s time to test the functionality of your knife block. By testing and inspecting the knife block, you can ensure that it meets your needs and provides a safe storage solution for your knives. Follow these steps:
- Organize your knives: Gather the knives that you plan to store in the knife block. Place them beside the block, ready for testing and insertion into the skewers.
- Insert the knives: Begin by carefully inserting each knife blade into the desired skewer, ensuring that it is fully seated and stable. Take note of how well the knives fit and how securely they are held in place.
- Test stability and balance: Gently wiggle each knife to test its stability. The knives should be securely held within the skewers without wobbling or coming loose. Verify that the knife block remains balanced and steady, even when different knives are inserted.
- Inspect spacing and alignment: Take a moment to evaluate the spacing and alignment of the knives within the knife block. Ensure that the knives are evenly spaced and aligned, creating an organized and visually appealing arrangement.
- Check ease of access: Test the ease of inserting and removing the knives from the skewers. The knives should slide in and out smoothly without any obstruction or difficulty, allowing for convenient access when needed.
- Verify safety: Carefully assess the safety of the knife block. Ensure that the knife blades are fully covered and protected by the skewers, reducing the risk of accidental cuts or injuries when reaching for a knife.
- Make adjustments if necessary: If you encounter any issues during the testing process, such as unstable knives or difficult access, consider making adjustments. This may involve repositioning the skewers or sanding the holes for a better fit.
Testing the knife block is an important step to verify its functionality and suitability for your knives. By ensuring stability, ease of access, and safety, you can have confidence in the performance of your finished knife block.
Step 9: Additional Customizations
Once you have tested the functionality of your knife block, you may consider additional customizations to personalize and enhance its appearance. Here are some ideas to consider:
- Decorative Elements: Add decorative elements to the base of your knife block to make it more visually appealing. This could include decals, stencils, or even wood carvings that reflect your personal style or kitchen theme.
- Labels or Tags: Attach labels or tags to each skewer to help you easily identify and locate specific knives. You can use adhesive labels or get creative by using engraved or painted tags that hang from the skewers.
- Unique Finishes: Get creative with the finishes of your knife block. Consider using techniques such as distressing, color fading, or even adding a glossy or matte finish to make it stand out.
- Customized Dimensions: Modify the dimensions of the base to accommodate larger or specialty knives. This customization ensures that your knife block is tailor-made to fit your knife collection perfectly.
- Additional Storage Space: If you have other kitchen utensils that you’d like to store alongside your knives, consider adding extra slots or compartments to the base. This customization will maximize the utility of your knife block.
- Personalized Engravings: Consider engraving your initials, a special message, or a meaningful design onto the wooden base. This will add a personal touch and make the knife block truly unique to you.
- Protective Coating: Apply a protective coating, such as polyurethane or lacquer, to the finished knife block. This will provide added durability and resistance to moisture, keeping your creation looking beautiful for years to come.
Remember, the customizations you choose should align with your personal preferences and kitchen decor. Feel free to get creative and make your knife block a reflection of your style and taste.
Step 10: Final Touches and Maintenance Tips
As you near the completion of your knife block project, there are a few final touches to consider, as well as important maintenance tips to ensure its longevity. Follow these steps:
- Inspect for imperfections: Take a moment to carefully inspect the knife block for any imperfections or areas that may need touch-ups. Sand or paint over any spots that require attention to ensure a polished finish.
- Clean and polish: Once you’re satisfied with the appearance of the knife block, give it a thorough cleaning. Use a soft cloth or brush to remove any dust or debris that may have accumulated during the construction process.
- Add felt pads or rubber feet: To protect your countertops or surfaces, consider adding felt pads or rubber feet to the underside of the knife block. This will help prevent scratches and provide stability when placing or removing knives.
- Establish maintenance routine: Develop a regular maintenance routine to keep your knife block in optimal condition. This may involve periodic cleaning, inspecting the skewers for any signs of wear, or reapplying a protective coating as needed.
- Avoid excessive moisture exposure: To prevent damage to the wooden base and the knives themselves, avoid placing the knife block in direct contact with water or excessive moisture. Moisture can cause the wood to warp or the knife blades to corrode.
- Proper knife placement: Ensure that when inserting knives into the skewers, the blades are facing downwards towards the base and the cutting edge is safely positioned away from your hand. This reduces the risk of accidents while handling the knives.
- Regularly sharpen knives: Keep your knives sharp to ensure their efficiency and effectiveness. Regularly sharpen or hone the blades using a suitable sharpening tool to maintain their cutting performance.
- Store knives when dry: Before placing the knives back into the knife block, ensure that they are thoroughly dry. This prevents moisture buildup and the potential for bacteria growth.
Finalizing your knife block with attention to detail and following proper maintenance practices will ensure its longevity and help you enjoy the benefits of a functional and safe storage solution for your knives.