
Choosing the Right Spot for Your Shelf
When it comes to installing a shelf with brackets, the first and most important step is choosing the right spot for it. The location you choose will not only affect the functionality of the shelf but also its overall aesthetic appeal. Here are some factors to consider when selecting the perfect spot for your shelf:
- Functionality: Determine the purpose of the shelf and how you plan to use it. Is it for decorative purposes, or will it be used to store and display items? Consider the weight capacity of the brackets and the size of the shelf to ensure it will be able to hold the items you have in mind.
- Wall structure: Take a close look at the wall where you intend to install the shelf. Is it a load-bearing wall or a partition wall? Load-bearing walls are typically sturdier and better suited for holding heavy shelves. If you’re unsure about the type of wall you have, consult a professional before proceeding.
- Height and accessibility: Consider the height at which you want to install the shelf. Will it be within easy reach, or do you need a step stool or ladder to access it? Think about the items you plan to place on the shelf and make sure they are easily reachable.
- Aesthetic appeal: Think about how the shelf will blend with the overall decor of the room. The spot you choose should complement the surrounding furniture and decor. Consider factors such as wall color, texture, and style.
- Safety considerations: Ensure that the chosen spot is away from potential hazards such as doors, windows, or high-traffic areas where the shelf could pose a risk of injury. Avoid placing the shelf above heat sources or in areas exposed to moisture.
By carefully considering these factors, you can choose the perfect spot for your shelf, ensuring both practicality and aesthetics. Take your time to measure and visualize the placement of the shelf before moving onto the next step of the installation process.
Gathering the Materials and Tools You’ll Need
Before you can begin the installation process, it’s essential to gather all the necessary materials and tools. Having everything on hand will make the process smoother and more efficient. Here’s a list of what you’ll need:
- Shelf: Choose a shelf material and size that suits your needs and aesthetic preferences. Common options include wood, glass, and metal.
- Brackets: Select brackets that are sturdy and able to support the weight of the shelf and the items you plan to place on it. Consider the design and material of the brackets to ensure they align with your desired style.
- Wall anchors: If the wall you are mounting the shelf on is not made of solid wood or concrete, you will need wall anchors to provide extra stability and support. Choose anchors that are appropriate for the wall material.
- Screws: Depending on the type of brackets and anchors you have chosen, you may need screws to secure them to the wall and attach the shelf.
- Level: A level will help ensure that your shelf is properly aligned and straight. This tool is essential for achieving a professional-looking installation.
- Tape measure: Accurate measurements are crucial when installing a shelf. Use a tape measure to determine the precise distances between the brackets and mark the placement on the wall.
- Pencil: A pencil will allow you to mark the measurements and bracket placement on the wall before installing.
- Drill: A drill is necessary for making holes in the wall for the brackets and anchors. Ensure you have the correct drill bits for the type of wall you are working with.
- Screwdriver: A screwdriver will be needed to screw the brackets into the wall and attach the shelf to the brackets. Depending on the type of screws you use, you may need a specific type of screwdriver.
- Protective equipment: Lastly, don’t forget to have safety goggles and gloves on hand to protect your eyes and hands during the installation process.
By gathering all the necessary materials and tools beforehand, you can ensure a smooth and efficient installation process. Double-check that you have everything on the list before moving on to the next step.
Measuring and Marking the Placement of the Brackets
Properly measuring and marking the placement of the brackets is crucial for a successful shelf installation. Here’s a step-by-step guide on how to do it:
- Measure the shelf: Start by measuring the length and width of your shelf. This will help you determine the spacing and placement of the brackets.
- Mark the desired height: Use a tape measure to determine the desired height of your shelf. Consider the items you plan to place on the shelf and ensure they will fit comfortably.
- Mark the center: Find the center point of the wall where you want to install the shelf. Use a pencil to make a small vertical mark at the desired height.
- Measure bracket spacing: Divide the length of the shelf by the number of brackets you have. This will give you an equal spacing measurement between each bracket.
- Mark bracket placement: Starting from the center mark, measure and mark the spacing distance on each side. This will indicate the exact placement of each bracket. Double-check your measurements to ensure accuracy.
- Use a level: Place the level vertically against each mark to ensure it is perfectly straight. Make any necessary adjustments to ensure a level installation.
- Consider wall studs: If your wall has studs, it’s best to align the brackets with them for added stability. Use a stud finder to locate the position of the studs and adjust your bracket placement accordingly.
- Double-check measurements: Before moving on to the installation step, review all your measurements and marks to confirm that everything is accurate and aligned.
By measuring and marking the placement of the brackets correctly, you will ensure a secure and visually pleasing installation. Take your time during this step to guarantee accurate results, as any errors can affect the stability and aesthetic appeal of your shelf.
Preparing the Wall for Installation
Before you can start installing the shelf brackets, it’s essential to prepare the wall to ensure a secure and long-lasting installation. Here are the steps to follow:
- Clear the area: Remove any furniture, decorations, or other objects from the wall and surrounding area. This will give you ample space to work and prevent any obstructions during the installation.
- Clean the wall: Use a clean, dry cloth or a mild cleaning solution to wipe down the wall surface where the brackets will be installed. This will remove any dust, dirt, or grease that could affect the adhesion of the brackets.
- Identify wall material: Determine the type of wall material you are working with, such as drywall, concrete, or plaster. This will help you choose the appropriate tools and hardware for installation.
- Pre-drill holes: If you are working with a wall that is not solid wood or concrete, it’s essential to pre-drill pilot holes for the wall anchors. Use a drill bit that matches the size of the anchors to ensure a proper fit.
- Attach wall anchors: Insert the wall anchors into the pre-drilled holes, tapping them gently with a hammer if necessary. Make sure they are flush with the wall surface to provide a solid foundation for the brackets.
- Consider stud placement: If your wall has studs, it’s recommended to install the brackets directly into them for added stability. Use a stud finder to locate the position of the studs and adjust your bracket placement accordingly.
- Test the wall anchors: Before proceeding, give the wall anchors a gentle tug to ensure they are firmly in place. If any anchors feel loose, remove them and try a larger size or consider using different types of anchors suitable for your wall material.
- Double-check the level: Use a level to ensure that the wall anchors and the area where the brackets will be attached are perfectly level. This will help prevent any slanted or uneven installation.
By properly preparing the wall before installation, you will ensure a secure and stable foundation for your shelf brackets. These steps will help prevent any damage to the wall surface and ensure the longevity of your installation.
Attaching the Brackets to the Wall
Once you have prepared the wall, it’s time to attach the brackets securely. Follow these steps to ensure a proper installation:
- Align the brackets: Place the first bracket against the wall, aligning it with the marks you made during the measuring and marking step. If you are attaching the brackets to studs, make sure they align with the studs as well.
- Mark screw hole locations: Use a pencil or marker to mark the screw hole locations on the wall through the holes in the bracket. This will guide you when drilling the holes.
- Pre-drill the screw holes: Remove the bracket and use a drill bit slightly smaller than the size of the screws. Drill into the marked locations to create pilot holes for the screws. Be careful not to drill too deep or damage the wall surface.
- Attach the brackets: Place the bracket back against the wall and align the screw holes with the pilot holes. Insert the screws into the holes and use a screwdriver or drill to secure the brackets to the wall. Repeat this process for all brackets.
- Check alignment: Use a level to ensure that the brackets are perfectly aligned and straight. Make any necessary adjustments at this stage before proceeding to the next step.
- Tighten the screws: Once all the brackets are attached, go back and double-check the tightness of the screws. Ensure that they are securely fastened but be careful not to overtighten as it could damage the brackets or the wall.
By following these steps, you will securely attach the brackets to the wall, providing a stable and reliable base for your shelf. Take your time and check alignment and tightness for a professional installation.
Securing the Shelf to the Brackets
With the brackets securely attached to the wall, it’s time to place the shelf on top and secure it in place. Follow these steps to ensure a stable attachment:
- Place the shelf on the brackets: Carefully lift the shelf and position it on top of the brackets. Ensure that it is centered and evenly aligned with the brackets.
- Mark the screw hole locations: Use a pencil or marker to mark the screw hole locations on the underside of the shelf through the holes in the brackets. This will guide you when drilling the holes.
- Pre-drill the screw holes: Remove the shelf and use a drill bit slightly smaller than the size of the screws. Drill into the marked locations on the underside of the shelf to create pilot holes for the screws. Be mindful not to drill too deep or damage the shelf surface.
- Attach the shelf to the brackets: Place the shelf back on top of the brackets, aligning the screw holes on the shelf with the pilot holes. Insert the screws into the holes and use a screwdriver or drill to secure the shelf to the brackets.
- Check alignment and stability: Once the shelf is attached, check its alignment and stability. Ensure that it is level and securely in place. Give the shelf a gentle push to see if it wobbles or shifts. If necessary, make any adjustments or tighten the screws further for added stability.
- Test the weight capacity: If your shelf is designed to hold heavy items, it’s advisable to test its weight capacity before placing valuable or fragile belongings on it. Gradually add weight to the shelf, making sure it can bear the load without sagging or compromising its stability.
By following these steps, you will securely attach the shelf to the brackets, providing a stable and functional display or storage solution. Ensure that the shelf feels secure and stable before moving on to the finishing touches.
Adding the Finishing Touches
Now that the shelf is securely attached to the brackets, it’s time to add the finishing touches to enhance its appearance and functionality. Here are some suggestions to consider:
- Clean and polish: Wipe down the surface of the shelf and brackets to remove any dust or fingerprints. Use a suitable cleaner or polish, depending on the material of the shelf, to restore its shine and keep it looking its best.
- Hide the brackets: If you prefer a more streamlined look, consider using decorative elements, such as decorative brackets, corbels, or shelf covers, to conceal the brackets and give the shelf a cleaner and more professional appearance.
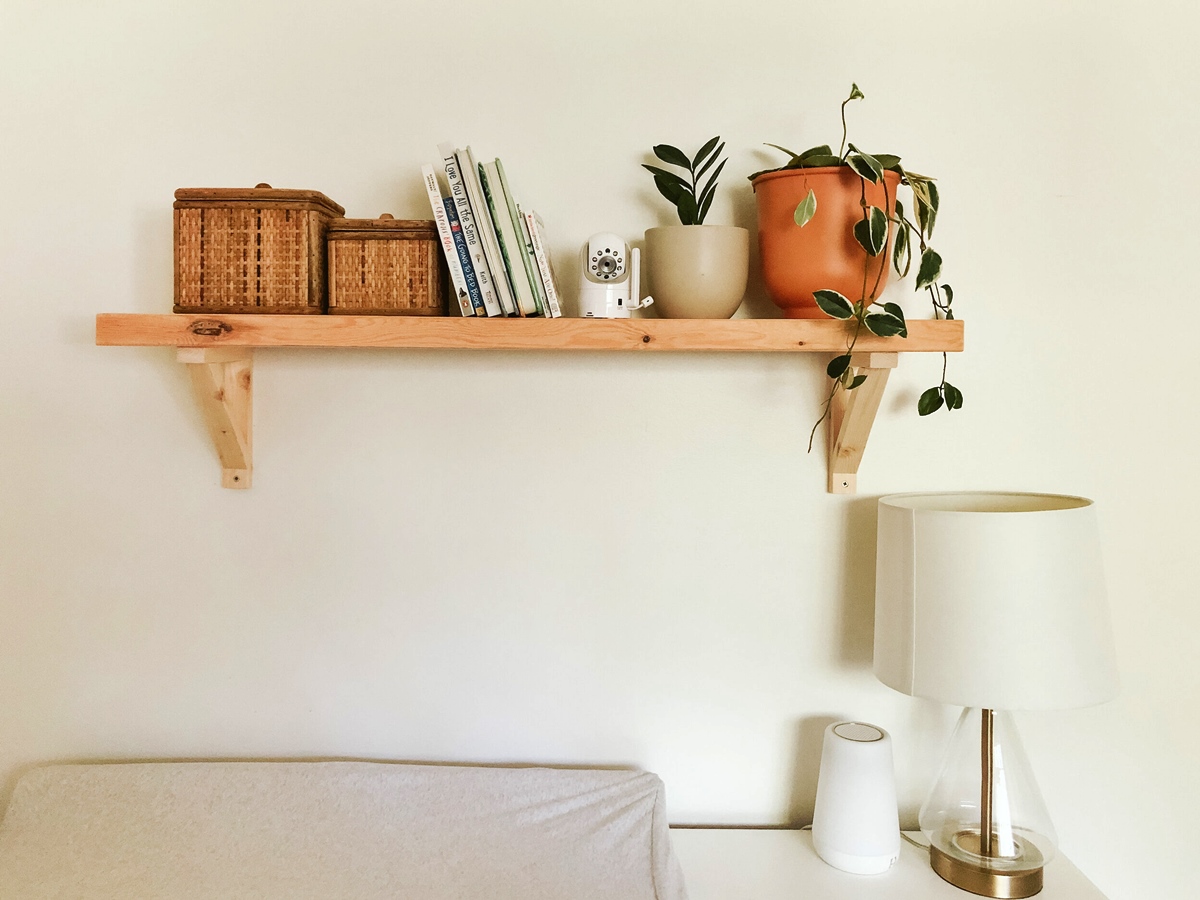
- Add decorative elements: Personalize your shelf by adding decorative pieces or accessories that complement the overall style and theme of the room. This could include framed photos, small plants, figurines, or other decorative items that showcase your personality and style.
- Organize and arrange items: Arrange your items on the shelf in an organized and visually appealing manner. Consider using baskets, containers, or decorative boxes to keep items neat and tidy. Play with different heights and textures to create an interesting and eye-catching display.
- Consider lighting: If the shelf is in a dimly lit area or you want to highlight specific items, consider adding lighting fixtures such as LED strip lights or small accent lamps to provide additional illumination.
- Secure items: For added safety, especially if the shelf is in a high-traffic area or you have valuable or fragile items, consider using adhesive putty or brackets to secure the items in place and prevent them from falling or sliding off the shelf.
By adding the finishing touches, you can enhance the overall look and functionality of your shelf. Take the time to organize and arrange your items in a visually appealing way, ensuring that the shelf aligns with your personal style and the decor of the room.
Tips for Maintenance and Care
Proper maintenance and care of your shelf with brackets will help keep it in excellent condition and extend its lifespan. Here are some tips to ensure optimal performance:
- Regular cleaning: Dust the surface of the shelf and brackets regularly to prevent the buildup of dirt and grime. Use a soft cloth or duster to wipe them down, and avoid using abrasive cleaners that can damage the material or finish.
- Protect from moisture: If the shelf is located in a bathroom, kitchen, or any other area prone to moisture, take precautions to protect it. Consider using a waterproof sealant or coating on the shelf and brackets to prevent water damage.
- Avoid excessive weight: Be mindful of the weight capacity of your shelf and avoid overloading it with heavy items. Excess weight can put strain on the brackets and compromise their stability.
- Inspect for damage: Regularly inspect the brackets, screws, and overall structure of the shelf to ensure there are no signs of damage or loosening. Tighten any loose screws and replace any damaged or broken brackets to maintain stability.
- Manage direct sunlight: If your shelf is exposed to direct sunlight, consider using curtains, blinds, or UV-protective films on windows to minimize the potential for fading or discoloration of the shelf and brackets.
- Avoid harsh chemicals: When cleaning the shelf or surrounding area, avoid using harsh chemicals that can damage the material or finish. Stick to mild soapy water or specific cleaners recommended for the type of material your shelf is made of.
- Consider seasonal changes: Wood shelves may expand or contract with changes in humidity, so it’s essential to monitor and adjust the brackets if necessary. Keep an eye out for any warping or shifting and make adjustments as needed.
- Regular maintenance checks: Make it a habit to regularly check the stability and condition of your shelf and brackets. This will help you address any potential issues promptly and ensure the shelf remains secure and safe.
By following these maintenance and care tips, you can keep your shelf with brackets looking beautiful and functional for years to come. By regularly cleaning, inspecting for damage, and taking precautions, you can enjoy the benefits of your shelf and maintain its longevity.