
Choosing the Right Corner Shelf
When it comes to adding a corner shelf to your space, ensuring that you choose the right one is crucial. With so many options available, it can be overwhelming to decide which corner shelf will meet your needs and complement your decor. Here are some important factors to consider when choosing the right corner shelf:
1. Size and Shape: Before making a purchase, measure the corner where you plan to install the shelf. Consider the height and width of the shelf to ensure it fits the available space. Additionally, think about the desired shape of your corner shelf – whether you prefer a floating shelf, a triangular shelf, or a multi-tiered design.
2. Material: Corner shelves come in a variety of materials, such as wood, glass, metal, or plastic. Each material has its own aesthetic appeal and level of durability. Consider the overall style of your room and choose a material that complements it while also ensuring the shelf can support the weight of the items you plan to place on it.
3. Style and Design: The style of the corner shelf should align with your overall room decor. Whether your space has a modern, rustic, or minimalist theme, choose a shelf that seamlessly integrates with the existing design. Look for decorative details, such as carved edges or ornate patterns, that can add visual interest to the shelf.
4. Functionality: Determine the purpose of your corner shelf – whether you want it for displaying decorative items, storing books and magazines, or organizing essentials. Some corner shelves come with built-in compartments or drawers, providing additional storage options. Consider the weight-bearing capacity of the shelf and ensure it can hold the items you intend to place on it.
5. Installation Method: Different corner shelves require different installation methods. Some shelves can be mounted directly to the wall, while others may need additional brackets or hardware for support. Consider your DIY skills and choose a shelf that can be easily installed according to your comfort level.
By considering these factors, you can ensure that you choose the right corner shelf that not only enhances the functionality of your space but also adds to its aesthetic appeal. Take your time to browse through different options and select a corner shelf that best suits your needs and personal style.
Gathering the Necessary Tools and Materials
Before you begin the installation process, it is important to gather all the necessary tools and materials. Having everything prepared in advance will save you time and frustration during the installation. Here is a list of the tools and materials you will need:
1. Tape Measure: This essential tool will help you accurately measure the height, width, and depth of the corner where you plan to install the shelf. Make sure to write down these measurements for reference later.
2. Pencil or Marker: These will be used to mark the desired height and location of the shelf on the wall. Ensure you have a pencil or marker that can be easily erased or removed later without leaving any marks on the wall.
3. Stud Finder: If you are planning to install a heavy-duty shelf or if your wall is made of drywall, a stud finder will help you locate the wall studs for added stability and support.
4. Level: A level is essential for ensuring that your shelf is installed straight and level. This tool will help you avoid any slanted or uneven shelves.
5. Screwdriver or Drill: Depending on the design of your corner shelf and the type of wall you have, you will need either a screwdriver or a drill to attach the shelf brackets or anchors to the wall. Make sure you have the appropriate screwdriver or drill bits for the job.
6. Wall Anchors and Screws: Wall anchors are necessary if your corner shelf does not align with the wall studs or if your wall is made of drywall. These anchors provide additional support and prevent the shelf from detaching from the wall. The type and size of wall anchors and screws will depend on the weight and size of your shelf.
7. Shelf Brackets: The shelf brackets play a vital role in supporting the weight of the shelf. Choose brackets that are compatible with your shelf and are designed to hold the desired weight capacity.
8. Corner Shelf: Of course, you will need the actual corner shelf itself. Ensure that you have purchased the correct size, material, and design that aligns with the measurements and style preferences you determined earlier.
9. Safety Gear: It is always a good practice to wear safety gear, such as safety glasses and gloves, especially when working with tools and mounting hardware.
By gathering these tools and materials before starting the installation process, you will be well-prepared and equipped to complete the task smoothly and efficiently. Having everything at hand will help ensure a seamless and successful installation of your corner shelf.
Measuring and Marking the Desired Height and Location
Properly measuring and marking the desired height and location for your corner shelf is crucial for a successful installation. Taking the time to accurately measure and mark will ensure that your shelf is positioned at the desired height and level. Follow these steps to measure and mark the location:
1. Measure the Height: Use a tape measure to determine the desired height at which you want your corner shelf to be installed. Consider the items you plan to place on the shelf and ensure that there is enough space below for them to fit comfortably.
2. Mark the Height: Once you have determined the height, use a pencil or marker to mark a small dot on the wall at this measurement. Make sure the mark is straight and clearly visible.
3. Measure and Mark the Location: Next, measure the distance from the corner of the room to the edge where you want the shelf to start. Mark this measurement on the wall with a pencil or marker. Repeat this step for the other side where the shelf will end.
4. Use a Level: Place a level horizontally on the wall between the two marks you made in the previous step. Adjust the level until the bubble is centered to ensure that the line connecting the marks is level. Use the level as a guide when marking the location on the wall.
5. Mark the Wall: Using the level as a reference, draw a straight line on the wall that connects the two marks you made for the location. This line will serve as a guide for aligning the shelf brackets later on.
6. Double-Check Measurements: Before proceeding, double-check all your measurements to ensure accuracy. Measure the height and location again to confirm that they align with your initial measurements.
7. Erase or Remove Unwanted Marks: If you have any additional marks or measurements that are no longer needed, carefully erase or remove them to avoid confusion during the installation process.
By taking the time to measure and mark the desired height and location accurately, you will ensure that your corner shelf is positioned exactly as you envisioned. These preliminary steps are crucial for a seamless installation process and will help you achieve a professional-looking result.
Preparing the Wall for Mounting
Before you can start mounting your corner shelf, it’s essential to prepare the wall to ensure a secure and stable installation. Preparing the wall will help prevent any damage and ensure that the shelf remains in place for a long period of time. Here are the steps to prepare the wall for mounting:
1. Clear the Area: Remove any objects, pictures, or decorations from the wall where you plan to install the corner shelf. Clearing the area will allow you to work freely without any obstructions.
2. Clean the Wall: Use a clean, dry cloth or sponge to wipe down the wall where the shelf will be mounted. Removing any dust, dirt, or grease will ensure that the adhesive or mounting hardware adheres properly to the wall surface.
3. Patch and Repair: Inspect the wall for any cracks, holes, or imperfections. If you notice any, use spackle or wall filler to patch and repair them. Allow the filler to dry completely before proceeding to the next step.
4. Sand the Wall: If there are rough or uneven areas on the wall, use fine-grit sandpaper to smooth them out. Sanding the wall will create a clean and even surface for mounting the shelf.
5. Determine the Studs: If your corner shelf is heavy or if you are mounting it on a drywall wall, it is essential to locate the wall studs for added support. Use a stud finder to determine the location of the studs. Mark the stud positions on the wall for reference during installation.
6. Mark the Bracket Positions: Using the measurements and the level line you previously marked, determine the positions of the bracket mounts on the wall. Space them evenly along the line, making sure to align the brackets with the studs if applicable. Mark the positions with a pencil or marker.
7. Protect the Wall: Consider using adhesive-backed felt pads or rubber bumpers on the inside corners of the shelf brackets to protect the wall from scratches or damage caused by the shelf rubbing against it.
8. Remove Baseboards: In some cases, you may need to remove the baseboard trim to ensure a flush installation of the corner shelf against the wall. Carefully remove the baseboard using a pry bar or utility knife if needed.
9. Double-Check Measurements: Before proceeding with the installation, double-check all your measurements and marks to ensure they are accurate and aligned with your desired shelf placement.
By properly preparing the wall for mounting, you are setting the foundation for a secure and successful installation of your corner shelf. Taking the time to complete these preparatory steps will ensure a sturdy and long-lasting attachment to the wall.
Installing the Wall Anchors
Wall anchors are essential for providing additional support and stability, especially if your corner shelf doesn’t align with wall studs or if you are mounting it on a drywall surface. Installing wall anchors will ensure that your shelf is securely mounted and can withstand the weight of the items placed on it. Here’s how to install wall anchors:
1. Select the Right Anchors: Choose wall anchors that are appropriate for the weight and size of your corner shelf. Read the packaging or consult the manufacturer’s instructions to ensure you have the correct type of anchors for your specific shelf and wall material.
2. Mark the Anchor Positions: Using the level line and the bracket marks on the wall as a guide, mark the positions where the wall anchors will be installed. Make sure to space them evenly and align them with the bracket positions.
3. Drill Pilot Holes: Using a drill bit that matches the size of the wall anchors, drill pilot holes at the marked anchor positions. Ensure that the holes are straight and deep enough to accommodate the length of the wall anchors.
4. Insert the Wall Anchors: Place the wall anchors into the pilot holes. Use a hammer or a rubber mallet to gently tap them into place until they are flush with the wall surface. Ensure that they are securely embedded in the wall.
5. Test the Anchors: Once the wall anchors are installed, give them a gentle tug to ensure they are firmly in place and can support the weight of the shelf. If any anchors feel loose or unstable, remove them and try a different type or size of anchor.
6. Attach the Shelf Brackets: With the wall anchors in place, align the bracket screw holes with the anchors. Insert the screws provided with the brackets into the anchors and tighten them with a screwdriver or drill, but be careful not to overtighten and damage the wall or bracket.
7. Check for Stability: After the brackets are securely attached, test the stability of the shelf by gently pressing on it and ensuring it feels solid and secure. If there is any wobbling or instability, double-check the anchor installation and tighten the screws if necessary.
8. Follow Manufacturer’s Instructions: It’s important to read and follow the manufacturer’s instructions regarding the specific installation process for your corner shelf. They may have specific recommendations or variations depending on the design and materials of the shelf.
By properly installing wall anchors, you’ll provide the necessary support for your corner shelf and ensure its stability. Take your time during this step to ensure the anchors are securely embedded in the wall, as this will be crucial for the overall strength and longevity of the shelf installation.
Attaching the Shelf Brackets
Attaching the shelf brackets is a critical step in the installation process that will provide the main support for your corner shelf. Properly securing the brackets will ensure that the shelf is stable and can hold the weight of the items you plan to display. Here’s how to attach the shelf brackets:
1. Align the Brackets: Place the shelf brackets against the marked anchor positions on the wall. Make sure they are aligned with the level line and positioned evenly along the line.
2. Mark the Screw Holes: Once the brackets are in position, use a pencil or marker to mark the screw holes on the wall through the holes in the brackets. Ensure the markings are visible and accurately represent the bracket hole positions.
3. Pre-drill Pilot Holes: Remove the brackets and, using the appropriate drill bit size, pre-drill pilot holes at the marked screw hole positions. The pilot holes should be slightly smaller than the size of the screws to provide a secure fit.
4. Realign the Brackets: Place the brackets back against the wall, aligning them with the pilot holes. Double-check that they are level and evenly spaced along the level line.
5. Insert and Tighten the Screws: Insert the screws provided with the brackets through the bracket holes and into the pilot holes. Use a screwdriver or drill to carefully tighten the screws, but avoid overtightening, as this can damage the wall or bracket. Repeat this step for each bracket.
6. Test the Bracket Stability: After attaching the brackets, give them a gentle shake or apply slight pressure to check their stability. Ensure that they are securely attached to the wall and that there is no wobbling or movement. If needed, re-tighten the screws for added stability.
7. Double-Check Levelness: Use a level to verify that the brackets are still level after attaching them. Adjust as necessary by loosening the screws slightly and repositioning the bracket until it is perfectly level.
8. Follow Manufacturer’s Instructions: It’s essential to refer to the manufacturer’s instructions for any specific recommendations or variations regarding the installation of your particular corner shelf brackets. They may have additional guidelines or considerations to ensure proper attachment.
By securely attaching the shelf brackets, you are laying the foundation for a stable and reliable corner shelf. Take the time to align the brackets correctly, pre-drill pilot holes, and tighten the screws adequately to ensure the brackets provide the necessary support for your shelf.
Securing the Shelf to the Brackets
Securing the shelf to the brackets is the final step in the installation process, ensuring that your corner shelf is secure, stable, and ready to hold your items. Follow these steps to properly secure the shelf to the brackets:
1. Place the Shelf on the Brackets: Carefully position the corner shelf onto the installed brackets. Ensure that the shelf is aligned with the brackets and rests securely on top of them.
2. Locate the Mounting Holes: Look for the pre-drilled holes or slots on the underside of the shelf that are meant for attaching it to the brackets. These holes or slots will line up with the bracket screws or pegs.
3. Align the Holes: Once you have located the mounting holes, align them with the bracket screws or pegs. Ensure that the shelf sits evenly on all the brackets and sits flush against the wall.
4. Insert the Screws or Attach the Pegs: Depending on the design of your shelf and brackets, either insert the provided screws through the mounting holes and into the bracket screws or attach the shelf to the pegs on the brackets. Use a screwdriver or drill to tighten the screws or snap the pegs into place, securing the shelf to the brackets.
5. Check Stability: After securing the shelf to the brackets, check for stability by gently applying pressure to different areas of the shelf. Ensure that the shelf doesn’t wobble and feels secure. If there is any instability, reevaluate the attachment points and make any necessary adjustments.
6. Verify Weight Capacity: Double-check the weight capacity specified for your corner shelf. Avoid overloading it with items that exceed the weight limit to ensure the longevity and strength of the shelf.
7. Test for Durability: Place some items on the shelf to test its durability and stability. Check that it can comfortably support the weight without any signs of strain or weakness. Make any necessary adjustments if needed.
8. Regularly Inspect: Periodically inspect the shelf and brackets for stability and signs of wear. Tighten any loose screws and address any maintenance or repair needs promptly to prolong the lifespan of your corner shelf.
By properly securing the shelf to the brackets, you can ensure that your corner shelf is strong, stable, and ready to showcase your items. Take the time to align the mounting holes, securely fasten the shelf, and check for stability to enjoy a reliable and functional addition to your space.
Checking for Stability and Adjusting if Needed
After installing your corner shelf, it is crucial to check for stability to ensure that it is secure and capable of safely holding your items. Checking for stability allows you to identify any issues early on and make necessary adjustments for a safer and more functional shelf. Here’s how to check for stability and make adjustments if needed:
1. Visual Inspection: Start by visually inspecting the shelf and brackets. Look for any signs of imbalance, misalignment, or visible damage. Check that the brackets are securely attached to the wall and that the shelf rests evenly on them.
2. Weight Distribution: Carefully place some items on the shelf to simulate the weight it will bear. Pay attention to how the shelf responds and ensure that it doesn’t lean to one side or show signs of sagging under the weight. If there are any concerns, you may need to reposition or redistribute the items on the shelf.
3. Stability Testing: Gently apply pressure to different areas of the shelf to test its stability. Push and pull on the shelf to see if there is any wobbling or movement. A stable shelf should remain firmly in place without any significant give.
4. Check Bracket Attachment: Inspect the attachment points between the brackets and the wall. Ensure that the screws are tight and that the brackets are securely fastened. If there is any vertical or horizontal movement at the bracket attachment points, you may need to tighten the screws or consider alternative reinforcement methods, such as installing additional wall anchors.
5. Evaluate Wall Anchors: If your shelf is attached with wall anchors, inspect them to ensure they are firmly anchored in the wall. If any of the anchors feel loose or show signs of instability, you may need to remove them and reinstall new, sturdier anchors to provide better support for the shelf.
6. Adjust Bracket Alignment: If the shelf appears unbalanced or tilted, check the alignment of the brackets. Loosen the screws slightly and adjust the position of one or both brackets until the shelf sits level. Use a level to double-check and make precise adjustments as needed.
7. Reinforce as Needed: If you notice any significant stability issues that cannot be resolved with simple adjustments, you may need to reinforce the shelf by adding additional screws, brackets, or other supportive measures. Consult the manufacturer’s instructions for any specific recommendations on reinforcing the shelf.
8. Regular Maintenance: Periodically check the stability of your corner shelf even after making adjustments. Regular maintenance and inspections will help ensure ongoing stability and provide an opportunity to address any new issues that may arise.
By regularly checking for stability and making necessary adjustments, you can maintain a safe and secure corner shelf that can proudly display your items for years to come. Paying attention to stability will help prevent accidents and ensure the longevity of your shelf installation.
Decorating and Organizing the Shelf
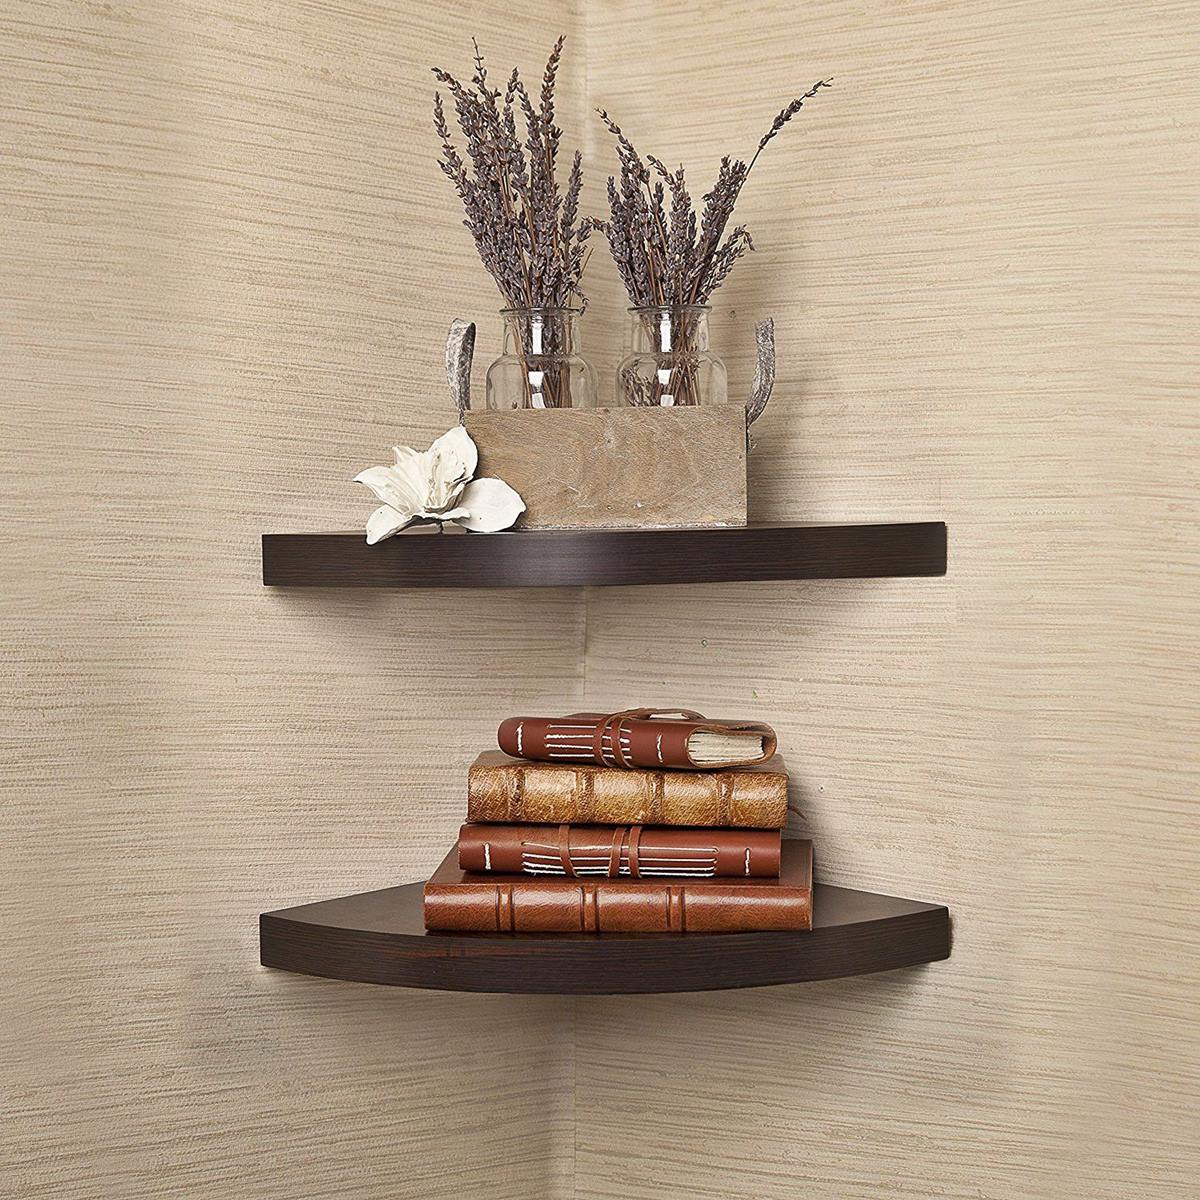
Once your corner shelf is securely installed, it’s time to decorate and organize it to maximize its visual appeal and functionality. By carefully curating the items you place on the shelf and arranging them thoughtfully, you can create an eye-catching display that reflects your personal style. Follow these tips for decorating and organizing your corner shelf:
1. Choose a Theme: Consider selecting a theme or color scheme to guide your decorating choices. Whether it’s a collection of books, plants, or decorative objects, a cohesive theme will give your shelf a polished and organized look.
2. Mix Sizes and Heights: Vary the height and size of the items you choose to display to create visual interest and balance. Mix tall objects, such as vases or sculptures, with smaller decorative pieces and books for an engaging display.
3. Consider Visual Balance: Achieve balance by distributing objects evenly across the shelf, both horizontally and vertically. Avoid overcrowding one area and leave space between items to give each piece room to shine.
4. Play with Textures and Materials: Incorporate different textures and materials to add depth and dimension to your corner shelf display. Mix materials like wood, glass, metal, and ceramics for a visually appealing and eclectic look.
5. Use Greenery or Flowers: Introduce greenery or fresh flowers to bring life and vibrancy to your shelf. Plants not only add a pop of color but also help purify the air and create a natural atmosphere.
6. Display Personal Items: Showcase meaningful or sentimental objects that reflect your personality and interests. Whether it’s cherished family photos, travel mementos, or handmade crafts, displaying personal items adds a personal touch and makes the shelf uniquely yours.
7. Group Objects: Arrange objects in clusters or groups rather than scattering them randomly on the shelf. Grouping similar items, such as a collection of figurines or a set of vintage cameras, creates a cohesive and visually appealing arrangement.
8. Utilize Storage Containers: If your corner shelf is used for organizational purposes, consider incorporating stylish storage containers. Decorative boxes, baskets, or fabric bins can help keep smaller items well organized and add an aesthetic element to the shelf.
9. Rotate Seasonally: Refresh and update your corner shelf by swapping out items seasonally. Adjusting the decor and objects based on the time of year can add a dynamic element to the display and keep the shelf feeling fresh.
10. Edit and Rearrange: Regularly assess your corner shelf display and make adjustments as needed. Edit items that no longer fit the theme or style, and rearrange objects to maintain an appealing and well-balanced arrangement.
By taking a thoughtful and creative approach to decorating and organizing your corner shelf, you can transform it into a visually captivating and functional focal point in your space. Experiment with different arrangements and enjoy the opportunity to showcase your unique style and interests.
Maintenance and Cleaning Tips
To keep your corner shelf looking its best and to ensure its longevity, it’s important to incorporate regular maintenance and cleaning into your routine. By following these maintenance and cleaning tips, you can keep your shelf in top condition:
1. Dusting: Regularly dust your corner shelf using a soft, dry cloth or a feather duster. This will help to remove any accumulated dust and prevent it from settling on the surface and decorative items.
2. Spill Management: If any liquid spills or stains occur on the shelf, address them promptly. Use a slightly damp cloth to gently blot and clean the affected area. Avoid using harsh chemicals or abrasive cleaners that could damage the surface of the shelf.
3. Avoid Overloading: Pay attention to the weight capacity of your corner shelf and avoid overloading it with excessively heavy items. Distribute the weight evenly across the shelf to prevent strain or damage.
4. Prevent Sunlight Damage: If your corner shelf is situated near a window, be mindful of the harmful effects of direct sunlight. Prolonged exposure to sunlight can cause fading or discoloration of items on the shelf. Consider using curtains or blinds to protect the shelf from intense sunlight.
5. Regular Inspection: Periodically inspect the shelf for any signs of damage or instability. Check for loose screws, cracks in the brackets, or any wobbling. Address any issues promptly to prevent further damage or accidents.
6. Cleaning the Brackets: If your brackets are made of metal or another material that may tarnish or collect dirt, clean them gently with a mild cleaner or metal polish. Follow the manufacturer’s recommendations for cleaning specific materials.
7. Seasonal Decor Switch-Out: Take the opportunity to rearrange and update your corner shelf decor seasonally. Swap out items, incorporate seasonal accents, or rearrange the display to keep it fresh and engaging throughout the year.
8. Use Coasters and Mats: If you plan to place vases, cups, or other items with the potential to scratch or leave marks on the shelf’s surface, use coasters or mats to protect the shelf from damage.
9. Avoid Excessive Moisture: Keep your corner shelf away from areas of excessive moisture, such as bathrooms or near humidifiers. Excessive moisture can cause warping or damage to wooden shelves or encourage the growth of mold and mildew.
10. Follow Manufacturer’s Instructions: Follow any specific care and maintenance instructions provided by the manufacturer for your corner shelf. They may have additional guidelines or recommendations based on the materials and design of the shelf.
By incorporating these maintenance and cleaning tips into your routine, you can keep your corner shelf looking beautiful and well-maintained for years to come. Regular care and attention will help preserve its aesthetics and functionality, keeping it in top condition for all to enjoy.