
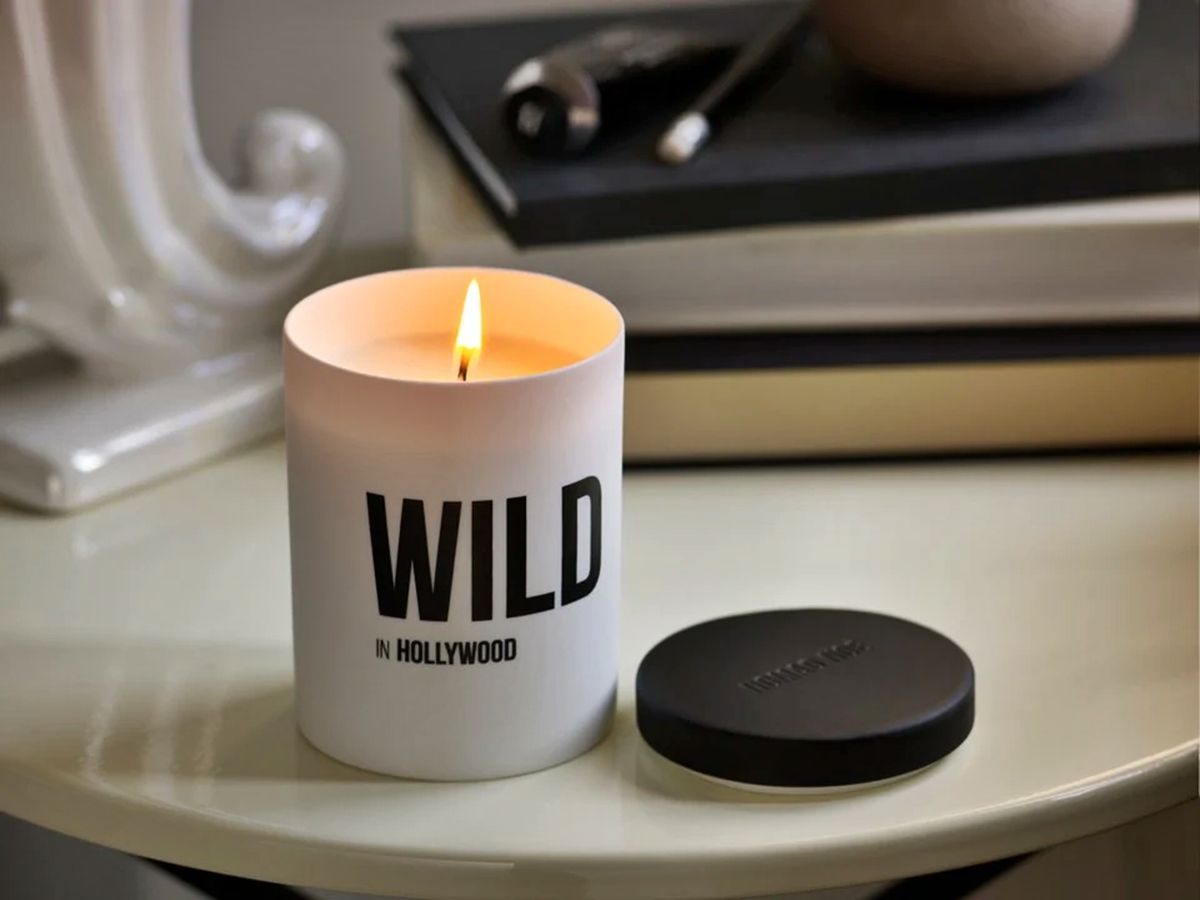
Common Causes of Uneven Candle Burning
Candles can create a warm and cozy ambiance in any room, but there’s nothing more frustrating than when a candle burns unevenly. Uneven burning can leave you with wasted wax and an unsightly, lopsided candle. Fortunately, there are several common causes for this issue, and simple solutions to fix it. Let’s explore some of the most common causes of uneven candle burning and how to address them.
1. Uneven Wick Trimming: If you don’t trim the wick before each use, it can become too long and cause the candle to burn unevenly. Make sure to trim the wick to about a quarter of an inch before lighting the candle.
2. Wick Off Center: Sometimes the wick can accidentally shift off-center when the candle is being poured. This can lead to uneven burning. Gently reposition the wick back to the center while the wax is still warm and pliable.
3. Uneven Airflow: Candles placed in drafty areas can experience uneven burning due to the inconsistent airflow. Move your candle to a draft-free location to ensure a more even burn.
4. Long Burning Sessions: Burning a candle for an extended period can lead to uneven burning. Try to limit your candle burning sessions to a maximum of four hours at a time, allowing the wax to melt evenly.
5. Lack of Rotation: If you frequently burn candles, rotating them can help prevent uneven burning. After each use, let the candle cool down and then rotate it slightly to ensure an even surface for the next burn.
Incorporating these simple practices can greatly improve the burning experience of your candles. By addressing the causes of uneven burning, you can enjoy not only the warm glow but also get the most out of your candles without wasting precious wax. Keep these tips in mind the next time you light a candle, and say goodbye to uneven burning!
Trimming the Wick
One of the most common causes of uneven candle burning is neglecting to trim the wick before each use. A long wick can lead to a larger flame, causing the candle to burn unevenly and produce more soot.
To ensure a clean and even burn, it’s essential to trim the wick to about a quarter of an inch before lighting the candle. This can be easily done with a pair of wick trimmers or sharp scissors. Trimming the wick will help control the size of the flame and prevent excessive flickering and smoking.
When trimming the wick, it’s important to handle it gently and avoid cutting it too short. Leaving the wick too short can result in a weak flame, making it difficult for the candle to burn evenly. On the other hand, a wick that is too long can lead to high soot production and an uneven burn.
Regularly trimming the wick not only promotes even burning but also helps to maintain the overall quality and longevity of the candle. By keeping the wick at an appropriate length, you can enjoy a clean and steady flame throughout the life of the candle.
Remember to trim the wick before each use, especially if you notice any signs of uneven burning. Taking this simple step will ensure that your candle burns evenly, providing you with hours of soothing and aromatic enjoyment.
Straightening the Wick
Another factor that can contribute to uneven candle burning is a wick that is not properly centered. During the manufacturing process or as the candle is used, the wick may move off-center, leading to an uneven burn.
To rectify this issue, you can easily straighten the wick while the wax is still warm and pliable. The best time to address the wick position is when the candle has been burning for a short time and the wax has melted slightly.
Using a pair of tweezers or a wick centering tool, gently push the wick back to the center of the candle. Take care not to disturb the melted wax surrounding the wick, as this can cause uneven cooling and further perpetuate the problem.
By maintaining a properly centered wick, you ensure that the flame is positioned in the center of the pool of melted wax. This allows for a more even distribution of heat and consistent candle burning.
Regularly check the position of the wick before lighting the candle to prevent a recurrence of uneven burning. By taking a moment to straighten the wick, you can optimize the performance of your candle and enjoy a more balanced and visually pleasing burn.
Using a Candle Snuffer
When it comes to extinguishing a candle, many people resort to blowing it out. However, this can create air turbulence and cause the wick to tilt or move off-center, resulting in uneven burning in future uses.
To prevent this, it’s recommended to use a candle snuffer. A candle snuffer is a simple tool designed to safely extinguish a candle by cutting off the oxygen supply to the flame without any unnecessary movement or disturbance to the wick.
When using a candle snuffer, hold it just above the flame and gently lower the snuffer over the wick until the flame is fully extinguished. This method reduces the chances of the wick getting displaced and promotes even burning in the subsequent uses of the candle.
Not only does using a candle snuffer help maintain the alignment and position of the wick, but it also eliminates the risk of hot wax splattering or accidental blows that may cause an uneven burn or damage the candle’s surface.
Make it a habit to use a candle snuffer whenever you need to extinguish a candle. By doing so, you can ensure that the wick remains centered and upright, allowing for a more consistent and balanced burn each time you light the candle.
Placing the Candle in a Draft-Free Area
A common culprit for uneven candle burning is placing the candle in an area with drafts or airflow. The presence of a draft can cause the flame to flicker and dance, leading to an uneven burn and potential wax drips.
To ensure a more even burn, it’s essential to place your candle in a draft-free area. This means avoiding locations near open windows, air vents, fans, or areas with frequent foot traffic that can create air currents.
By positioning your candle in a draft-free area, you provide a stable environment for the flame to burn consistently. This allows the wax to melt evenly, maximizing the burning time and reducing the risk of unsightly tunneling or lopsided burning.
Additionally, keeping your candle away from drafts can also enhance its safety. A flickering flame near flammable objects or in an unstable position can increase the risk of accidents and potential damage.
Consider placing your candle on a sturdy, heat-resistant surface and ensure that it is positioned away from any objects that may catch fire. This will further help ensure a safe and even burn throughout the life of the candle.
Remember, finding the right location for your candle is just as important as selecting the candle itself. By placing your candle in a draft-free area, you create an ideal environment for a beautiful, even burn, allowing you to fully enjoy the soothing glow and fragrance it provides.
Avoiding Long Burning Sessions
While it may be tempting to keep a candle burning for hours on end, doing so can contribute to uneven burning. Prolonged burning sessions can cause the wax to melt unevenly, resulting in tunneling or a lopsided burn.
To maintain an even burn, it’s important to limit your candle burning sessions to a maximum of four hours at a time. This allows the wax to melt evenly across the entire surface of the candle, preventing tunneling and ensuring a more consistent burn throughout.
After four hours, it’s advisable to extinguish the candle, let it cool completely, and then trim the wick before relighting it for another session. This practice helps maintain the optimal burn for future uses and ensures that the candle lasts as long as possible.
Avoiding long burning sessions also helps to preserve the overall quality of the candle. Overextending the burn time can lead to excess heat, causing the fragrance to dissipate more quickly and reducing the longevity of the candle.
By being mindful of the recommended burn time, you can enjoy a more even and efficient burn, making the most out of your candle while maximizing its lifespan.
Remember, moderation is key. By avoiding long burning sessions and following the recommended burn time, you can enjoy a consistently beautiful and even burn every time you light your candle.
Rotating the Candle
One effective technique to promote even burning and prevent tunneling in a candle is to rotate it regularly. Over time, the heat from the flame can cause uneven melting and create a tunnel in the center of the candle, leaving wasted wax along the sides.
By rotating the candle, you ensure that the wax melts evenly across the entire surface, allowing for a more uniform burn. After each use, let the candle cool down completely before gently rotating it a quarter turn clockwise or counterclockwise.
This rotation helps distribute the heat and ensures that the candle burns evenly throughout its lifespan. It also helps in maintaining a level surface, preventing any potential tilting or lopsided burning.
Regularly rotating the candle is particularly important if you burn it for longer periods or if you notice signs of uneven melting. By paying attention to the uniformity of the wax melt and taking the necessary steps to rotate the candle, you can optimize its burn performance.
Remember, when rotating the candle, ensure that the flame is fully extinguished, and the wax has solidified. You can use a candle holder or gloves to handle the candle, protecting your hands from any residual heat.
Incorporating the practice of rotating your candle into your routine will help ensure a beautiful and even burn from start to finish, allowing you to fully enjoy its soothing glow and delightful fragrance.
Using a Candle Shade or Topper
Another helpful technique to promote even candle burning is to use a candle shade or topper. These accessories can help regulate the heat distribution and airflow around the flame, ensuring a more consistent and uniform burn.
A candle shade is a decorative cover that sits on top of the candle jar or holder. It acts as a barrier between the flame and the surrounding environment, limiting air movement and reducing the risk of drafts. This helps create a more controlled burn and prevents the flame from flickering or dancing excessively.
A candle topper, on the other hand, is a perforated metal or glass disc that sits directly on top of the candle. It functions similarly to a shade by reducing air circulation but also allows some light to pass through the holes, creating a beautiful ambiance.
Using a shade or topper not only promotes even burning but also enhances the safety of candle usage. It can help prevent accidental contact with the flame and reduce the risk of fire hazards, especially in households with pets or young children.
When selecting a shade or topper, ensure it is the appropriate size for your candle to fit securely and maintain proper ventilation. Be mindful of any safety guidelines provided by the manufacturer regarding the use of these accessories.
By incorporating a candle shade or topper into your candle burning routine, you can achieve a more controlled and consistent burn. Enjoy the enhanced beauty, fragrance, and longevity of your candles while reducing the chances of uneven burning and prolonging their overall lifespan.
Using a Candle Plate or Tray
When it comes to achieving an even burn with your candles, using a candle plate or tray can make a significant difference. These accessories provide a stable and heat-resistant surface for your candles and help promote consistent melting and burning.
A candle plate or tray serves two primary purposes. Firstly, it protects the surface on which the candle is placed. The plate or tray acts as a barrier, preventing any heat or wax drips from damaging your furniture or countertops. This protection allows you to confidently burn your candles without worrying about potential damage.
Secondly, a candle plate or tray helps distribute and retain heat more evenly around the candle. By providing a flat and solid base, it ensures that the heat generated from the flame is evenly distributed, aiding in an even wax melt. This can help prevent tunneling or uneven burning, allowing you to enjoy the full potential of your candle.
When selecting a candle plate or tray, choose one that is slightly larger than the base of your candle to ensure sufficient space for any wax drips. Opt for a heat-resistant material, such as glass, ceramic, or metal, to protect against any heat transfer to the underlying surface.
In addition to their functional benefits, candle plates or trays also add a decorative touch to your candle display. They come in various designs, colors, and materials, allowing you to enhance the aesthetic appeal of your candles and complement your home decor.
By incorporating a candle plate or tray into your candle setup, you create a stable and protective environment for your candles to burn evenly and safely. Enjoy the beauty and ambiance of your candles while ensuring a consistent and long-lasting burn.
Fixing Tunneling in a Candle
Tunneling is a common issue that occurs when a candle burns unevenly, leaving a hole or tunnel in the center while leaving untouched wax along the sides. This not only wastes precious wax but also prevents the candle from burning evenly in future uses.
If you notice tunneling in your candle, don’t worry! There are several effective methods to fix this issue and ensure a more uniform burn:
1. Use a Candle Wick Trimmer: Trim the wick to a quarter of an inch before lighting the candle. A properly trimmed wick helps maintain a controlled flame and promotes even melting across the entire surface of the candle.
2. Increase the Burning Time: Burn the candle for a longer duration so that the melted wax reaches the outer edge of the container. This helps remedy tunneling by melting the untouched wax along the sides and creating a uniform burn pool.
3. Utilize Aluminum Foil: Place a piece of aluminum foil loosely around the top of the candle, covering the tunneling area. This directs the heat towards the edges, allowing the wax to melt evenly and fill the tunnel.
4. “Hug” the Candle: Gently press the softened wax along the sides of the container towards the center using a spoon or a candle tool. This helps redistribute the wax and close the tunnel.
5. Relight the Candle: After fixing the tunneling, make sure to trim the wick and relight the candle. Monitor the burn and ensure the flame remains stable and centered for an even and continuous burn.
By employing these methods, you can salvage a tunneling candle and achieve a more balanced and efficient burn. It’s important to remember that prevention is key, so practicing regular wick trimming and appropriate burn times from the start can minimize the likelihood of tunneling in the future.
With a little effort and attention to detail, you can revitalize your tunneling candle and enjoy a more complete and gratifying burn experience.
Using a Candle Wick Trimmer
A candle wick trimmer is a handy tool that can help maintain the optimal length of a candle wick. It plays a crucial role in ensuring a clean and even burn, preventing issues such as uneven melting, excessive smoking, and mushrooming.
When using a candle wick trimmer, follow these steps to trim the wick effectively:
1. Wait for the Candle to Cool: Make sure the candle has completely cooled down before trimming the wick. Attempting to trim a hot wick can be hazardous and cause injury.
2. Choose the Right Time to Trim: The ideal time to trim the wick is before each use of the candle. Trimming the wick to a length of about a quarter of an inch helps maintain a controlled and even burn.
3. Position the Wick Trimmer: Hold the candle wick trimmer at a slight angle, allowing the tray of the trimmer to rest on the surface of the candle while ensuring the blades are in contact with the wick.
4. Trim the Wick: Gently squeeze the handle of the trimmer, allowing the blades to cut through the wick. Avoid cutting the wick too short, as this may make it difficult for the flame to stay lit.
5. Dispose of the Trimmed Wick: After trimming the wick, carefully remove any trimmed debris from the candle using the trimmer or a small brush. This helps maintain a clean and debris-free candle surface.
Using a candle wick trimmer offers several benefits beyond just maintaining an even burn. It helps control the size of the flame, reducing the potential for soot and excessive smoking. Trimming the wick also prevents the formation of mushrooming, which is the black carbon buildup at the end of the wick.
Additionally, regularly trimming the wick prolongs the lifespan of the candle by preventing the wick from curling into the melted wax and causing uneven burning or tunneling.
Remember to always use a dedicated candle wick trimmer rather than regular scissors or household tools. Candle wick trimmers are designed specifically for this purpose, with a length that allows for easier access to the wick within the container.
By incorporating the use of a candle wick trimmer into your candle care routine, you can ensure a consistent and enjoyable burn, prolong the life of your candles, and maximize their overall performance.
Extinguishing the Candle Properly
Extinguishing a candle may seem like a simple task, but it’s important to do it properly to maintain the quality of the candle and prevent potential hazards. Correct extinguishing practices can also help promote even burning and extend the lifespan of your candles.
Here are some tips for extinguishing a candle properly:
1. Use a Candle Snuffer: A candle snuffer is a convenient tool specifically designed to extinguish candles without causing any disturbance to the wick or surrounding wax. Gently place the snuffer over the flame, allowing it to suffocate the fire, ensuring a smoke-free and even extinguishing process.
2. Dip the Wick into the Wax Pool: When extinguishing a candle that has a substantial melted wax pool, you can use a non-combustible item, such as a metal spoon or a wick dipper, to dip the wick into the pool of liquid wax. This method cuts off the oxygen supply to the wick and extinguishes the flame smoothly while coating the wick for an easier relighting experience.
3. Blow Out the Flame with Caution: If you don’t have access to a candle snuffer or a dipper, gently blow out the flame by directing a steady flow of air from your mouth towards the base of the wick. This minimizes the risk of hot embers or soot flying off the wick and causing any damage or fire hazards.
4. Avoid Using Water: Water should never be used to extinguish a candle. The sudden introduction of water to a hot flame can generate steam and cause the hot wax to splatter or the glass container to crack. This can lead to dangerous situations and potential injuries.
5. Double-check for Safety: After extinguishing the candle, make sure to double-check that the flame is completely out and there are no lingering embers or smoke. This is particularly important if you plan to leave the candle unattended or in close proximity to flammable objects.
By following these proper extinguishing methods, you not only preserve the integrity and safety of your candles but also ensure a more consistent and longer-lasting burn. Establishing good candle extinguishing habits is an essential part of responsible candle ownership and care.
Remember, always exercise caution and practice safe handling when dealing with open flames. With these guidelines in mind, you can enjoy the beauty and ambiance of your candles while minimizing the risk of accidents or uneven burning.