
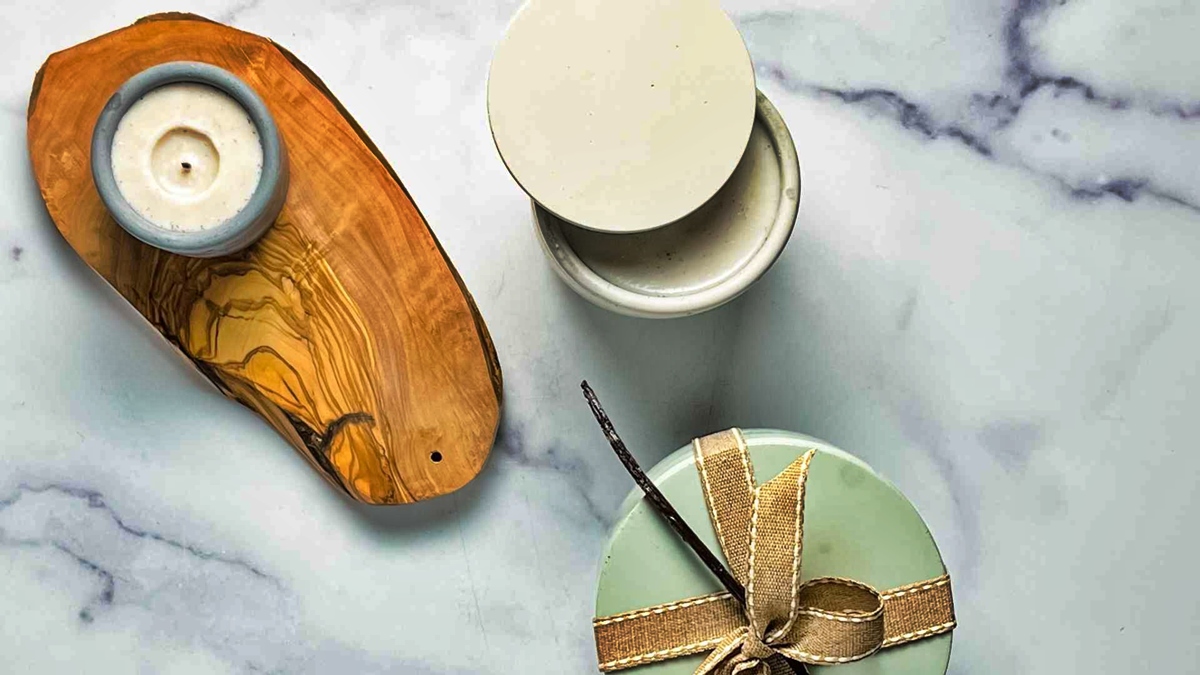
Choosing the Right Supplies
When it comes to creating your own vanilla candle, choosing the right supplies is crucial in ensuring a successful and aromatic result. Here are the key supplies you’ll need:
1. Wax: The foundation of any candle is the wax. Opt for high-quality, natural wax such as soy wax or beeswax. These waxes burn cleaner and have a longer-lasting scent compared to paraffin wax.
2. Fragrance Oil or Vanilla Extract: To infuse your candle with the delightful scent of vanilla, you can choose between fragrance oils specifically designed for candle making or vanilla extract from your kitchen cupboard. Fragrance oils offer a stronger and longer-lasting aroma, while vanilla extract can provide a more subtle and natural scent.
3. Candle Coloring: If you desire a colored vanilla candle, you’ll need some candle coloring. Choose dyes specifically made for candle making, as regular food coloring may not blend well with the wax and could affect the burning quality of the candle.
4. Candle Wicks: The wick plays a crucial role in the candle’s performance. Make sure to select a wick suitable for the type and size of the candle you’re making. Cotton wicks are popular for their reliability and clean burn.
5. Candle Container or Mold: Decide whether you want to make a container candle or a molded candle. For container candles, choose heat-resistant glass jars or tins that will contain the melted wax. If you prefer a molded candle, consider silicone molds for easy removal.
6. Double Boiler or Melting Pot: To melt the wax, you’ll need a double boiler or a dedicated melting pot. Avoid melting the wax directly on the stovetop, as it can be hazardous and may cause fires.
7. Thermometer: To ensure a proper melt and avoid any damage to the fragrance, use a thermometer to monitor the temperature of the melted wax.
8. Stirring Tools: You’ll need heat-safe stirring tools, such as a wooden spoon or a dedicated candle-making stir stick, to mix the fragrance oil and coloring into the melted wax.
9. Safety Equipment: Don’t forget safety equipment, such as heat-resistant gloves and protective goggles, to protect yourself from any potential accidents while working with hot wax.
By choosing the right supplies, you’ll set a solid foundation for creating your homemade vanilla candle. With careful attention to each component, you’ll be on your way to a beautifully scented masterpiece.
Melting the Wax
Now that you have gathered all the necessary supplies, it’s time to begin the candle-making process by melting the wax. Follow these steps to ensure a smooth and safe melting process:
1. Prepare a Double Boiler: Fill a large pot with water and place it on the stove. Bring the water to a simmer. Place a smaller pot, specifically designated for candle making, into the larger pot. This creates a double boiler, allowing indirect heat to melt the wax without direct exposure to the heat source.
2. Measure and Add the Wax: Measure the desired amount of wax using a scale. Add the measured wax chunks or pellets into the smaller pot. Stir the wax occasionally to ensure even melting.
3. Monitor the Temperature: Use a thermometer to keep an eye on the temperature of the wax. The ideal melting temperature for soy wax is usually between 160°F to 180°F (71°C to 82°C), while beeswax melts between 144°F to 147°F (62°C to 64°C). Avoid overheating the wax, as it can affect the fragrance and quality of the final product.
4. Patience is Key: Depending on the quantity of wax, melting can take some time. Be patient and avoid rushing the process by increasing the heat. Slow and steady heating ensures a thorough and even melt.
5. Continuous Stirring: As the wax melts, stir it gently to aid in even heating and to prevent any sticking or clumping. Use a heat-safe stirring tool, such as a wooden spoon or a dedicated candle-making stir stick.
6. Prepare the Fragrance and Coloring: While the wax is melting, prepare the fragrance oil or vanilla extract and the candle coloring. Measure the desired amount of fragrance oil and set it aside. If using candle coloring, follow the manufacturer’s instructions to achieve the desired shade.
7. Ready for the Next Step: Once the wax is completely melted and reaches the desired temperature, it is ready for the next step of adding fragrance and coloring. Remove the smaller pot from the double boiler, but be sure to handle it with oven mitts or heat-resistant gloves, as it will be hot.
Melting the wax is an essential step in the candle-making process. By following these guidelines, you will ensure that your wax melts evenly and thoroughly, setting the stage for a beautifully scented vanilla candle.
Adding Fragrance and Coloring
Once the wax has melted to the desired temperature and is ready for the next step, it’s time to add fragrance and coloring to your vanilla candle. Follow these steps to infuse your candle with a delightful aroma and beautiful color:
1. Measure the Fragrance: Using a dropper or a measuring tool, carefully measure the desired amount of fragrance oil or vanilla extract. The recommended ratio is usually around 1 ounce (30 ml) of fragrance per pound (454 grams) of wax. Adjust the amount according to your personal preference.
2. Add the Fragrance: Slowly pour the measured fragrance oil or vanilla extract into the melted wax. Stir gently but thoroughly to ensure proper distribution. Take care not to spill or splash the hot wax during this step.
3. Add Coloring (Optional): If you desire a colored vanilla candle, now is the time to add the candle coloring. Follow the manufacturer’s instructions on how much coloring to use based on the amount of wax. Start with a small amount and gradually add more until the desired shade is achieved. Remember that a little goes a long way, so it’s better to start with less and add more if needed.
4. Stir the Wax: Use a heat-safe stirring tool to gently mix in the fragrance and coloring. Stir until the fragrance and color are evenly incorporated throughout the wax. Avoid excessive stirring, as it may create air bubbles in the wax.
5. Check the Fragrance Strength: Take a moment to do a scent test by placing a small amount of the melted wax in a heat-resistant container. Allow it to cool and solidify, then smell it to gauge the strength of the fragrance. Adjust the amount of fragrance oil or vanilla extract if desired.
6. Be Mindful of Over-Scenting: While it’s tempting to have a strong fragrance in your candle, it’s important not to over-scent. Too much fragrance can cause the candle to burn unevenly or emit a suffocating scent. Keep in mind that fragrances tend to intensify as the candle cures, so a subtle scent during the melting stage will develop into a more pronounced aroma over time.
7. Prepare for the Pour: With the fragrance and coloring mixed into the melted wax, you’re now ready to move on to the next step of pouring the wax into the candle mold or container of your choice.
Adding fragrance and coloring is a critical step in creating a personalized vanilla candle. By following these steps, you will infuse your candle with a captivating scent and, if desired, a vibrant hue that will enhance both the visual and olfactory experience.
Preparing the Candle Mold
Before pouring the melted wax into a mold or container, it’s important to properly prepare the candle mold to ensure successful candle making. Follow these steps to prepare your candle mold:
1. Clean and Dry the Mold: Ensure that your chosen candle mold is clean and free from any dust or debris. Wash the mold with warm soapy water and dry it thoroughly. Any impurities or moisture in the mold can affect the quality of the finished candle.
2. Apply Mold Release Agent (If Necessary): Depending on the type of mold you are using, you may need to apply a mold release agent. This is particularly important for rubber or silicone molds to prevent the wax from sticking and ensure easy removal of the finished candle. Follow the specific instructions provided with the release agent and allow it to dry completely before proceeding.
3. Secure the Wick: Position the wick in the center of the mold. There are several methods to secure the wick, including using a wick sticker or hot glue to attach the wick tab to the bottom of the mold. Ensure that the wick is straight and centered, allowing enough length to protrude from the top of the candle.
4. Use Wick Centering Devices (Optional): For molds that require additional support to keep the wick centered, consider using wick centering devices. These small metal or plastic devices can be placed over the wick to hold it in place during the pouring process. This ensures that your candle burns evenly.
5. Secure the Wick (Alternative Method): If you are using a container to make your candle, secure the wick to the bottom by tying it around a metal washer or using a wick sticker to affix it to the container’s base.
6. Prevent Wax Leakage: To prevent any wax from leaking out during pouring, you can use a heat-resistant adhesive or mold sealer to seal any gaps or potential leakage points in the mold. This step is especially important for molds that may have seams or seams that are not completely sealed.
7. Protect the Work Surface: To catch any potential spills or drips, place a protective covering, such as newspaper or wax paper, underneath the mold. This will make cleanup easier and prevent any damage to your workspace.
By properly preparing your candle mold, you’ll ensure that the wax pours smoothly and that the finished candle easily releases from the mold once it has set. Taking the time to prep the mold adequately will contribute to the overall success of your homemade vanilla candle.
Pouring the Wax
With your prepared candle mold and melted wax ready, it’s time to pour the wax into the mold and begin shaping your homemade vanilla candle. Follow these steps to ensure a smooth pouring process:
1. Set Up a Stable Surface: Find a flat and stable surface where you can pour the wax into the mold. It’s essential to have a steady workspace to prevent any spills or accidents.
2. Position the Mold: Place the prepared candle mold in the center of your workspace. Ensure that the mold is stable and won’t be easily disturbed during the pouring process.
3. Slow and Controlled Pouring: Starting with a low pour height, slowly pour the melted wax into the mold. Pouring the wax too quickly or from too high can create air bubbles and uneven distribution. Aim for a steady and controlled pour to achieve the best results.
4. Leave Some Space: Avoid pouring the wax all the way up to the mold’s rim. Leave some space, typically about ¼ to ½ inch (0.6 to 1.3 cm), to allow room for the candle to expand and settle as it solidifies.
5. Keep the Wick Centered: While pouring the wax, ensure that the wick remains centered in the mold. Gently guide the wick, if necessary, to prevent it from leaning or getting misplaced in the wax.
6. Pour in Layers (Optional): If you’re making a layered or multi-colored candle, pour the wax in stages. Allow each layer to partially solidify before adding the next layer. This will help create distinct layers and prevent colors from blending together.
7. Tap or Wiggle the Mold: After pouring the wax, gently tap or wiggle the mold to release any trapped air bubbles. This will ensure a smooth and even appearance in the finished candle.
8. Set Aside to Cool: Allow the poured wax to cool and solidify completely. This usually takes several hours or overnight, depending on the type and quantity of wax used. Avoid moving or disturbing the mold during this time to prevent imperfections in the candle’s shape.
By following these steps, you’ll achieve a neat and evenly poured vanilla candle. The pouring process is a critical stage in candle making, as it directly influences the final appearance and quality of your homemade creation.
Inserting the Wick
Now that the poured wax in your candle mold has cooled and solidified, it’s time to insert the wick. Properly inserting the wick ensures that it is secure and centered in the candle, allowing for a clean and efficient burn. Follow these steps to successfully insert the wick into your vanilla candle:
1. Trim the Wick: Before inserting the wick, trim the excess length to about ¼ to ½ inch (0.6 to 1.3 cm) above the surface of the candle. This will prevent excessive smoke and ensure a more controlled burn.
2. Create a Guide Hole: If the cooled wax has formed a thin layer or “skin” on the surface, create a small guide hole for the wick to easily penetrate through. Gently poke the wick through the skin using a pointed tool like a skewer or a toothpick.
3. Apply Wax Adhesive (Optional): To guarantee the wick’s stability in the candle, you can apply a small amount of hot wax or a specialized wick adhesive to the bottom of the wick tab. This will help anchor the wick securely to the base of the candle.
4. Insert the Wick into the Guide Hole: Holding the wick at the top, carefully guide the wick through the guide hole and push it down until the wick tab rests flat against the bottom of the candle. Take caution not to disturb the surface of the candle while inserting the wick.
5. Straighten and Center the Wick: Ensure that the inserted wick is straight and aligned in the center of the candle. Use a wick centering device or gently adjust the wick with your fingers, ensuring it remains taut and upright.
6. Support the Wick (Optional): For taller candles or containers with a wider diameter, you may need to use a wick holder or wick bar to keep the wick centered during the burning process. Simply place the holder over the candle and rest the wick on the designated groove or slot.
7. Allow the Wick to Set: Give the inserted wick some time to set and adhere to the solidified wax. This typically takes around 1 to 2 hours. Avoid disturbing the candle during this period to ensure the wick remains securely in place.
By carefully inserting and positioning the wick in your vanilla candle, you’ll ensure a centered and well-anchored wick that contributes to an optimal burn and enhances the overall performance of your homemade candle.
Allowing the Candle to Set
After inserting the wick into your vanilla candle, it’s important to give the candle sufficient time to set and fully solidify. Allowing the candle to set properly ensures that it maintains its shape, quality, and performance. Follow these steps to ensure the optimal setting of your homemade vanilla candle:
1. Find a Suitable Setting Area: Choose a cool and undisturbed area for the candle to set. Avoid placing it in direct sunlight or near drafts, as these can affect the candle’s setting process and overall quality.
2. Patience is Key: Allow the candle to set and cool completely. This typically takes several hours to overnight, depending on the size and type of wax used. Rushing this process may result in uneven setting or imperfections in the candle’s appearance.
3. Maintain Stable Temperature: It’s essential to maintain a stable temperature while the candle sets. Drastic fluctuations in temperature can cause the wax to crack or create air pockets. Keep the room temperature consistent to achieve the best results.
4. Avoid Touching or Moving the Candle: During the setting process, refrain from touching or moving the candle. Any disturbances can disrupt the solidification process and affect the overall quality of the finished product.
5. Check for Imperfections: Once the candle has fully set and solidified, inspect it for any imperfections, such as cracks, air pockets, or an uneven surface. If you notice any flaws, you may consider remelting the wax and pouring a new layer to fix the issues.
6. Note the Curing Time: Keep in mind that even after the candle has set, it still needs additional time to cure before it is ready to be burned. The curing process allows the fragrance to blend with the wax thoroughly. This typically takes around 24 to 48 hours for optimal scent performance.
7. Practice Patience and Care: Remember that patience and care are paramount when allowing the candle to set. Taking the time to ensure proper setting and curing will result in a well-formed, high-quality vanilla candle that will provide hours of delightful scent and ambiance.
By following these steps and allowing your vanilla candle to set undisturbed, you’ll ensure a professionally crafted candle that is visually appealing, solid, and ready for a long-lasting burn.
Trimming the Wick
Once your homemade vanilla candle has fully set and cured, it’s important to trim the wick before lighting it. Trimming the wick is a crucial step in maintaining a clean and safe burn, as well as prolonging the life of the candle. Follow these steps to properly trim the wick:
1. Prepare the Candle: Ensure that the candle is completely cooled and settled before attempting to trim the wick. This typically takes a few hours after the candle has fully set.
2. Examine the Wick Length: Assess the length of the wick and determine the appropriate length for trimming. Ideally, the wick should be trimmed to about ¼ inch (0.6 cm) before each lighting. This helps control the flame and prevents excessive soot or smoke.
3. Use Wick Trimmers or Scissors: To trim the wick, use specialized wick trimmers designed for candles or a pair of scissors. These tools provide a clean, straight cut and make it easier to reach into container candles.
4. Trim to the Desired Length: Hold the candle steady and carefully trim the wick to the desired length. It’s best to cut the wick at an angle to help it catch fire more easily during the lighting process.
5. Remove Trimmed Wick: After trimming, remove the trimmed portion of the wick from the candle. This helps prevent any debris or trimmed wick from falling into the melted wax, which can create potential hazards or interfere with the burn quality.
6. Dispose of the Trimmed Wick: Dispose of the trimmed wick in a safe manner, such as placing it in a non-flammable container or wrapping it in tissue before disposing of it in the trash. Do not leave trimmed wicks in the candle or on any flammable surface.
7. Check for Debris: Take a moment to inspect the candle for any debris or foreign objects. Ensure that the area around the wick is free from trimmings or any other items that could potentially interfere with the flame.
8. Repeat Before Each Use: Before each lighting, repeat the process of trimming the wick to the appropriate length. This practice will help maintain a consistent and efficient burn every time you enjoy your vanilla candle.
By regularly trimming the wick to the correct length, you’ll create a clean and controlled burn, minimize soot, and maximize the longevity of your homemade vanilla candle. This simple step will ensure that you derive the most enjoyment from your candle while maintaining a safe and beautiful burning experience.
Enjoying Your Homemade Vanilla Candle
After all the hard work and wait, it’s time to enjoy the delightful ambiance and soothing scent of your homemade vanilla candle. Here are some tips to enhance your experience and make the most of your creation:
1. Find the Perfect Setting: Choose a suitable location to burn your candle, whether it’s in your living room, bedroom, or bathroom. Create a cozy atmosphere by dimming the lights and lighting the candle.
2. Trim the Wick: Before lighting the candle, remember to trim the wick to approximately ¼ inch (0.6 cm) for an optimal burn. This will help prevent excessive smoke and ensure a clean, even flame.
3. Practice Safety Measures: Ensure the candle is placed on a stable, heat-resistant surface and away from flammable materials. Never leave a burning candle unattended. Keep children and pets away from open flames.
4. Burn in Intervals: Avoid burning your vanilla candle for extended periods, especially during the first few burns. This helps prevent tunneling and promotes an even wax melt pool, maximizing the candle’s longevity.
5. Allow for Full Melt Pool: When burning the candle, allow the wax to melt completely to the edges of the container. This helps prevent wasted wax and ensures an even burn, making your candle last longer.
6. Enjoy the Fragrance: Breathe in the captivating aroma of vanilla as it fills the room. Take the time to relax and indulge in the ambiance created by your homemade candle.
7. Practice Candle Care: Take care of your candle by extinguishing it properly with a snuffer or by gently blowing it out. Avoid trimming the wick while the wax is hot or liquid. After each burn, allow the candle to cool before relighting.
8. Safety First: Always prioritize safety when enjoying your candle. Ensure it is out of reach of children and pets, and check for any signs of damage or irregular burning patterns.
9. Share the Experience: Share the joy of your homemade vanilla candle with others. Gift your candle to loved ones or use it to create a cozy atmosphere during gatherings or special occasions.
With proper care and attention, your homemade vanilla candle will provide you with hours of relaxation and a delightful scent that fills the room. Enjoy the warm glow and comforting aroma as you experience the rewards of your candle-making endeavor.