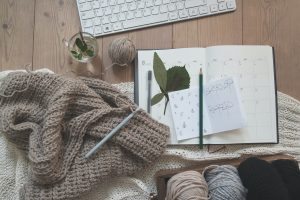
Choosing the Right Yarn and Hook Size
When it comes to crocheting a bowl, choosing the right yarn and hook size can make all the difference. The type of yarn you select will determine the texture, durability, and appearance of your finished piece. Additionally, the hook size you use will influence the gauge and overall size of your crochet project.
First, consider the yarn weight. For a sturdy and structured bowl, opt for a medium or bulky weight yarn. These thicker yarns will create a more rigid and substantial finished product. Alternatively, if you prefer a softer and more flexible bowl, a lighter weight yarn can be used. Keep in mind that the weight of the yarn will also impact the amount of yarn needed for your project.
Next, think about the fiber content of the yarn. Acrylic yarns are often a popular choice for beginners as they are affordable, easy to work with, and come in a wide variety of colors. However, natural fibers such as cotton, wool, or bamboo can provide a different look and feel to your bowl. Cotton yarns are great for items that require absorbency, while wool can provide a warm and cozy texture.
Once you have chosen the yarn, it’s time to select the appropriate hook size. The hook size will determine the tension and tightness of your stitches. A larger hook size will produce larger loops and a looser finished product, while a smaller hook size will create tighter stitches. Keep in mind that the hook size should correspond with the yarn weight you have chosen. Most yarn labels will recommend an appropriate hook size for that particular yarn.
Experimenting with different yarn weights and hook sizes can help you achieve the desired look and feel for your crochet bowl. Remember, there is no right or wrong choice when it comes to yarn and hook size – it’s all about personal preference and the outcome you envision for your project.
Creating a Slip Knot
Before you can start crocheting your bowl, you’ll need to create a slip knot. The slip knot is the foundation of any crochet project and is used to secure your yarn to the crochet hook.
To create a slip knot, begin by holding the end of the yarn in your hand, leaving a tail of about 6 inches. Hold the tail securely with your thumb and forefinger. Take the working yarn (the yarn connected to the ball or skein) and loop it over your other hand, making sure the yarn crosses over the tail. This creates a loop with the working yarn end on top.
Next, reach through the loop with your crochet hook from the front, catching the working yarn. Pull this loop of yarn through the loop to form a new loop. Gently tighten the loop by pulling on the tail end of the yarn and adjusting the size of the loop by sliding it up or down the crochet hook.
Once you’ve created your slip knot, slide it onto the crochet hook. It should be snug but not too tight, allowing you to easily manipulate the hook and yarn as you crochet. Remember to keep a firm grip on the tail end of the yarn to prevent it from slipping out of the slip knot.
The slip knot serves as the starting point for your crochet project, providing a secure and adjustable loop on your hook. It ensures that your stitches will stay in place as you work through your pattern. With your slip knot ready, you are now prepared to move on to the next step in creating your crochet bowl.
Making the Foundation Chain
Once you have created your slip knot, it’s time to start working on the foundation chain for your crochet bowl. The foundation chain is the base of your project and determines the width of your work.
To make the foundation chain, hold the crochet hook in your dominant hand and grasp the tail end of the slip knot between your thumb and middle finger. With your other hand, hold the working yarn securely.
Insert the crochet hook into the slip knot, hooking the yarn and pulling it through the loop. This creates the first chain stitch. Continue this process, inserting the hook into the loop you just created and pulling the yarn through, to make additional chain stitches.
The number of chain stitches you make will depend on the size of your crochet bowl and the pattern you are following. To determine the desired length of your foundation chain, you can refer to the pattern instructions or use a stitch gauge. This will help you achieve the correct dimensions for your project.
As you work on your foundation chain, make sure to keep the tension consistent. You don’t want the stitches to be too tight or too loose. Practice finding a comfortable grip on the yarn and hook, allowing your stitches to glide smoothly and evenly.
Once you have completed the required number of chain stitches, you are ready to move on to the next step in creating your crochet bowl. This may involve joining the chain into a ring or continuing to build your project from the foundation chain. Follow the pattern instructions or your own design to know where to proceed from here.
The foundation chain is a crucial element in crochet, setting the stage for the rest of your project. Take your time to create a neat and even chain, as it will contribute to the overall appearance and stability of your crochet bowl.
Working the First Round
With your foundation chain in place, it’s time to start working the first round of your crochet bowl. This is where you will begin to see your project take shape and the stitches come together.
To start the first round, insert your hook into the second chain stitch from the hook. Wrap the yarn over the hook from back to front, and then pull it through the chain stitch. You should now have two loops on your hook. Wrap the yarn over the hook again and pull it through both loops to complete your first single crochet stitch.
Continue making single crochet stitches in each chain stitch across the foundation chain. Remember to maintain consistent tension and work evenly. At the end of the row, you should have the same number of stitches as the number of chain stitches you started with.
Once you have completed the first round of single crochet stitches, take a moment to assess the overall shape and tension of your work. If needed, you can gently adjust the tension by pulling on the yarn in certain areas to even out the stitches.
The first round lays the foundation for the rest of your crochet bowl. Pay close attention to the size and shape of your stitches, as it will influence the final appearance and structure of the bowl. Take your time and aim for neat and evenly spaced stitches.
As you progress through the first round, you may start to visualize how the crochet bowl will take shape. The first round sets the stage for the subsequent rounds, where you can explore different stitch patterns, color changes, and shaping techniques.
Now that you have completed the first round, you are ready to move on to the next steps in creating your crochet bowl. Whether you follow a pattern or experiment with your own design, each round will bring you closer to a finished and beautiful crochet bowl.
Single Crochet Stitch
The single crochet stitch is one of the most basic and versatile stitches in crochet. It is commonly used in various crochet projects, including the creation of a crochet bowl. Mastering this stitch will allow you to create a solid and textured fabric.
To execute a single crochet stitch, start by inserting your crochet hook into the next stitch of your work. This could be a chain stitch or the top of a previous stitch, depending on your pattern or design.
Once the hook is inserted, wrap the yarn over the hook from back to front. This is known as a yarn over. Draw the wrapped yarn through the stitch, creating two loops on your hook.
Wrap the yarn over the hook once again and pull it through both loops on the hook. This completes the single crochet stitch. Take note of your tension to ensure that the stitch is neither too tight nor too loose.
Continue working single crochet stitches in each stitch across the row or round, following the pattern instructions or your desired design. Pay attention to the number of stitches you make, as accuracy is crucial for maintaining the shape and size of your crochet bowl.
The single crochet stitch creates a dense and compact fabric, making it ideal for projects where durability and structure are important. It can be used to create a solid base for your crochet bowl or as a building block for more complex stitch patterns.
Once you feel comfortable with the single crochet stitch, you can experiment with variations and modifications to add visual interest to your crochet bowl. These may include working in different loops of the stitch, incorporating color changes, or combining the single crochet stitch with other stitches.
Take your time to practice and perfect the single crochet stitch, as it is a fundamental skill in crochet. With each stitch, you will gain confidence and expertise in creating beautiful and functional crochet bowls.
Increasing Stitches
Increasing stitches is an important technique in crochet, allowing you to expand the size and shape of your crochet bowl. By adding more stitches in each round or row, you can create a wider and more rounded bowl.
To increase stitches, you will need to work multiple stitches into a single stitch. There are various methods to achieve this, depending on the pattern or design you are following. One common technique is to make two single crochet stitches in the same stitch.
To use this method, insert your hook into the designated stitch, yarn over, and pull up a loop. Instead of completing the single crochet stitch as usual, leave two loops on the hook. Then, yarn over again and insert your hook back into the same stitch. Yarn over one more time and pull up another loop. Now, you should have three loops on your hook. To complete the increase, yarn over and pull through all three loops on your hook.
Repeat this process in each stitch where an increase is indicated in your pattern. This will gradually add more stitches to each round or row and create a wider circumference for your crochet bowl. The frequency at which you increase stitches will determine the rate of expansion.
Increasing stitches not only enlarges your crochet bowl but also helps to shape it. By strategically placing increases, you can achieve a rounder or more oval shape, depending on your preference. Experiment with different increase techniques and placements to create unique and customized designs.
When increasing stitches, it is important to maintain a consistent tension throughout your work. This will ensure that the stitches are even and the fabric remains smooth. Take your time and double-check your stitch count to ensure accuracy.
Keep in mind that patterns may vary in terms of their specific instructions for increasing stitches. Always refer to the pattern or design you are following for guidance on where and how to make increases.
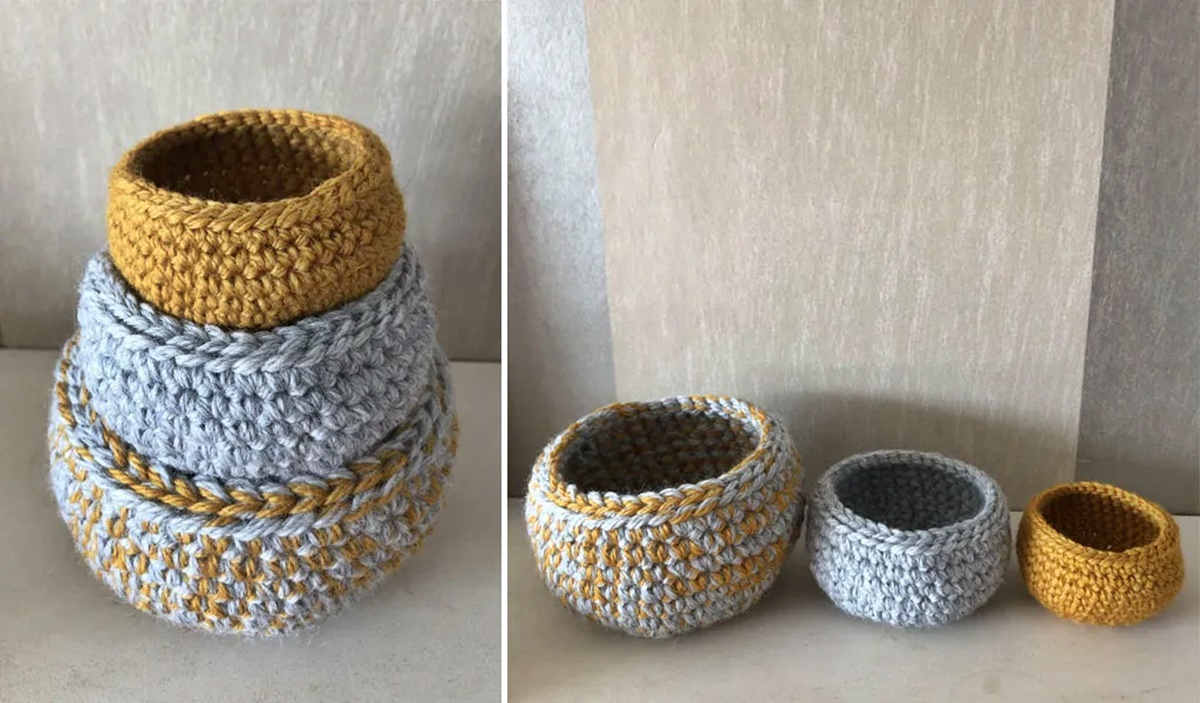
The technique of increasing stitches is an essential skill to have in crochet. With this skill, you can create crochet bowls of various sizes and shapes, allowing you to unleash your creativity and produce beautiful, functional pieces.
Changing Colors
Changing colors in your crochet bowl adds visual interest and allows you to incorporate different hues and combinations. Whether you want to create stripes, color blocks, or intricate patterns, mastering the art of changing colors will elevate the aesthetic appeal of your crochet project.
To change colors, begin by completing the last stitch of the old color up until the last yarn over. Instead of completing the stitch, leave the last two loops on your hook. Take the new color of yarn and make a slip knot.
Insert the hook into the last stitch of the old color, yarn over with the new color, and pull the new yarn through the stitch, completing the stitch with the new color. This effectively joins the new color and secures it in place.
Once the new color is secured, continue working with the new yarn. You can carry the old color yarn along the edge of your work until it is ready to be used again or, if desired, cut the old yarn leaving a long enough tail to weave in later.
When changing colors, it is crucial to achieve a clean and neat transition. To ensure that the yarn tails are not too loose or too tight, give them a gentle tug to adjust the tension. This will help to maintain an even and smooth appearance.
Experiment with different color combinations to create unique and eye-catching designs. Whether you prefer bold and contrasting colors or a more subtle and harmonious palette, changing colors allows you to express your personal style and creativity.
Changing colors in crochet bowls can also be used to signify specific sections or rounds. This can be especially useful when following complex patterns or creating intricate designs. By coordinating your color changes with the pattern instructions, you can create stunning and intricate visual effects.
When working with multiple colors, it is essential to keep the yarn that you are not currently using neat and organized. This prevents tangling and ensures that your crochet bowl maintains a polished appearance.
Changing colors adds depth, dimension, and personality to your crochet bowl. With a wide range of colors available, you have endless possibilities to explore and create unique pieces that reflect your individual style.
Working in Rounds
Working in rounds is a common technique in crochet bowl making that allows you to create a seamless and continuous fabric. Instead of turning your work at the end of each row, you will work in a circular motion, building upon the previous stitches with each round.
To work in rounds, start by completing the required number of stitches in the first round. This could be single crochet, double crochet, or any other stitch specified in your pattern or design.
Once the first round is complete, you will continue working in a spiral or continuous fashion. Instead of turning your work, simply move your hook to the beginning of the next round and start stitching. Use a stitch marker to mark the start of each round, helping you keep track of your progress.
As you work in rounds, remember to maintain consistent tension to ensure that your stitches are evenly spaced and the fabric remains smooth. By avoiding excessive tightness or looseness, you will create a uniform and polished appearance in your crochet bowl.
Working in rounds provides the flexibility to easily adjust the size and shape of your crochet bowl. You can increase or decrease the number of stitches in each round as needed to achieve your desired dimensions. This allows you to customize the pattern to fit your preferences or experiment with different design elements.
When transitioning from round to round, take care to align your stitches properly. This will ensure that there are no gaps or unevenness in the fabric. Paying attention to details like these contributes to the overall quality and professionalism of your crochet bowl.
Working in rounds can be done using various stitch patterns and color changes. You can alternate colors in each round to create stripes or use different stitch combinations to add texture and interest. The possibilities are endless, and you can let your creativity and personal style shine through in each round.
Remember to enjoy the process of working in rounds. Crocheting in a continuous motion can be both relaxing and satisfying, allowing you to see your crochet bowl gradually take shape. With each round completed, you are one step closer to a beautiful and functional finished piece.
Decreasing Stitches
Decreasing stitches in crochet is a technique used to narrow the circumference or shape of your crochet bowl. By reducing the number of stitches in each round, you can create a tapered or more narrow shape, depending on your desired outcome.
There are various methods for decreasing stitches, depending on the pattern or design you are following. One common technique is the single crochet decrease, also known as a sc2tog.
To execute a single crochet decrease, begin by inserting your hook into the next stitch. Yarn over and pull up a loop, just as you would for a regular single crochet. Instead of completing the stitch, leave two loops on your hook. Then, insert your hook into the next stitch, yarn over, and pull up a loop. You should now have three loops on your hook.
Yarn over once more and pull the yarn through all three loops on your hook. This completes the single crochet decrease. The two stitches that you worked into have now been combined into one stitch, effectively decreasing the stitch count by one.
Repeat this process wherever a decrease is indicated in your pattern. By strategically incorporating decreases, you can achieve the desired shape and size for your crochet bowl.
When decreasing stitches, it is crucial to maintain consistent tension throughout your work. This will ensure that the stitches are even and the fabric remains smooth. Check your stitch count regularly to ensure accuracy.
Decreasing stitches can be done in every round or selectively based on your pattern or design. Experiment with different methods and placements to create unique shapes and contours. Remember to follow the instructions provided and trust your creative intuition.
As with any new technique, practicing and gaining experience in decreasing stitches will enhance your crochet skills. With each decrease made, you will gain confidence and proficiency in creating beautifully shaped crochet bowls.
Enjoy the process of decreasing stitches and the transformation it brings to your crochet bowl. Together with the other techniques you have learned, you are well on your way to creating a stunning and functional piece of crochet art.
Fastening Off and Weaving in Ends
Once you have completed your crochet bowl and reached the desired size and shape, it’s time to secure your work and tidy up any loose ends. Fastening off and weaving in ends is an essential step in finishing your crochet project with a polished and professional touch.
To fasten off, finish the last stitch as indicated in your pattern or design. Cut the working yarn, leaving a tail of about 4-6 inches. Yarn over and pull the end of the yarn through the loop that is on your hook. Gently tug on the tail to tighten the loop and secure the last stitch.
Once your work is fastened off, you will have loose yarn ends at the beginning and end of your rows or rounds. These ends need to be woven into the fabric to ensure that they are securely hidden and do not unravel over time.
To weave in ends, thread the yarn end onto a yarn needle. Starting from the back of your work, insert the needle underneath the stitches of the same color, following the path of the yarn. Weave the needle in and out of the stitches for a few inches, taking care not to pull too tightly or distort the fabric.
After weaving the yarn in one direction, change direction and weave the needle back through the stitches in a different path. Repeat this process a few times to ensure that the yarn is securely woven into the fabric.
Once you are satisfied with the weaving, carefully trim any excess yarn. Be cautious not to cut the working yarn or any neighboring stitches. Trim the yarn close to the fabric, leaving just a small tail that is hidden within the stitches.
By fastening off and weaving in ends, you create a professional and neat finish to your crochet bowl. This not only enhances the appearance but also ensures the longevity and durability of your project.
Remember to fasten off and weave in ends for all the different colors used in your crochet bowl. By taking the time to complete this step, you will have a clean and refined finished product to be proud of.
Now that you have fastened off and woven in all ends, your crochet bowl is complete and ready to be enjoyed or gifted. Admire your handiwork and appreciate the effort and skill that went into creating this functional and beautiful piece.
Blocking the Crochet Bowl
Blocking is the final step in completing your crochet bowl project and is often overlooked but is crucial for achieving a polished and professional finish. Blocking refers to the process of shaping and setting your crochet piece to improve its structure, shape, and overall appearance.
To block your crochet bowl, you will need a few simple tools such as a blocking mat or towel, rustproof pins, and a spray bottle filled with water or a steam iron. The method you choose will depend on the fiber content of your yarn and the desired outcome.
If your yarn is natural fibers such as cotton or wool, wet blocking is recommended. Start by soaking your crochet bowl in lukewarm water for about 15-20 minutes. Gently squeeze out the excess water, being careful not to distort the shape of the bowl. Lay your damp crochet bowl onto a blocking mat or towel, shaping it to your desired size and smoothness.
Use rustproof pins to secure the edges and any shaping details of the bowl. Allow it to air dry completely. The wet blocking process helps to relax the fibers and allows the stitches to stretch and settle into their final form.
If your yarn is synthetic or delicate, steam blocking is a better option. Hold a steam iron a few inches above your crochet bowl and gently pass the steam over the surface, taking care not to touch the yarn directly with the iron. As the steam penetrates the fibers, use your hands to shape the crochet bowl to its desired form.
Allow the bowl to cool and dry before unpinning and handling. Steam blocking helps to shape and set the stitches while avoiding any potential damage to sensitive yarns.
Blocking your crochet bowl not only enhances its appearance but also improves the drape, shape, and fit. It allows stitches to relax and settle, creating a more professional finish and ensuring that your crochet bowl maintains its shape over time.
Depending on the specific pattern or design, blocking may be necessary to achieve the desired result. Always refer to the individual pattern instructions or use your judgment to determine if blocking is appropriate for your crochet bowl.
Now that you have completed blocking, your crochet bowl is ready to be displayed, used, or gifted. Take pride in the time and effort you have invested in creating a beautiful and functional piece through the art of crochet.