
Choosing the Right Yarn and Hook Size
When it comes to crocheting a Christmas ornament, choosing the right yarn and hook size is crucial for achieving the desired outcome. The yarn you select will determine the texture, thickness, and appearance of your ornament, while the hook size will affect the overall size and tension of your stitches.
Firstly, consider the type of yarn you want to use for your ornament. Acrylic yarn is a popular choice due to its wide range of colors, affordability, and durability. It is also easy to work with, making it ideal for beginners. However, if you prefer a more luxurious feel, you can opt for natural fibers such as cotton or wool.
Next, think about the thickness or weight of the yarn. The weight of the yarn is categorized using numbers ranging from 0 to 6, with 0 being the thinnest and 6 being the thickest. For a Christmas ornament, you may want to choose a lightweight or medium-weight yarn (such as a 3 or 4 weight) to ensure that the ornament is not too bulky or heavy.
Once you have chosen your yarn, you need to select an appropriate hook size to go along with it. The recommended hook size for a particular yarn can usually be found on the yarn label or in crochet patterns. The size of the hook determines the size of the stitches, with larger hooks creating larger stitches and smaller hooks creating smaller stitches.
Keep in mind that different crochet projects may require different hook sizes even if the yarn weight is the same. So, it’s essential to refer to the specific pattern or experiment with different hook sizes to achieve the desired gauge and tension.
Ultimately, the right combination of yarn and hook size will ensure that your Christmas ornament turns out beautifully. Take the time to sample different yarns and hook sizes before starting your project to ensure that you achieve the desired effect.
Understanding Crochet Terms and Abbreviations
When diving into the world of crochet, it’s essential to familiarize yourself with commonly used crochet terms and abbreviations. Crochet patterns often contain a variety of abbreviations, which can be overwhelming for beginners. However, once you grasp these terms, you’ll have a better understanding of the instructions and be able to crochet with ease.
One of the essential terms to know is “chain stitch” or “ch.” This stitch serves as the foundation for most crochet projects. It involves creating a series of interlocking loops and is often used to form the beginning row of stitches.
Another commonly used term is the “single crochet” or “sc.” This stitch involves inserting the hook into the designated stitch, yarn over, pull up a loop, and finally, yarn over and pull through both loops on the hook. Single crochet stitches are often used in amigurumi, or stuffed toy, projects.
The “double crochet” or “dc” stitch is a taller stitch and is achieved by yarn over, inserting the hook into the designated stitch, yarn over again, pull through, yarn over and pull through two loops on the hook, yarn over and pull through the remaining two loops. This stitch provides a looser and more open texture compared to single crochet stitches.
In addition to these basic stitches, crochet patterns may also include advanced stitches such as the half double crochet (hdc), treble crochet (tr), or even more intricate stitch combinations.
Furthermore, crochet patterns utilize abbreviations to make the instructions more concise. Common abbreviations include “st” for stitch, “rep” for repeat, “sk” for skip, and “tog” for together. By understanding these abbreviations, you’ll be able to follow the instructions accurately.
To assist you in decoding crochet patterns, numerous online resources and books provide comprehensive guides to crochet symbols and abbreviations. These references will help you master the various terms, enabling you to tackle a wide range of crochet projects with confidence.
Remember, practice makes perfect, and with time and experience, you’ll become comfortable with both the crochet terms and abbreviations. So, embrace the learning process and enjoy the journey of exploring the creative possibilities of crochet.
Starting with a Slip Knot and Chain Stitch
Before you can begin crocheting your Christmas ornament, you’ll need to know how to start with a slip knot and chain stitch. These two foundational techniques will get you started on the right foot and set the stage for your crochet journey.
The first step is to create a slip knot. Start by making a loop with the working end of the yarn on top. Then, insert your crochet hook through the loop and pull the yarn end through, forming a slip knot. Adjust the loop’s size by pulling the yarn end gently until it’s snug but not too tight.
Once you have your slip knot in place, you’re ready to move on to the chain stitch (abbreviated as “ch”). This stitch serves as the foundation for most crochet projects, as it creates a row of interconnected loops.
To make a chain stitch, hold the crochet hook in your dominant hand and the slip knot in your non-dominant hand. Insert the crochet hook into the slip knot, yarn over (wrap the yarn around the hook from back to front), and pull the yarn through the slip knot, creating a new loop on the hook. This first loop represents your first chain stitch.
Continue making chain stitches by repeating the process: insert the hook into the last loop created, yarn over, and pull the yarn through the loop on the hook. Each time you complete a chain stitch, you create a new loop that serves as the foundation for the next stitch.
The number of chain stitches you make depends on your project’s pattern or instructions. Often, patterns will specify the desired number of chain stitches needed for your project’s width or circumference.
Keep in mind that while making chain stitches, it’s crucial to maintain an even tension. Loosely or tightly crocheted chain stitches can affect the overall appearance and size of your project. Take your time and practice until you achieve a consistent and comfortable tension that works for you.
With a slip knot and chain stitches mastered, you’re now prepared to move on to more advanced stitches and patterns. These basic techniques serve as the building blocks of crochet and will lay the foundation for the creation of beautiful Christmas ornaments and other crochet projects.
Creating the Magic Ring
When crocheting a Christmas ornament, the magic ring technique is often used to create a tight and seamless center. Also known as the magic loop or adjustable ring, this technique allows you to start your project with a closed loop, ensuring that there are no gaps or holes in the center of your ornament.
To create a magic ring, begin by making a loop with the yarn, leaving a long tail end. Hold the loop with your non-dominant hand, with the tail end held down by your fingers.
Next, insert your crochet hook into the loop from the front, hooking the yarn tail and pulling it through the loop. Hold the yarn tail against the loop to secure it in place.
Now, with the working yarn (the yarn attached to the skein), yarn over (wrap the yarn around the hook from back to front), and pull the yarn through the loop. This creates the first chain stitch of the magic ring.
Continue by making the required number of stitches for your pattern directly into the loop. This may include single crochet stitches, double crochet stitches, or any other stitch specified in the pattern. The loop of the magic ring will act as the foundation for these stitches.
Once you have finished crocheting the required stitches into the magic ring, it’s time to close the loop. Gently pull on the tail end of the yarn to tighten the loop, gradually closing it. As you pull, the stitches will gather and close the center of the magic ring, creating a neat and tight finish.
After closing the magic ring, you can continue working in rounds or rows as indicated in your pattern. The stitches made into the magic ring will form the center of your Christmas ornament.
The magic ring technique provides flexibility in adjusting the size of the center hole. By pulling the tail end tighter or loosening it, you can control the size of the hole to accommodate different projects and designs.
With a little practice, creating a magic ring will become second nature. It will become an essential technique in your crochet arsenal, ensuring that your Christmas ornaments have a professional-looking and seamless start.
Working Single Crochet Stitches in the Round
Working single crochet stitches in the round is a fundamental technique used in crochet projects, including Christmas ornaments. This technique allows you to crochet in a continuous spiral, creating a seamless and uniform appearance. Whether you’re making a simple spherical ornament or a more intricate design, the single crochet stitch in the round is a versatile and essential skill to master.
To begin, make a slip knot and chain a few stitches as specified in your pattern. Then, insert your crochet hook into the first chain stitch you made, forming a loop.
Next, yarn over (wrap the yarn around the hook from back to front), and pull the yarn through the loop on the hook. This creates the first single crochet stitch of the round. Make sure to work over the tail end of the yarn to secure it in place as you crochet.
Continue working single crochet stitches by inserting your hook into the next stitch of the previous round. Yarn over and pull the yarn through the stitch, creating a loop on your hook. Finally, yarn over once more and pull through both loops on the hook, completing the single crochet stitch.
Repeat this process for each stitch of the previous round until you reach the end. As you work, you will notice the spiral formation, with each stitch joining seamlessly to the previous one.
It’s crucial to maintain a consistent tension as you crochet in the round. Too loose or too tight stitches can result in an uneven or distorted shape. Practice finding the right tension that creates a firm and even fabric for your ornament.
Depending on your pattern, you may need to increase or decrease the number of stitches in each round to shape your ornament. This is done by making additional stitches in a single stitch (increase) or skipping stitches (decrease) according to the pattern instructions.
Crocheting single crochet stitches in the round gives you the flexibility to create various shapes and designs. By experimenting with different stitch counts, color changes, and embellishments, you can personalize your Christmas ornaments and bring your creative vision to life.
With practice, working single crochet stitches in the round will become second nature. Soon enough, you’ll be able to crochet beautiful and intricate Christmas ornaments with ease, impressing everyone with your crochet skills.
Changing Colors for a Striped Pattern
Adding stripes to your crochet Christmas ornaments can introduce a vibrant and eye-catching element to your designs. To achieve this effect, you’ll need to know how to change colors seamlessly. With a few simple techniques, you can create beautiful striped patterns that will make your ornaments stand out.
When changing colors, it’s essential to plan your color scheme beforehand. Decide on the order and number of colors you want to incorporate into your striped pattern. You can create classic combinations or experiment with bold and contrasting hues to achieve different effects.
As you approach the end of a row or round, work the last stitch until two loops remain on your hook. Then, drop the current color yarn and pick up the next color yarn from your chosen color scheme.
Before proceeding, it’s crucial to secure the loose ends of the yarn to prevent them from unraveling. To do this, you can either crochet over the loose ends as you work the next stitches or weave them in later using a yarn needle.
To join the new color, simply complete the last step of the stitch with the new color yarn. This ensures a seamless transition and prevents any gaps or loose ends between color changes.
Continue working with the new color as directed by your pattern. Remember to maintain an even tension to ensure consistent stitch size and appearance throughout your striped pattern.
If your pattern requires changing colors in specific positions, such as creating color blocks or alternating colors within a row or round, follow the instructions carefully. Pay attention to stitch counts and color changes in order to achieve the desired design.
When changing colors, it’s important to carry the unused color yarn behind your stitches to prevent loose strands on the back of your work. To do this, work over the unused yarn, wrapping it behind the stitches as you crochet with the active color.
By incorporating color changes into your crochet Christmas ornament projects, you can unleash your creativity and personalize your designs. Whether you prefer subtle hues or bold contrasts, mastering the art of changing colors will allow you to create stunning striped patterns that will make your ornaments truly unique.
With practice and attention to detail, you’ll be able to effortlessly crochet colorful and visually appealing striped Christmas ornaments that will brighten any holiday décor.
Adding Texture with Different Stitch Patterns
Crocheting Christmas ornaments opens up a world of possibilities for adding texture to your designs. By incorporating different stitch patterns, you can create ornaments with rich textures that add depth and visual interest. Whether you want a cozy and textured look or a sleek and modern design, experimenting with various stitch patterns will elevate your ornaments to the next level.
One popular stitch pattern for adding texture is the “bobble” or “popcorn” stitch. This stitch involves creating several stitches in the same stitch or space and then joining them together to form a mini cluster or “bobble.” The result is a raised and textured surface that adds dimension and helps your ornament stand out.
Another stitch pattern that provides texture is the “front post double crochet” or “FPdc” stitch. This technique involves working a double crochet stitch around the vertical post of the stitch from the previous row, rather than into the top of the stitch itself. This creates a ribbed or ridged texture that adds depth and detail to your ornament.
If you’re looking for a lacy and intricate texture, consider incorporating “cluster stitches” or “shell stitches” into your design. These stitches involve grouping multiple stitches together to form a cluster or shell, creating a delicate and airy texture that is perfect for highlighting the beauty of your Christmas ornaments.
Don’t be afraid to combine different stitch patterns within one ornament to create a unique and intricate design. Mixing textures can add visual interest and make your ornament more visually dynamic.
When using textured stitch patterns, it’s important to pay attention to the tension of your stitches. Since some stitch patterns create a denser fabric, you may need to adjust your hook size or yarn weight to ensure that the ornament maintains its desired shape and size.
Additionally, consider the purpose of your ornament when selecting stitch patterns. For ornaments intended for hanging on a tree, intricate stitch patterns with long stitches or open spaces may not be suitable, as they can catch on branches or snag on ornaments nearby.
Adding texture with different stitch patterns allows you to unleash your creativity and bring your ornaments to life. Whether you choose bobbles, post stitches, clusters, shells, or a combination of these techniques, the texture you incorporate will lend character and uniqueness to your crochet Christmas ornaments.
So, grab your hook and let your imagination wander as you explore the vast world of stitch patterns and create textured ornaments that will be cherished for years to come.
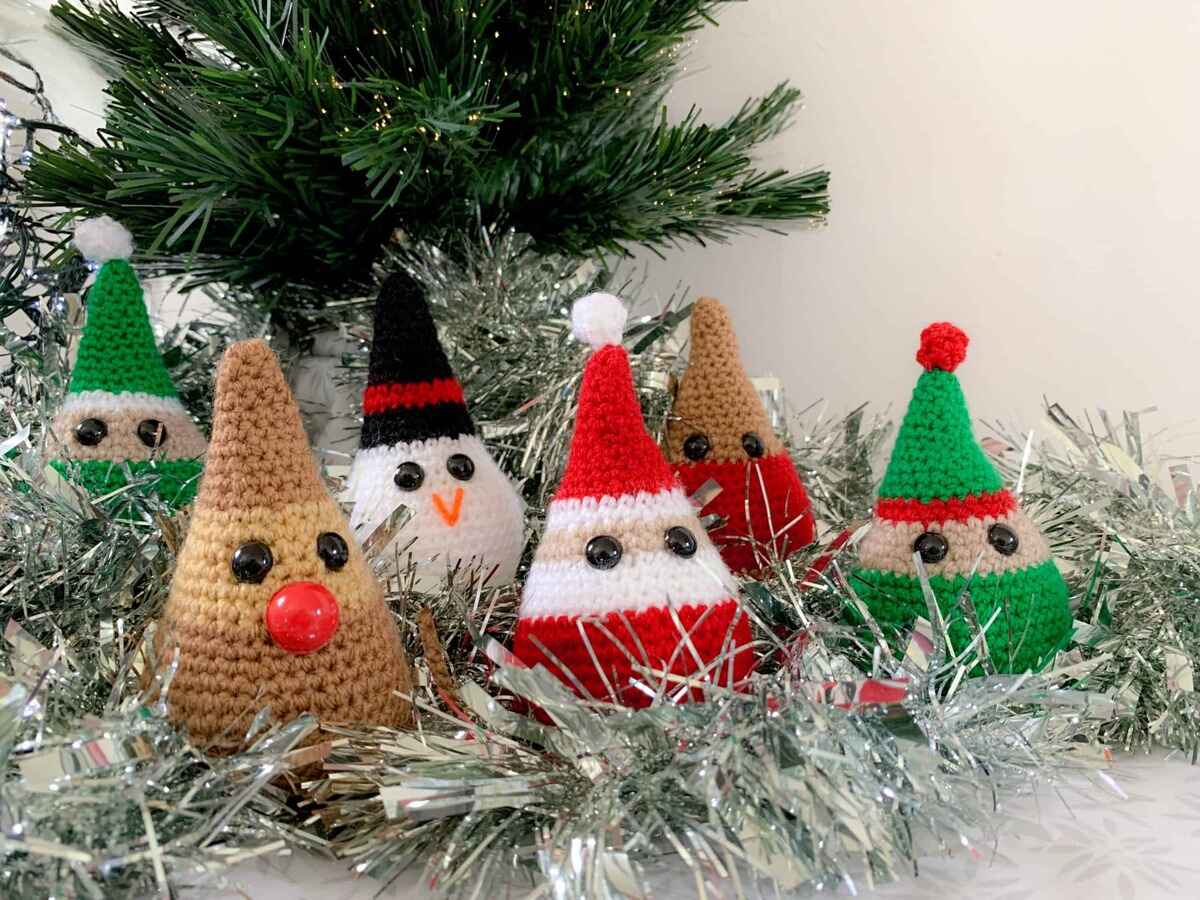
Adding Embellishments and Decorations
Once you’ve completed the basic crochet structure of your Christmas ornament, it’s time to add the finishing touches. Embellishments and decorations are what bring your ornaments to life, making them uniquely yours. Whether you prefer a minimalist aesthetic or a more whimsical and festive look, there are countless ways to enhance your ornaments with creative and eye-catching elements.
One simple yet effective way to add charm to your ornaments is by attaching small beads or buttons. Choose beads or buttons that match your color scheme or add a pop of contrasting color to create visual interest. Sew them onto the surface of your ornaments using a needle and thread, or even crochet them directly into your design for a seamless look.
Ribbons and bows are another popular choice for adding a touch of elegance or playfulness to your ornaments. Attach a small ribbon loop to create a hanger for your ornament, or tie a decorative bow around the top or bottom for added flair. Experiment with different ribbon colors, textures, and widths to achieve the desired effect.
If you want to create a sparkling and glamorous ornament, consider incorporating sequins, rhinestones, or metallic threads. Sew or glue these embellishments onto the surface of your ornament, or use them to create intricate patterns and designs. The shimmer and shine of these additions will certainly catch the light and make your ornament shine.
Crocheted appliques and motifs are also popular choices for adding decorative elements to your ornaments. From snowflakes and stars to hearts and flowers, there are countless patterns available for creating beautiful crocheted additions. Sew or crochet them onto your ornament to add intricate detail and a touch of charm.
For a more festive and playful look, consider adding pom-poms, tassels, or mini yarn pompoms to your ornaments. These textured and fun additions can be easily made using yarn and a pom-pom maker or by wrapping yarn around your fingers. Attach them to the edges, corners, or center of your ornaments for a whimsical touch.
Remember to consider the overall aesthetic and theme of your Christmas decorations when choosing embellishments and decorations. Creating a cohesive and harmonious look will enhance the impact of your ornaments and create a well-curated holiday display.
Let your creativity run wild as you explore various embellishments and decorations to customize your crochet Christmas ornaments. Whether you opt for delicate and classic elements or bold and unique additions, the finishing touches you add will bring your ornaments to life and make them truly special.
Fastening Off and Weaving in Ends
After completing your crochet Christmas ornament, it’s important to finish off your work neatly to give it a polished look. Fastening off and weaving in ends ensures that your stitches remain secure and prevents any unraveled or loose threads from spoiling the appearance of your ornament.
To fasten off, complete the last stitch of your pattern as instructed, leaving a long yarn tail of about 6 inches. Cut the yarn, then yarn over and pull the tail through the last loop on your hook. Gently pull the tail tight to secure the stitch.
To weave in ends, thread the yarn tail through a yarn needle. Carefully insert the needle under the stitches on the backside of your work, following the path of the stitches for a few inches. This helps to hide the yarn tail and prevents it from unraveling.
Continue weaving the yarn tail back and forth, changing directions as you move along, for a secure hold. Be cautious not to pull too tightly, as it may cause your work to pucker or distort.
If working with multiple colors or changing yarns during the project, you’ll have additional yarn tails to weave in. Follow the same process for each tail, weaving them in separately to maintain a neat finish.
For extra security, you can make a small knot using the yarn tails before weaving them in. However, be sure to do this discreetly and in a location where it won’t affect the appearance of your ornament.
Once all ends are woven in, carefully trim any excess yarn close to the work, ensuring not to cut through any stitches. Take care to blend the cut ends seamlessly with the rest of the work.
By properly fastening off and weaving in ends, you not only achieve a professional and finished look, but you also ensure that your crochet Christmas ornament will withstand use and handling without coming apart.
Remember, take the time to securely fasten off and weave in ends for each completed ornament. It’s the final step that adds a touch of professionalism and craftsmanship to your work, leaving you with beautifully finished ornaments that will last for seasons to come.
Attaching a Loop for Hanging the Ornament
One essential finishing touch for your crochet Christmas ornaments is attaching a loop for hanging. This loop allows you to easily hang the ornaments on a tree, display them in a festive arrangement, or attach them to other holiday decorations.
To create a loop for hanging, you have a few options. One common method is to use a simple crochet chain. Cut a length of yarn, approximately 6-8 inches long, and make a slip knot at one end.
Insert your crochet hook into the desired location on your ornament, such as the top center or one of the corners. Pull the slip knot through with your hook, leaving a small loop on the front side of the ornament.
Next, yarn over and pull the yarn through the loop on your hook to create a single chain stitch. Repeat this process to create the desired length of the loop, usually 2-3 chain stitches.
Once you’ve made the desired number of chain stitches, cut the yarn, leaving a tail about 2-3 inches long. To secure the loop, pull the tail end through the last loop on your hook and gently tighten.
Another option for attaching a hanging loop is to use a small piece of ribbon or cord. Cut a length of ribbon or cord to your preferred size, usually around 4-6 inches long. Fold it in half to create a loop, and position it at the desired location on your ornament.
Secure the loop by stitching it in place with a needle and thread or by using a small amount of glue. Be mindful of the ornament’s weight and the strength of your attachment method to ensure that the loop remains secure and can support the ornament’s weight.
When attaching a loop for hanging, consider the visual balance of your ornament. Place the loop in a way that complements the ornament’s shape and design, ensuring that it hangs evenly and does not affect the ornament’s overall appearance.
By adding a loop for hanging, you transform your crochet Christmas ornament into a functional and decorative piece. It allows you to display your creations in various ways and brings holiday cheer to any space.
Remember to carefully attach your hanging loop to ensure the ornament hangs securely and withstands handling. Whether you choose a crochet chain or a ribbon loop, the final result will be a beautifully finished ornament ready to be showcased and enjoyed during the holiday season.