
Materials Needed
To create a beautiful wreath ornament, you will need a few essential materials. Gather the following items before starting your crochet project:
- Crochet Hook: Choose a hook size that is suitable for the yarn you will be using. A 3.5mm or 4mm hook is typically ideal for a small wreath ornament.
- Crochet Yarn: Pick a yarn color that complements your holiday decor. You can opt for traditional green, or experiment with other festive colors like red, gold, or silver.
- Scissors: A sharp pair of scissors is essential for trimming yarn and cutting any excess thread.
- Tapestry Needle: Use a tapestry needle to weave in loose ends and attach the leaves, berries, and bow to the wreath.
- Stitch Markers: These handy tools will help you keep track of your stitches and ensure that your wreath maintains its shape.
- Stuffing: You will need a small amount of stuffing or fiberfill to add volume and shape to the wreath ornament.
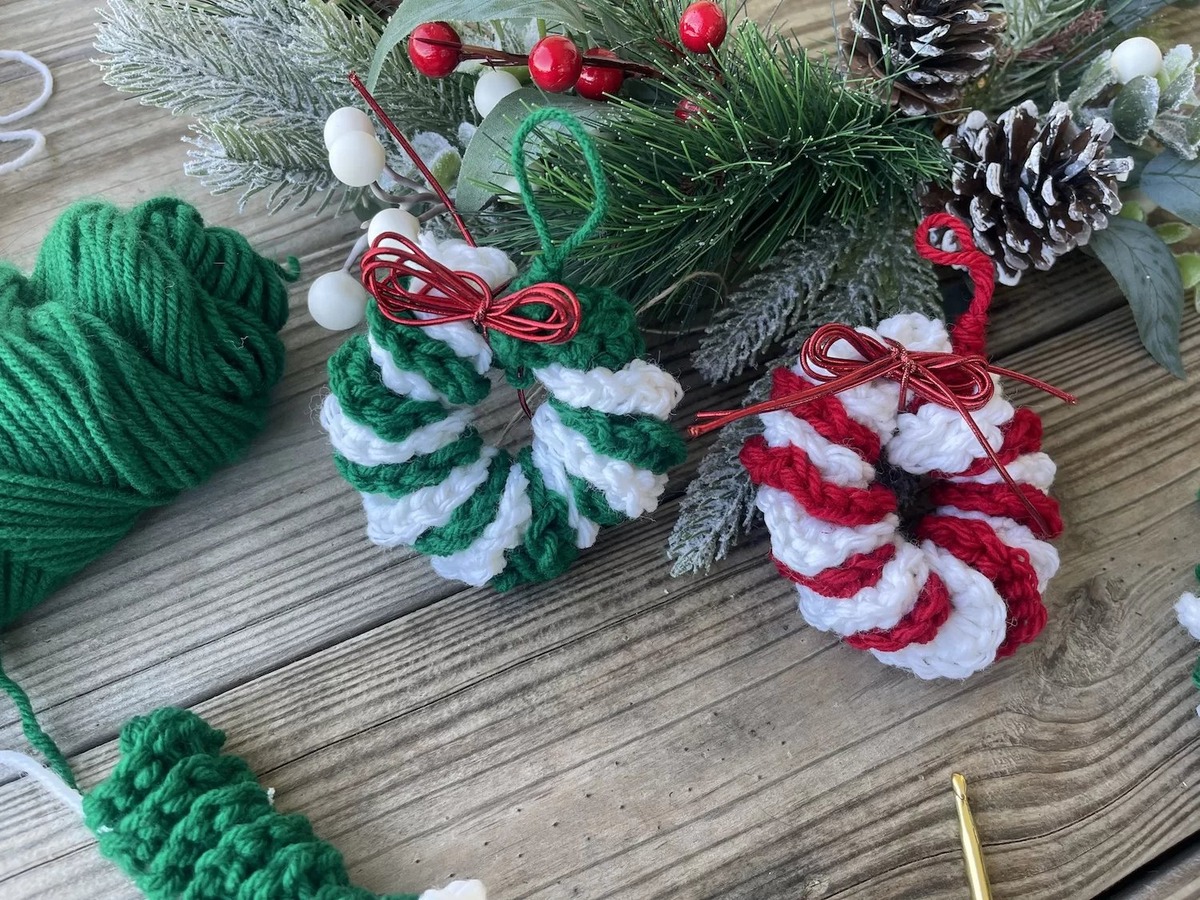
- Ribbon: Choose a decorative ribbon in a coordinating color to create a festive bow and hang the wreath ornament.
- Optional Embellishments: If you want to add extra sparkle and flair to your wreath, consider including small beads, sequins, or miniature bells.
Now that you have gathered all the necessary materials, you are ready to proceed with making your crochet wreath ornament. Let’s move on to the first step: making the base.
Step 1: Making the Base
The first step in creating a crochet wreath ornament is to make the base. The base will serve as the foundation for attaching the leaves, berries, and other decorative elements.
To make the base, start by creating a magic ring. This technique creates a tight and seamless center for your crochet project. Alternatively, you can chain 4 and join the ends to form a ring.
Next, work a certain number of single crochet stitches (sc) into the magic ring or the chain ring. The number of stitches will depend on the desired size of your wreath. For a small ornament, 8-10 single crochet stitches should suffice.
Once you have completed the initial round of single crochet stitches, join the last stitch to the first stitch with a slip stitch (sl st). This will create a closed loop.
Continue working single crochet stitches in the round until the base of your wreath reaches the desired width. Remember to place a stitch marker on the first stitch of each round to help you keep track of your progress.
Once you have reached the desired width, fasten off the yarn by cutting it, leaving a tail. Using a tapestry needle, weave the yarn tail through the stitches to secure it.
You have now completed the base of your crochet wreath ornament. This sturdy foundation will provide the structure for adding the decorative leaves, berries, and other embellishments. In the next step, we will crochet the leaves.
Step 2: Crocheting the Leaves
Now that you have created the base of your crochet wreath ornament, it’s time to crochet the leaves. The leaves will add a touch of nature and elegance to your ornament.
To crochet the leaves, you will need a contrasting color of yarn. Choose a shade that complements the base color of your wreath. For a more realistic look, opt for a green or variegated yarn.
Start by making a slip knot and attaching the yarn to one of the stitches on the base of the wreath. Next, chain a certain number of stitches to create the length of the leaf. The number of chains will depend on the desired size of the leaf.
Once you have chained the desired number of stitches, work single crochet stitches into the chain, starting from the second chain from the hook. Depending on the size of the leaf, you may need to work 3-5 single crochet stitches.
After working the single crochet stitches, chain a few more stitches to create the leaf’s tip. The number of additional chains will depend on the desired length of the tip. This will help give the leaf a realistic shape.
Now, work single crochet stitches into the chains you just made, starting from the second chain from the hook. Again, the number of stitches will depend on the size of the leaf and the desired width of the tip.
Continue this pattern of chaining for the leaf’s body and adding single crochet stitches for the tip until you reach the end of the leaf. Fasten off the yarn, leaving a tail to attach the leaf to the wreath.
Repeat this process to crochet as many leaves as desired for your wreath ornament. You can create different sizes and shapes of leaves to add variety and depth to your design.
Once you have crocheted all the leaves, you are ready to move on to the next step: adding the berries.
Step 3: Adding the Berries
Adding berries to your crochet wreath ornament will bring a pop of color and a festive touch to the design. It is a simple yet effective way to enhance the overall appearance of your ornament.
To create the berries, you will need a small amount of red or any other berry-colored yarn. This can be the same yarn you used for the leaves or a different shade to create contrast.
Start by making a slip knot and attaching the yarn to one of the stitches on the base of the wreath. Next, create a small loop by chaining 2 or 3 stitches.
After making the loop, work single crochet stitches into the loop. The number of stitches will depend on the desired size of the berry. Typically, 4-5 single crochet stitches should suffice.
Once you have completed the single crochet stitches, join the last stitch to the first stitch with a slip stitch to form a small circle.
To add dimension to the berry, crochet around the circle by working 2 single crochet stitches into each stitch from the previous round. This will result in an increase in the number of stitches and create a rounded shape.
Continue working in the round, gradually increasing the number of stitches in each round until the berry reaches the desired size. Remember to place a stitch marker on the first stitch of each round to help you keep track of your progress.
Once the berry has reached the desired size, fasten off the yarn, leaving a tail to attach the berry to the wreath. Tuck in any loose ends using a tapestry needle.
Repeat this process to crochet as many berries as desired for your wreath ornament. You can vary the sizes and colors of the berries to add visual interest to your design.
Now that you have added the berries, it’s time to move on to the next step: attaching the leaves and berries to the wreath base.
Step 4: Attaching the Leaves and Berries
Now that you have crocheted the leaves and berries for your wreath ornament, it’s time to attach them to the base. This step will bring your ornament to life and create a beautiful and festive design.
Start by arranging the crocheted leaves and berries on the wreath base. Position them in a visually appealing way, considering color, size, and spacing. This will help you determine the best placement before attaching them permanently.
Using a tapestry needle and the yarn tails left from crocheting the leaves and berries, stitch them in place on the wreath base. Take care to securely attach each element, ensuring they are properly secured and won’t easily come loose.
You can also get creative with your placement, alternating the leaves and berries or clustering them in specific areas of the wreath. This will add depth and dimension to the overall design.
As you attach the leaves and berries, take a step back occasionally to assess the overall look and make adjustments if necessary. This will ensure a balanced and aesthetically pleasing arrangement.
Continue attaching the leaves and berries until you are satisfied with the arrangement. Remember to take your time and pay attention to detail, as this step will significantly impact the final appearance of your wreath ornament.
Once all the leaves and berries are securely attached, take a moment to admire your work. The colors and textures of the crocheted elements will beautifully complement the wreath base, creating a delightful holiday decoration.
Now that you have successfully attached the leaves and berries, it’s time to add a bow to complete the look. In the next step, we will cover how to create and attach a decorative bow to your wreath ornament.
Step 5: Adding a Bow
Adding a bow to your crochet wreath ornament is the final touch that will elevate its festive charm. The bow will serve as a focal point and enhance the overall appearance of your creation.
To create the bow, you will need a decorative ribbon in a color and pattern of your choice. Choose a ribbon that complements the colors of your wreath and adds a touch of elegance or whimsy.
Start by cutting a length of ribbon, leaving enough extra to wrap around the wreath and create a bow. The length will depend on the size of your wreath and the desired size of the bow.
Take the cut ribbon and form a loop by crossing one end over the other, creating a simple knot in the center.
Next, form a second loop by folding the longer end of the ribbon over itself, creating another loop that is slightly smaller than the first one.
Bring the longer end of the ribbon around the back, passing it through the center to create the tails of the bow. Adjust the loops and tails as needed to create a symmetrical and pleasing shape.
To attach the bow to the wreath, use the excess length of ribbon and tie it around the base of the wreath, positioning the bow in the desired location.
Make sure to secure the bow tightly, yet gently, to the wreath base, ensuring that it stays in place and doesn’t come loose.
Once the bow is securely attached, take a moment to adjust and fluff the loops and tails to give it a full and attractive appearance.
Stand back and admire your completed wreath ornament with its beautiful bow. The addition of the bow will add a festive and whimsical touch, completing the look of your crochet creation.
With the bow in place, your wreath ornament is nearly finished. In the next step, we will cover some final touches to add a polished and professional look to your creation.
Step 6: Finishing Touches
Now that you have added the bow to your crochet wreath ornament, it’s time to add some final touches to give it a polished and professional look.
Trim any excess yarn or thread that may be sticking out from the leaves, berries, or the base of the wreath. Use a sharp pair of scissors to carefully snip away any loose ends, creating clean edges and a neat appearance.
If you want to add a touch of sparkle or shine to your wreath, consider incorporating some optional embellishments. You can glue small beads, sequins, or miniature bells onto the leaves or berries, creating a beautiful and eye-catching detail.
Feel free to get creative with your embellishments, allowing your personal style and preferences to shine through. Just be mindful of not overcrowding the design and maintaining a balanced and visually appealing arrangement.
Once you are satisfied with the overall appearance of your wreath ornament, take a moment to inspect it from different angles. Look for any areas that may need additional adjustments or fine-tuning.
If needed, gently reshape the leaves or berries to ensure they are arranged in an aesthetically pleasing manner. Sometimes, a small tweak can make a big difference in the overall look and balance of the ornament.
Finally, step back and admire your completed wreath ornament. The combination of crocheted elements, the festive bow, and any additional embellishments you added will create a beautiful and unique holiday decoration.
Your wreath ornament is now ready to be displayed or gifted. Whether it’s hanging on a tree, adorning a door, or surprising a loved one, your crochet creation is sure to spread holiday cheer and bring joy to those who see it.
Congratulations on completing your crochet wreath ornament! Enjoy the satisfaction of your accomplishment and the beauty of your handmade creation.
Step 7: Hanging the Wreath Ornament
Now that you have completed your crochet wreath ornament, it’s time to hang it up and showcase your beautiful creation. Hanging the ornament is the final step in the process and allows you to display it in all its glory.
Start by selecting a suitable location to hang your wreath ornament. Whether it’s on a Christmas tree, a door, a wall, or a festive display, choose a spot that will best highlight and complement the ornament.
If you wish to hang the wreath ornament on a tree, use a small piece of decorative ribbon or string to create a loop. Thread the loop through the center of the wreath and make a knot to secure it.
For hanging the ornament on a door or wall, you can use a command hook, a small nail, or adhesive hooks. Attach the hook securely to the desired location and hang the wreath ornament by its loop or a piece of ribbon attached to the back.
Take a step back and ensure that the ornament is hanging straight and at the desired height. Make any adjustments as needed to ensure a balanced and visually pleasing presentation.
Once the wreath ornament is securely hung in its designated spot, stand back and admire your handiwork. The combination of the crochet work, the decorative elements, and your creativity have come together to create a stunning holiday decoration.
Remember, the wreath ornament you have created can also make a wonderful gift for family, friends, or loved ones. Consider making additional ornaments and sharing the joy of your crochet skills with others.
With your wreath ornament hanging in place, you can enjoy the festive atmosphere it brings to your home or the smiles it brings to those who receive it. Take pride in your crochet skills and the beauty you have created.
Thank you for following these steps and creating a crochet wreath ornament. Enjoy the holiday season with your beautiful handmade decoration!