
Tools and Materials Needed
When it comes to cutting a mirror, having the right tools and materials is essential for achieving professional and precise results. Here are the key items you will need for this project:
- Measuring tape or ruler: This will help you accurately measure the dimensions of the mirror.
- Masking tape: Use masking tape to mark the cutting line on the mirror’s surface.
- Glass cutter: A glass cutter is the primary tool used to score and cut the mirror.
- Straightedge: A straightedge, such as a metal ruler or T-square, helps in creating straight and even cuts.
- Glass-cutting jig: This tool assists in holding the mirror securely and guiding the glass cutter for precise cuts.
- Safety goggles: Protect your eyes from any potential glass fragments or splinters during the cutting process.
- Work gloves: Wear work gloves to safeguard your hands from sharp edges and potential injuries.
- Glass pliers: These are useful for breaking off small pieces of glass or making adjustments to the cut edges.
- Sandpaper or emery cloth: These tools are used for smoothing and refining the edges of the cut mirror.
- Microfiber cloth: Use a soft microfiber cloth to remove any dust or debris from the mirror’s surface.
Ensuring that you have all these tools and materials on hand before beginning the cutting process will make the entire process smoother and safer. Remember to always follow the manufacturer’s instructions for any specific tools, especially when it comes to safety gear like goggles and gloves. With the right tools and materials, you’ll be well-prepared to successfully cut your mirror to the desired size and shape.
Safety Precautions
When working with mirrors and glass, it is important to prioritize safety to prevent accidents and injuries. Follow these safety precautions to ensure a safe cutting process:
- Wear safety goggles: Protect your eyes from any potential glass fragments or splinters that may fly off during the cutting process. Safety goggles should be worn at all times.
- Use work gloves: Wear thick, work gloves to shield your hands from sharp glass edges and potential injuries. This will also provide you with a better grip on the glass and reduce the risk of slipping.
- Workspace preparation: Clear your cutting area of any unnecessary items or obstructions. Make sure you have a stable and flat work surface where you can safely lay the mirror for cutting.
- Work in a well-ventilated area: If possible, choose a well-ventilated workspace to minimize the exposure to glass dust and fumes. Open windows or use a fan to improve airflow.
- Secure the mirror: Ensure the mirror is firmly positioned and won’t move during the cutting process. Consider using a glass-cutting jig or clamps to keep the mirror in place.
- Mark the cutting line: Use masking tape to clearly mark the cutting line on the mirror’s surface. This will help guide your cutting tool and create precise cuts.
- Handle with care: Always handle the mirror with care to minimize the chances of it breaking or shattering. Avoid applying excessive pressure or force during the cutting process.
- Clean up properly: After completing the cutting process, carefully clean up any glass shards, debris, or dust. Use a broom and dustpan to collect the waste and dispose of it safely.
- Proper storage: If you have leftover glass pieces or broken mirror fragments, store them in a sturdy container or package them securely to prevent any accidental injuries.
By following these safety precautions, you can ensure a safe cutting experience and minimize the risk of accidents or injuries. Remember, cutting glass can be a delicate process, so take your time and work with caution. Always prioritize your safety and the safety of those around you when handling mirrors and glass.
Measuring and Marking the Mirror
Before cutting the mirror, precise measurements and accurate marking are crucial to ensure that you achieve the desired size and shape. Follow these steps to measure and mark the mirror effectively:
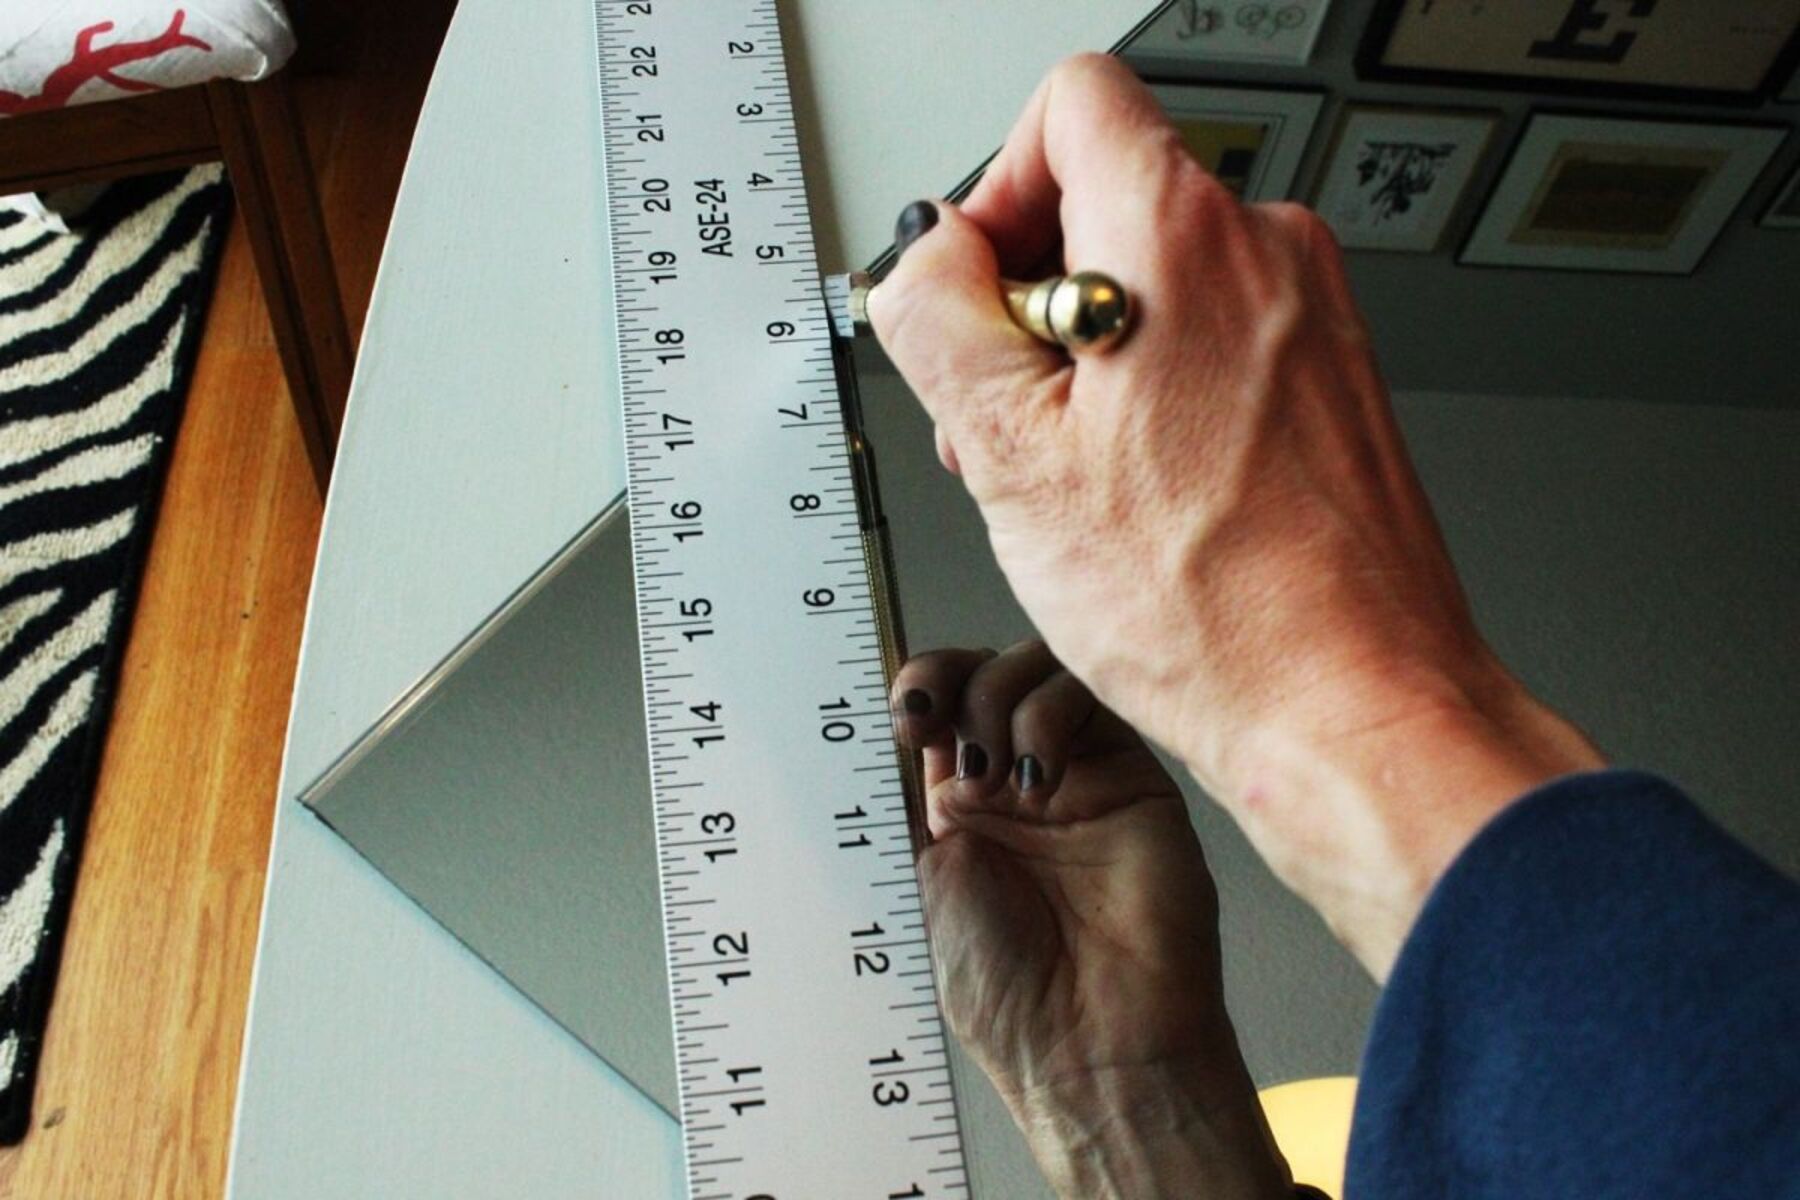
- Measure the mirror: Use a measuring tape or ruler to determine the dimensions of the mirror. Take measurements of both the length and width, ensuring accuracy down to the nearest millimeter.
- Determine the cutting line: Based on your desired size and shape, mark the cutting line on the mirror’s surface using masking tape. Make sure the line is straight and clearly visible.
- Consider any design elements: If you plan on cutting out specific shapes or patterns, take them into account when marking the cutting line. Use a pencil to lightly outline the design before applying masking tape.
- Double-check the measurements: Before proceeding with the cutting process, double-check your measurements to confirm that they are accurate. Ensure that the marked cutting line aligns with your desired dimensions.
- Account for the blade width: Keep in mind that when cutting with a glass cutter, you will be removing a thin strip of glass along the cutting line. Adjust your measurements accordingly to account for the blade width.
- Verify stability: Make sure the mirror is securely positioned on a stable work surface before proceeding with the cutting. A wobbly or unstable mirror can result in inaccurate cuts or potential accidents.
Remember, it’s essential to take your time during the measuring and marking process to ensure precision. Rushing this step can lead to inaccurate cuts and a mirror that doesn’t meet your desired specifications. By following these steps carefully, you’ll be well-prepared to move on to the next stage of the cutting process.
Preparing the Cutting Area
To ensure a smooth and successful mirror cutting process, it is important to properly prepare the cutting area. Follow these steps to create a safe and organized workspace:
- Clean the work surface: Start by cleaning the work surface where you will be cutting the mirror. Remove any dust, debris, or other materials that may interfere with the cutting process.
- Use a protective covering: Place a soft, non-abrasive material, such as a thick piece of felt or a towel, on the work surface to protect the mirror from scratches or damage.
- Secure the mirror: Ensure that the mirror is firmly secured to prevent it from moving or sliding during the cutting process. Consider using clamps or a glass-cutting jig to hold the mirror in place.
- Set up lighting: Good lighting is crucial for accurate cutting. Position a bright light source, such as a desk lamp or overhead light, to illuminate the cutting area and make the marked cutting line clearly visible.
- Clear the surroundings: Remove any unnecessary objects from the vicinity of the cutting area to prevent accidents or distractions while working with the glass.
- Organize tools and materials: Arrange all the tools and materials you will need for the cutting process within easy reach. This will help you work efficiently without having to search for items as you go.
- Keep safety equipment nearby: Have safety goggles and work gloves readily accessible in case you need them during the cutting process. Safety should always be a top priority.
- Inform others: If you are working in a shared space or have others nearby, make sure they are aware of the cutting process. Advise them to keep a safe distance and exercise caution.
By taking the time to properly prepare the cutting area, you create an environment that is conducive to accurate and safe mirror cutting. Organizing your tools and ensuring a clean, well-lit, and secure workspace will contribute to a successful cutting experience.
Cutting Techniques (Score and Snap)
The score and snap method is a commonly used technique for cutting mirrors. It involves scoring the surface of the mirror with a glass cutter and then applying pressure to snap the glass along the scored line. Follow these steps to successfully cut a mirror using the score and snap method:
- Position the mirror: Place the mirror on a stable and flat surface, with the marked cutting line facing up and visible.
- Prepare the glass cutter: Hold the glass cutter in a comfortable grip, ensuring that the cutting wheel is in contact with the surface of the mirror. Tilt the cutter at a slight angle, typically around 45 degrees.
- Score the mirror: Apply firm and even pressure to the glass cutter as you move it along the marked cutting line. Make a single, continuous score, ensuring that you maintain a steady and consistent speed throughout the process.
- Focus on the score line: After scoring the mirror, visually inspect the score line to ensure that it is clean and visible. If necessary, use a soft brush or cloth to remove any debris or dust from the score line.
- Snap the glass: With the scored line facing up, carefully position your hands on both sides of the mirror. Apply equal and gentle pressure to each side of the scored line until the glass snaps along the score line. Be cautious and wear work gloves to protect your hands during this step.
- Smooth the edges: After snapping the mirror, the edges may be sharp. Use sandpaper or emery cloth to smooth out the edges, working in a gentle and controlled motion. This will help to reduce the risk of injury and create a clean finish.
It is important to note that scoring and snapping requires practice and precision. Be patient with yourself and take your time to ensure accurate scoring and controlled snapping. Remember to always prioritize your safety while handling glass and wear appropriate protective gear.
This cutting technique is suitable for straight cuts and simple shapes. If you require more complex cuts or intricate designs, other methods such as using a glass-cutting jig or seeking professional assistance may be more appropriate.
Using a Glass Cutter
A glass cutter is a specialized tool designed for scoring glass surfaces, making it an essential tool for cutting mirrors. Here is a step-by-step guide on how to use a glass cutter effectively:
- Prepare the mirror: Place the mirror on a stable surface with the marked cutting line facing up and visible.
- Hold the glass cutter correctly: Hold the glass cutter firmly but not too tightly, ensuring a comfortable grip. Position your index finger along the top of the cutter and use your thumb and middle finger for support.
- Align the glass cutter: Start at one end of the marked cutting line and position the glass cutter’s cutting wheel directly on the line. Tilt the cutter at a slight angle, typically around 45 degrees.
- Score the mirror: Apply firm and steady pressure on the glass cutter as you move it along the marked cutting line. Maintain a consistent speed, making sure to keep the cutter wheel in contact with the glass throughout the process.
- Focus on the score line: After scoring the mirror, inspect the score line carefully. It should be a clean, continuous line without interruptions or gaps. If needed, repeat the scoring process to ensure a proper score.
- Breaking the glass: To break the glass along the score line, hold the mirror firmly on both sides of the cut, with the scored line facing up. With controlled pressure, apply equal force on both sides of the score line to snap the glass.
- Smooth the edges: After the glass has been snapped, use sandpaper or emery cloth to smooth the edges of the cut. Work in a gentle and controlled motion to remove any sharp or jagged edges.
Keep in mind that practice and patience are key when using a glass cutter. It may take some time to develop the right technique and achieve clean and precise cuts. Take breaks as needed and maintain focus to ensure accurate scoring and breaking of the glass.
Remember to always prioritize safety by wearing protective gear, such as safety goggles and work gloves, when using a glass cutter. Additionally, follow the manufacturer’s instructions for the specific glass cutter you are using, as different models may have slight variations in usage.
Using a glass cutter is an excellent method for creating straight cuts and simple shapes in mirrors, providing you with the ability to customize the mirror to your desired size and dimensions. If you require more complex cuts or intricate designs, it may be beneficial to explore alternative cutting methods or seek professional assistance.
Using a Glass-Cutting Jig
A glass-cutting jig is a helpful tool that provides stability and precision when cutting mirrors. It ensures accurate and repeatable cuts, making it an excellent option for beginners or those looking for more complex cuts. Follow these steps to utilize a glass-cutting jig effectively:
- Prepare the glass-cutting jig: Set up the glass-cutting jig according to the manufacturer’s instructions. Make sure it is securely assembled and offers a stable platform for the mirror.
- Position the mirror: Place the mirror on the glass-cutting jig, aligning the marked cutting line with the guiding features on the jig. Adjust the mirror’s position until it is firmly held in place.
- Secure the mirror: Depending on the type of glass-cutting jig you are using, secure the mirror by tightening the clamps or sliding mechanisms provided. This ensures the mirror remains stable throughout the cutting process.
- Align the glass cutter: Position the glass cutter against the cutting edge of the glass-cutting jig, with the cutting wheel aligned precisely with the marked cutting line on the mirror.
- Score the mirror with the glass cutter: Apply even pressure and smoothly run the glass cutter along the guided cutting edge of the jig, following the marked cutting line. Maintain a steady hand and a constant speed to achieve a clean and accurate score.
- Break the glass: Once the mirror has been scored, release the clamps or sliding mechanisms on the glass-cutting jig. Carefully remove the mirror and place it on a soft, padded surface with the scored line facing up. Apply gentle, even pressure to both sides of the score line to snap the glass.
- Smooth the edges: After breaking the glass, use sandpaper or emery cloth to smooth the edges of the cut. Work in a controlled manner, removing any sharp or jagged edges to create a clean and polished finish.
Using a glass-cutting jig provides added stability and guidance during the cutting process, resulting in precise and professional cuts. It eliminates the need for freehand cutting, making it a preferred method for intricate designs or complex shapes.
Remember to always wear safety goggles and work gloves while using a glass-cutting jig. Follow the specific instructions provided with the jig and take the necessary precautions to ensure a safe and successful cutting experience.
Utilizing a glass-cutting jig offers a reliable and accurate way to achieve intricate and customized cuts in mirrors. It is especially beneficial for those who are new to mirror cutting or require consistent and precise results.
Alternative Cutting Methods
While the score and snap method and using a glass cutter or glass-cutting jig are commonly used for cutting mirrors, there are alternative cutting methods available. These methods may be suitable for different cutting needs or special circumstances. Here are a few alternative cutting methods to consider:
- Wet saw: A wet saw is a power tool that uses a blade with a continuous stream of water to cut through the mirror. This method is ideal for cutting thicker mirrors or making precise cuts with complex shapes. The water helps to reduce heat and minimize the risk of the mirror cracking or shattering.
- Laser cutter: Laser cutters use high-powered lasers to precisely cut through materials, including mirrors. This method is best suited for intricate designs or patterns that require a high level of precision. Laser cutters provide clean, smooth cuts without any contact, minimizing the risk of glass breakage or chipping.
- Professional services: If you need complex cuts or have specific requirements, it may be best to consult with a professional glass cutting service. These experts have the tools, expertise, and experience to handle any cutting needs efficiently and accurately.
- Electric glass cutter: Electric glass cutters are battery-powered tools that create a vibration in the glass, allowing for easier cutting and control. This method is best suited for straight cuts and simple shapes.
Before using any alternative cutting method, it is crucial to carefully read and follow the manufacturer’s instructions, take proper safety precautions, and ensure you have the necessary skills and experience for the technique. Each method has its own advantages and considerations, so it’s essential to choose the method that best suits your cutting needs and abilities.
Remember, not all alternative cutting methods are suitable for all types and thicknesses of mirrors. It is important to consider the specific characteristics of the mirror and the complexity of the desired cut before selecting an alternative cutting method. When in doubt, consulting with a professional or experienced glass cutter can provide valuable guidance and ensure successful results.
How to Smooth the Edges
After cutting a mirror, the edges may be sharp and require smoothing to ensure a safe and polished finish. Here are some steps you can take to smooth the edges of a cut mirror:
- Inspect the edges: Carefully examine the cut edges of the mirror to identify any sharp or uneven areas that need attention.
- Gather the necessary materials: Prepare sandpaper or emery cloth with medium to fine grit. You may need multiple grit levels for optimal results.
- Hold the mirror securely: Place the mirror on a stable surface and hold it firmly with one hand. Ensure the cut area is easily accessible for the smoothing process.
- Begin with medium-grit sandpaper: Start with a medium-grit sandpaper (around 220 to 320 grit) and gently rub it along the cut edges. Use a circular or back-and-forth motion while applying light pressure. Repeat the process until the edges become smoother.
- Transition to fine-grit sandpaper: Switch to a finer-grit sandpaper (around 400 to 600 grit) to further refine the edges. Continue sanding with the same circular or back-and-forth motion, focusing on eliminating any remaining roughness.
- Monitor progress: Frequently check the edges by running your fingers along them to assess their smoothness. Be cautious not to apply excessive pressure that may lead to accidental breakage.
- Clean the edges: Once you are satisfied with the smoothness of the edges, use a soft cloth to gently wipe away any dust or debris left from the sanding process.
- Optional: Use specialized glass polish: If desired, you can use a specialized glass polish or compound to further enhance the smoothness and shine of the mirror’s edges. Follow the product instructions for proper application.
- Handle with care: After smoothing the edges, handle the mirror with caution to avoid any accidental scratches or damage.
Remember to always work slowly and carefully when smoothing the edges of a cut mirror. Take breaks as needed and avoid rushing the process to achieve the best results. If you prefer a more professional finish, you can consult with a glass cutting professional who can provide additional techniques or tools for edge smoothing.
By following these steps, you can ensure that the edges of your cut mirror are safe, smooth, and visually appealing. Properly smoothed edges not only improve the aesthetic value of the mirror but also minimize the risk of injury when handling the glass.
Finishing Touches
After cutting and smoothing the edges of a mirror, there are a few finishing touches you can apply to enhance its appearance and longevity. Consider the following steps to complete the project:
- Clean the mirror surface: Use a gentle glass cleaner or a mixture of vinegar and water to clean the mirror’s surface. Wipe away any fingerprints, smudges, or dust particles using a soft, lint-free cloth or microfiber cloth.
- Inspect for imperfections: Carefully inspect the mirror for any remaining scratches, marks, or imperfections that may have occurred during the cutting process. If necessary, use a specialized glass polish to buff out minor flaws and restore the mirror’s pristine appearance.
- Apply a protective coating: Consider applying a protective coating to the backside of the mirror to prevent tarnishing, moisture damage, and the formation of black spots. Consult with a professional or a reputable glass supplier to find a suitable protective coating that is compatible with mirrors.
- Mount or frame the mirror: Depending on your desired use and aesthetic preference, you can mount or frame the mirror. Follow the manufacturer’s instructions or seek professional assistance to ensure proper and secure installation.
- Display and enjoy your mirror: Once the finishing touches are complete, find the perfect spot to display your mirror. Whether it’s a bathroom, bedroom, or hallway, enjoy the beauty and functionality of your custom cut mirror.
Remember to handle the mirror with care during the finishing touches to avoid any accidental damage or smudging. If you are uncertain about any step or lack the necessary tools or skills, do not hesitate to seek professional assistance to ensure the best results.
By paying attention to these finishing touches, you can enhance the overall look and longevity of your cut mirror. A clean and protected mirror adds a touch of elegance and functionality to any space, making it a worthwhile addition to your home or office.
Common Mistakes to Avoid
When cutting a mirror, certain mistakes can lead to disappointing results or even pose safety hazards. Avoiding these common mistakes can help you achieve clean and precise cuts while ensuring a safe cutting process. Here are some mistakes to watch out for:
- Insufficient preparation: Failing to prepare the cutting area properly can lead to accidents or inaccurate cuts. Clear the workspace, secure the mirror, and gather all necessary tools and materials before starting the cutting process.
- Inaccurate measurements: Taking inaccurate measurements or incorrectly marking the cutting line can result in a mirror that does not fit or cuts that are off-centered. Double-check your measurements and mark the cutting line accurately before scoring the mirror.
- Poor scoring technique: Applying inconsistent pressure or not maintaining a steady hand while scoring the mirror can yield uneven or incomplete scores. Be sure to score the mirror with firm and consistent pressure, moving in one continuous motion along the marked cutting line.
- Improper breaking technique: Failing to apply gentle and equal pressure to both sides of the scored line when breaking the mirror can result in an uneven or jagged break. Take care to snap the mirror evenly and smoothly along the scored line.
- Neglecting safety precautions: Disregarding safety measures, such as not wearing safety goggles or work gloves, can lead to eye injuries or cuts. Always prioritize safety and wear the appropriate protective gear throughout the cutting process.
- Rushing the process: Cutting a mirror requires patience and precision. Rushing the process can result in inaccurate cuts, jagged edges, or accidents. Take your time and work methodically to achieve the best results.
- Skipping edge smoothing: Neglecting to smooth the edges of the cut mirror can leave them sharp and potentially hazardous. Always properly smooth the edges to ensure a safe finish.
- Forgetting proper cleaning: Failing to clean the mirror surface after cutting and smoothing can leave behind dust, debris, or residue. Clean the mirror with a soft cloth and glass cleaner to achieve a polished and spotless finish.
By being aware of these common mistakes and taking the necessary precautions, you can avoid potential pitfalls and achieve professional-looking results when cutting a mirror. Remember that practice and attention to detail are crucial for mastering the technique and ensuring a successful mirror-cutting experience.
Frequently Asked Questions
Here are some commonly asked questions about cutting mirrors:
- Is it possible to cut a mirror without a glass cutter?
- Can I cut the mirror to any shape I want?
- Can a mirror be cut after it has been mounted or framed?
- How do I prevent the mirror from cracking or shattering while cutting?
- What should I do if I make a mistake while cutting the mirror?
- How can I ensure a clean finish when cutting a mirror?
- Are there any safety precautions I should take while cutting a mirror?
While a glass cutter is the most common tool for cutting mirrors, alternative methods like using a wet saw or laser cutter can also be used in certain situations.
In most cases, straight cuts and simple shapes are more achievable when cutting mirrors. Intricate designs may require specialized tools or professional assistance.
It is difficult to cut a mirror after it has been mounted or framed. It is recommended to cut the mirror to the desired size before any mounting or framing process.
Proper technique, steady pressure, and using the correct tools, such as a glass cutter or wet saw, can help minimize the risk of the mirror cracking or shattering during the cutting process.
If you make a mistake or the cut is not as desired, it is best to consult a professional glass cutter who can provide guidance or fix the issue. It’s important not to force or further damage the mirror.
Scoring the mirror with even pressure, snapping it gently along the scored line, and smoothing the edges with sandpaper or emery cloth can help achieve a clean and polished finish.
Absolutely! Always wear safety goggles and work gloves to protect your eyes and hands. Ensure a well-ventilated workspace, secure the mirror properly, and properly dispose of any glass shards or debris.
These FAQs address some of the most common concerns when cutting mirrors. If you have additional questions or more specific inquiries, it’s recommended to consult with a professional glass cutter or seek further guidance from reliable sources.