
Why do you need to cut a mirror?
There are several reasons why you might need to cut a mirror. Whether you’re embarking on a DIY home improvement project or creating a unique piece of art, cutting a mirror can be a useful skill to have. Here are a few common reasons why you might want to cut a mirror:
- Customizing mirror size: Mirrors often come in standard sizes, but sometimes you may need a mirror that fits a specific space or frame. Cutting a mirror allows you to tailor it to your exact dimensions, ensuring a perfect fit.
- Repairing a broken mirror: Accidents happen, and if you have a cracked or broken mirror, cutting it can help salvage the usable parts. By removing the damaged section and cutting a new piece to replace it, you can restore the mirror’s functionality and aesthetics.
- Creating unique mirror shapes: Straight-edged mirrors are elegant, but sometimes you crave a more unconventional shape. Cutting a mirror enables you to unleash your creativity by crafting curved, circular, or even asymmetrical designs that stand out.
- Designing decorative mirrors: Cutting a mirror allows you to transform it into a decorative piece. By cutting intricate patterns or adding beveled edges, you can create a stunning focal point that reflects your personal style.
No matter your reason for cutting a mirror, mastering this skill opens up countless possibilities for customization and creativity. However, it’s important to approach mirror cutting with caution, as it requires specific tools, techniques, and safety measures. In the following sections, we will explore the necessary tools, step-by-step instructions, and practical tips to help you cut a mirror successfully.
What tools do you need to cut a mirror?
To cut a mirror effectively, you will need the following tools:
- Glass cutter: The glass cutter is the most essential tool for cutting a mirror. It typically has a diamond or tungsten carbide wheel that scores the surface of the mirror, creating a cut line.
- Straight edge: A straight edge, such as a ruler or a T-square, is necessary for creating straight cuts in the mirror. It acts as a guide for the glass cutter, ensuring a precise and straight score line.
- Masking tape: Masking tape is used to prevent the mirror from chipping or cracking during the cutting process. It creates a protective barrier along the intended cut line and helps to stabilize the mirror while cutting.
- Clamps: Clamps are useful for securing the mirror in place while cutting. They provide stability and prevent any unnecessary movements that could lead to uneven cuts or accidents.
- Safety equipment: Safety should always be a priority when working with glass. Wear safety goggles to protect your eyes from any potential shards or glass fragments. Additionally, gloves can provide an extra layer of protection for your hands.
- Workbench: A sturdy workbench or table with a smooth, flat surface is ideal for cutting a mirror. It provides a stable workspace and helps to ensure accuracy during the cutting process.
- Optional tools: Depending on your specific project, you may require additional tools such as a jigsaw, glass grinder, or sandpaper for shaping and smoothing the cut edges of the mirror.
Before starting the cutting process, make sure you have all the necessary tools and equipment readily available. This will help ensure a smooth and efficient cutting experience and increase the chances of achieving precise and clean cuts in your mirror.
Step-by-step guide to cutting a mirror
Cutting a mirror may seem like a daunting task, but with the right tools and technique, it can be accomplished successfully. Follow these step-by-step instructions for cutting a mirror:
- Prepare the workspace: Choose a well-lit area with ample space to work. Clear the area of any clutter and ensure you have a stable workbench or table to support the mirror during the cutting process.
- Measure and mark the mirror: Use a measuring tape to determine the desired dimensions for the mirror. Mark the cut line on the backside of the mirror using a permanent marker or wax pencil. Double-check your measurements to ensure accuracy.
- Apply masking tape: Place masking tape along the marked cut line on both sides of the mirror. This will help to prevent chipping and stabilize the glass during cutting.
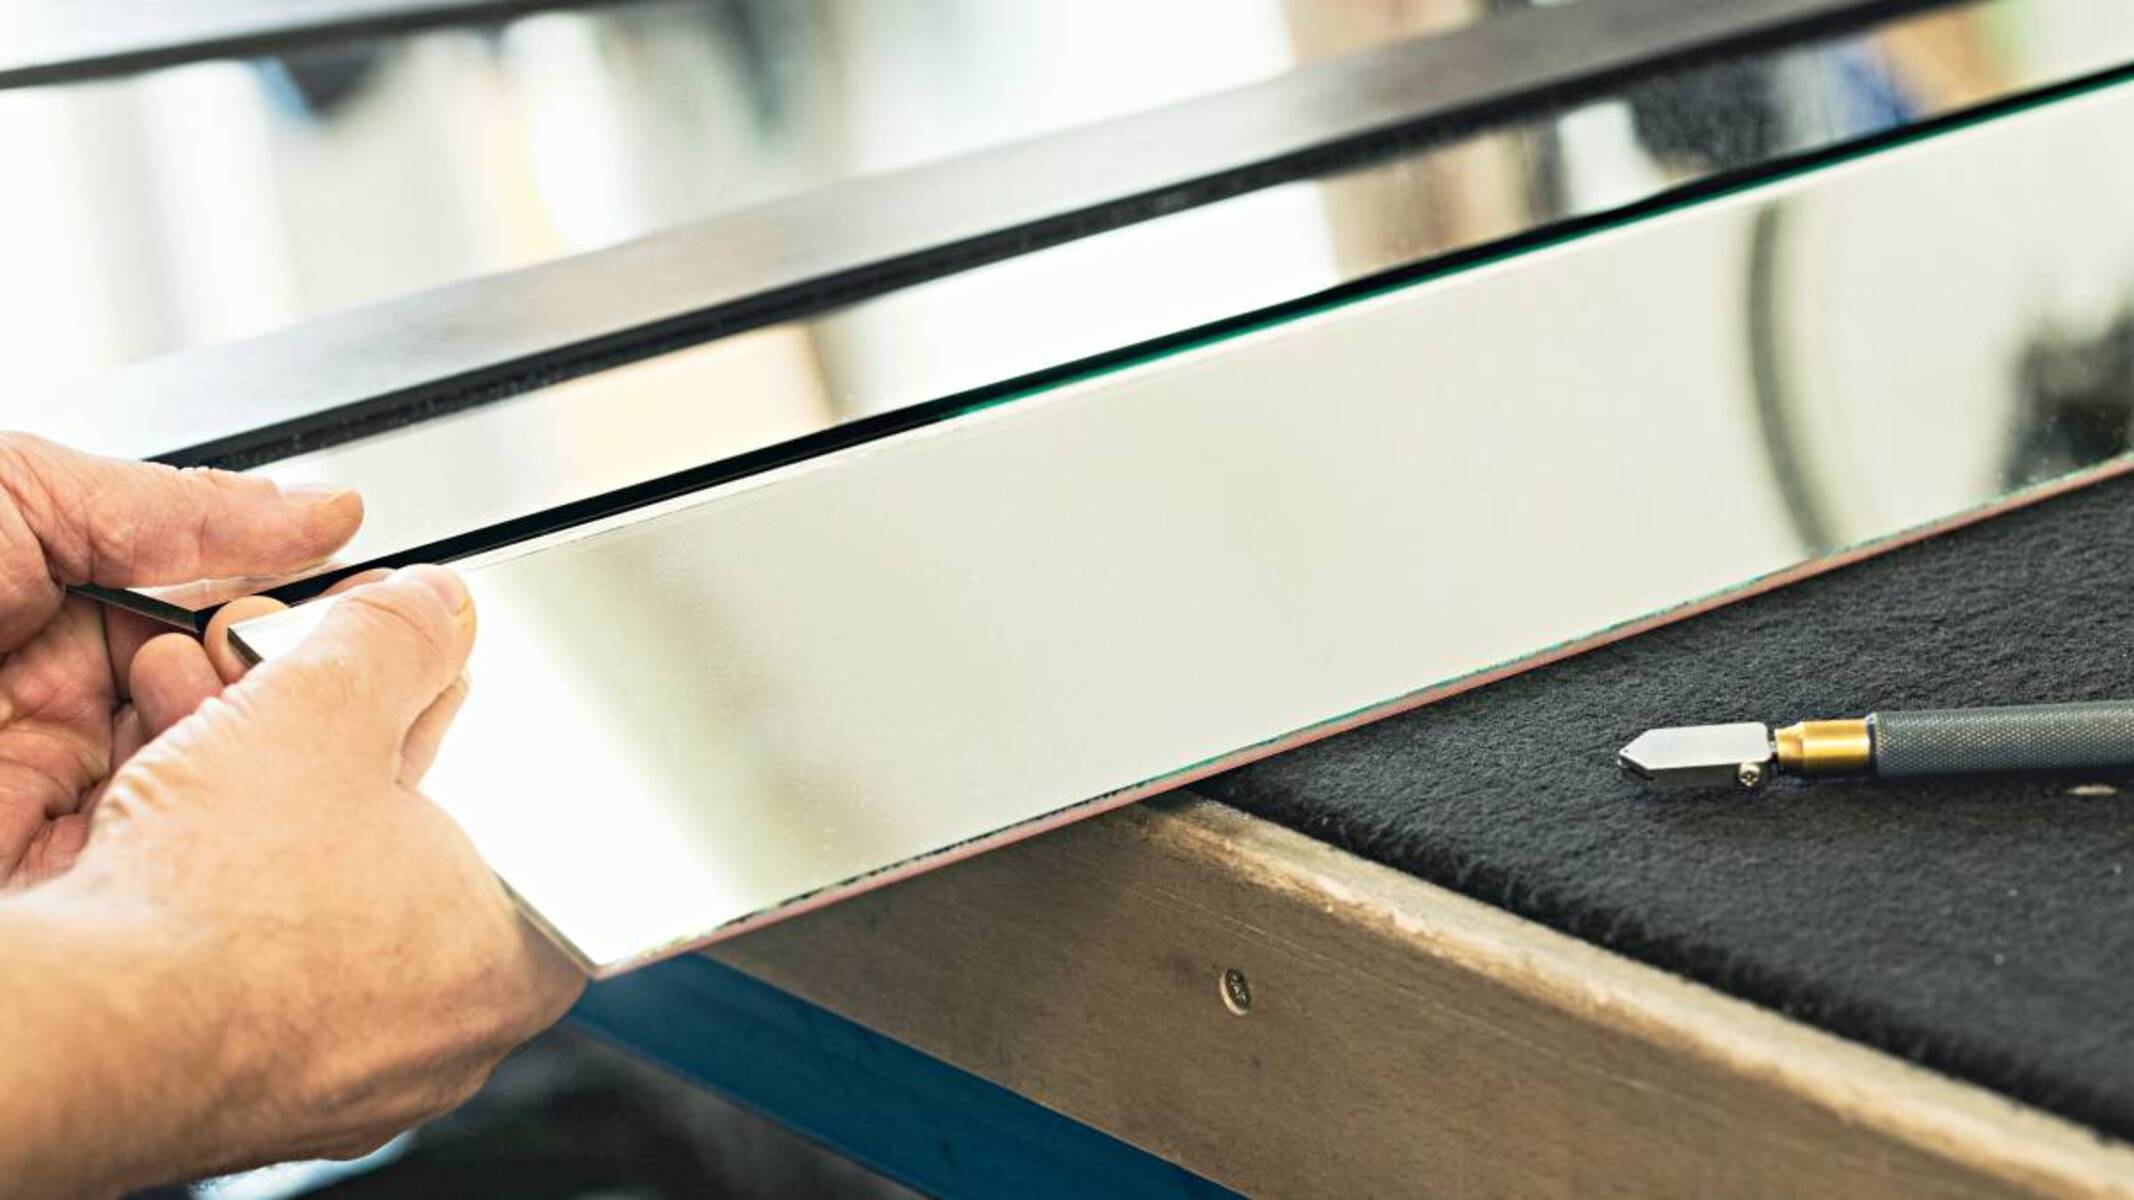
- Score the mirror: Position a straight edge along the marked cut line and hold it firmly in place. With the glass cutter, apply gentle but firm pressure as you roll it along the straight edge, scoring the surface of the mirror. Ensure that the score line spans the entire width of the mirror.
- Break the mirror: Once the scoring is complete, carefully lift the mirror and position it with the scored line facing upwards. Apply gentle pressure on both sides of the score line using your thumbs or the edge of a table to create a controlled break. The mirror should snap along the scored line.
- Smooth the edges: After the mirror is cut, the edges may be sharp. Use a glass grinder, sandpaper, or emery cloth to smooth and round the edges. Be cautious and wear protective gloves during this step to avoid injury.
- Clean the mirror: Wipe down the mirror with a clean cloth or a glass cleaner to remove any debris or fingerprints. Properly dispose of any broken glass and clean up your workspace.
Remember to always prioritize safety when cutting a mirror. Wear safety goggles, work in a controlled manner, and take breaks as needed. With practice and patience, you can achieve clean and accurate cuts in mirrors for your various projects.
Preparing the mirror for cutting
Before you start cutting a mirror, it is important to properly prepare the mirror to ensure a smooth and successful cutting process. Here are some steps to follow when preparing the mirror:
- Clean the mirror: Begin by cleaning the surface of the mirror. Use a glass cleaner or a mixture of vinegar and water to remove any dirt, dust, or smudges. This will ensure that you have a clear and debris-free surface to work on.
- Choose a suitable workspace: Select a well-lit area with ample space to work. Make sure you have a sturdy workbench or table with a flat surface to support the mirror during the cutting process.
- Clear the work area: Remove any objects or clutter from your workspace to minimize the risk of accidents or damage to the mirror. Having a clear and organized work area will help you focus and work more efficiently.
- Mirror support: Using clamps or non-slip mats, secure the mirror to the workbench or table. This will prevent the mirror from moving or sliding while you are cutting it, ensuring precision and safety.
- Protective measures: To prevent the mirror from chipping or cracking during cutting, apply masking tape along the cut line on both sides of the mirror. This will create a protective barrier and help stabilize the glass as you work.
- Wear safety gear: It is essential to prioritize safety when cutting a mirror. Wear safety goggles to protect your eyes from any flying debris or glass fragments. Additionally, consider wearing gloves to protect your hands from cuts or injuries.
By taking the time to properly prepare the mirror and your workspace, you can minimize the risk of mishaps and ensure a smoother cutting process. Remember that patience and precision are key when working with glass, so take your time and proceed with caution to achieve the best results.
Measuring and marking the mirror
Accurate measurements and precise markings are crucial when cutting a mirror. Follow these steps to ensure you measure and mark the mirror correctly:
- Determine the desired dimensions: Measure the area where you want to install the mirror. Take into account any allowances for frames or borders if applicable. Note down the measurements to guide you during the cutting process.
- Clean the mirror: Wipe down the mirror with a clean cloth or glass cleaner to ensure the surface is free from dirt, dust, or smudges. A clean mirror will allow for accurate measurements and markings.
- Mark the cutting line: Flip the mirror over so that the backside is facing up. Use a permanent marker or a wax pencil to mark the cutting line. Measure and mark the exact dimensions you noted earlier, ensuring that the line is straight and aligned with your desired specifications.
- Double-check the measurements: Before proceeding, double-check your measurements to ensure accuracy. Measure the marked cutting line once again to verify that it matches your intended dimensions.
- Apply masking tape: To protect the mirror and stabilize it during cutting, apply masking tape on both sides of the marked cutting line. The tape will act as a buffer, reducing the risk of chipping or cracking while providing support as you score the mirror.
Remember to take your time while measuring and marking the mirror. Accuracy is key to achieving the desired dimensions and ensuring a successful cutting process. By following these steps, you will be well-prepared to move on to the actual cutting stage of the mirror.
How to make a straight cut in a mirror
Making a straight cut in a mirror requires precision and the right technique. Follow these steps to ensure a clean and accurate straight cut:
- Prepare the mirror: Clean the mirror surface and apply masking tape along the marked cutting line on both sides of the mirror. This will protect the mirror from chipping and provide stability during cutting.
- Secure the straight edge: Position a straight edge, such as a ruler or a T-square, along the marked cutting line. Ensure that it is firmly held in place to act as a guide for the glass cutter.
- Hold the glass cutter correctly: Grasp the glass cutter in your dominant hand, applying light but firm pressure. Hold it at a slight angle, typically between 30 and 45 degrees, ensuring that the cutting wheel is in contact with the mirror surface.
- Score the mirror: Starting from one end of the straight edge, run the glass cutter along the marked cutting line in one continuous motion. Apply consistent pressure as you move, allowing the cutting wheel to create a shallow groove or score on the mirror surface.
- Avoid going over the same line: It is crucial not to go over the scored line multiple times, as this can cause the mirror to chip or crack. A single, well-executed score is sufficient for a clean break.
- Remove the masking tape: Once the scoring is complete, carefully remove the masking tape along the cut line. Be gentle to avoid damaging the scored area.
- Break the mirror: Hold the mirror with both hands on either side of the scored line. Apply controlled pressure to snap the mirror along the scored line. You can use the edge of a table as support or gently tap the back of the mirror to encourage the break.
Remember to take your time and maintain a steady hand while scoring the mirror. Practice proper technique and be cautious to avoid any accidents. With practice, you will be able to make smooth and precise straight cuts in mirrors for your various projects.
How to make curved cuts in a mirror
Making curved cuts in a mirror adds a unique touch to your projects and requires careful execution. Follow these steps to successfully make curved cuts:
- Prepare the mirror: Clean the mirror surface and apply masking tape along the marked cutting line on both sides of the mirror. This will protect the mirror from chipping and provide stability during cutting.
- Create a template: If you have a specific curved shape in mind, create a template out of a sturdy material such as cardboard or acrylic. Trace the desired shape onto the template and cut it out using a utility knife or scissors.
- Position the template: Place the template on the mirror, aligning it with the desired curve. Secure the template in place using masking tape or small weights to prevent it from shifting during cutting.
- Trace the template: Using a marker or a wax pencil, carefully trace the curve of the template onto the mirror. Ensure that your lines are smooth and accurately follow the shape of the template.
- Score the mirror: Just like making straight cuts, use a glass cutter to score along the traced curved lines on the mirror. Apply gentle, but consistent pressure as you guide the cutter along the curve. Take your time, as curved cuts require more precision than straight cuts.
- Remove the masking tape: Once the scoring is complete, remove the masking tape along the curved cutting line. Be cautious to avoid disturbing the scored area or damaging the mirror.
- Break the mirror: Hold the mirror with both hands on either side of the scored curved line. Apply pressure in a controlled and even manner to snap the mirror along the curved score line. You can use the edge of a table for support or gently tap the back of the mirror to facilitate the break.
It’s important to note that making curved cuts in a mirror requires practice and patience. Take your time to ensure accuracy and always prioritize your safety by wearing appropriate protective gear. With practice, you can achieve beautiful and precise curved cuts in mirrors for your decorative and artistic projects.
Safety precautions when cutting a mirror
Working with glass can be hazardous, so it’s crucial to prioritize your safety when cutting a mirror. Follow these essential safety precautions:
- Wear safety goggles: Protect your eyes from potential shards or glass fragments by wearing safety goggles throughout the cutting process. This will help prevent any eye injuries.
- Use gloves: Wear gloves, such as cut-resistant or protective gloves, to shield your hands from cuts or injuries while handling the mirror and during the cutting process.
- Secure the mirror: Use clamps or non-slip mats to secure the mirror firmly in place during cutting. This will prevent it from sliding or shifting, ensuring stability and reducing the risk of accidents.
- Work in a well-ventilated area: Cutting a mirror can produce dust and debris, so it’s important to work in a well-ventilated area to minimize inhalation of glass particles. Open windows or use fans to improve air circulation.
- Handle the glass cutter with care: The glass cutter has a sharp wheel, so handle it with caution. Always keep your fingers away from the cutting edge and ensure that the blade is secure and properly aligned.
- Avoid rushing: Take your time when cutting a mirror to maintain accuracy and reduce the risk of making mistakes or causing accidents. Rushing can lead to uneven cuts or loss of control.
- Properly dispose of broken glass: Safely dispose of any broken glass or mirror shards. Use a dustpan and broom or tongs to gather the debris and place it in a sturdy container or wrap it in thick layers of newspaper before discarding.
- Clean up your workspace: After the cutting is complete, clean up your workspace to remove glass shards or other debris. Dispose of any waste materials in a responsible manner.
- Keep children and pets away: Ensure that children and pets are kept at a safe distance from the cutting area to prevent accidents or injuries.
- Seek professional assistance if needed: If you are unsure or uncomfortable with cutting a mirror, it is best to seek professional assistance to avoid potential accidents or damage.
By following these safety precautions, you can minimize the risk of accidents and injuries while cutting a mirror. Remember, safety should always be a top priority when working with glass or any sharp tools.
Troubleshooting common issues when cutting a mirror
While cutting a mirror, you may encounter some common issues. Here are a few troubleshooting tips to help you overcome them:
- Chipping along the cut line: If you notice chipping along the cut line, it may be due to excessive pressure or a dull glass cutter. Try using less pressure and ensuring that the cutting wheel is sharp. Consider investing in a high-quality glass cutter for cleaner cuts.
- Uneven breaks: Sometimes, the mirror may not break cleanly along the scored line, resulting in uneven breaks. This can happen if the pressure is not applied evenly or the score line is not deep enough. Take care to apply uniform pressure along the scored line and ensure a deep score for a clean break.
- Cracking beyond the cut line: If the mirror cracks or extends beyond the cut line, it may be due to exerting too much pressure or cutting too quickly. Slow down and apply even pressure to prevent the mirror from cracking beyond the desired line.
- Inaccurate measurements: If the final cut does not match your intended measurements, it may be due to incorrect measuring or marking. Double-check your measurements and markings before cutting to ensure accuracy. Consider using a straight edge or template to guide your cuts.
- Difficulty snapping the mirror: If you’re having difficulty breaking the mirror along the scored line, you can use a rubber mallet or gently tap the backside of the mirror to encourage the break. Take care to apply controlled pressure to avoid shattering the mirror.
- Shards or glass fragments: While cutting or breaking the mirror, it is possible for shards or glass fragments to be present. Take caution to avoid injury by wearing safety goggles and gloves. Immediately clean up any broken glass and dispose of it properly.
- Ragged or sharp edges: After cutting the mirror, you may notice ragged or sharp edges. Use a glass grinder, sandpaper, or emery cloth to carefully smooth and round the edges. Be sure to wear protective gloves during this process to avoid cuts or injuries.
Remember, practice makes perfect when it comes to cutting mirrors. If you encounter any issues, don’t get discouraged. Learn from the experience and adjust your technique accordingly. With time and patience, you’ll gain the confidence and skill needed to overcome any challenges while cutting mirrors.
How to smooth the edges of a cut mirror
After cutting a mirror, the edges may be rough or sharp. Smoothing the edges not only enhances the appearance of the cut but also ensures safety. Follow these steps to effectively smooth the edges of a cut mirror:
- Inspect the edges: Carefully examine the cut edges of the mirror to identify any sharp or jagged areas that require smoothing. Take note of any larger chips or imperfections that may need additional attention.
- Use a glass grinder: A glass grinder is an effective tool for smoothing and shaping glass edges. Gently guide the edge of the cut mirror along the grinding wheel of the glass grinder, applying light pressure. Move the mirror in a smooth and consistent motion to avoid creating any dips or uneven surfaces.
- Use sandpaper or emery cloth: If you don’t have access to a glass grinder, sandpaper or emery cloth can be used to smoothen the edges. Start with a coarse-grit sandpaper and gradually work towards finer grits. Hold the sandpaper or emery cloth firmly and rub it along the cut edge in a back-and-forth motion. Continue until the edges become smooth to the touch.
- Apply water for lubrication: To prevent heat buildup and keep the glass cool while using a glass grinder or sandpaper, apply water as a lubricant. This not only helps to cool the glass but also aids in achieving a smoother finish.
- Check for rough spots: After smoothing the edges, run your fingers along the cut edge to check for any remaining rough spots. If you encounter any, continue with the grinding or sanding process until a consistent smoothness is achieved.
- Clean the mirror: Once you are satisfied with the smoothness of the edges, clean the mirror with a glass cleaner or a mixture of vinegar and water. This will remove any debris or residue left over from the grinding or sanding process, leaving the mirror in a pristine condition.
It’s important to wear protective gloves while smoothing the edges of a cut mirror to avoid cuts or injuries. Additionally, take breaks as needed to prevent overheating the glass or straining yourself during the process. With patience and care, you can achieve smooth and safe edges on your cut mirror.
Creative ideas for using cut mirrors
Cut mirrors offer endless possibilities for creative and unique projects. Here are some inspiring ideas to make the most of your cut mirror:
- Decorative wall art: Arrange cut mirrors of various sizes and shapes on a wall to create a stunning and reflective focal point. Experiment with different arrangements and patterns to add visual interest to any room.
- DIY mirror frames: Use cut mirrors to create custom frames for artwork, photographs, or even bathroom mirrors. The versatility of cut mirrors allows you to design frames in unique shapes and sizes.
- Accent for furniture: Apply cut mirrors to the surfaces of furniture pieces, such as tables or cabinets, to add a touch of elegance and reflectivity. Mirrored accents can instantly elevate the aesthetic of any furniture.
- Mirror mosaic: Break the cut mirrors into smaller pieces and create a mosaic design on surfaces like walls, tabletops, or even outdoor stepping stones. The reflective properties of the mirror fragments add a sparkling element to the mosaic.
- Backsplash for kitchen or bathroom: Install cut mirror pieces as a backsplash for your kitchen or bathroom. Not only will it create a modern and glamorous look, but it will also reflect light and make the space appear larger.
- Mirrored shelving or display: Attach cut mirrors to the back or sides of shelves or display cases to showcase your collectibles or decorative items. The mirrors will create a beautiful reflection and enhance the visibility of your displayed pieces.
- Creative mirror shapes: Explore unconventional mirror shapes, such as circles, triangles, or polygonal designs, by cutting the mirrors accordingly. These unique shapes add a touch of artistry and intrigue to any space.
- Accent for vases or candle holders: Adhere cut mirror pieces to the exterior of vases or candle holders for a glamorous and reflective touch. When candles are lit, the mirror will enhance the glow and create a magical ambiance.
- Mirror art installations: Create captivating art installations using cut mirrors. Combine mirrors with other materials, such as wood or metal, to produce eye-catching and multidimensional pieces of art.
- Mirrored furniture panels: Incorporate cut mirrors into the design of furniture, such as doors or panels for cabinets or wardrobe doors. The mirrors will add a touch of sophistication and style, perfect for modern or contemporary interiors.
These creative ideas for using cut mirrors are just a starting point. Feel free to let your imagination run wild and explore new ways to incorporate cut mirrors into your projects. Whether it’s for functional purposes or artistic expression, cut mirrors can transform any space into a visually captivating and reflective environment.