
Choosing the Right Wood for Your Tray
When it comes to making a tray, selecting the right type of wood is crucial to ensure its durability, functionality, and aesthetic appeal. The type of wood you choose will depend on your personal preferences, the intended use of the tray, and the overall style you want to achieve. Here are some factors to consider when choosing the wood for your tray:
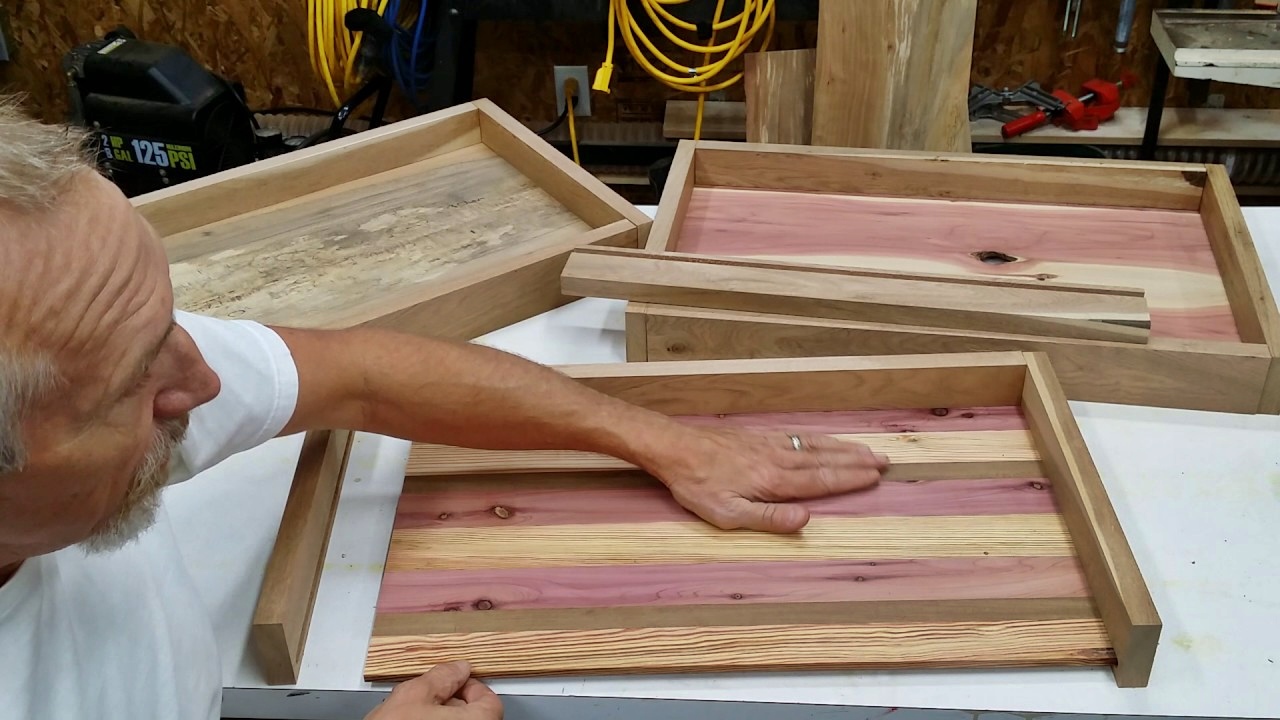
1. Hardwood vs. Softwood: Hardwoods, such as oak, maple, and walnut, are known for their strength and durability, making them ideal for heavy-duty trays. Softwoods, like pine and cedar, are lighter and easier to work with, but they may not withstand heavy loads as well. Consider the purpose of your tray and choose the appropriate wood accordingly.
2. Grain Pattern: The grain pattern of the wood can greatly impact the appearance of your tray. If you prefer a more rustic or natural look, opt for a wood with a pronounced grain, like oak. If you’re going for a sleek and modern design, a wood with a smoother and more consistent grain, such as maple, might be a better choice.
3. Color and Finish: Different woods come in a variety of colors, from light beech to dark mahogany. Consider the existing color scheme of your space and choose a wood that complements it. Additionally, think about the type of finish you want for your tray – whether you prefer a natural, matte, or glossy look – as this will affect the type of wood you select.
4. Availability and Cost: Availability and cost can also play a role in your wood selection. Some types of wood may be more readily available in your area, while others might need to be sourced online or through specialty lumberyards. Additionally, certain woods may be more expensive than others, so consider your budget when making your decision.
By considering these factors and doing some research, you’ll be able to choose the perfect wood for your tray. Remember, the type of wood you select will not only affect the appearance of the finished product but also its durability and functionality. So take your time, explore your options, and choose a wood that fits your needs and preferences.
Measuring and Cutting Your Wood
Before you start cutting your wood for the tray, it’s essential to have accurate measurements to ensure a precise fit and a professional-looking end result. Here are the steps to follow:
1. Determine the Size: Decide on the dimensions of your tray based on its intended use and the available space. Measure the length, width, and height you want for your tray, and mark those measurements down on your wood.
2. Use the Right Tools: To achieve clean and accurate cuts, it’s crucial to use the appropriate tools. A good quality tape measure, a square, and a reliable saw, such as a circular saw or a miter saw, can help you achieve precise measurements and cuts.
3. Measure Twice, Cut Once: This old carpenter’s adage holds true when it comes to cutting wood for your tray. Double-check your measurements before making any cuts to avoid any costly mistakes.
4. Safety First: Always prioritize safety when working with power tools. Wear protective goggles, gloves, and ear protection, and ensure your work area is well-lit and free from distractions. Take your time and exercise caution while using saws or other cutting tools.
5. Cut Carefully: Once you’re ready to cut, use your marks as a guide and carefully follow the measured lines. Take your time to ensure steady and controlled cuts. If using a circular saw, support the wood with a stable work surface or clamps to prevent it from moving during the cutting process.
6. Check the Fit: After cutting, test the pieces together to ensure they fit properly and align correctly. Make any necessary adjustments if needed.
7. Label the Pieces: To avoid confusion during assembly, consider labeling the pieces of wood according to their positions in the tray. This will make it easier to identify which piece goes where.
8. Keep Spare Pieces: It’s always a good idea to keep spare pieces of wood in case of any errors or future repairs. Label and store them in a safe place until your tray is complete.
By following these steps, you’ll be able to measure and cut your wood accurately, ensuring a perfect fit for your tray. Remember to take your time, be precise, and prioritize safety throughout the process.
Sanding and Smoothing the Edges
Once you have cut the wood for your tray, the next step is to sand and smooth the edges to create a polished and professional finish. Sanding not only smooths out rough surfaces but also helps to remove any sharp edges or splinters. Here’s how you can achieve perfectly smooth edges for your tray:
1. Gather the Necessary Supplies: You will need sandpaper in various grits (such as coarse, medium, and fine), a sanding block or sanding tool, and a dust mask to protect yourself from the dust particles.
2. Start with Coarse Grit Sandpaper: Begin the sanding process by using a coarse grit sandpaper to remove any rough surfaces or prominent imperfections. Hold the sandpaper firmly and sand the edges using smooth and even strokes, going in the same direction as the wood grain.
3. Transition to Medium Grit Sandpaper: After you have smoothed out the edges with the coarse grit sandpaper, transition to a medium grit sandpaper. This will help to further refine the surface and remove any remaining roughness from the wood.
4. Finish with Fine Grit Sandpaper: To achieve a silky-smooth finish, finish the sanding process with fine grit sandpaper. This will help to eliminate any visible scratches or marks, leaving the edges of your tray beautifully smooth to the touch.
5. Use a Sanding Block or Sanding Tool: To ensure even sanding and consistent pressure, consider using a sanding block or a sanding tool. This will help to prevent uneven surfaces or flat spots on the edges of your tray.
6. Check for Sharp Edges: Run your fingers along the sanded edges to check for any remaining sharp or splintered areas. If you find any, carefully sand them down until they are smooth and safe to touch.
7. Remove Dust: After sanding, use a clean cloth or a brush to remove any dust or debris from the wood. This will prepare the surface for the next steps in the tray-making process.
8. Optional: Use Wood Conditioner: If you plan to apply a finish or stain to your tray, consider using a wood conditioner after sanding. This will help to ensure an even and smooth absorption of the finish, enhancing the appearance and longevity of your tray.
By following these steps and taking the time to properly sand and smooth the edges of your tray, you’ll achieve a professional and refined look that enhances the overall quality of your finished piece.
Attaching the Sides and Bottom of the Tray
Once you have sanded and smoothed the edges of your tray, it’s time to assemble the sides and bottom to create the structure of your tray. This step requires precision and attention to detail to ensure a sturdy and secure construction. Here’s a step-by-step guide on how to attach the sides and bottom of your tray:
1. Gather the Necessary Tools and Materials: You will need wood glue, clamps, a brad nailer or screws, a drill (if using screws), and the pre-cut pieces for the sides and bottom of your tray.
2. Apply Wood Glue: Apply a thin layer of wood glue to the edges of the bottom piece. This will help to create a strong bond when attaching the sides of the tray.
3. Position and Align the Sides: Carefully position the sides onto the glued edges of the bottom piece. Make sure they are aligned properly and flush with the edges. Use a square or a measuring tool to ensure the corners are at a perfect 90-degree angle.
4. Secure with Clamps: Once the sides are properly aligned, use clamps to hold them in place. Apply enough pressure to ensure a tight bond between the pieces and wipe off any excess glue that may squeeze out.
5. Nail or Screw the Sides into Place: If you are using a brad nailer, carefully drive nails through the sides into the bottom piece to secure them. Make sure to space the nails evenly along the length of each side. If using screws, drill pilot holes and screw them in with a screwdriver or drill.
6. Repeat the Process for the Remaining Sides: Follow the same process to attach the remaining sides of the tray. Apply wood glue to the edges, position and align the sides, secure with clamps, and then nail or screw them into place.
7. Check for Stability: Once all the sides are attached, check the stability of the tray by gently shaking it. Ensure that it feels sturdy and the corners are tightly joined. If any movement or gaps are detected, apply additional glue or reinforcement nails/screws as needed.
8. Allow Sufficient Drying Time: Follow the drying time recommended by the wood glue manufacturer. This will ensure that the bond between the pieces is strong and secure before moving on to the next steps in the tray-making process.
By carefully attaching the sides and bottom of your tray, you will create a solid and reliable structure that sets the foundation for the rest of the tray’s construction. Take your time, double-check the alignment, and ensure a proper and secure attachment to achieve a high-quality finished tray.
Adding Handles or Decorative Accents
Adding handles or decorative accents to your tray can elevate its functionality and enhance its overall appearance. Whether you want to add handles for easy carrying or decorative elements for a personalized touch, this step allows you to put your own creative spin on the design. Here are some options to consider:
1. Handles: If you want to make your tray easy to carry, consider adding handles. You can use pre-made handles purchased from a hardware store or create your own by cutting and shaping wood or metal. Position them symmetrically on the sides of the tray and secure them with screws or dowels.
2. Rope Handles: For a rustic or nautical look, you can use thick ropes as handles. Drill holes on the sides of the tray and loop the ropes through, securing them with knots on the inside of the tray. This adds a unique and charming touch to your tray.
3. Decorative Hardware: Another way to enhance the visual appeal of your tray is by adding decorative hardware. This can include ornamental corner brackets, decorative nails, or drawer pulls. Choose hardware that matches the style and theme of your tray to create a cohesive and eye-catching design.
4. Wood Carvings or Engravings: If you have woodworking skills or access to a wood carving tool, you can add intricate designs or patterns directly to the tray. This allows you to personalize the tray and make it truly one-of-a-kind.
5. Paint or Stain: Applying paint or stain to your tray can also add a decorative touch. Choose a color or finish that complements your space or matches your desired style. Use a brush or sponge to apply the paint or stain evenly, following the manufacturer’s instructions.
6. Personalized Details: Consider adding personal touches to your tray, such as monograms, hand-painted designs, or decoupage. This allows you to showcase your creativity and make the tray uniquely yours.
7. Keep Functionality in Mind: While adding handles or decorative accents, be mindful of the tray’s functionality. Ensure that the handles are sturdy and comfortable to hold, and that the added elements do not interfere with the tray’s practical use.
By adding handles or decorative accents, you can customize your tray to fit your style and preferences. These added embellishments not only enhance the tray’s appearance but also make it more functional and enjoyable to use. Get creative and have fun with this step to truly make your tray stand out.
Applying Finishes or Stains to Your Tray
Applying finishes or stains to your tray is an essential step that can greatly enhance its appearance, protect the wood from moisture and wear, and add a touch of personal style. Choosing the right finish or stain depends on the desired look you want to achieve and the level of protection you need. Here are some things to consider when applying finishes or stains to your tray:
1. Sanding: Before applying any finish or stain, make sure the surface of your tray is smooth and free from imperfections. Sand the wood gently with fine-grit sandpaper to ensure an even application and promote better absorption of the finish or stain.
2. Test Samples: It’s always a good idea to test different finishes or stains on a small, inconspicuous area of your tray or on a scrap piece of wood. This will allow you to see how the color and finish will look on the actual wood before committing to the entire tray.
3. Choose the Right Finish: There are various types of finishes available, such as varnish, polyurethane, lacquer, or shellac, each offering different levels of protection and sheen. Consider the intended use of your tray and the desired level of durability and shine when selecting the finish.
4. Apply the Finish: Follow the manufacturer’s instructions for applying the chosen finish. Typically, this involves using a brush, a clean cloth, or a foam applicator and applying thin, even coats. Allow each coat to dry fully before applying additional coats for a smooth and uniform finish.
5. Staining Options: If you prefer the natural look of wood but want to enhance its color or add richness, consider using a wood stain. Choose a stain that complements the type of wood and brings out its natural beauty. Apply the stain with a brush, sponge, or cloth, and wipe off any excess after a few minutes to achieve the desired shade.
6. Protective Topcoat: After applying the stain or finish, consider adding a protective topcoat for added durability. This can be a clear varnish or polyurethane that creates a protective layer over the wood, guarding it against moisture, spills, and scratches.
7. Follow Proper Drying Time: Allow the finish or stain to dry completely according to the manufacturer’s instructions. This will ensure that the tray is fully cured and ready for use.
8. Maintain and Reapply: Over time, the finish or stain may wear off or become damaged. Regularly clean and maintain your tray, and if needed, reapply a fresh coat of finish or stain to keep it looking its best.
By choosing the right finish or stain and applying it carefully and evenly, you can enhance the beauty of your tray and protect it for years to come. Take your time in this step to achieve the desired look and ensure long-lasting durability.
Caring for and Maintaining Your Tray
Proper care and maintenance are essential for keeping your tray looking beautiful and preserving its functionality over time. By following a few simple guidelines, you can ensure that your tray remains in optimal condition. Here are some tips for caring for and maintaining your tray:
1. Clean Regularly: Keep your tray clean by wiping it with a soft, slightly damp cloth after each use. Avoid using harsh chemicals or abrasive cleaners that can damage the finish or stain.
2. Avoid Excessive Moisture: Limit exposure to moisture to prevent warping or other damage. Wipe up spills promptly and avoid placing wet or damp items directly on the tray’s surface.
3. Use Coasters or Trivets: When placing hot or cold objects on the tray, use coasters or trivets to protect the wood from heat or moisture damage. This helps to prevent unsightly marks or stains.
4. Avoid Direct Sunlight: Prolonged exposure to direct sunlight can cause fading or discoloration of the wood. Place your tray away from windows or use curtains or blinds to minimize exposure to harmful UV rays.
5. Reapply Finish as Needed: Over time, the finish on your tray may wear off or become dull. If needed, periodically evaluate the condition of the finish and apply a fresh coat to maintain its luster and protection.
6. Handle with Care: When carrying or moving your tray, handle it with care to avoid accidental drops or impacts that can cause damage. Use the handles, if available, for better grip and stability.
7. Store Properly: When not in use, store your tray in a cool, dry place, away from direct sunlight and extreme temperature fluctuations. This helps to prevent warping or other structural damage.
8. Repair or Restore if Needed: If your tray develops any cracks, scratches, or other damage, take the necessary steps to repair or restore it. Consult a professional or follow DIY tutorials and use appropriate wood fillers, sanding techniques, or matching finishes to restore its original beauty.
By following these simple care and maintenance tips, you can ensure that your tray remains in excellent condition and continues to be a functional and beautiful addition to your home. Regular attention and care will help to prolong the lifespan and enjoyment of your tray for years to come.