
Preparing to Remove the Vegetable Tray
Before removing the vegetable tray from your LG fridge, it is essential to take a few preparatory steps to ensure a smooth and hassle-free process. By following these guidelines, you can avoid any potential damage to the tray or the surrounding components of your refrigerator.
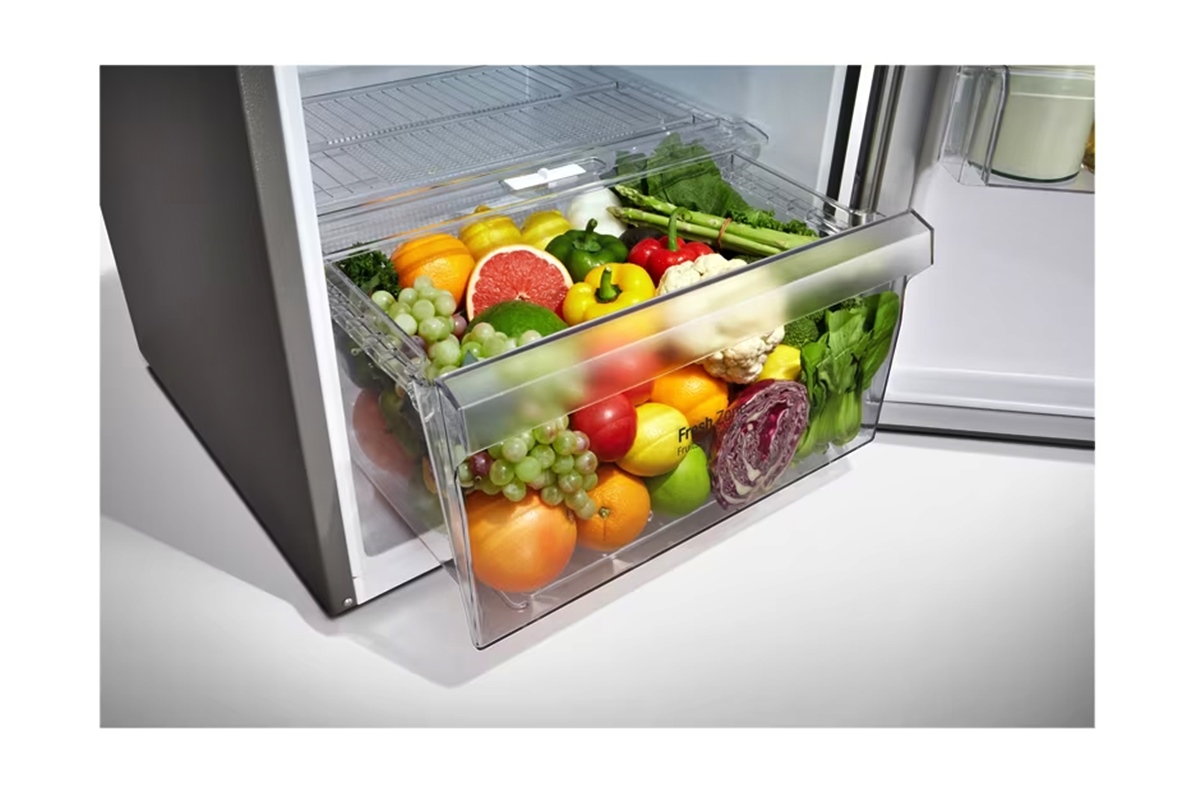
1. Empty the Tray: Begin by removing all the items stored in the vegetable tray. Take out the fruits, vegetables, and any other contents, placing them in a safe location away from the refrigerator. Ensure that there are no fragile or delicate items in the tray that may get damaged during the removal process.
2. Power Off the Fridge: To prevent any accidental activation or interference with the fridge’s cooling system, it is advisable to switch off the power supply or unplug the refrigerator from the electrical outlet. This precautionary measure will help protect you from potential electric shocks and maintain the safety of your appliance.
3. Locate the Owner’s Manual: It is always beneficial to consult the owner’s manual or user guide provided with your LG fridge. The manual usually contains specific instructions and diagrams that can guide you through the removal process. Familiarize yourself with the relevant section that addresses the removal of the vegetable tray.
4. Gather the Required Tools: To remove the vegetable tray, you may need some basic tools such as a screwdriver, pliers, or a wrench, depending on the model of your LG fridge. Check the owner’s manual or look for any specific instructions related to the tools required for removing the vegetable tray.
5. Find a Suitable Workspace: It is essential to provide yourself with enough space and a stable surface to work comfortably. Clear a countertop or table near the refrigerator where you can place the removed parts. Make sure the area is clean and free from any clutter or obstacles that might hinder your progress.
By following these preparation steps, you can ensure a smooth and effective process of removing the vegetable tray from your LG refrigerator. Once these measures are in place, you can proceed confidently with the next steps of the removal process.
Removing Items from the Vegetable Tray
Before removing the vegetable tray from your LG fridge, it is important to empty it of any items that may be stored inside. Follow these steps to ensure a smooth and safe removal process:
1. Assess the Contents: Take a moment to evaluate the items stored in the vegetable tray. Remove any fruits, vegetables, or other perishable items and set them aside. It is advisable to place these items in a separate container or on a clean surface away from the refrigerator to prevent any accidental spoilage.
2. Check for Spills or Spoiled Produce: Inspect the vegetable tray for any spills or signs of spoiled produce. If you notice any spills, use a damp cloth or sponge to clean the surface of the tray before proceeding with its removal. Discard any spoiled produce and sanitize the tray to maintain cleanliness and prevent odors from lingering.
3. Handle Delicate Items with Care: If you have any fragile or delicate items in the vegetable tray, such as herbs or soft fruits, handle them with extra care. Gently remove them and transfer them to a suitable container or plate to minimize the risk of damage during the removal process.
4. Store Items Temporarily: If you need to keep the contents of the vegetable tray chilled during the removal process, consider using a cooler or another refrigerator compartment. This will help maintain the freshness of the produce while you attend to the removal of the tray.
5. Organize and Label: To make the reinstallation process easier, take a moment to organize and label the items you have removed from the vegetable tray. This will ensure that you can easily identify and place them back into the tray in the correct order once the removal and cleaning process is complete.
By following these steps, you can safely remove the items from your LG fridge’s vegetable tray. Taking the time to assess and organize the contents will help ensure that the removal process goes smoothly, and you can resume using the tray efficiently once it is reinstalled.
Clearing Space around the Vegetable Tray
Before removing the vegetable tray from your LG fridge, it is important to create sufficient space around the tray to facilitate its removal. Follow these steps to clear the area and ensure a smooth removal process:
1. Remove Adjacent Items: Take a look at the items that are located next to the vegetable tray. If there are any jars, containers, or other objects in close proximity, remove them to create more space. This will prevent any accidental knocking or damage to these items during the removal process.
2. Adjust Shelves or Drawers: If necessary, adjust the shelves or drawers above or below the vegetable tray to provide enough clearance. Some LG fridge models have adjustable shelves or movable drawers that can be repositioned easily. Make the necessary adjustments to create sufficient space for removing the vegetable tray without any obstructions.
3. Secure Loose Items: Check for any loose items or accessories near the vegetable tray. This could include small tools, magnets, or other objects that may hinder the removal process. Secure or remove these items to ensure a clear and unobstructed path for removing the tray.
4. Clear Dust or Debris: Take a moment to clean the area around the vegetable tray to remove any dust, debris, or food particles. Use a damp cloth or a vacuum cleaner with a brush attachment to gently clean the surfaces. This will prevent any dirt or debris from falling into the tray during its removal.
5. Create a Workspace: If needed, clear a countertop or table near the refrigerator to serve as a temporary workspace for the removed components. This will provide a safe and stable surface for placing the vegetable tray during the removal process. Make sure to clean the workspace beforehand to avoid any contamination.
By following these steps to clear the space around the vegetable tray, you can ensure a smooth and hassle-free removal process. Taking the time to organize and clean the area will make it easier to access the tray and prevent any accidents or damage during its removal.
Finding the Release Mechanism
Before you can remove the vegetable tray from your LG fridge, it is important to locate the release mechanism that holds it in place. Follow these steps to find the release mechanism:
1. Consult the Owner’s Manual: The owner’s manual or user guide provided with your LG fridge is a valuable resource for finding the release mechanism. Refer to the manual and locate the section that provides instructions or diagrams specific to the vegetable tray and its removal.
2. Examine the Side Rails: In most LG fridges, the vegetable tray is typically held in place by side rails or tracks. These rails often have a release mechanism that allows you to slide the tray out. Look for any buttons, levers, or tabs located on the side rails of the vegetable tray.
3. Observe the Tray Handles: Some LG fridge models have handles attached to the vegetable tray that can act as the release mechanism. Check if there are any buttons or levers integrated into the handles. These buttons or levers may need to be pressed or pulled to release the tray from its position.
4. Look for Locking Tabs: Depending on the design of your LG fridge, there may be small plastic tabs that lock the vegetable tray in place. These tabs are generally located near the back or sides of the tray. Gently push or release these tabs to unlock the tray and prepare it for removal.
5. Check for Adjustable Guide Rails: Some LG fridges have adjustable guide rails that hold the vegetable tray securely in place. These guide rails typically have release buttons or levers that need to be pressed or pulled to release the tray. Look for these buttons or levers and follow the corresponding instructions in the owner’s manual.
By following these steps, you can easily locate the release mechanism for the vegetable tray in your LG fridge. It is important to exercise caution while handling the release mechanism to avoid any damage to the tray or surrounding components. Once you have identified the release mechanism, you are ready to proceed with removing the tray from your fridge.
Loosening the Vegetable Tray from its Slots
Once you have located the release mechanism for the vegetable tray in your LG fridge, the next step is to loosen the tray from its slots. Follow these steps to accomplish this:
1. Activate the Release Mechanism: Depending on the design of your LG fridge, you may need to press a button, pull a lever, or release a tab to activate the release mechanism. Refer to the owner’s manual or look for any labeled indicators on the release mechanism. Follow the instructions provided to activate the mechanism.
2. Apply Even Pressure: Once the release mechanism has been activated, apply even pressure to both sides of the vegetable tray. This will help loosen it from the slots and ensure that it slides out smoothly. Avoid applying excessive force or pulling on one side more than the other, as this may cause the tray to get stuck or become misaligned.
3. Wiggle the Tray: To further loosen the vegetable tray, gently wiggle it from side to side. This motion helps to release any potential friction or resistance between the tray and the slots. Move the tray back and forth while maintaining even pressure until it starts to slide out from the fridge.
4. Be Mindful of Wiring: Some LG fridges may have wiring or connectors attached to the vegetable tray or its slots. If you encounter any resistance or feel like there may be wiring in the way, stop and double-check. Take extra care to avoid damaging any wiring during the loosening process.
5. Utilize a Lubricant (if necessary): If the vegetable tray is particularly stubborn or difficult to loosen, you may consider using a food-safe lubricant. Apply a small amount of the lubricant to the slots or the sides of the tray, then proceed with gently wiggling and applying even pressure. Be sure to use a lubricant that is safe for use in food storage areas.
By following these steps and exercising patience and caution, you can successfully loosen the vegetable tray from its slots in your LG fridge. Take your time and be gentle with the removal process to avoid any damage to the tray or refrigerator. Once you have loosened the tray, the next step is to slide it out completely.
Sliding out the Vegetable Tray
After loosening the vegetable tray from its slots, the next step is to slide it out completely from your LG fridge. Follow these steps to accomplish this:
1. Maintain Even Pressure: As you slide out the vegetable tray, continue to apply even pressure to both sides. This will ensure a smooth and controlled movement, preventing the tray from getting stuck or causing any damage to the fridge or surrounding components.
2. Guide the Tray with Your Hands: Using your hands as guides, gently pull the vegetable tray towards you. Keep your fingers on the sides of the tray, avoiding any potential contact with delicate items or sharp edges. Slowly and steadily slide the tray out of the fridge, taking care not to tilt or tip it.
3. Beware of Wiring or Connections: While sliding out the vegetable tray, be mindful of any wiring or connectors that may be attached to the tray or its slots. If you encounter any resistance or feel like there may be wiring in the way, stop and double-check. Take extra care to avoid damaging any wiring during the removal process.
4. Clear the Path: Ensure that there are no obstructing items or objects in the way as you slide out the vegetable tray. Clear any nearby shelves, drawers, or other fridge components to create a clear and unobstructed path for the tray to slide out smoothly.
5. Slow and Controlled Movement: It is important to maintain a slow and controlled movement while sliding out the vegetable tray. Avoid jerky or sudden movements that may cause the tray to tip or spill its contents. Take your time and proceed with caution to ensure a successful and safe removal of the tray.
By following these steps, you can smoothly slide out the vegetable tray from your LG fridge. Remember to apply even pressure, be cautious of any wiring or connections, and maintain a slow and controlled movement. With the tray successfully removed, you can proceed to the next step of cleaning it thoroughly before reinstalling it in your fridge.
Removing the Vegetable Tray Completely
After sliding out the vegetable tray partially, the next step is to remove it completely from your LG fridge. Follow these steps to accomplish this:
1. Evaluate the Tray’s Position: Once the vegetable tray is partially slid out, assess its position to determine the best angle and approach for complete removal. Pay attention to any potential obstructions or connectors that may be attached to the tray.
2. Lift and Tilt the Tray: To remove the vegetable tray, lift it gently while tilting it slightly towards you. This will help disengage any remaining slots or connectors that are holding it in place. Be cautious of any wiring or fragile components that may be present near the tray.
3. Clear Any Resistance: If you encounter any resistance or the tray seems to be sticking, double-check for any remaining connectors or locking mechanisms. Release or disengage them carefully to ensure the smooth and complete removal of the vegetable tray.
4. Support the Tray’s Weight: As you lift and remove the vegetable tray, be mindful of its weight, especially if it is filled with items. Use both hands to provide adequate support to prevent dropping or spilling the contents, which could cause damage or create a mess.
5. Set Aside the Tray: Once the vegetable tray is completely removed from the fridge, place it on a stable and secure surface. Ensure that the tray is placed in a safe location, away from any potential hazards or accidents. Take note of its position to ensure an easy reinstallation later.
By following these steps, you can successfully remove the vegetable tray completely from your LG fridge. Lift and tilt the tray, clear any remaining connectors or locking mechanisms, and provide support to prevent any accidents or damage. With the tray now removed, you can proceed with cleaning it thoroughly before reinstalling it in your fridge.
Cleaning the Vegetable Tray
Once the vegetable tray is removed from your LG fridge, it is important to clean it thoroughly to maintain hygiene and prevent any potential odors or contamination. Follow these steps to clean the vegetable tray effectively:
1. Empty and Discard Any Debris: Begin by emptying any leftover contents or debris from the vegetable tray. Dispose of any spoiled or expired items properly. Use a damp cloth or paper towel to wipe away any loose dirt or crumbs.
2. Prepare a Cleaning Solution: Create a cleaning solution by mixing a mild dish soap or a gentle all-purpose cleaner with warm water in a sink, basin, or large container. Follow the instructions on the cleaning product for the appropriate dilution ratio.
3. Remove Detachable Parts: If your vegetable tray has removable parts, such as dividers or lids, separate them for individual cleaning. Refer to the owner’s manual for guidance on how to detach these parts safely.
4. Soak and Scrub: Immerse the vegetable tray, along with any detachable parts, in the cleaning solution. Allow them to soak for a few minutes to loosen any stubborn stains or residue. Use a soft sponge or brush to gently scrub the surfaces of the tray and its parts. Pay special attention to corners, crevices, and any textured areas
5. Rinse Thoroughly: After scrubbing, rinse the vegetable tray and its parts with clean water to remove any detergent residue. Ensure that all soap suds are thoroughly rinsed away to avoid imparting any unwanted flavors or odors to future stored items.
6. Dry Completely: Before reassembling or reinstalling the vegetable tray, ensure that it is completely dry. Use a clean towel or allow it to air dry in a well-ventilated area. Make sure there is no moisture left to prevent the growth of mold or bacteria.
7. Clean the Surrounding Area: While the vegetable tray is out of the fridge, take the opportunity to clean the surrounding area. Wipe down the slots, rails, or connectors that hold the tray in place. Remove any spills or residue to maintain cleanliness and prevent any sticking or difficulty during reinstallation.
By following these steps, you can effectively clean the vegetable tray of your LG fridge. Properly empty, soak, scrub, rinse, and dry the tray and its detachable parts. Cleaning the surrounding area will also ensure a thorough and hygienic experience. Once the vegetable tray is clean and dry, you can proceed to reinstall it in your fridge.
Reinstalling the Vegetable Tray
After cleaning and drying the vegetable tray of your LG fridge, the next step is to reinstall it. Follow these steps to ensure a proper and secure reinstallation:
1. Check the Tray and Surrounding Area: Before reinstallation, inspect the vegetable tray for any residual moisture or debris. Make sure the surrounding area in the fridge is clean and free from any obstacles or spills that may hinder the tray’s placement.
2. Align the Tray with the Slots: Hold the vegetable tray with both hands and align it with the slots or rails from which it was initially removed. Be mindful of any connectors or wiring that may be present.
3. Slide the Tray into Place: With the tray aligned, gently slide it back into position, ensuring that it glides smoothly along the slots or rails. Take care not to force the tray, as it should slide in effortlessly when properly aligned.
4. Engage the Locking Mechanism: Once the vegetable tray is in place, check for any locking mechanisms or tabs that need to be engaged to secure the tray. Depending on your LG fridge model, these tabs may need to be pushed or clicked into position to lock the tray in place.
5. Test the Stability: Give the vegetable tray a gentle shake to test its stability. If it feels loose or wobbly, double-check the alignment and locking mechanism. Ensure that the tray is securely in place before loading it with items.
6. Reorganize Contents: Now that the vegetable tray is reinstalled, take the items you removed earlier and arrange them back in their proper places. Organize the contents neatly, maximizing the available space within the tray.
7. Power On the Fridge: Once everything is in place, power on the fridge by plugging it back in or switching on the power supply. Allow the refrigerator to restart and resume its normal operation.
By following these steps, you can successfully reinstall the vegetable tray in your LG fridge. Ensure proper alignment, secure the tray in place using any locking mechanisms, and test its stability. Once the tray is securely installed, you can resume using it to store and organize your fruits and vegetables.
Checking the Tray’s Stability
After reinstalling the vegetable tray in your LG fridge, it is important to check its stability to ensure it is securely in place. Follow these steps to assess the stability of the tray:
1. Gently Shake the Tray: Give the vegetable tray a gentle shake from side to side to determine if it feels stable. The tray should not wobble or shift out of place easily. If the tray feels loose or unstable, it may not be properly aligned or locked into position.
2. Verify Locking Mechanisms: Double-check any locking mechanisms or tabs that secure the vegetable tray in place. Ensure that they are engaged and holding the tray firmly. If the tray has multiple locking mechanisms, make sure all of them are properly locked.
3. Test Sliding Smoothness: Slide the vegetable tray back and forth within its slots or rails to ensure it moves smoothly. The tray should not stick or encounter any resistance when sliding. If there are any issues with the sliding motion, recheck the alignment and make necessary adjustments.
4. Assess Weight Capacity: Consider the weight of the items you typically store in the vegetable tray. Ensure that the tray is capable of supporting the expected load without sagging or bending. If necessary, redistribute the items to balance the weight across the tray evenly.
5. Monitor Over Time: After checking the tray’s stability initially, periodically monitor its stability over time. Pay attention to any changes or signs of instability, such as increased wobbling or shifting. Address any stability issues promptly to prevent further problems.
6. Consult the Owner’s Manual: If you have concerns about the stability of the vegetable tray or need additional guidance, refer to the owner’s manual or user guide provided with your LG fridge. The manual may contain specific instructions or troubleshooting tips related to the stability of the tray.
By following these steps and assessing the stability of the vegetable tray, you can ensure it is securely in place in your LG fridge. A stable tray not only enhances the functionality of the fridge but also provides a safe and reliable storage space for your fruits and vegetables.