
Supplies Needed
Before you embark on creating your burlap cross picture frame, make sure you have the following supplies ready:
- A picture frame – Choose a frame that suits your style and the desired size of your project.
- Burlap fabric – Burlap adds a rustic touch to your frame. Make sure to measure the dimensions needed for your cross and frame accordingly.
- Scissors – You’ll need a good pair of scissors to cut the burlap fabric and any additional materials you may use.
- Hot glue gun and glue sticks – To securely attach the burlap and any embellishments.
- Decorative items – This is optional, but you may want to include items like ribbons, faux flowers, or charms to further personalize your frame.
- Measuring tape or ruler – To accurately measure and cut the burlap fabric.
- Marker or pen – For marking the burlap fabric and any other materials.
- Optional extras – If desired, you may also gather embellishments such as buttons, beads, or small charms to enhance the design.
Having these supplies ready will ensure that you have a smooth experience during the crafting process. Gather everything together and set up a well-organized workspace to make the construction of your burlap cross picture frame as enjoyable as possible.
Step 1: Prepare the Materials
Before starting the crafting process, it’s essential to properly prepare the materials for your burlap cross picture frame. Follow these steps to ensure a smooth and successful project:
- Choose the Picture Frame: Select a picture frame that fits the aesthetic you desire. Consider the size and style that will complement your overall design scheme.
- Cut the Burlap Fabric: Measure the dimensions needed for your cross and frame. Use a measuring tape or ruler to get accurate measurements. Carefully cut the piece of burlap fabric according to these measurements, ensuring it’s large enough to cover the frame and create the cross.
- Prepare the Glue Gun: Plug in your hot glue gun and make sure it’s heated and ready to use. Having it prepared in advance will save you time during the assembly process.
- Gather Additional Decorative Items: If you plan to embellish your burlap cross picture frame, gather the necessary decorative items such as ribbons, faux flowers, or charms. Make sure they are clean and ready to be attached.
- Set Up Your Workspace: Create a well-organized workspace with plenty of room for your materials. Lay out the picture frame, burlap fabric, glue gun, and any additional materials you’ll be using. Having everything easily accessible will make the crafting process more efficient.
By carefully preparing your materials and setting up your workspace, you’ll be ready to move on to the next steps of creating your burlap cross picture frame. Taking the time to organize and gather the necessary supplies will result in a smoother and more enjoyable crafting experience.
Step 2: Cut the Burlap
With your materials prepared, it’s time to move on to cutting the burlap fabric for your picture frame. Follow these steps to ensure clean and precise cuts:
- Position the Burlap: Lay the burlap fabric flat on a clean and level surface. Smooth out any wrinkles or creases to ensure an even cut.
- Measure and Mark: Use a measuring tape or ruler to determine the dimensions needed for your cross. Measure and mark the appropriate length and width on the burlap fabric using a marker or pen. Take your time to ensure accurate measurements.
- Cut the Burlap: Following the marked lines, carefully cut the burlap fabric using a sharp pair of scissors. Make slow, steady cuts to achieve clean edges. Take care not to cut beyond the marked lines.
- Check the Fit: Lay the cut burlap fabric over the picture frame to check the fit. Ensure it covers the frame completely and leaves enough excess to create the cross. Trim any excessive fabric if needed.
Remember to handle the scissors carefully to avoid any accidents or injuries. If you’re not confident in your cutting skills, consider using fabric shears or other specialized cutting tools to achieve precise cuts. Taking the time to cut the burlap fabric accurately will result in a clean and professional-looking finished product.
Step 3: Attach the Burlap to the Frame
Now that the burlap fabric is cut to the desired size, it’s time to attach it to the picture frame. Follow these steps to securely fasten the burlap fabric:
- Apply Glue to the Frame: Heat up your glue gun and apply a thin line of hot glue along one side of the picture frame. Start at the top or bottom corner for better control.
- Attach the Burlap Fabric: Carefully press and hold the cut piece of burlap fabric onto the glue. Make sure to align it evenly with the edges of the frame. The glue will adhere the burlap fabric to the frame securely.
- Continue Gluing: Work your way around the frame, applying small amounts of glue and pressing the burlap fabric onto it. Take your time to ensure the fabric is smooth and taut, without any wrinkles or bubbles.
- Trim Excess Fabric: Once the burlap fabric is fully attached around the frame, trim any excess fabric using sharp scissors. Cut close to the edges of the frame for a clean and neat finish.
- Secure Loose Ends: If there are any loose ends or corners of the burlap fabric, you can apply a small amount of hot glue to secure them to the back of the frame. This will ensure a tidy appearance.
Be cautious when working with the hot glue gun to prevent any burns. Take your time during this step to ensure that the burlap fabric is securely attached to the frame. This will provide a sturdy foundation for the remaining steps of creating your burlap cross picture frame.
Step 4: Create the Burlap Cross
With the burlap fabric securely attached to the picture frame, it’s time to create the burlap cross. Follow these steps to construct the cross shape:
- Measure and Mark: Determine the desired size and placement of the cross on your picture frame. Use a ruler or measuring tape to measure and mark the center of the frame horizontally and vertically.
- Cut the Burlap Strips: Measure and cut two long strips of burlap fabric. The length of each strip will depend on the dimensions of the cross you want to create. Typically, the vertical strip should be longer than the horizontal one.
- Position the Vertical Strip: Take one of the burlap strips and position it vertically over the center mark on the frame. Allow the excess length to hang both above and below the mark.
- Attach the Vertical Strip: Apply a small amount of hot glue to the back of the vertical strip and press it down onto the burlap fabric already attached to the frame. Use your fingers to hold it in place for a few seconds until the glue sets.
- Position the Horizontal Strip: Take the second burlap strip and position it horizontally over the center mark on the frame, overlapping the vertical strip. Again, allow the excess length to hang on both sides of the mark.
- Attach the Horizontal Strip: Apply hot glue to the back of the horizontal strip and press it down onto the burlap fabric, overlapping the vertical strip at the center. Hold it in place until the glue dries and the strips are securely bonded.
Adjust the position and alignment of the burlap strips as needed to create a symmetrical cross shape. Take your time during this step to ensure a neat and visually appealing cross. Once the cross is in place, it’s time to move on to the next step: decorating your burlap cross picture frame.
Step 5: Decorate the Cross (Optional)
After creating the burlap cross on your picture frame, you have the option to further enhance its aesthetic appeal by decorating it. Follow these steps to add personalized touches to your burlap cross:
- Choose Your Decorative Items: Select the embellishments you want to use to decorate the burlap cross. Options include ribbons, faux flowers, charms, beads, buttons, or any other decorative elements that suit your style and theme.
- Plan the Placement: Visualize how you want to arrange the decorations on the cross. Consider symmetry, balance, and spacing. You can place them directly on the cross or add them to specific areas, such as the intersection point or the ends of the cross arms.
- Attach the Decorations: Use hot glue or another adhesive suitable for the chosen embellishments to attach them to the burlap cross. Be careful not to use too much adhesive, as it may show through the fabric or make the decorations bulky.
- Experiment and Adjust: Play around with the placement of the decorations before attaching them permanently. This will allow you to find the most pleasing arrangement and make any necessary adjustments.
- Consider Personalization: If you’re creating the burlap cross as a gift or keepsake, consider adding personal touches. For instance, you can attach small charms or pendants with initials or important symbols.
Decorating the burlap cross is entirely optional but can add a unique and customized touch to your picture frame. Remember to keep the decorations in line with the overall style and theme you want to achieve. Take your time, enjoy the process, and let your creativity shine as you personalize your burlap cross picture frame.
Step 6: Attach the Cross to the Frame
Now that you have created and decorated the burlap cross on your picture frame, it’s time to securely attach it. Follow these steps to ensure the cross is firmly in place:
- Position the Cross: Carefully align the burlap cross on the frame, making sure it is centered and positioned to your liking. Take a step back to assess the placement before moving on.
- Apply Glue: Once you are satisfied with the positioning, apply a generous amount of hot glue to the back of the burlap cross where it touches the frame. This will provide a strong bond between the cross and the frame.
- Press Firmly: With the glue applied, press the burlap cross firmly onto the frame. Use your hands to hold it in place for a few seconds to allow the glue to set and adhere the cross securely to the frame.
- Check for Stability: After attaching the cross, gently wiggle it to ensure that it is securely fastened and does not loosen or wobble. If needed, apply additional glue to any areas that may require extra reinforcement.
It’s important to handle the glue gun with caution to avoid any burns. Take your time during this step to ensure that the burlap cross is securely attached to the frame. Once it is affixed, you can move on to adding the finishing touches to complete your burlap cross picture frame.
Step 7: Add Finishing Touches
With the burlap cross securely attached to the picture frame, it’s time to add the finishing touches that will elevate the overall look of your creation. Follow these steps to give your burlap cross picture frame its final polish:
- Clean and Neaten: Take a moment to clean any excess glue or loose threads from the frame and burlap fabric. Use a clean, damp cloth to gently wipe away any residue.
- Trim Excess Material: If there are any stray threads or burlap fabric extending beyond the frame, carefully trim them with sharp scissors for a clean and professional finish.
- Inspect and Adjust: Take a step back and carefully examine the entire frame. Make any necessary adjustments to ensure that the burlap cross is aligned, the decorations are secure, and the frame is in its desired condition.
- Consider Additional Embellishments: If desired, you can further enhance your burlap cross picture frame by adding more embellishments. This could include ribbon bows, small beads, or additional charms that complement the overall design.
- Personalize or Label: If the picture frame is a gift or has sentimental value, consider adding a personalized touch. You can attach a small engraved plaque, label the back with a special message, or include meaningful dates or names.
Remember to take your time during this step to ensure that every detail is well-executed. Adding these finishing touches will give your burlap cross picture frame a polished and professional appearance, ready to be displayed or gifted with pride.
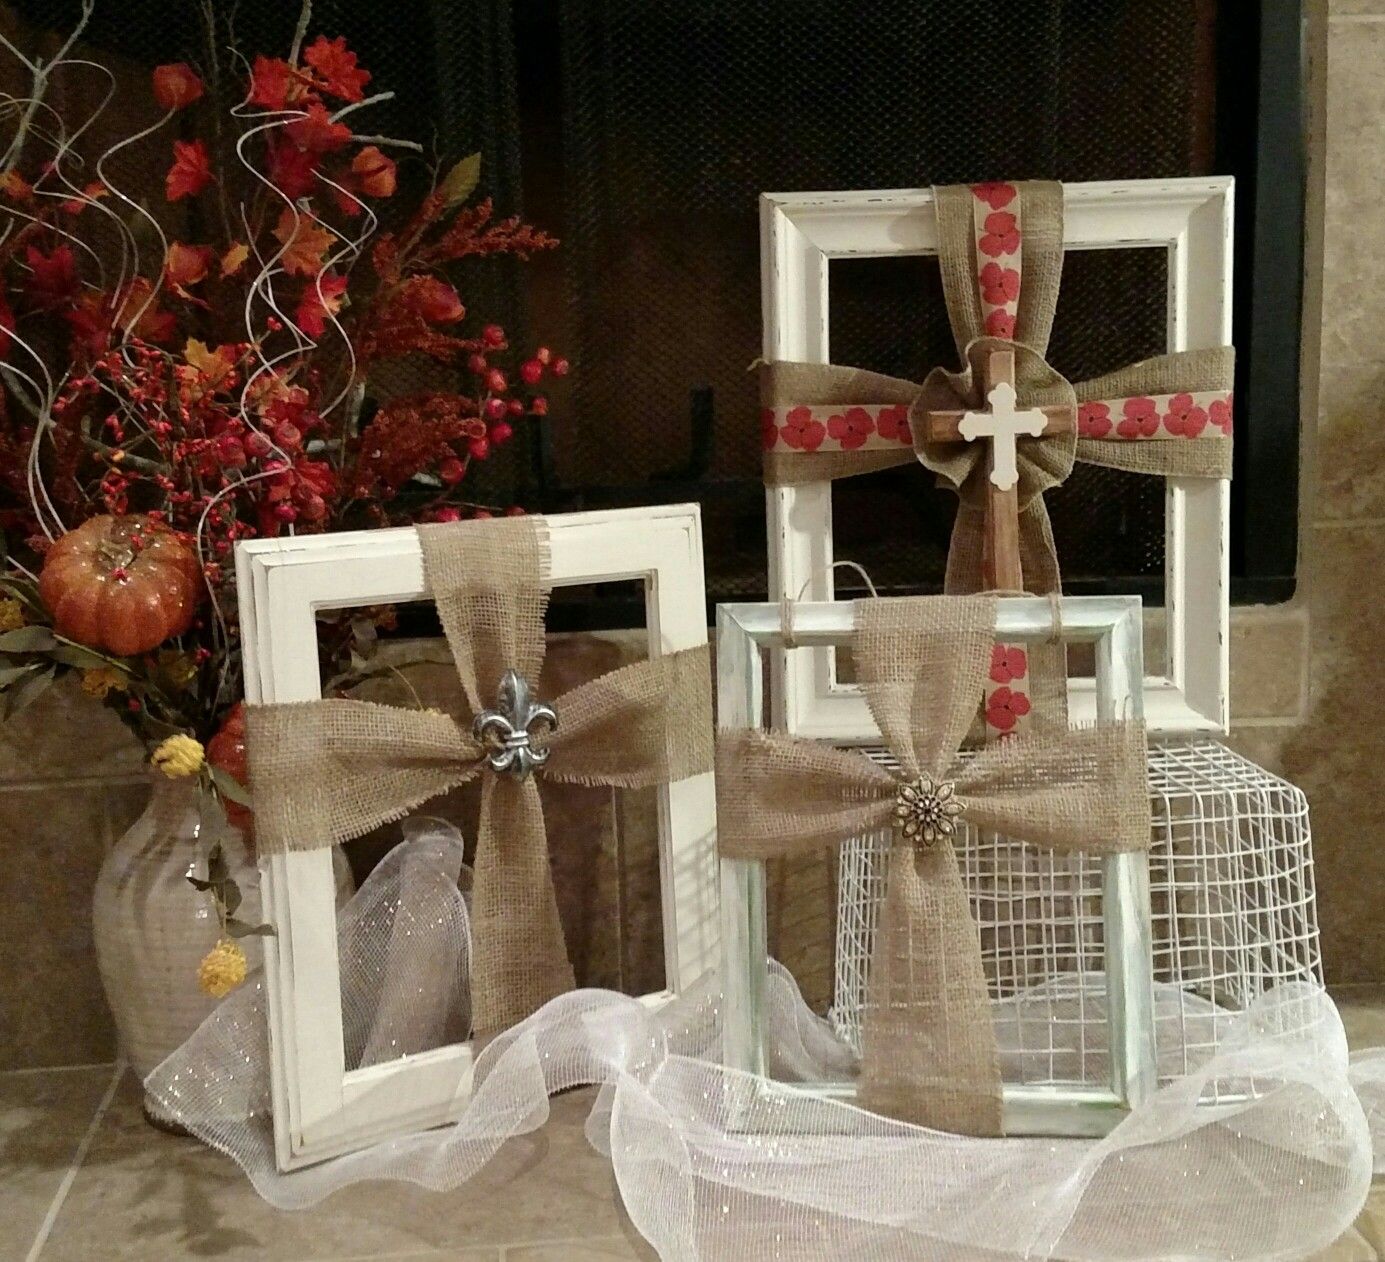
Step 8: Display Your Burlap Cross Picture Frame
Congratulations! You have successfully created your burlap cross picture frame. Now it’s time to find the perfect spot to display your beautiful creation. Follow these steps to showcase your burlap cross picture frame:
- Select a Location: Choose a suitable location in your home where your burlap cross picture frame will be prominently displayed. Consider areas such as a mantelpiece, a wall shelf, or a bedside table.
- Consider the Surroundings: Take into account the decor and style of the room where you plan to place the picture frame. Ensure that it will complement the overall ambiance and aesthetic appeal of the surroundings.
- Hanging or Standing: Determine whether you want to hang the frame on the wall or display it on a tabletop or other furniture surface. Depending on your preference, use appropriate hanging hooks or stands to securely position the frame.
- Arrange with Other Decor: If you have other decorative items or photographs, arrange them around the burlap cross picture frame to create an appealing display. Consider incorporating items that enhance the theme or convey a meaningful story.
- Lighting and Focus: Make sure the area where you display the frame has appropriate lighting to accentuate its beauty. Consider using spotlights or accent lights to draw attention to the frame and create a focal point.
- Appreciate and Enjoy: Step back and admire your burlap cross picture frame, appreciating the effort and creativity you put into making it. Share it with friends and family, and take pleasure in the joy it brings to your space.
Your burlap cross picture frame is now ready to be showcased and admired. Take pride in your craftsmanship and the unique touch it adds to your home decor. Enjoy the daily reminder of the artistry and personal connection that went into creating this heartfelt piece.