
Preparations before moving
Before you embark on the task of moving a grandfather clock, it’s essential to make some preparations to ensure a smooth and successful relocation. Taking the time to plan and gather the necessary tools and assistance will help you avoid any potential mishaps or damage to this delicate and valuable timepiece.
Firstly, it’s crucial to conduct thorough research or consult professionals to acquire a comprehensive understanding of the process involved in moving a grandfather clock. This will provide you with the necessary knowledge and confidence to handle the task effectively.
Next, gather the appropriate tools and materials needed for disassembling and packing the clock. This may include items such as screwdrivers, pliers, bubble wrap, moving blankets, and sturdy packing boxes. Having these tools readily accessible will save you time and effort during the moving process.
In addition to the tools, it’s vital to enlist the help of at least one or two strong individuals to assist you in moving the clock. Grandfather clocks are heavy and bulky, making it practically impossible for one person to handle the task alone. Enlisting the help of others will not only make the process safer but will also help distribute the weight evenly, preventing any strain or damage to the clock.
Another crucial step is to remove the clock’s weights and pendulum. These components are delicate and can be easily damaged during transportation. Carefully remove them and secure them separately to avoid any potential harm. It’s also important to take note of their positions to ensure they are correctly reinstalled once the clock is in its new location.
Prior to disassembling the clock, take some time to protect its delicate components. Wrap the pendulum and weights in bubble wrap or soft fabric to prevent any scratches or impact damage. Cover the clock’s face with a clean cloth or plastic sheet to protect it from dust or accidental scratches.
By making these preparations before moving the grandfather clock, you’ll be well-equipped to handle the task with ease and confidence. Taking the time to gather the necessary tools, enlisting the help of others, and protecting the clock’s delicate components will ensure a successful and stress-free relocation process.
Gathering the necessary tools and assistance
When it comes to moving a grandfather clock, having the right tools and assistance is crucial to ensuring a smooth and efficient process. By gathering the necessary tools and enlisting help, you’ll be well-prepared to tackle the task at hand and minimize the risk of damage to the clock.
One of the first steps is to gather the appropriate tools needed for disassembling and packing the clock. These tools may include screwdrivers, pliers, and possibly a wrench, depending on the specific design of the clock. It’s important to have these tools readily accessible and in good condition to avoid any delays or frustration during the process.
In addition to tools, it’s essential to enlist the help of at least one or two individuals to assist with moving the clock. Grandfather clocks are often heavy and cumbersome, making it nearly impossible to handle the task on your own. Having extra hands will not only make the process more manageable but also reduce the risk of injury or damage to the clock.
When selecting individuals to help, it’s important to consider their physical strength and ability to handle heavy objects. Moving a grandfather clock can require lifting and maneuvering with precision, so choosing people who are capable and experienced in this type of task is recommended.
If you don’t have friends or family available to assist, you may consider hiring professional movers who specialize in relocating fragile and valuable items. These professionals often have the necessary equipment and experience to handle the unique challenges associated with moving a grandfather clock.
Additionally, it’s a good idea to have a clear plan in place for the moving process. Discuss with your helpers the specific steps involved, including how to disassemble the clock and what precautions to take during the transportation. Having a well-organized approach will ensure that everyone is on the same page and that the clock is handled with care.
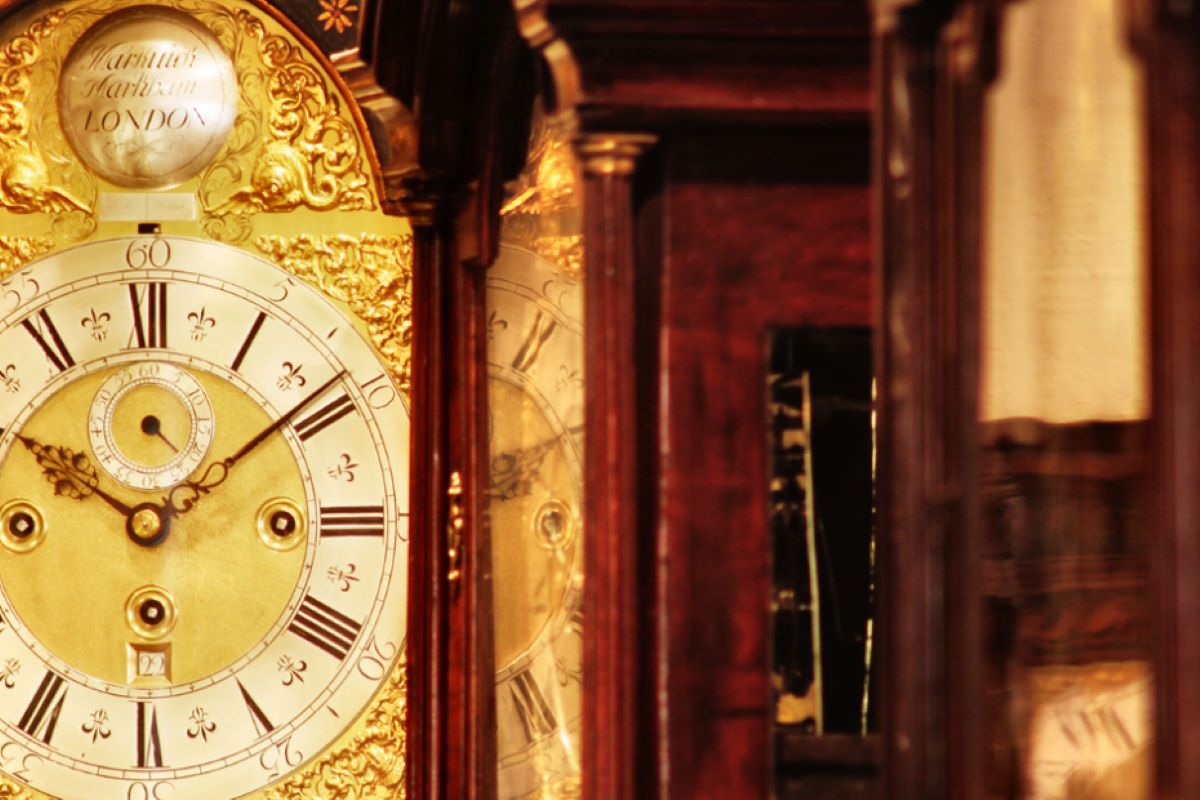
Removing the clock’s weights and pendulum
Before you can safely move a grandfather clock, it’s crucial to remove its weights and pendulum. These delicate components must be handled with care to avoid damage during transportation. Properly removing and securing them will ensure that they remain intact and functional throughout the moving process.
Begin by identifying the weights and pendulum on the clock. The weights are often located on the sides of the clock case, while the pendulum hangs below the clock face. Carefully examine the clock and take note of their positions and attachments, as this will aid in reinstallation later.
Start with the weights. Most grandfather clocks have three weights, each responsible for driving a specific function of the clock, such as the timekeeping mechanism, chimes, and pendulum. To remove the weights, locate the pulleys or chains that connect them to the clock mechanism.
Gradually lower each weight until it reaches the bottom of its travel. While doing this, be mindful of any obstacles or pinch points that may cause the weight to get stuck or swing uncontrollably. Use caution to prevent the weights from hitting against the clock case as you guide them down.
Once the weights are lowered, detach them from the pulleys or chains. This is typically done by unhooking them or releasing a small latch that holds them in place. Take care not to drop the weights or let them forcefully unwind, as this can cause damage to the clock’s inner mechanisms.
The next step is to remove the pendulum. This long, swinging component is responsible for regulating the clock’s timekeeping. To remove the pendulum, locate the suspension spring or rod that holds it in place. This is usually found at the back of the clock case, near the top.
Depending on the clock’s design, you may need to loosen a small nut or set screw to release the pendulum. Once loosened, carefully lift the pendulum off the suspension spring or rod. Take note of its position and orientation to ensure proper reinstallation later.
After removing the weights and pendulum, it’s important to store them in a protected and secure manner. Wrap them individually in bubble wrap or soft cloth to prevent scratches and damage. Keep them separate from the clock itself, labeling each item to ensure easy identification during the reassembly process.
By properly removing the weights and pendulum from the grandfather clock, you’ll be taking important steps to safeguard these delicate components during the moving process. Remember to handle them with care, document their positions, and protect them during storage to ensure a seamless transition to the clock’s new location.
Protecting the clock’s delicate components
When moving a grandfather clock, it’s essential to take special care in protecting its delicate components. The intricate inner mechanisms and fragile parts of the clock can be easily damaged during transportation if not properly secured and safeguarded. By following a few precautions, you can ensure that the clock’s delicate components remain intact and functional.
First and foremost, it’s important to wrap the pendulum and weights in protective material. This can be done by using bubble wrap or soft fabric. Gently wrap each component individually, ensuring they are well-padded and protected from any potential impact.
Once the pendulum and weights are wrapped, it’s advisable to secure them separately. Consider placing them in padded boxes or containers to provide an extra layer of protection during transportation. Label each box clearly to avoid any confusion during the reassembly process.
In addition to the pendulum and weights, it’s crucial to protect the clock’s face or dial. Dust, scratches, or accidental damage can easily occur if not properly covered. Prior to transportation, cover the clock face with a clean cloth or plastic sheet. This will help prevent any unwanted debris from settling and ensure the face remains in pristine condition.
Furthermore, it’s important to secure any movable parts or doors on the clock. Locking or securing these components will prevent them from swinging open or moving during transportation, reducing the risk of damage. Use tape or small ties to hold doors or other movable parts securely in place.
Another essential step in protecting the delicate components is to keep the clock upright and stable during the moving process. Make sure the clock is properly balanced and supported to prevent any unnecessary jostling or shifting that could lead to damage. Placing soft padding, such as moving blankets or foam, around the clock will provide an additional layer of protection.
If possible, consider disassembling the clock further to protect its delicate components. This may involve removing the clock’s face or other removable parts that may be at risk of damage during transportation. Consult the clock’s manual or seek professional advice on the disassembly process specific to your clock model.
By taking the necessary steps to protect the grandfather clock’s delicate components, you can minimize the risk of damage and preserve its functionality and beauty. Wrap the pendulum and weights, cover the clock face, secure movable parts, and ensure the clock is properly supported and stable throughout the move. With these precautions in place, you can safely transport the clock to its new location with peace of mind.
Safely disassembling the clock
Disassembling a grandfather clock is a crucial step in preparing it for safe transportation. Careful disassembly ensures that the clock’s components are protected during the move and allows for easier handling and packing. By following proper disassembly techniques, you can ensure the integrity of the clock and minimize the risk of damage.
Start by consulting the clock’s manual or seeking professional advice on the disassembly process. Each clock model may have specific instructions and considerations to take into account. Familiarize yourself with the steps involved before proceeding.
The first step in disassembling the clock is to remove any detachable components and accessories. This may include the clock’s decorative finials, glass panels, side panels, or any other removable parts. Take care when removing these components to avoid any accidental damage or breakage.
Next, carefully detach the clock’s hood from the main body. The hood is usually secured by screws or clips and may require the use of a screwdriver or other tools. Take your time to remove the hood gently, maintaining stability and preventing any unnecessary strain on the clock’s structure.
Once the hood is removed, you may need to disengage the clock’s movement or mechanism. This is typically done by disconnecting any connecting rods, levers, or cables that hold the movement in place. Again, refer to the clock’s instructions or seek professional guidance to ensure proper disconnection.
It’s important to be patient during this step and avoid rushing the disassembly process. Take note of how different parts are connected and where they should be reattached when it comes time to reassemble the clock. Labeling or marking these parts can help simplify the reassembly process.
As you disassemble the clock, be mindful of any fragile or delicate components. Take extra precautions to protect them from damage during the disassembly process. Wrapping them in soft cloth or bubble wrap, as mentioned in a previous section, can provide an added layer of protection.
Remember to always handle the clock with care, supporting it with both hands and avoiding any sudden movements or impacts. Treat each disassembled component as a valuable and fragile item that requires delicate handling.
By safely disassembling the grandfather clock, you ensure that its components are protected and prepared for transportation. Carefully remove detachable parts, detach the hood, disengage the movement, and handle each component with care. Proper disassembly sets the stage for a successful move and a seamless reassembly process at the clock’s new location.
Wrapping and packing the clock’s parts
When it comes to moving a grandfather clock, proper wrapping and packing of its individual parts is essential to prevent damage during transportation. By taking the time to securely wrap and pack each component, you can ensure that the clock arrives at its new location in pristine condition.
Start by gathering the necessary packing supplies, such as bubble wrap, packing paper, foam padding, and sturdy cardboard boxes. These materials will provide the necessary cushioning and protection for the delicate clock parts.
Begin with the clock’s face or dial. Wrap it carefully in bubble wrap or packing paper, ensuring that it is fully covered and secured. Place it in a box that is slightly larger than the face to avoid any movement during transit. Fill any empty spaces in the box with packing peanuts or crumpled paper to prevent the face from shifting.
Next, wrap each removable part of the clock individually. This includes the weights, pendulum, finials, and any other detachable components. Wrap them tightly with bubble wrap, paying attention to any delicate or protruding elements. Place each wrapped part in its own box, filling any gaps with packing material to prevent them from moving around.
For the clock’s main body, it’s essential to protect it from scratches and impacts. Wrap the entire body in moving blankets or foam padding, securing it with packing tape or straps. This added layer of protection will prevent any damage during handling and transportation.
If you have disassembled the clock further, such as removing the hood or side panels, wrap each piece individually. Use bubble wrap or packing paper to safeguard them from scratches and dents. Place them in appropriately sized and labeled boxes, filling any empty spaces with packing material to prevent shifting.
Label each box clearly with its contents and indicate its fragile nature. This will help movers or anyone handling the items to exercise caution during the transportation process. Consider using arrow labels on the boxes to indicate the correct upright position.
Remember to keep all the clock parts together in a safe and easily accessible location during the move. This will ensure that the parts don’t get misplaced or damaged during the chaos of the relocation process.
By taking the time to properly wrap and pack the grandfather clock’s parts, you are giving them the protection they need to withstand the rigors of transportation. Carefully wrapping each component, placing them in appropriately sized boxes, and labeling them properly will help ensure a seamless reassembly process and preserve the clock’s overall condition.
Choosing the right transportation method
Deciding on the appropriate transportation method is a crucial step when moving a grandfather clock. The goal is to ensure that the clock is safely and securely transported to its new location. By considering factors such as distance, logistics, and the fragility of the clock, you can make an informed decision that will protect the clock during transit.
If you’re moving the clock locally or within a short distance, you may consider transporting it yourself using a personal vehicle. This gives you more control over the transportation process and allows you to monitor the clock’s condition throughout the move. However, keep in mind that you will need to ensure the clock is properly secured and protected within the vehicle to prevent any shifting or damage.
For longer-distance moves or moves that require crossing state lines or borders, professional moving services are recommended. Look for movers who have experience handling fragile and valuable items like grandfather clocks. These movers have the knowledge and equipment to safely transport the clock. Be sure to communicate the specific requirements and fragility of the clock to the moving company for proper handling and care.
When hiring a professional moving service, consult with them to determine the most appropriate transportation method. Depending on the circumstances, the clock may be transported in a dedicated moving truck, along with other belongings if you are moving multiple items. The truck should be equipped with air-ride suspension to minimize vibrations and shocks during transit.
If the clock is of significant value or has sentimental importance, you may want to consider crating services. A custom crate can be built specifically for the clock, providing maximum protection and minimizing the risk of damage. Crating is a suitable option for long-distance moves or when the clock is particularly fragile or delicate.
Keep in mind that regardless of the transportation method chosen, it’s important to insure the clock against any potential damage or loss during transit. Consult with the moving company or your insurance provider to ensure that the clock is adequately covered and protected.
When selecting the right transportation method for your grandfather clock, carefully consider the distance, logistics, and fragility of the clock. Whether you choose to transport it personally or hire a professional moving service, the goal is to ensure that the clock arrives at its new location in excellent condition, allowing you to continue cherishing this timeless piece.
Loading the clock into the moving vehicle
When it comes time to move a grandfather clock, loading it into the moving vehicle is a critical step that requires careful planning and execution. Improper handling during this stage can lead to damage or even the complete destruction of the clock. By following proper loading techniques, you can ensure the clock’s safety and minimize the risk of any mishaps.
Prior to loading, make sure the moving vehicle is prepared and ready for the transportation of the clock. Clear out any obstructions or debris that could hinder the loading process. If using a rental truck, ensure that it is clean and has appropriate tie-down points or straps to secure the clock.
Enlist the assistance of at least two or more strong individuals to help with the loading process. Distribute the weight evenly and handle the clock with care to prevent any strain or damage. Ensure that everyone involved is aware of the fragility of the clock and the importance of cautious handling.
Begin by carefully guiding the disassembled parts of the clock into the moving vehicle. This can be done by passing each component through the doorway of the vehicle and placing them securely inside. Exercise caution to avoid any impact or collisions with the interior surfaces of the vehicle.
For the clock’s main body, use a dolly or a sturdy handcart to transport it to the vehicle. Ensure that the clock is properly balanced on the dolly and securely fastened to prevent any shifting or falling during transit. Gently guide the clock up the ramp of the truck, being mindful of the clearance and any obstacles in the way.
As you load the clock into the vehicle, take extra care with any fragile or delicate components. Use padding, such as moving blankets or foam, to create a protective layer around the clock and prevent any potential damage during loading and transportation.
To secure the clock inside the vehicle, use straps or tie-downs to keep it in place. Position the clock in an upright position whenever possible, as this is its natural orientation. Secure the clock tightly, but be careful not to over-tighten and cause any stress or damage to the components. Double-check that all straps or tie-downs are securely fastened before closing the doors of the vehicle.
Throughout the loading process, maintain open lines of communication with the individuals assisting you. This will help ensure that everyone is on the same page and that the clock is handled with care and precision.
By following proper loading techniques, you can safely load the grandfather clock into the moving vehicle, minimizing the risk of damage and ensuring a successful and stress-free transportation process. Handle each component with care, secure them properly inside the vehicle, and maintain open communication with your helpers to make loading the clock an efficient and secure task.
Securing the clock during transportation
Once the grandfather clock is loaded into the moving vehicle, it’s crucial to take the necessary steps to secure it during transportation. Properly securing the clock will help prevent any shifting, vibrations, or impacts that could result in damage to its delicate components. By following recommended techniques, you can ensure the clock remains safe and protected throughout the journey.
First and foremost, ensure that the clock is positioned securely within the vehicle. Place it in an area where it is less likely to be jostled or bumped during transportation. Avoid placing heavy items or other objects around the clock that could potentially cause damage or apply pressure on its surface.
Using straps or tie-downs, create a secure anchor system to further stabilize the clock. Attach the straps or tie-downs to sturdy parts of the vehicle, such as the walls or floor, and loop or fasten them around the clock. Be careful not to overtighten the straps, as this could put unnecessary stress on the clock’s components. The goal is to keep the clock in place without squeezing or damaging it.
If the clock has been disassembled into multiple parts, ensure that each piece is securely fastened and held in position. Use extra padding or foam to further protect the components and prevent them from shifting or colliding with one another during transit.
In addition, consider using blankets or cushioning materials to create a protective barrier around the clock. This will help absorb any vibrations or impacts that may occur during transportation. Use soft packing materials to fill any empty spaces around the clock, providing additional stability and reducing the risk of movement.
Throughout the transportation process, it’s important to handle the vehicle with care. Drive smoothly, avoiding sudden braking or sharp turns that could cause the clock to shift or tip over. Be cautious of road conditions and slow down when encountering potholes, speed bumps, or uneven surfaces.
Regularly check the clock’s security during stops or breaks along the way. Make sure the straps or tie-downs are still securely in place and that the clock has not shifted or been compromised in any way. Adjust as needed and re-secure if necessary.
Lastly, it’s important to communicate with the driver or passengers to ensure they are aware of the presence of the clock and are taking precautions to avoid any accidental impacts or damage.
By properly securing the grandfather clock during transportation, you can provide the necessary protection to safeguard its delicate components. Taking the time to anchor the clock, secure each part, pad it with cushioning materials, and drive carefully will help ensure that it arrives at its new location unharmed and ready to be reassembled and enjoyed.
Unloading the clock at the new location
After a successful transportation, unloading the grandfather clock at its new location requires careful attention to ensure that it is handled safely and brought inside without any damage. By following proper unloading techniques, you can complete the relocation process smoothly and prepare the clock for reassembly.
Begin by carefully opening the doors of the moving vehicle, allowing for easy access to the clock. If the clock is secured with straps or tie-downs, ensure that they are properly released and removed prior to attempting to move the clock.
Enlist the help of strong individuals to assist with unloading the clock. Clear a path from the vehicle to the desired location inside the new space, ensuring that it is free from obstacles or potential hazards that could cause accidents or damage to the clock.
With caution and coordination, gently guide the clock out of the vehicle, ensuring that it remains in an upright position. Avoid any sudden movements or impacts that could result in damage to the clock’s components. Place the clock on a flat and stable surface to provide temporary stability while preparing for reassembly.
Take a moment to assess the clock’s condition before proceeding to reassemble it. Check for any signs of damage or shifting during transportation. If any issues arise, document and address them accordingly.
Next, gather the clock’s disassembled components, including the weights, pendulum, and any other removable parts. Unpack them carefully, ensuring that they are protected from potential damage during this process.
If necessary, refer back to the notes or labels made during the disassembly process to ensure that each component is correctly repositioned and reattached. Follow the manufacturer’s instructions or seek professional guidance to ensure proper reassembly of the clock.
Note any adjustments that may be required, such as leveling the clock or adjusting the pendulum swing, to optimize its performance and accuracy.
Once the clock is reassembled and in working order, carefully position it in its designated location. Take into consideration factors such as stability, visibility, and room aesthetics when determining the best place to showcase the clock in its new surroundings.
Throughout the unloading process, it’s crucial to handle the clock with care and maintain open communication among the individuals involved. By doing so, you can ensure that the clock is safely brought into its new location and prepared for reassembly, allowing you to continue enjoying its timeless beauty and functionality.
Reassembling the clock
Reassembling a grandfather clock is a meticulous process that requires careful attention to detail and precision. Following the correct steps and taking your time will ensure a successful reassembly and the restoration of the clock to its functional state. By patiently reassembling the clock, you can once again admire its timeless beauty and enjoy its accurate timekeeping.
Begin by referring to any notes or labels made during the disassembly process. This will help guide you in reattaching the various components and ensuring their proper positioning. If you did not make notes, consult the manufacturer’s instructions or seek professional guidance.
First, focus on reattaching the clock’s movement or mechanism. This involves reconnecting any rods, levers, or cables that hold the movement in place. Take care to align each component correctly and secure them according to the manufacturer’s specifications.
Next, reattach the pendulum to its suspension spring or rod. Carefully position the pendulum and ensure that it is properly aligned and securely fastened. Refer to any previous markings or notes to aid in its proper placement.
After reattaching the pendulum, it’s time to reinstall the weights. Take note of their respective positions and rehang them according to their designated functions within the clock. Ensure that each weight is securely hooked or attached to its corresponding pulley or chain.
If there are any removable panels or decorative elements, reinstall them at this point. Pay attention to their alignment and make any necessary adjustments to ensure a proper fit. Check that they are securely fastened to the clock’s main body.
Once all the components are reassembled, take a moment to visually inspect the clock for any irregularities or issues. Check that everything appears aligned, secure, and in proper working order. Listen for any unusual sounds or observe any indication of malfunction.
Finally, initiate the clock’s movement by gently giving the pendulum a light swing. Listen for the steady ticking or movement of the clock’s hands. Observe that the weights are descending evenly and consistently.
If necessary, make any necessary adjustments to achieve optimal timekeeping and functionality. This may involve adjusting the position of the clock, leveling it, or fine-tuning the pendulum swing. Refer to the clock’s instructions for specific tuning and adjustment techniques or seek professional assistance if needed.
Once the clock is reassembled and properly aligned, you can take a step back and admire the beauty and craftsmanship of the grandfather clock. Take the time to wind the clock and set it to the correct time, allowing it to once again become a focal point of your space and a reliable timekeeper.
By following the proper reassembly steps and taking the necessary time to ensure each component is securely attached and aligned, you can successfully restore the grandfather clock to its functional glory. Embrace the satisfaction that comes with successfully reassembling the clock and appreciate the charm it brings to your space.
Placing the clock in its new location
After reassembling the grandfather clock, carefully selecting the ideal location to display it in your new space is crucial. Proper placement not only allows you to appreciate the aesthetic beauty of the clock but also ensures its stability and functionality. By considering factors such as room layout, visibility, and stability, you can create a captivating showcase for your beloved timepiece.
Begin by assessing the available space and determining the most suitable area to showcase the clock. Consider the room’s dimensions, lighting, and overall decor style. Choose a location where the clock will be a standout accent, commanding attention from anyone entering the room.
Ensure that the chosen location provides adequate visibility and accessibility. The clock should be easily viewed from various angles in the room, allowing everyone to appreciate its timeless elegance. Avoid placing the clock in corners or areas where it may be obstructed by furniture or other objects.
Stability is crucial when placing the clock. Look for a level surface that can support the weight of the clock without any wobbling or imbalance. Uneven surfaces can affect the clock’s performance and potentially damage its delicate internal mechanisms.
Consider the proximity to windows or areas where the clock may be exposed to direct sunlight. Harsh sunlight can fade the clock’s finish or cause thermal expansion, affecting its accuracy. Protect the clock from excessive heat and minimize exposure to direct sunlight to preserve its appearance and functionality.
During the placement process, involve a level to ensure that the clock stands upright. Adjust the clock’s position as necessary to achieve a perfectly level display. A balanced and stable clock not only contributes to its appearance but also enhances its functionality and accuracy.
Take into account the presence of other furnishings and decorations in the vicinity of the clock. Arrange complementary items around the clock to create an aesthetically pleasing arrangement. This could include decorative items, artwork, or furniture that enhances the overall appeal of the clock’s placement.
Once you have settled on a final location, take a moment to step back and admire the impact the clock brings to the room. Reflect on the atmosphere it creates and the character it adds to your living space. Embrace the timeless charm and significance that the grandfather clock represents.
Regularly inspect and maintain the clock’s location to ensure its continued stability and performance. Dust the clock regularly to keep it looking its best, and periodically check its operational aspects, such as winding, to ensure optimal timekeeping.
By thoughtfully placing the grandfather clock in its new location, you create an exquisite focal point that not only captures the attention of all who enter the room but also enriches the ambiance of your living space. Treasure the privilege of owning a piece of history and enjoy the beauty and functionality that the grandfather clock brings to your home.