
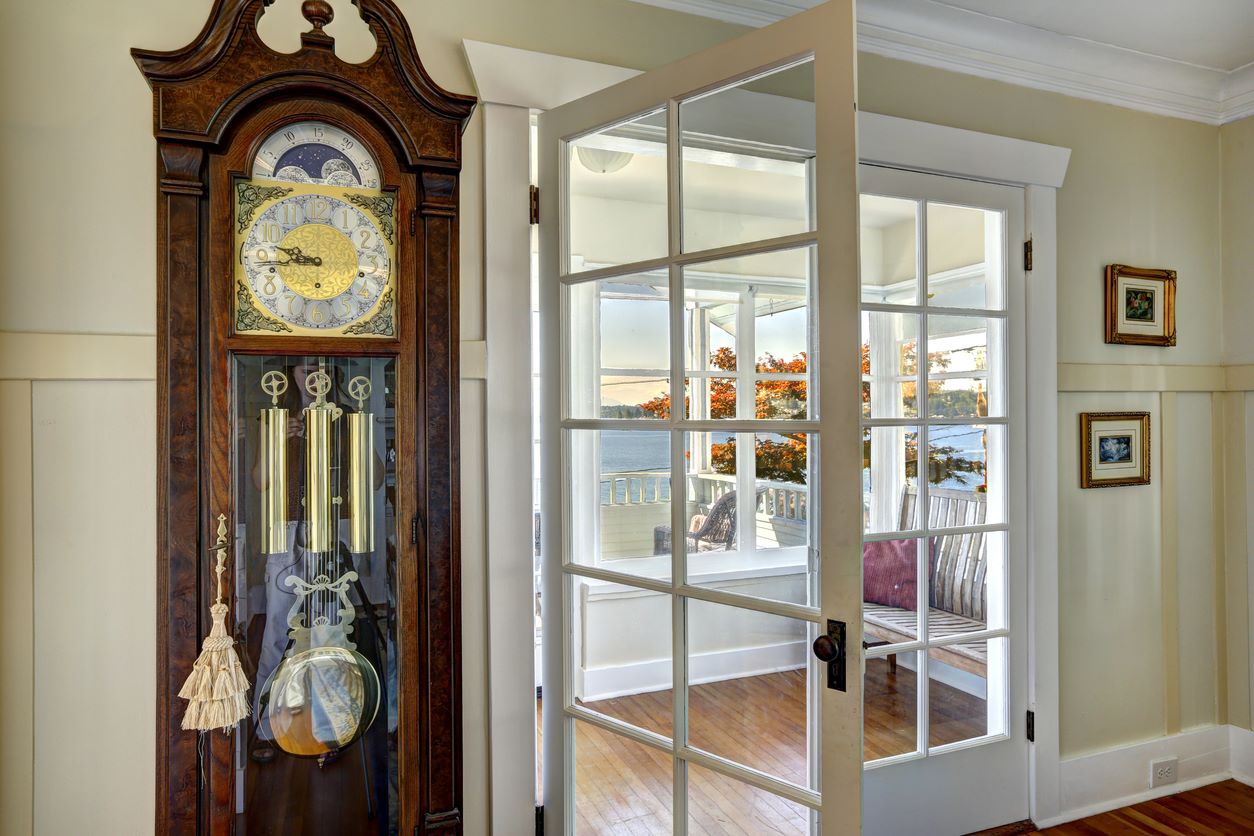
Choosing the Right Location
When it comes to setting up a grandfather clock, choosing the right location is crucial. Not only does it affect the aesthetics of your space, but it also plays a key role in the proper functioning of the clock. Here are some essential factors to consider when selecting the perfect spot for your prized timepiece.
1. Stability: Grandfather clocks are tall and heavy, which means they need a stable and solid surface to rest on. Ensure that the floor or platform where you place the clock is level and sturdy enough to support its weight. Avoid areas prone to vibrations from foot traffic or heavy machinery, as these can disrupt the delicate workings of the clock.
2. Clearance: Grandfather clocks require ample space around them for their pendulum and weights to swing freely. Make sure there is enough clearance between the clock and nearby furniture or walls. As a general rule, leave at least two feet of space on all sides to allow for unrestricted movement.
3. Temperature and Humidity: Extreme temperature changes and high humidity levels can adversely affect the accuracy and longevity of a grandfather clock. Avoid placing the clock near windows, doors, fireplaces, or air conditioning vents, as these can expose it to fluctuating temperatures. Additionally, avoid areas with excessive moisture, such as bathrooms or damp basements.
4. Lighting: Natural and artificial lighting can cause the finish and wood of the clock to fade over time. Direct sunlight can also create heat, leading to expansion and contraction of the wood, potentially affecting the clock’s performance. Find a location where there is minimal direct exposure to sunlight or use UV-filtering curtains or blinds to protect the clock.
5. Aesthetics: Lastly, consider the visual impact of the clock in its chosen location. Grandfather clocks often serve as focal points in a room, so it’s worth placing them in an area where they can be admired and appreciated. Take into account the overall décor and style of the room to ensure the clock complements the surroundings.
By carefully selecting the right location for your grandfather clock, you can ensure its stability, functionality, and longevity. Keep in mind the factors of stability, clearance, temperature, lighting, and aesthetics to find the perfect spot for your cherished timepiece.
Leveling the Clock
Once you have chosen the ideal location for your grandfather clock, the next step is to ensure that it is properly leveled. Proper leveling is essential for the clock’s smooth operation and accurate timekeeping. Here’s a step-by-step guide on how to level your clock:
1. Use a Leveling Tool: Start by placing a leveling tool, such as a spirit level, on top of the clock’s case or on the wooden platform it rests on. This tool will help you determine whether the clock is sitting level or if it needs adjustments.
2. Check for Balance: Gently rock the clock from side to side and front to back to check if it feels unbalanced or wobbly. If you notice any imbalance, it’s an indication that the clock needs to be leveled.
3. Adjust the Leveling Feet: Most grandfather clocks have leveling feet located at the base of the case. These feet can often be adjusted to achieve proper leveling. Use a wrench or a screwdriver to raise or lower the feet as needed. Make small adjustments at a time and recheck the level to ensure accuracy.
4. Test the Pendulum Swing: Once you have leveled the clock, observe the pendulum swing. It should have a consistent and even motion. If the pendulum swings to one side more than the other, it may be an indication that the clock is still not completely level. In this case, make further adjustments to the leveling feet until the pendulum swings evenly.
5. Verify Stability: After leveling the clock and adjusting the pendulum swing, ensure that the clock remains stable without any wobbling. Sit or stand near the clock and listen for any unusual sounds or vibrations that may suggest an imbalance. If everything feels stable and in place, you have successfully leveled your grandfather clock.
Leveling your grandfather clock is a crucial step to ensure its smooth operation and accuracy. By following these steps and paying attention to details, you can enjoy the beauty and precision of your timepiece for years to come.
Setting the Pendulum Length
Properly setting the pendulum length is essential for the accurate timekeeping of your grandfather clock. The pendulum controls the back and forth movement of the clock’s mechanism, and adjusting its length ensures the correct timing. Here’s a step-by-step guide on how to set the pendulum length:
1. Determine the Ideal Length: Refer to the manufacturer’s instructions or consult a professional to determine the ideal pendulum length for your specific clock model. The length is usually measured from the center of the pendulum bob to the suspension point at the top.
2. Access the Pendulum: Open the front door of the clock or access the pendulum through a designated panel on the case. Some clocks may require removing a small door at the bottom to access the pendulum.
3. Adjust the Pendulum Crutch: Locate the pendulum crutch, which is a thin metal arm that connects the pendulum rod to the clock’s escapement mechanism. Most pendulum crutches have a rating nut or adjustment screw that can be turned to lengthen or shorten the pendulum.
4. Make Small Adjustments: Start by making small adjustments to the pendulum length. Turn the rating nut or adjustment screw clockwise to lengthen the pendulum for slower timekeeping and counterclockwise to shorten it for faster timekeeping. Make gradual changes and observe the clock’s timing for a day or two to determine the accuracy.
5. Fine-tune the Length: Continue making small adjustments to the pendulum length until the clock keeps time accurately. Be patient and allow the clock to run for a period of time before making further changes. It may take several adjustments to achieve the desired accuracy.
6. Check for a Steady Beat: Once you have set the pendulum length, listen for a steady tick-tock beat of the clock. The tick should be followed by a tock, indicating a proper beat. If the beat is irregular or inconsistent, reevaluate the pendulum length and make necessary adjustments.
Setting the pendulum length may require some trial and error, but it is a crucial step in ensuring the accurate timekeeping of your grandfather clock. Take your time, make small adjustments, and listen to the steady beat of the clock to achieve optimal performance.
Winding the Clock
Winding a grandfather clock is an essential maintenance task that ensures its proper operation and longevity. While the frequency of winding may vary depending on the specific clock model, most grandfather clocks require winding every 7 to 10 days. Here’s a step-by-step guide on how to properly wind your clock:
1. Identify the Winding Points: Locate the winding points on the clock’s dial. Typically, there are two winding points – one for the timekeeping mechanism and another for the chimes. The timekeeping winding point is usually located on the right side of the dial, while the chime winding point is on the left.
2. Gather the Key: Use the appropriate winding key for your clock. The key should fit snugly into the winding points, ensuring a secure grip and preventing damage to the clock.
3. Wind the Timekeeping Mechanism: Insert the key into the timekeeping winding point and turn it clockwise. Depending on the clock’s mechanism, you may need to make several full rotations for optimal winding. Take care not to overwind, as this can damage the clock. Once you feel slight resistance, stop winding.
4. Wind the Chimes: Move to the chime winding point and insert the key. Turn it clockwise to wind the chime mechanism. As with the timekeeping mechanism, be cautious not to overwind. Once you feel resistance, stop winding.
5. Maintain a Regular Winding Schedule: To keep the clock running smoothly, adhere to a regular winding schedule. Note the number of days your clock can go before requiring winding and mark it on your calendar as a reminder.
6. Be Mindful of Weight Descending: As you wind the clock, the weights will begin to descend. Keep an eye on their movement to ensure they are lowering smoothly and evenly. If you notice any jerky or irregular descent, seek professional assistance, as it may indicate a mechanical issue.
7. Listen for Confirming Sound: After winding, listen for the confirming sound of the clock starting to tick. This indicates that the mechanism is properly engaged, and the clock is running.
Remember, winding a grandfather clock is a necessary task to maintain its functionality. By following these steps and being mindful of the winding process, you can enjoy the accurate timekeeping and enchanting chimes of your cherished timepiece.
Setting the Time
Setting the time on your grandfather clock is a straightforward process that ensures it displays the correct hour and minute. Here’s a step-by-step guide on how to set the time on your clock:
1. Determine the Correct Time: Before setting the time, ensure that you have access to an accurate time source, such as a reliable clock or a trusted timekeeping device.
2. Open the Clock Door: Gently open the front door of the clock or access the clock face through a designated panel on the case.
3. Locate the Hour and Minute Hands: Observe the clock face and identify the hour and minute hands. The hour hand is usually shorter and thicker, while the minute hand is longer and narrower.
4. Set the Hour Hand: Slowly move the hour hand in a clockwise direction to indicate the current hour. Pay attention to the correct hour markers on the clock face and align the hand accordingly. Take care not to move the minute hand accidentally.
5. Set the Minute Hand: Once the hour hand is set accurately, gently move the minute hand in a clockwise direction to indicate the current minute. Align it precisely with the minute markers on the clock face. If your clock features a second hand, it will automatically align with the correct second.
6. Account for the Correct AM/PM: If your clock displays the time in a 12-hour format, ensure that you set the correct AM or PM by referring to an accurate time source. Adjust the position of the hour hand accordingly.
7. Observe the Movement of the Clock Hands: After setting the time, observe the movement of the clock hands for a few minutes. Ensure that they progress smoothly and without any hindrance. If you notice any resistance or irregularity, double-check the setting and make necessary adjustments.
8. Close the Clock Door: Once you are satisfied with the time setting, gently close the clock door or secure the access panel on the case. This will protect the clock’s delicate mechanisms and maintain its appearance.
By following these steps, you can easily set the time on your grandfather clock, ensuring that it remains synchronized with an accurate time source. Enjoy the precise time display and the timeless beauty of your cherished timepiece.
Adjusting the Chimes
One of the delightful features of a grandfather clock is its enchanting chime melodies. Adjusting the chimes allows you to customize the sound and ensure they align with the correct time. Here are the steps to adjust the chimes on your grandfather clock:
1. Identify the Chime Selector: Locate the chime selector lever or dial on the clock’s dial or movement. This lever or dial allows you to choose from different chime options, such as Westminster, Whittington, St. Michael, or others.
2. Move the Chime Selector: Carefully move the chime selector lever or rotate the chime selector dial to the desired chime melody. Take note of the corresponding markings or instructions on the clock to ensure accurate selection.
3. Test the Chime Melody: After adjusting the chime selector, listen for the chime melody sequence by waiting for the next quarter or hour strike. Pay attention to the melody’s clarity, volume, and timing. If any adjustments are needed, proceed to the next step.
4. Adjust the Chime Speed: Some grandfather clocks offer the option to adjust the speed of the chime melody. If your clock has this feature, locate the chime speed adjustment mechanism, which is usually a lever or dial near the chime selector. Move the lever or rotate the dial to increase or decrease the speed of the chime melody.
5. Fine-tune the Chime Hammers: In certain cases, the chime hammers may need adjustment to ensure precise strikes and clear melody. Refer to the manufacturer’s instructions or consult a professional for guidance on how to adjust the chime hammers if needed.
6. Check for Consistency: After making adjustments, listen to the chime melody for consistency in volume, timing, and resonance. Ensure that the chimes strike the correct number of times for each hour or quarter-hour. If any inconsistencies persist, consider seeking professional assistance to troubleshoot and fine-tune the chimes.
Adjusting the chimes on your grandfather clock allows you to personalize the auditory experience and enjoy the harmonious melodies that fill your space. Take your time to select the desired chime melody, adjust the speed if applicable, and fine-tune the chime hammers for optimal performance. Sit back, relax, and let the enchanting chimes enhance the ambiance of your home.
Maintaining and Servicing the Clock
A well-maintained grandfather clock not only preserves its beauty and functionality but also ensures its longevity. Regular maintenance and occasional servicing are necessary to keep the clock in optimal condition. Here are some essential steps to maintain and service your grandfather clock:
1. Dusting and Cleaning: Periodically dust the clock’s exterior, including the case, dial, and pendulum, using a soft, lint-free cloth. Avoid using harsh chemicals or abrasive cleaners that can damage the clock’s finish. Additionally, gently clean the glass or acrylic panels with a non-ammonia based cleaner to maintain their clarity.
2. Lubrication: Proper lubrication is crucial for the smooth functioning of the clock’s mechanisms. Consult the manufacturer’s guidelines or enlist the help of a professional clock technician to determine the appropriate lubricants and schedule of application. Avoid over-lubricating, as it can attract dust and cause more harm than good.
3. Checking the Level: Regularly check the level of the clock to ensure its stability and accurate timekeeping. Use a spirit level and adjust the leveling feet if necessary. A properly leveled clock ensures that the pendulum swings freely and the timekeeping is precise.
4. Inspecting the Movement: Occasionally inspect the clock’s movement for any signs of wear, damage, or misalignment. Look for worn gears, loose screws, or other visible issues. If you notice any abnormalities, consider contacting a professional clock repair technician to address these concerns.
5. Professional Servicing: Periodically, it is recommended to have your grandfather clock serviced by a professional. The frequency of servicing depends on the clock model and its usage. A professional clock technician can perform a thorough inspection, clean the internal components, make any necessary adjustments, and ensure the clock is functioning optimally.
6. Handling with Care: Treat your grandfather clock with care to avoid any accidental damage. Avoid moving the clock without professional assistance, as improper handling can cause misalignment, damage to delicate components, or even complete malfunction. Take extra precautions during any household renovations or movements to safeguard the clock from potential harm.
7. Record Keeping: Keep a record of any maintenance or servicing performed on the clock, including dates, details of the work done, and the contact information of the clock technician. This information will be valuable for future reference and for maintaining the clock’s history.
By following these maintenance steps and arranging periodic professional servicing, you can ensure the longevity and smooth operation of your beloved grandfather clock. Treat it with care, appreciate its craftsmanship, and enjoy the timeless beauty it brings to your home.