
Understanding the buttons and functions of your G-Shock watch
Before you can set the time on your G-Shock watch, it’s essential to understand the various buttons and functions it offers. G-Shock watches are known for their durability and multifunctionality, so familiarizing yourself with these features will make it easier to navigate through the settings and set the time accurately.
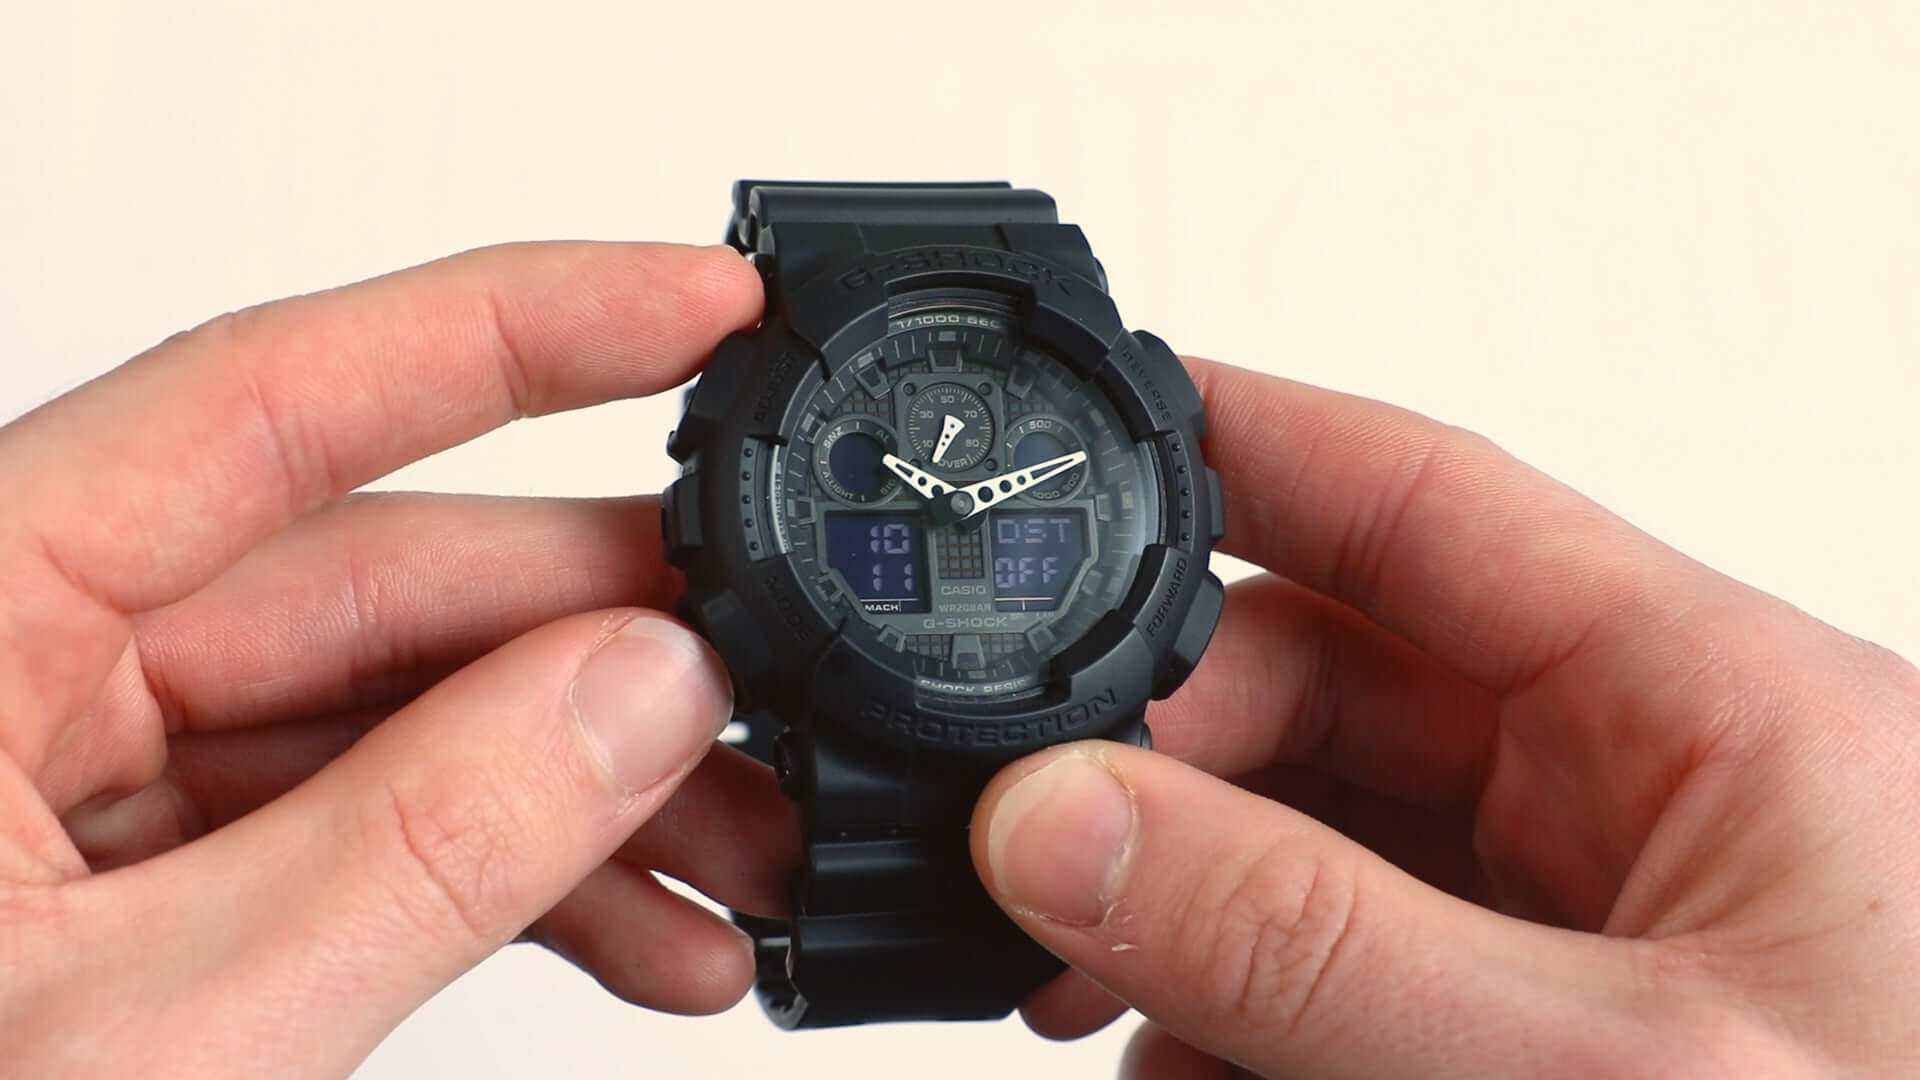
Most G-Shock watches have a combination of analog and digital displays, allowing you to choose between analog or digital timekeeping. The buttons on your G-Shock watch may vary depending on the model, but here are the common ones you’ll find:
- Mode Button: This button allows you to switch between different modes, including Timekeeping, Alarm, Timer, and more.
- Adjust Button: The adjust button is used to change the settings within a mode, such as setting the time or date.
- Light Button: Pressing the light button illuminates the watch’s display, making it easier to read the time in low-light conditions.
- Start/Stop Button: This button is commonly used to start or stop functions such as timers, chronographs, or stopwatch.
- Reset Button: The reset button is typically used to reset timers or chronographs to their default settings.
It’s also important to note any additional buttons or functions specific to your G-Shock watch model. Consult your user manual or visit the Casio official website for detailed instructions on the buttons and functions of your specific model.
Familiarizing yourself with the buttons and functions of your G-Shock watch will make it easier to navigate through the settings and set the time accurately. Now that you understand the basic buttons and functions, let’s move on to accessing the time-setting mode on your G-Shock watch.
Accessing the time-setting mode on your G-Shock watch
Setting the time on your G-Shock watch involves accessing the time-setting mode, which allows you to make adjustments to the hours, minutes, and seconds. The process may vary slightly depending on the specific model of your G-Shock watch, but the following general steps will guide you in accessing the time-setting mode:
- Identify the mode button on your G-Shock watch. This button is typically located at the lower-left or upper-left side of the watch face.
- Press and hold the mode button until the display enters the setting mode. This may take a few seconds, and some models may require you to press the mode button multiple times.
- Once in the setting mode, you can use the adjust button or the start/stop button to cycle through the available settings, such as the hour, minutes, and seconds.
- To make adjustments, press the adjust button, which will allow you to increase or decrease the value of the selected setting. The watch may advance rapidly when the button is held down, making it quicker to set the desired time.
- After making the necessary adjustments to the hours, minutes, and seconds, press the mode button again to save the changes and exit the time-setting mode.
It’s important to consult your user manual or visit the Casio official website for specific instructions related to your G-Shock watch model, as the steps to access the time-setting mode may vary.
Now that you know how to access the time-setting mode on your G-Shock watch, let’s proceed to the next section, where we will guide you through setting the time on your analog G-Shock watch.
Setting the time on your analog G-Shock watch
If you own an analog G-Shock watch, setting the time involves a slightly different process compared to digital models. Follow these steps to set the time on your analog G-Shock watch:
- Press the mode button on your G-Shock watch until you enter the time-setting mode. The hour and minute hands should start moving.
- Use the adjust button to move the hour hand forward or backward until it aligns with the correct hour of the day.
- Once the hour hand is set, press the adjust button to move the minute hand forward or backward to match the desired minute.
- If your G-Shock watch has a seconds hand, wait until the seconds hand reaches the 12 o’clock position, then press the adjust button to synchronize it with the correct time.
- After setting the hour, minute, and (if applicable) seconds hands, press the mode button to save the changes and exit the time-setting mode.
It’s important to note that some analog G-Shock watches have additional features or complications, such as a 24-hour hand, a date display, or a day of the week display. Consult your user manual or visit the Casio official website for specific instructions related to your particular model.
Setting the time on your analog G-Shock watch may take a bit of practice, but with patience and precision, you’ll be able to accurately set the time. In the next section, we will guide you through setting the time on your digital G-Shock watch.
Setting the time on your digital G-Shock watch
Setting the time on your digital G-Shock watch is a straightforward process. Follow these steps to ensure accurate timekeeping:
- Press the mode button on your G-Shock watch until you enter the time-setting mode.
- Once in the time-setting mode, locate the digits or segments on the display that represent the hour, minute, and (if applicable) seconds.
- Use the adjust button to cycle through the digits or segments and set the correct hour.
- After setting the hour, press the adjust button again to move to the minute digits or segments.
- Use the adjust button to set the correct minute.
- If your digital G-Shock watch includes a 12/24-hour format option, use the adjust button to select the desired format.
- Once you have set the hour and minute, press the mode button to save the changes and exit the time-setting mode.
Depending on the specific model of your digital G-Shock watch, there may be additional features, such as setting the date, day, or additional time zones. Refer to your user manual or visit the Casio official website for detailed instructions on the specific features and settings of your digital G-Shock watch.
With these simple steps, you can easily set the time on your digital G-Shock watch. In the next section, we will explore setting the date and day on your G-Shock watch.
Setting the date and day on your G-Shock watch
In addition to setting the time, many G-Shock watches include a date and day display. Follow these steps to set the date and day on your G-Shock watch:
- Press the mode button on your G-Shock watch until you enter the time-setting mode.
- Once in the time-setting mode, locate the digits or segments on the display that represent the date and day.
- Use the adjust button to cycle through the digits or segments and set the correct date.
- After setting the date, press the adjust button again to move to the day.
- If your G-Shock watch has a day display, use the adjust button to select the correct day of the week.
- Once you have set the date and day, press the mode button to save the changes and exit the time-setting mode.
It’s important to note that some G-Shock watch models may require you to adjust the month as well. Refer to your user manual or visit the Casio official website for specific instructions on setting the date and day for your particular G-Shock watch model.
By following these simple steps, you can accurately set the date and day display on your G-Shock watch. In the next section, we’ll explore how to use the World Time feature to set the time in different time zones.
Setting the time and date using the World Time feature on your G-Shock watch
G-Shock watches that offer the World Time feature allow you to set the time and date for different time zones around the world. This feature is particularly useful for frequent travelers or those who need to keep track of multiple time zones. Follow these steps to utilize the World Time feature on your G-Shock watch:
- Press the mode button on your G-Shock watch until you enter the time-setting mode.
- Once in the time-setting mode, locate and select the World Time option. This is usually denoted by a globe icon or by cycling through the available modes using the adjust button.
- Use the adjust button to cycle through the available time zones until you find the desired time zone.
- Once you have selected the appropriate time zone, use the adjust button to set the correct time for that zone.
- After setting the time, press the mode button to switch to the date-setting mode.
- Use the adjust button to set the date for the chosen time zone.
- Once you have set the date, press the mode button again to save the changes and exit the time-setting mode.
Using the World Time feature on your G-Shock watch allows you to easily switch between different time zones and keep track of time no matter where you are. Remember to consult your user manual or visit the Casio official website for specific instructions on how to utilize the World Time feature for your G-Shock watch model.
Now that you know how to set the time and date using the World Time feature, let’s move on to adjusting the daylight saving time (DST) setting on your G-Shock watch.
Adjusting the daylight saving time (DST) setting on your G-Shock watch
Daylight Saving Time (DST) is a practice followed in many regions where the clock is adjusted forward by one hour during the summer months to make better use of daylight. Fortunately, most G-Shock watches offer the option to adjust the DST setting automatically or manually. Follow these steps to adjust the DST setting on your G-Shock watch:
- Press the mode button on your G-Shock watch until you enter the time-setting mode.
- Once in the time-setting mode, locate and select the DST (Daylight Saving Time) option. This may be indicated by an abbreviation like “DST” or a setting related to summer time.
- If your G-Shock watch has the option for automatic DST adjustment, use the adjust button to enable or disable it according to your preference.
- If your watch does not have automatic DST adjustment, use the adjust button to manually toggle the DST setting for the appropriate time period.
- After adjusting the DST setting, press the mode button to save the changes and exit the time-setting mode.
It’s important to be aware of the DST practices in your region and adjust the DST setting on your G-Shock watch accordingly. Additionally, some G-Shock watches have the option to set the DST offset for different time zones. Refer to your user manual or visit the Casio official website for specific instructions on adjusting the DST setting for your particular G-Shock watch model.
Now that you know how to adjust the DST setting on your G-Shock watch, let’s move on to syncing it with atomic timekeeping signals for precise and accurate timekeeping.
Syncing your G-Shock watch with atomic timekeeping signals
G-Shock watches offer the convenience of atomic timekeeping, which allows you to sync your watch with atomic timekeeping signals for precise and accurate timekeeping. With atomic timekeeping, your G-Shock watch can automatically adjust itself to the correct time by receiving signals from atomic clocks. Follow these steps to sync your G-Shock watch with atomic timekeeping signals:
- Ensure that your G-Shock watch is in a location where it can receive the atomic timekeeping signals. This typically requires being outdoors with an unobstructed view of the sky.
- Press the mode button on your G-Shock watch until you enter the time-setting mode.
- Find and select the option to receive atomic timekeeping signals. This option may be labeled as “Atomic”, “Auto Receive”, or similar.
- Your G-Shock watch will attempt to receive the atomic timekeeping signals. The process may take several minutes, so be patient and keep your watch in the correct location.
- Once the signals are successfully received, your G-Shock watch will automatically adjust to the precise and accurate atomic time.
- Press the mode button to save the changes and exit the time-setting mode.
It’s important to note that not all regions have atomic timekeeping signals available, and the strength of the signals may vary depending on your location. Additionally, some G-Shock watches may have specific instructions or requirements for atomic timekeeping synchronization. Refer to your user manual or visit the Casio official website for detailed instructions on syncing your G-Shock watch with atomic timekeeping signals for your specific model.
By syncing your G-Shock watch with atomic timekeeping signals, you can ensure that your watch is consistently accurate and precise. In the next section, we will explore troubleshooting common issues that may arise when setting the time on your G-Shock watch.
Troubleshooting common issues with setting the time on your G-Shock watch
While setting the time on your G-Shock watch is usually a straightforward process, there may be certain issues that can arise. Here are some common problems you may encounter when setting the time on your G-Shock watch and how to troubleshoot them:
1. Difficulty accessing the time-setting mode: If you’re having trouble entering the time-setting mode, ensure that you’re pressing the correct button or combination of buttons. Refer to your user manual for specific instructions related to your G-Shock watch model.
2. Incorrect time synchronization: If your G-Shock watch has the option to sync with atomic timekeeping signals or if it relies on radio signals for time synchronization, make sure that your watch is in an area with good signal reception. Additionally, check the time zone settings to ensure they are correctly adjusted.
3. Incorrect time display: If the time on your G-Shock watch is consistently incorrect, double-check that you have correctly set the time, including the hours, minutes, and, if applicable, seconds. Make sure you have followed the proper procedure for setting the time on your specific watch model.
4. Inconsistent timekeeping: If your G-Shock watch is not consistently keeping time, it may be due to a low battery. Consider replacing the battery if it has been a while since your last replacement and if other troubleshooting steps do not resolve the issue.
5. Error messages or icons: If you encounter error messages or unusual icons on your G-Shock watch while setting the time, refer to your user manual or visit the Casio official website to understand what these messages or icons indicate. It may require a specific action to resolve the issue.
If you continue to experience difficulties setting the time on your G-Shock watch, it is advisable to contact customer support or seek assistance from an authorized service center to ensure a proper diagnosis and resolution of the issue.
Now that you are equipped with troubleshooting tips, let’s explore some additional features and tips to enhance your G-Shock watch experience in the next section.
Tips and additional features to enhance your G-Shock watch experience
Your G-Shock watch offers a range of additional features and functionalities that can enhance your overall experience. Here are some tips and features to take full advantage of your G-Shock watch:
1. Utilize the alarm function: Set alarms on your G-Shock watch to help you keep track of important events or reminders throughout the day. Experiment with different alarm tones or vibrations to find what suits your preferences.
2. Explore the stopwatch and timer: Take advantage of the stopwatch and timer functions on your G-Shock watch for activities such as exercise, cooking, or timing everyday tasks. Familiarize yourself with the buttons and controls to make accurate measurements.
3. Make use of the backlight: Many G-Shock watches come with a built-in backlight that illuminates the display for easy reading in low-light conditions. Get accustomed to using the backlight to check the time in dark environments.
4. Discover additional features: Depending on the model, your G-Shock watch may offer features such as world time, compass, thermometer, or moon phase display. Take the time to explore these features and understand how they can enhance your daily activities.
5. Regular maintenance: Keep your G-Shock watch in optimal condition by regularly cleaning it with a soft cloth and avoiding exposure to extreme temperatures or harsh chemicals. Consider replacing the battery when needed, and ensure that any seals or gaskets are properly maintained for water resistance.
6. Customize your watch: Some G-Shock watches allow for customization through interchangeable bands, bezels, or straps. Explore available options to personalize your watch and make it uniquely yours.
7. Explore mobile app connectivity: Certain G-Shock watch models offer connectivity with mobile apps, allowing you to access additional features and functionalities. Download the compatible app and explore the possibilities it offers.
By implementing these tips and utilizing the additional features of your G-Shock watch, you can enhance your overall experience and make the most out of this durable and versatile timepiece.
Now that you have a good understanding of various features and tips, you are well-equipped to fully enjoy your G-Shock watch. Remember to refer to your user manual or manufacturer’s website for model-specific instructions and further guidance.