
What is Wi-Fi and How Does it Work?
Wi-Fi, short for Wireless Fidelity, is a technology that allows devices to connect and communicate wirelessly over a local area network (LAN). It utilizes radio waves instead of physical cables to transmit data, providing users with the convenience of accessing the internet and network resources without being tethered to a wired connection.
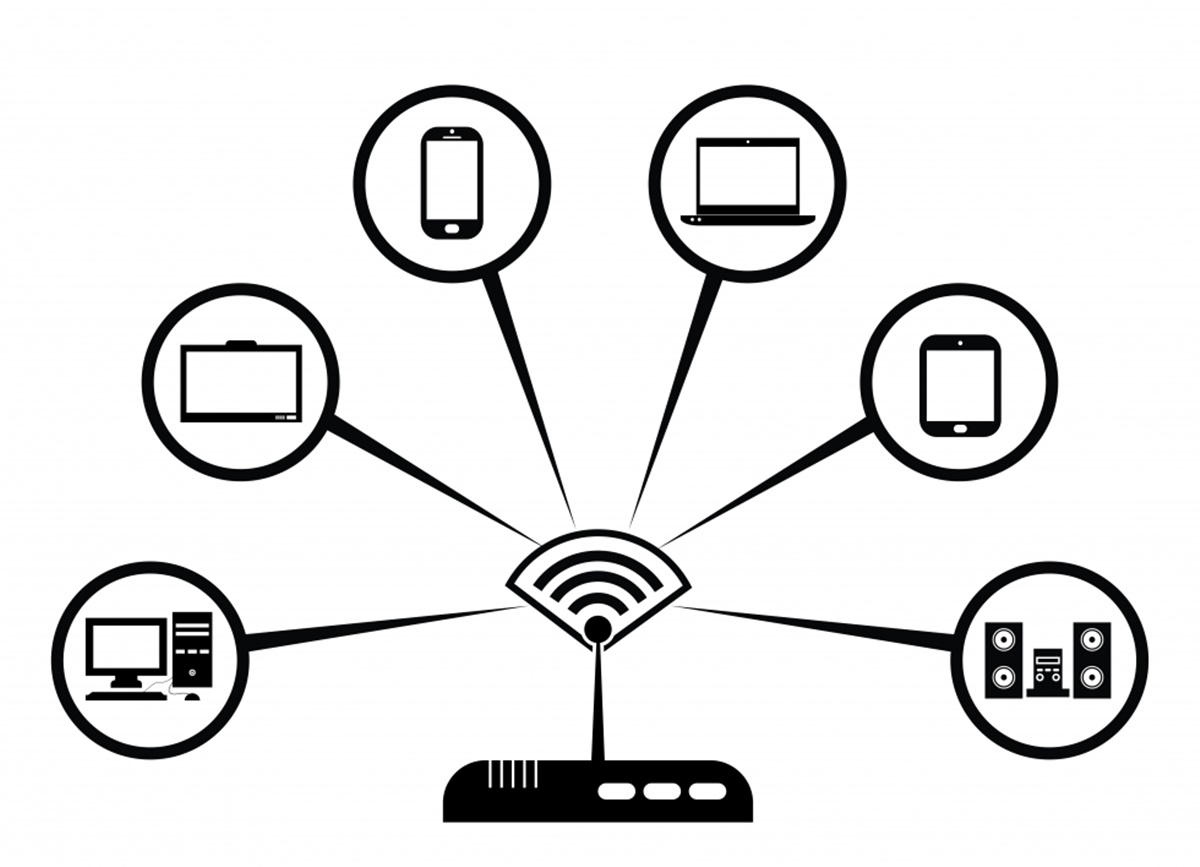
At its core, Wi-Fi works by converting data into radio signals that are transmitted through the air. These signals are picked up by Wi-Fi enabled devices, such as smartphones, laptops, tablets, and smart home devices, and then decoded and translated into usable information.
To establish a Wi-Fi connection, you need two main components: a wireless router and a Wi-Fi enabled device. The wireless router acts as the central hub, creating a network by sending and receiving data between devices. It connects to the internet through an internet service provider (ISP) and uses radio waves to transmit data to and from connected devices.
When you connect a Wi-Fi enabled device to a wireless network, it sends a signal to the router requesting a connection. The router responds by assigning the device a unique IP address, which allows it to send and receive data within the network. This IP address acts as an identification number, ensuring that data is sent to the correct device.
Once connected, the device and the router communicate through radio waves using a specific frequency band. This band can vary depending on the Wi-Fi standard being used, such as 802.11b, 802.11g, or the latest 802.11ac. The Wi-Fi standard determines the maximum speed and range of the connection.
In addition to facilitating internet access, Wi-Fi networks can also be set up to enable communication between devices within the same network. This feature allows users to share files, printers, and other resources, creating a seamless and connected environment.
Overall, Wi-Fi has revolutionized the way we connect to the internet and interact with our devices. Its wireless capability provides flexibility and convenience, making it an essential technology in today’s connected world.
Secure Networks: WEP, WPA, and WPA2 Encryption
When it comes to Wi-Fi networks, security is a crucial aspect that should not be overlooked. To protect your network and sensitive information from unauthorized access, encryption protocols are used. The most common encryption protocols are WEP (Wired Equivalent Privacy), WPA (Wi-Fi Protected Access), and WPA2.
WEP, the oldest encryption protocol, provides basic security for Wi-Fi networks. It uses a shared key that is manually entered into the router and devices. However, WEP is considered weak and vulnerable to attacks. Hackers can easily crack the encryption key, exposing your data to potential threats.
As a response to the security flaws of WEP, WPA was introduced. WPA provides stronger security by implementing the Temporal Key Integrity Protocol (TKIP). TKIP automatically generates and changes the encryption key for every data packet transmitted. This makes it significantly more difficult for attackers to crack the encryption and gain unauthorized access to the network.
WPA2, the successor to WPA, is the current industry standard for Wi-Fi security. It further enhances the security by utilizing the Advanced Encryption Standard (AES) encryption algorithm. AES is a robust and highly secure encryption method that significantly strengthens the protection of your Wi-Fi network.
It is important to note that while WPA2 is the standard, not all devices or routers support it. Some older devices may only be compatible with WEP or WPA. However, it is highly recommended to upgrade to WPA2 if your devices and router support it to ensure the highest level of security.
In addition to encryption protocols, strong and unique passwords are also crucial for network security. A strong password should be a combination of uppercase and lowercase letters, numbers, and special characters. Avoid using common words, personal information, or easily guessable patterns as passwords.
Regularly updating your router’s firmware and keeping all devices connected to your network up to date with the latest security patches are also important steps to ensure network security.
By implementing strong encryption protocols and following good security practices, you can safeguard your Wi-Fi network and protect your data from potential threats.
Types of Wireless Networks: 802.11a, 802.11b, 802.11g, 802.11n, 802.11ac
Wireless networks come in different flavors, each with its own capabilities and specifications. The most common types of wireless networks are 802.11a, 802.11b, 802.11g, 802.11n, and the latest standard, 802.11ac. Let’s take a closer look at each of these wireless network standards.
802.11a was one of the first widely adopted wireless network standards. It operates in the 5 GHz frequency band and offers a maximum data transfer rate of up to 54 Mbps. While 802.11a provides faster speeds and better signal quality compared to other standards, its shorter range and limited compatibility make it less commonly used today.
802.11b, another early wireless network standard, operates in the 2.4 GHz frequency band. It supports a maximum data transfer rate of 11 Mbps. Despite its slower speeds compared to newer standards, 802.11b has better range and compatibility, making it suitable for basic internet browsing and low-bandwidth activities.
802.11g introduced significant improvements over 802.11b. It also operates in the 2.4 GHz frequency band and supports a data transfer rate of up to 54 Mbps. The backward compatibility with 802.11b and the increased range and speed made 802.11g the dominant wireless standard for many years.
802.11n, often referred to as Wi-Fi 4, is a significant upgrade from its predecessors. This standard operates in both the 2.4 GHz and 5 GHz frequency bands, providing better network capacity and reduced interference. 802.11n supports higher data transfer rates of up to 300 Mbps or even 600 Mbps with multiple antennas. It also introduced MIMO (Multiple Input Multiple Output) technology, which improves signal strength and range.
The latest standard, 802.11ac, or Wi-Fi 5, is designed for high-performance wireless networks. It operates exclusively in the 5 GHz frequency band and supports data transfer rates of up to 1.3 Gbps or even higher with advanced features like multiple antennas and channel bonding. 802.11ac also utilizes beamforming technology, which focuses the Wi-Fi signal toward connected devices, resulting in improved speeds and reliability.
It is worth noting that to take full advantage of the speed and features of newer standards like 802.11n and 802.11ac, both the wireless router and the connected devices need to support the respective standard. However, most modern devices are backward compatible, allowing them to connect to older Wi-Fi networks with lower standards, although at reduced speeds.
Understanding the different wireless network standards can help you make informed decisions when purchasing routers and devices, ensuring compatibility and optimal performance for your specific needs.
Finding and Connecting to a Wireless Network on Windows
If you are using a Windows computer, connecting to a wireless network is a straightforward process. Follow the steps below to find and connect to a wireless network on Windows:
- Open the Windows settings by clicking on the Windows Start button and selecting the gear icon, or by pressing the Windows key + I.
- In the settings window, select the “Network & Internet” option.
- On the left-hand side, click on the “Wi-Fi” tab. This will display the available wireless networks in your vicinity.
- From the list of available networks, select the network you want to connect to. If the network is secured with a password, you will be prompted to enter it.
- Check the box next to “Connect automatically” if you want your computer to automatically connect to this network whenever it is in range.
- Click on “Connect” to establish the connection to the selected wireless network.
- If the network requires additional authentication, such as a username and password, a browser window may open automatically. Enter the required credentials to complete the authentication process.
- Once connected, a notification will appear confirming that you are now connected to the Wi-Fi network.
In case the network you want to connect to is hidden, meaning the network name (SSID) is not being broadcasted, you can still connect to it by following these steps:
- While in the “Wi-Fi” tab of the settings window, click on the “Hidden Network” option located at the top of the list of available networks.
- Click on “Add a new network” to enter the network name manually.
- If the network is secured, select the appropriate security type (WPA, WPA2, etc.) and enter the password, if required.
- Click on “Next” and then on “Connect” to establish the connection to the hidden Wi-Fi network.
Once you are successfully connected to a wireless network on Windows, you can enjoy the freedom of accessing the internet and network resources without the need for physical cables.
Finding and Connecting to a Wireless Network on Mac
If you are using a Mac computer, connecting to a wireless network is a simple and straightforward process. Follow the steps below to find and connect to a wireless network on your Mac:
- Click on the Wi-Fi icon located in the menu bar at the top right corner of your screen. It looks like a series of concentric arcs.
- A drop-down menu will appear, showing the available wireless networks in your vicinity. The networks with a lock icon next to them indicate secured networks.
- Select the wireless network you want to connect to by clicking on its name.
- If the network is secured, you will be prompted to enter the password. Type in the password and click “Join” to connect to the network.
- If the network requires additional authentication, a pop-up window may appear asking for a username and password. Enter the required credentials and click “Join” or “OK” to complete the authentication process.
- Once connected, the Wi-Fi icon in the menu bar will display the Wi-Fi signal strength, and a checkmark symbol will appear next to the network name.
In case the network you want to connect to is hidden, meaning the network name (SSID) is not being broadcasted, you can still connect to it on your Mac by following these steps:
- Click on the Wi-Fi icon in the menu bar and select “Join Other Network” from the drop-down menu.
- In the pop-up window, enter the exact network name (SSID) of the hidden network.
- Select the appropriate security type (WPA, WPA2, etc.) and enter the password if required.
- Click “Join” to establish the connection to the hidden Wi-Fi network.
Once you are successfully connected to a wireless network on your Mac, you can enjoy the freedom of wireless internet access and take advantage of various online services and resources.
Connecting to a Wireless Network on Android Devices
Connecting to a wireless network on your Android device allows you to access the internet and enjoy online services and applications. Follow the steps below to connect to a wireless network on your Android device:
- Open the “Settings” app on your Android device. You can usually find it in your app drawer or by swiping down from the top of the screen and tapping the gear-shaped icon.
- In the Settings menu, find and tap the “Wi-Fi” option. This will display a list of available wireless networks in your vicinity.
- From the list of available networks, tap on the network you want to connect to.
- If the network is secured, you will be prompted to enter the password. Tap the password field and use the on-screen keyboard to enter the correct password.
- After entering the password, tap the “Connect” button to establish a connection to the selected wireless network.
- Once connected, your Android device will display a “Connected” status next to the network name in the Wi-Fi settings.
In case the network you want to connect to is hidden, meaning the network name (SSID) is not being broadcasted, you can still connect to it on your Android device by following these steps:
- In the Wi-Fi settings, tap the three-dot menu icon in the top-right corner of the screen.
- From the dropdown menu, select “Add network”.
- In the “Network SSID” field, enter the exact network name (SSID) of the hidden network.
- Choose the appropriate security type (WPA, WPA2, etc.) and enter the password if required.
- Tap the “Save” button to save the network settings.
- Your Android device will attempt to connect to the hidden network. If successful, it will display a “Connected” status next to the network name in the Wi-Fi settings.
Once connected to a wireless network on your Android device, you can enjoy the benefits of wireless internet access, browse the web, check emails, stream media, and much more.
Connecting to a Wireless Network on iOS Devices
Connecting to a wireless network on your iOS device, whether it’s an iPhone or iPad, is a quick and easy process. Follow the steps below to connect to a wireless network on your iOS device:
- Open the “Settings” app on your iOS device. You can find it on your home screen, usually represented by a gear icon.
- In the Settings menu, tap on the “Wi-Fi” option. This will display a list of available wireless networks in your area.
- From the list of available networks, tap on the network you want to connect to.
- If the network is secured, you will be prompted to enter the password. Tap the password field and use the on-screen keyboard to enter the correct password. You can also use Face ID, Touch ID, or enter the password using iCloud Keychain if you have these features enabled.
- After entering the password, tap the “Join” button or the equivalent prompt on your device’s screen to establish a connection to the selected wireless network.
- Once connected, your iOS device will display a checkmark next to the network name in the Wi-Fi settings, indicating a successful connection.
In the event that the network you want to connect to is hidden, meaning the network name (SSID) is not being broadcasted, you can still connect to it on your iOS device by following these steps:
- In the Wi-Fi settings, tap the “Other” option located at the top of the list of available networks.
- Enter the exact network name (SSID) of the hidden network in the “Name” field.
- Choose the appropriate security type (WPA, WPA2, etc.) and enter the password if required.
- Tap the “Join” button or the equivalent prompt on your device’s screen to connect to the hidden network.
Once connected to a wireless network on your iOS device, you can enjoy the freedom of wireless internet access, browse the web, use apps, and stay connected wherever you go.
Troubleshooting Wi-Fi Connection Issues
Experiencing Wi-Fi connection issues can be frustrating, but there are some common troubleshooting steps you can take to resolve the problem. Follow the steps below to troubleshoot common Wi-Fi connection issues:
- Check the basics: Make sure your Wi-Fi router is powered on and properly connected to your modem or internet source. Also, ensure that your device’s Wi-Fi is turned on and in range of the router.
- Restart your devices: Sometimes, a simple restart can help resolve Wi-Fi connection issues. Restart your Wi-Fi router, modem, and the device you’re trying to connect to the network.
- Forget and reconnect to the network: If you’re having trouble connecting to a specific network, you can try forgetting the network on your device and then reconnecting to it. Go to the Wi-Fi settings, find the network, tap on it, and select “Forget This Network”. Then, reconnect by entering the password or following the authentication steps.
- Reset network settings: On your device, you can try resetting the network settings to their default values. This can help resolve any misconfigured settings that might be causing connection issues. Go to the settings, find the “General” section, and select “Reset”. Then, choose “Reset Network Settings”. Keep in mind that this will remove saved Wi-Fi passwords and other network-related settings.
- Check for firmware updates: Ensure that your Wi-Fi router’s firmware is up to date. Manufacturers often release firmware updates that address bugs and improve compatibility. Check the manufacturer’s website or the router’s administration page for any available updates.
- Move closer to the router: If you’re experiencing a weak Wi-Fi signal, try moving closer to the router. Physical obstructions like walls and furniture can weaken the signal. Additionally, avoid interference from other electronic devices that operate on the same frequency as your Wi-Fi network.
- Restart your modem: If restarting your devices didn’t help, consider restarting your modem. Unplug the power cable from the modem, wait for a few seconds, and then plug it back in. Allow the modem to fully restart before attempting to connect your devices again.
- Contact your internet service provider: If the above steps don’t resolve the issue, it’s possible that the problem lies with your internet service provider. Contact your ISP to check if there are any known network outages or if they can provide further assistance in troubleshooting your Wi-Fi connection.
By following these troubleshooting steps, you can often resolve common Wi-Fi connection issues and enjoy a stable and reliable wireless network connection.