
What Is Steps Recorder (PSR)?
Steps Recorder, also known as Problem Steps Recorder (PSR), is a handy tool available in Windows operating systems that allows users to record and capture screenshots while performing specific tasks. It is an excellent tool for troubleshooting and documentation purposes, as it allows users to create step-by-step recordings of their actions on the computer.
Steps Recorder is particularly useful in scenarios where users encounter issues or errors while using an application or performing a task. Instead of trying to explain the problem verbally or through written descriptions, Steps Recorder allows users to record their actions and provide real-time visual evidence of the issue.
By using Steps Recorder, users can easily document steps to reproduce a problem, which can be shared with technical support teams or colleagues to help identify and resolve the issue. This tool is especially valuable for IT professionals, software testers, and technical writers.
Not only does Steps Recorder record the actions taken by users, but it also captures screenshots at each step. This feature further enhances the ability to document and showcase a specific issue or task, as users can visually demonstrate what they are experiencing or performing on the computer.
Steps Recorder also includes additional functionality to annotate and add comments to the recorded steps. This feature enables users to provide further context or explanations for each action, making it easier for others to understand the recorded steps and any associated problems or observations.
Overall, Steps Recorder is a powerful tool that simplifies the process of troubleshooting and documenting issues on Windows operating systems. It provides a practical and efficient way to record, capture, and annotate actions, making it easier for users to communicate and resolve technical problems.
How to Access Steps Recorder
Steps Recorder (PSR) is a built-in tool in Windows operating systems, and accessing it is a simple process. Here are the steps to access Steps Recorder:
- Press the Windows key on your keyboard or click on the Start menu in the bottom left corner of the screen.
- Type “Steps Recorder” in the search bar.
- Click on the Steps Recorder option that appears in the search results.
- The Steps Recorder tool will open, ready for you to start recording your actions.
Alternatively, you can also access Steps Recorder through the Windows Accessories folder. Here’s how:
- Open the Start menu by clicking on the Start button.
- Scroll through the list of programs until you find the Windows Accessories folder.
- Click on the Windows Accessories folder to expand it.
- Look for the Steps Recorder icon within the Windows Accessories folder and click on it to launch the tool.
Once you have accessed Steps Recorder, you can begin recording your steps or actions to document and troubleshoot any issues or tasks.
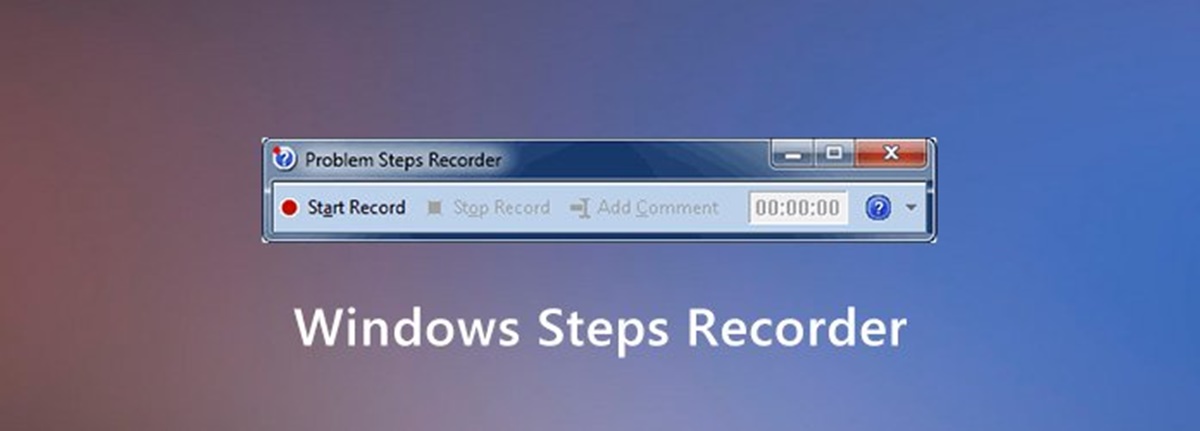
It’s important to note that Steps Recorder may be named differently in some older versions of Windows. For example, in Windows 7, it is known as “Problem Steps Recorder.” Regardless of the name, the functionality and purpose of the tool remain the same.
Now that you know how to access Steps Recorder, you can leverage this helpful tool to record and document your actions in Windows operating systems.
Recording Steps with PSR
Once you have accessed Steps Recorder (PSR), you can start recording the steps you take on your computer. Follow these instructions to record steps with PSR:
- Open the application or perform the task that you want to record.
- Click on the “Start Record” button in the Steps Recorder toolbar.
- PSR will start recording all the actions you perform, including mouse clicks and keyboard inputs.
- Carry out the steps you want to record, ensuring that you follow the desired sequence.
- If needed, you can pause the recording at any time by clicking on the “Pause Record” button.
- Resume the recording by clicking on the “Start Record” button once again.
- Once you have completed the steps, click on the “Stop Record” button to finish the recording.
During the recording process, PSR automatically captures screenshots at each step, providing a visual record of your actions. These screenshots are displayed alongside the corresponding actions in the recorded file.
It is important to note that PSR does not record any information that is considered sensitive or private, such as passwords or personal data entered in secure fields.
After you have stopped the recording, Steps Recorder will generate a file (usually in .zip format) containing the recorded steps and screenshots. You can save this file on your computer for future reference or share it with others to help troubleshoot issues or document specific tasks.
Recording steps with Steps Recorder is an effective way to document processes, showcase issues, or provide instructions. By following these simple steps, you can easily record and save a detailed record of your actions on your Windows computer.
Capturing Screenshots with PSR
In addition to recording steps, Steps Recorder (PSR) allows you to capture screenshots to further enhance the documentation or troubleshooting process. Here’s how you can capture screenshots with PSR:
- Open Steps Recorder (PSR) on your Windows computer by following the steps mentioned earlier.
- Click on the “Start Record” button to initiate the recording process.
- Perform the steps or actions that you want to capture as screenshots.
- Once you reach a point where you want to capture a screenshot, click on the “Add Comment” button in the Steps Recorder toolbar.
- A crosshair cursor will appear on your screen. Use it to select the specific area you want to capture as a screenshot.
- Click and drag the crosshair over the desired area, and then release the mouse button to capture the screenshot.
- The captured screenshot will be added to the recorded steps, appearing alongside the corresponding action.
- Continue with the remaining steps, capturing additional screenshots as needed.
- When you have completed the recording, click on the “Stop Record” button to finish the process.
Each captured screenshot is labeled with a unique number, making it easy to identify and reference during the documentation or troubleshooting process.
It’s important to note that Steps Recorder automatically captures screenshots of the entire screen, regardless of whether you select a specific area or not. However, using the crosshair to select a specific area allows you to highlight and emphasize a particular portion of the screen in the captured screenshot.
Capturing screenshots with Steps Recorder can help provide visual evidence and detailed documentation of specific actions, issues, or tasks. By following these simple steps, you can capture screenshots alongside your recorded steps, enhancing the overall clarity and understanding of your documentation.
Annotating Steps with PSR
Steps Recorder (PSR) not only allows you to record your steps and capture screenshots, but it also provides the ability to annotate the recorded steps. This feature enables you to add comments or annotations to further enhance the clarity and understanding of the recorded process. Here’s how you can annotate steps with PSR:
- Open Steps Recorder (PSR) on your Windows computer.
- Click on the “Start Record” button to initiate the recording process.
- Perform the steps or actions that you want to document.
- At any point in the recording, when you want to add an annotation or comment, click on the “Add Comment” button in the Steps Recorder toolbar.
- A text box will appear on the screen, allowing you to enter your comment or annotation.
- Type your comment or annotation in the text box.
- After entering your comment, click on the “OK” button to save the annotation.
- The annotation will be added to the recorded steps, appearing alongside the corresponding action.
- Continue with the remaining steps, adding annotations as needed.
- When you have completed the recording, click on the “Stop Record” button to finish the process.
The annotations you add can provide additional context, explanations, or insights into the recorded steps. This can be particularly helpful when documenting complex processes, troubleshooting steps, or providing instructions to others.
Each annotation is associated with a specific step, making it easy to find and reference during the documentation or troubleshooting process.
By annotating steps with PSR, you can enhance the overall clarity and understanding of your recorded process. It allows you to provide specific details and explanations that can be valuable for yourself or others who are reviewing the documentation or troubleshooting the captured steps.
Saving and Sharing the PSR File
Once you have recorded your steps and annotated them as needed in Steps Recorder (PSR), you can save and share the resulting PSR file. This file contains all the recorded steps, screenshots, and annotations, providing a comprehensive record of your actions. Here’s how you can save and share the PSR file:
- After you have stopped the recording, Steps Recorder will automatically generate a file containing the recorded steps and screenshots.
- Click on the “File” menu in the Steps Recorder toolbar.
- From the dropdown menu, select the “Save As” option.
- Choose a location on your computer where you want to save the PSR file.
- Enter a name for the file, and select the desired file format (usually .zip or .mht).
- Click on the “Save” button to save the file to the specified location.
- Once the file is saved, you can easily share it with others via email, file-sharing platforms, or any other preferred method.
When sharing the PSR file with others, it’s important to explain its purpose and provide any necessary instructions or context. This will help recipients understand the recorded steps and annotations, enabling them to use the file for troubleshooting, documentation, or any other intended purpose.
Furthermore, if the PSR file has been saved in .zip format, be sure to inform recipients that they need to extract the contents of the zip file to access the recorded steps and screenshots.
By saving and sharing the PSR file, you can effectively communicate and collaborate with others, providing them with a detailed record of your actions and annotations. This enables streamlined troubleshooting, documentation, and knowledge-sharing processes.
Troubleshooting with Steps Recorder
Steps Recorder (PSR) is a valuable tool when it comes to troubleshooting technical issues on Windows operating systems. By recording and documenting the steps leading up to a problem, you can provide clear and visual evidence of the issue at hand. Here’s how you can utilize Steps Recorder for troubleshooting:
- When you encounter a problem or error on your computer, launch Steps Recorder by following the steps mentioned earlier.
- Click on the “Start Record” button to initiate the recording process.
- Recreate the steps or actions that triggered the problem, making sure to capture all relevant information.
- If necessary, add annotations or comments to specific steps, providing additional context or explanations.
- Once you have replicated the problem and recorded all the relevant steps, click on the “Stop Record” button to finish the recording.
- Save the recorded steps as a PSR file (usually in .zip or .mht format) by following the steps outlined in the previous section.
- Share the PSR file with technical support teams, colleagues, or other relevant parties who can assist in troubleshooting the issue.
By sharing the PSR file, you provide others with a thorough account of the problem, showcasing the exact steps that led to the issue and any accompanying error messages or unexpected behavior. This comprehensive documentation can significantly facilitate the troubleshooting process.
When communicating the problem, be sure to include any pertinent information or details that may help in understanding the issue. This could include the specific software or application involved, the version of the operating system, any recent updates or changes made, and any error codes or messages received.
By utilizing Steps Recorder for troubleshooting, you can streamline the process of identifying and resolving technical issues. The recorded steps and annotations serve as a valuable resource for both yourself and others involved in troubleshooting, ensuring a thorough and efficient resolution to the problem at hand.
Limitations of Steps Recorder
While Steps Recorder (PSR) is a helpful tool for documenting steps, capturing screenshots, and troubleshooting issues, it does have certain limitations. It’s important to be aware of these limitations to ensure proper utilization of the tool. Here are a few limitations of Steps Recorder to keep in mind:
- Steps Recorder is only available on Windows operating systems. If you are using a different operating system, you will need to explore alternative tools or methods for achieving similar functionality.
- Steps Recorder may not be available or accessible in all versions of Windows. While it is typically found in Windows starting from Windows 7, the exact name or location of the tool can vary.
- Steps Recorder only records actions performed on the desktop environment. It does not capture actions within certain applications or browser windows, such as those running in secure or protected modes.
- Steps Recorder does not capture any information entered in password fields or other sensitive input fields. This is done to protect the privacy and security of user information.
- Steps Recorder may not record certain user interface interactions accurately, such as dragging and dropping files or moving windows. These actions may not be represented accurately in the recorded steps.
- Steps Recorder does not provide advanced editing or image manipulation features. While you can add annotations and comments, more advanced editing options may require additional software or tools.
- Steps Recorder may not be suitable for recording complex interactions or scenarios that involve multiple applications or extensive system configurations.
Despite these limitations, Steps Recorder remains a valuable tool for basic documentation and troubleshooting purposes. It allows users to easily record and share their steps, providing a clear and visual representation of actions taken on a Windows computer.
Understanding the limitations of Steps Recorder helps manage expectations and explore alternative tools or methods when necessary. However, for many common troubleshooting and documentation needs, Steps Recorder remains a practical and efficient solution.
Alternatives to Steps Recorder
While Steps Recorder (PSR) is a built-in tool for Windows operating systems, there are alternative options available for recording steps, capturing screenshots, and documenting processes on various platforms. Here are a few alternatives to consider:
- Snagit: Snagit is a popular screen capture and recording tool that allows you to capture screenshots, record videos, and annotate them with ease. It offers a range of editing tools and features, making it a comprehensive solution for capturing and documenting steps.
- Camtasia: Camtasia is a powerful screen recording and video editing software that provides a more advanced approach to recording steps and creating instructional videos. It offers features like multi-track editing, visual effects, and interactive quizzes.
- CloudApp: CloudApp is a handy tool that enables quick screen and webcam recording, as well as easy sharing of screenshots and GIFs. With its user-friendly interface and cloud-based storage, it simplifies the process of capturing and sharing steps.
- Loom: Loom is a video messaging and screen recording tool that allows you to capture and share recorded steps. It offers features like drawing and highlighting on screen, making it a suitable option for adding annotations and comments to recorded steps.
- ShareX: ShareX is an open-source screen capture, recording, and sharing tool that supports various capture methods and allows for easy annotation and editing. It offers a range of customization options and supports integration with several cloud storage platforms.
These are just a few examples of the many alternatives available in the market. Each tool has its own unique features and benefits, so it’s important to choose one that aligns with your specific requirements and preferences.
When selecting an alternative to Steps Recorder, consider factors such as ease of use, editing capabilities, compatibility with your operating system, and any additional features that may be useful for your specific needs.
By exploring these alternatives, you can find a tool that suits your requirements and provides a more tailored solution for capturing, documenting, and sharing steps and screenshots.