
Features of Windows Ink
Windows Ink is a powerful tool that allows users to get the most out of their devices with touch-based input, particularly with a stylus or pen. It provides a variety of features and functionalities that make it a valuable tool for both productivity and creativity. In this section, we will explore some of the key features of Windows Ink.
1. Sticky Notes: Windows Ink includes a built-in Sticky Notes app that allows users to jot down quick notes and reminders, just like traditional sticky notes. Users can write, type, and even draw on them, making it an excellent tool for capturing ideas or making to-do lists.
2. Sketchpad: With Windows Ink, users can access a digital sketchpad right on their device. It allows users to doodle, draw, and sketch using a range of tools and brushes. The sketchpad can be a great tool for artists, designers, or anyone who wants to unleash their creativity.
3. Screen Sketch: This feature enables users to take screenshots and quickly annotate them, making it easier to communicate ideas or provide feedback on images. Whether you need to highlight specific areas, add text, or draw shapes, Screen Sketch makes it a breeze.
4. Ink Workspace: Windows Ink comes with an Ink Workspace, where users can access all the ink-related apps and features in one place. It provides quick access to Sticky Notes, Sketchpad, Screen Sketch, and other relevant apps, making it convenient and efficient.
5. Pen and Touch Shortcut: Windows Ink allows users to customize the pen and touch shortcuts, enabling them to access specific features or apps with just a tap or a click. This customization ensures a personalized and seamless experience for users, improving their productivity and ease of use.
6. Pen Settings: The Pen Settings feature in Windows Ink allows users to further customize their pen and stylus settings. From adjusting the pressure sensitivity to choosing the default ink color, users can fine-tune the pen settings to suit their preferences and handwriting style.
7. Integration with Microsoft Edge: Windows Ink seamlessly integrates with Microsoft Edge, the default web browser for Windows devices. Users can use the ink feature to write directly on web pages, annotate articles or PDFs, and even share their digital notes with others, enhancing collaboration and productivity.
8. Integration with OneNote: OneNote, Microsoft’s note-taking app, fully supports Windows Ink. Users can write, draw, and annotate notes using a stylus or pen, making it a versatile tool for capturing ideas, brainstorming, and organizing information.
9. Integration with Maps: Windows Ink enhances the mapping experience by allowing users to write directly on the maps. Users can mark locations, draw routes, and add notes, making it easier to plan trips, navigate, or simply explore the world in a more interactive and personalized way.
10. Integration with Photos: Windows Ink enables users to unleash their creativity by adding ink effects and annotations directly on photos. Whether it’s highlighting special moments, adding captions, or doodling, this feature makes photo editing more fun and engaging.
With Windows Ink, users can transform their Windows devices into powerful tools for creativity, productivity, and personalization. Whether you’re an artist, a student, or a professional, Windows Ink provides a seamless and intuitive ink experience that enhances your digital workflow.
Setting Up and Using Windows Ink
Windows Ink offers a range of intuitive features that can enhance your productivity and creativity. To get started with Windows Ink, follow these simple steps:
1. Check Compatibility: Ensure that your Windows device supports touch input and has a stylus or pen capability. Most modern Windows devices, including tablets, 2-in-1 laptops, and some desktops, are equipped with touch screens and stylus support.
2. Enable Windows Ink: Windows Ink is built into the Windows operating system. To enable it, go to the Start menu and open the Settings app. From there, navigate to the Devices section and select Pen & Windows Ink. Toggle on the “Use Windows Ink” option to activate the Windows Ink workspace.
3. Customize Pen Settings: To make the most of your stylus or pen, you can customize its settings. In the Pen & Windows Ink settings, you can choose the hand you write with, adjust pen pressure sensitivity, and even assign specific actions to the pen button, such as launching apps or taking screenshots.
4. Familiarize Yourself with the Ink Workspace: The Ink Workspace is a hub for all Windows Ink features. You can access it by clicking the pen icon on the taskbar or pressing the Windows key + W. Take some time to explore the available apps and features, such as Sticky Notes, Sketchpad, and Screen Sketch.
5. Try Sticky Notes: Sticky Notes is a handy app for jotting down quick notes and reminders. Open the app from the Ink Workspace or by clicking the Sticky Notes icon in the taskbar. You can type or write your notes and move them around the screen. The app also supports ink-to-text conversion, allowing you to search and organize your notes more efficiently.
6. Explore Sketchpad: Sketchpad provides a digital canvas for your creative ideas. Open it from the Ink Workspace or by clicking the Sketchpad icon in the taskbar. Experiment with different brushes, colors, and pen sizes to draw and sketch with precision. You can also erase or undo any changes you make.
7. Utilize Screen Sketch: Screen Sketch makes it easy to capture and annotate screenshots. To take a screenshot, press the Windows key + Shift + S. A selection tool will appear, allowing you to choose the area you want to capture. Once captured, a toolbar will appear, enabling you to draw, write, or highlight specific parts of the screenshot.
8. Try Ink Integration with Apps: Many Microsoft apps, such as Microsoft Edge, OneNote, Maps, and Photos, seamlessly integrate with Windows Ink. Explore the ink functionalities within these apps to experience the full potential of Windows Ink. For example, you can use the ink feature in Microsoft Edge to mark up webpages or annotate PDFs.
9. Experiment and Have Fun: The true power of Windows Ink lies in its versatility and adaptability to your needs. Don’t be afraid to experiment and find creative uses for it. Whether you’re taking notes, sketching, or collaborating with others, Windows Ink offers a flexible and intuitive platform.
By following these steps, you can easily set up and start using Windows Ink on your Windows device. Whether you’re an artist, a student, or a professional, Windows Ink can revolutionize the way you interact with your device and unleash your creativity.
Using Sticky Notes
Sticky Notes is a versatile feature in Windows Ink that allows you to create digital notes and reminders on your device. Whether you need to jot down a quick idea, make a to-do list, or save important information, Sticky Notes offers a convenient and accessible way to stay organized. Here’s how you can make the most of Sticky Notes:
Creating Sticky Notes: To create a new Sticky Note, open the Sticky Notes app from the Ink Workspace or by clicking the Sticky Notes icon in the taskbar. Simply start typing or use your stylus or pen to write directly on the note. You can resize and move the notes around your screen for easy visibility.
Adding Formatting: Sticky Notes allows you to customize the appearance of your notes. You can highlight text, change font colors, and apply formatting options such as bold, italic, and underline. Right-click on a note to access the formatting options or use keyboard shortcuts for quick formatting.
Ink-to-Text Conversion: One impressive feature of Sticky Notes is its ability to convert your handwritten ink into text. Simply write your notes using a stylus or pen, and Sticky Notes will automatically convert your handwriting into typed text. This makes it easier to search and organize your notes.
Organizing and Syncing: Sticky Notes allows you to easily organize and sync your notes across multiple devices. You can use tags to categorize your notes, and the app will automatically back up your notes in the cloud, ensuring you can access them from any connected device with your Microsoft account.
Using Cortana Integration: Sticky Notes integrates with Cortana, Microsoft’s virtual assistant. You can create reminders or create follow-up tasks directly from your Sticky Notes. Just highlight a text in your note, right-click, and choose the “Add Reminder” or “Create a Task” option. Cortana will keep track of your tasks and remind you at the specified time.
Keyboard Shortcuts: Sticky Notes offers several keyboard shortcuts to streamline your note-taking experience. For example, you can create a new note using the Windows key + N shortcut, or quickly delete a note with the Windows key + Alt + D shortcut. Familiarize yourself with these shortcuts to save time and boost productivity.
Backing Up and Restoring Notes: If you need to reinstall Windows or switch to a new device, you don’t have to worry about losing your Sticky Notes. The app automatically backs up your notes, and you can restore them by signing in with your Microsoft account on the new device or after reinstalling Windows.
Sticky Notes offers a simple yet powerful way to capture and organize your thoughts, reminders, and information. Whether you’re a student, a professional, or just someone who loves to stay organized, Sticky Notes in Windows Ink can become your go-to tool for digital note-taking. Start using Sticky Notes and experience the convenience and efficiency it brings to your daily life.
Using Sketchpad
Sketchpad is a fantastic feature of Windows Ink that allows users to unleash their creativity and express their ideas digitally. Whether you’re an artist, designer, or simply enjoy doodling, Sketchpad offers a range of tools and brushes to bring your imagination to life. Here’s how you can make the most of Sketchpad:
Opening Sketchpad: To open Sketchpad, access the Ink Workspace by clicking the pen icon on the taskbar or pressing the Windows key + W. You can also find the Sketchpad app in the Start menu. It provides a dedicated canvas for your drawings and sketches.
Choosing Tools: Sketchpad offers a variety of tools to enhance your drawings. On the left side of the screen, you’ll find a toolbar with different brushes and colors. Experiment with different pen sizes, brush types, and colors to achieve the desired effect for your artwork.
Drawing and Sketching: Use your stylus or pen to draw directly on the Sketchpad canvas. Whether you’re creating intricate illustrations, quick doodles, or detailed sketches, Sketchpad provides a responsive and fluid drawing experience. You can also erase any mistakes or undo changes using the eraser tool or keyboard shortcuts.
Adding Annotations and Shapes: Sketchpad allows you to add annotations or shapes to your drawings. By using the text tool, you can add text boxes to include captions or labels in your artwork. Additionally, you can utilize the shape tool to draw lines, squares, circles, or other geometric shapes with precision.
Using Ruler and Protractor: Sketchpad includes a ruler tool and a protractor tool to assist with precise drawings. To access them, click on the ruler icon at the top of the screen. These tools can be helpful for creating technical drawings, architectural sketches, or any artwork that requires accurate measurements or angles.
Zooming and Panning: Sketchpad allows you to zoom in and out on your artwork for detailed work. Use the zoom slider at the bottom right corner of the screen or use the keyboard shortcuts to zoom in and out. You can also pan across the canvas using touch gestures or the hand tool provided.
Saving and Sharing: Once you’ve completed your masterpiece, you can save your artwork by clicking the save icon in the upper-left corner of the Sketchpad app. It will prompt you to choose a location on your device to save the image. You can then share your artwork by opening the saved image file or copy-pasting it into other apps or documents.
Editing and Collaborating: Sketchpad integrates seamlessly with other Windows Ink apps, such as OneNote. You can import your sketch into OneNote for further editing, adding annotations, or collaborating with others. This makes Sketchpad a versatile tool for both individual creativity and collaborative work.
Sketchpad in Windows Ink offers a rich and intuitive platform for artists and enthusiasts to express themselves creatively. Whether you’re a professional artist or someone who enjoys doodling in your free time, Sketchpad empowers you to bring your ideas to life digitally. Explore the endless possibilities of Sketchpad and let your imagination soar.
Using Screen Sketch
Screen Sketch is a powerful feature of Windows Ink that allows users to capture screenshots and annotate them with ease. Whether you need to highlight important information, provide feedback on an image, or simply express your ideas visually, Screen Sketch provides the tools necessary to enhance your screenshots. Here’s how you can make the most of Screen Sketch:
Capturing Screenshots: To capture a screenshot, press the Windows key + Shift + S. This will activate the Screen Sketch tool. A selection tool will appear, allowing you to choose the area you want to capture. Click and drag to select the desired region, and Screen Sketch will automatically save the screenshot to the clipboard or to the Screen Sketch app.
Annotating Screenshots: Once you’ve captured a screenshot, Screen Sketch opens automatically, enabling you to annotate and edit the image. You can use various drawing tools, such as the pen, highlighter, and eraser, to make your annotations. Additionally, the built-in ruler tool can assist you in creating straight lines or precise shapes.
Drawing and Writing: Screen Sketch offers a range of pen styles, colors, and sizes to suit your annotation needs. You can draw freehand to emphasize certain areas or write text to provide additional information. The selection of tools and customization options makes it easy to create clear and visually appealing annotations on your screenshots.
Highlighting and Underlining: With the highlighter and underline tools, you can draw attention to specific elements or text within your screenshots. Whether you want to emphasize important details, mark important sections, or provide context, these tools help make your annotations stand out.
Adding Arrows and Shapes: Screen Sketch allows you to add arrows or shapes to your screenshots for added clarity and visual communication. You can draw arrows to indicate directions or specific points of interest. Additionally, you can add shapes such as circles, rectangles, or squares to encapsulate certain elements within the image.
Erasing and Undoing: Mistakes happen, and Screen Sketch provides an easy way to fix them. You can use the eraser tool to remove any unwanted annotations or drawings. Additionally, if you make a mistake while drawing, you can simply use the undo button or the keyboard shortcut (Ctrl + Z) to step back and revert to the previous state.
Sharing and Saving: Once you’ve completed your annotated screenshot, you can save or share it with others. Screen Sketch allows you to save the image to your device or copy it to the clipboard for pasting into other documents or applications. You can also share the screenshot directly from the Screen Sketch app to collaborate or seek feedback from others.
Using Options and Settings: Screen Sketch offers additional options and settings to enhance your annotation experience. You can adjust the transparency and thickness of the pen or customize your preferred shortcuts for capturing screenshots or activating Screen Sketch.
Screen Sketch in Windows Ink provides a straightforward and efficient way to annotate and enhance your screenshots. Whether you need to highlight important information, provide feedback, or simply make your visuals more engaging, Screen Sketch offers the necessary tools to make your screenshots more impactful. Explore the features of Screen Sketch and take your annotated screenshots to the next level.
Using the Ink Workspace
The Ink Workspace is a centralized hub in Windows Ink that brings together various ink-related apps and features in one convenient location. It provides quick access to tools that allow you to maximize productivity, unleash your creativity, and streamline your digital workflow. Here’s how you can make the most of the Ink Workspace:
Accessing the Ink Workspace: To access the Ink Workspace, click on the pen icon located on the taskbar or press the Windows key + W on your keyboard. This will open a sidebar on the right side of your screen, displaying the available ink-related apps and features.
Sticky Notes: The Sticky Notes app is prominently featured in the Ink Workspace. You can use it to create digital notes and reminders, jot down ideas, or make to-do lists. The ability to write and draw on the sticky notes makes it a versatile and handy tool for organizing your thoughts and tasks.
Sketchpad: The Sketchpad app within the Ink Workspace provides a digital canvas for your artistic creations. It allows you to draw, doodle, and sketch using different brushes, colors, and pen sizes. The intuitive interface and responsive tools make Sketchpad ideal for unleashing your creativity and expressing your ideas digitally.
Screen Sketch: Screen Sketch, another powerful tool in the Ink Workspace, enables you to capture screenshots and annotate them with drawings, text, and shapes. It comes in handy when you need to highlight important details, provide feedback, or visually communicate your ideas with precision and clarity.
Recent Sketches: The Ink Workspace also conveniently displays your recent sketches and screenshots. This feature allows you to quickly access and review your previous ink creations, making it easier to reference or continue working on them without the need to search through your files or folders.
Pen and Touch Shortcut: The Ink Workspace includes a pen and touch shortcut, which provides quick access to ink-related features and apps. Clicking on the shortcut icon displays a radial menu containing shortcuts to important apps such as Sticky Notes, Sketchpad, and Screen Sketch, as well as options to customize your pen settings.
Ink Workspace Apps: The Ink Workspace is designed to integrate with other ink-enabled apps on your device. This means that additional apps, such as Microsoft Edge, OneNote, Maps, and Photos, can provide ink-specific functionalities, allowing you to annotate webpages, draw on maps, write and sketch in notes, and add ink effects to photos within the context of their respective applications.
Customization: The Ink Workspace allows for customization to suit your preferences and workflow. You can choose which apps are displayed in the sidebar, rearrange their order, and even hide apps you don’t frequently use. This customization ensures that your Ink Workspace is tailored to your specific needs and allows for a more efficient and personalized digital experience.
The Ink Workspace in Windows Ink is designed to enhance your productivity, creativity, and overall digital experience. By providing easy access to a range of ink-related apps and features, it streamlines your workflow and enables you to take full advantage of the capabilities offered by your touch-enabled device and stylus. Explore the Ink Workspace, customize it to your liking, and unlock the full potential of Windows Ink.
Using the Pen and Touch Shortcut
The Pen and Touch Shortcut is a convenient feature in Windows Ink that provides quick access to ink-related apps and features. By clicking on the shortcut icon, you can easily access various functionalities that enhance your productivity and creativity. Here’s how you can make the most of the Pen and Touch Shortcut:
Accessing the Shortcut: The Pen and Touch Shortcut can be accessed by clicking on the pen icon located on the taskbar or by pressing the Windows key + W. This action will open a radial menu on your screen, displaying a selection of ink-related apps and options.
Customizing the Shortcut: You have the option to customize the Pen and Touch Shortcut to suit your preferences and workflow. Right-clicking on the pen icon on the taskbar and selecting “Settings” will open the Pen & Windows Ink settings. From there, you can adjust the shortcuts and choose which apps are displayed in the radial menu.
Launching Apps: The Pen and Touch Shortcut provides quick access to ink-enabled apps such as Sticky Notes, Sketchpad, and Screen Sketch. By clicking on the respective app icon in the radial menu, you can open the app directly and start using its specific ink-related functionalities.
Custom Actions: In addition to launching apps, the Pen and Touch Shortcut allows you to assign custom actions to the shortcut. For example, you can set it to take a screenshot, activate a specific tool or feature within an app, or launch a frequently used ink-related function. This customization ensures that the shortcut caters to your specific needs.
Changing Pen Settings: The Pen and Touch Shortcut provides quick access to the Pen & Windows Ink settings, where you can further customize your pen preferences. From adjusting pen pressure sensitivity to choosing the default ink color, you can fine-tune the pen settings to match your writing style and improve the precision of your digital ink strokes.
Switching to Touch Mode: If you’re using a touch-enabled device, the Pen and Touch Shortcut also allows you to switch seamlessly between pen and touch modes. By selecting the touch icon in the radial menu, you can navigate your device using touch gestures, making it easy to transition between ink-based tasks and regular touch interactions.
Improving Workflow Efficiency: The Pen and Touch Shortcut offers a time-saving solution for navigating between ink-related features and apps. Instead of searching for specific tools or functions, you can simply access them directly from the radial menu, streamlining your workflow and eliminating unnecessary steps.
Enhancing Collaboration: The Pen and Touch Shortcut promotes collaborative work by providing quick access to ink-related apps and features. Whether you’re using a stylus to annotate documents or sketching ideas during a brainstorming session, the ease of access provided by the shortcut enables smoother collaboration and encourages creativity.
The Pen and Touch Shortcut in Windows Ink is designed to improve your experience with ink-related tasks and applications. By providing easy access to ink functionalities, custom actions, and pen settings, the shortcut enhances productivity and facilitates seamless navigation between different ink-related tools. Take advantage of the Pen and Touch Shortcut to make your digital ink experience more efficient and enjoyable.
Customizing Your Pen Settings
Windows Ink offers a range of customization options that allow you to tailor your pen settings to best suit your preferences and writing style. By adjusting various parameters, such as pressure sensitivity, button functions, and ink color, you can enhance your digital ink experience. Here’s how you can customize your pen settings:
Accessing Pen Settings: To access the pen settings in Windows Ink, go to the Start menu and open the Settings app. From there, navigate to the Devices section and select Pen & Windows Ink. This will open the Pen & Windows Ink settings, where you can customize your pen preferences.
Handedness: Windows Ink allows you to specify your handedness, whether you use your right or left hand to write with a pen or stylus. By choosing the correct option in the settings, you ensure that your digital ink strokes are accurately registered and aligned with your hand movements.
Pressure Sensitivity: Many styluses and pens support pressure sensitivity, which means the ink output can vary based on the applied pressure. Within Pen & Windows Ink settings, you can adjust the pressure sensitivity level to match your writing or drawing style. Experiment with different settings to find the right balance for your needs.
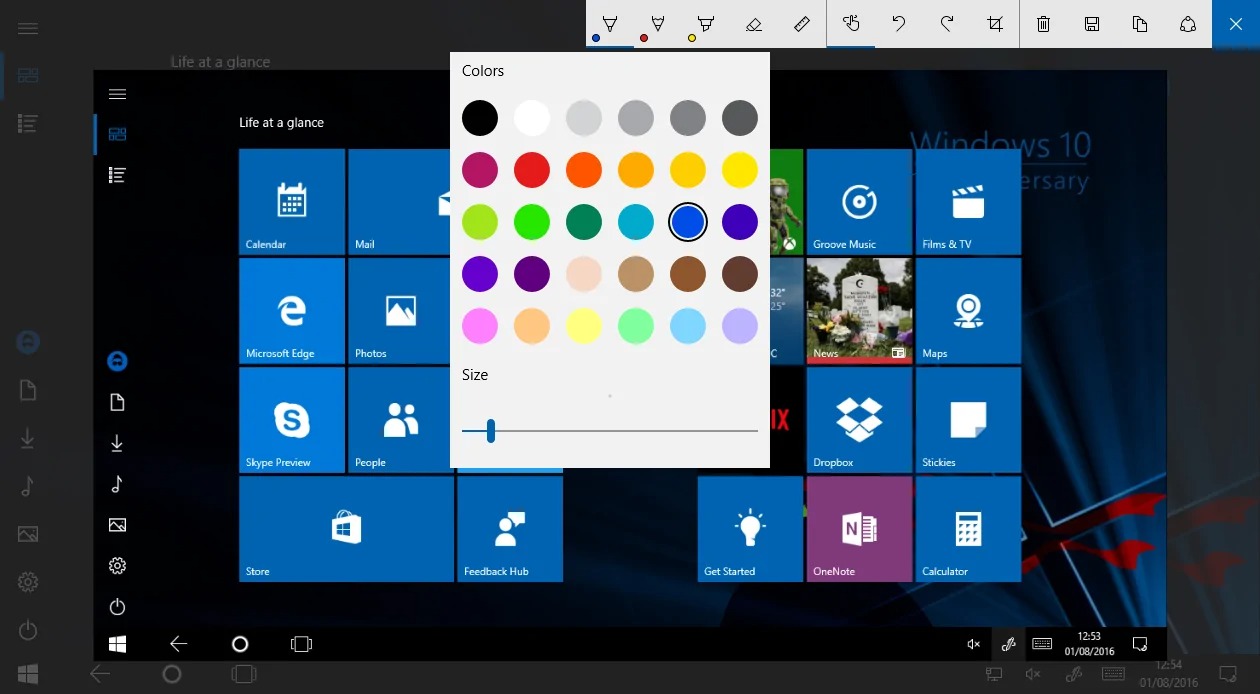
Ink Color: Windows Ink gives you the ability to choose the default ink color for your digital ink. Whether you prefer black, blue, red, or any other color, you can select it in the pen settings. This customization allows you to personalize your ink output and make it visually appealing as you write or draw.
Custom Button Functions: Many styluses and pens come with buttons that can be assigned custom functions. In the pen settings, you can configure these buttons to perform specific actions, such as launching an app, taking a screenshot, or activating an ink-related feature. This customization allows you to streamline your workflow and easily access frequently used functions.
Hover Feedback: When using a stylus or pen, Windows Ink can provide hover feedback, which displays a preview of the ink stroke before it is applied to the screen. You can enable or disable this feature in the pen settings based on your personal preference and the level of feedback you find helpful during your digital ink interactions.
Cursor Options: Windows Ink provides different cursor options when using a stylus or pen. You can choose to display a dot or a custom cursor that simulates the appearance of a physical pencil or pen. You can experiment with different cursor styles to find the one that feels most comfortable and intuitive for your digital ink activities.
Handwriting Recognition: If you frequently use handwriting to input text, Windows Ink offers handwriting recognition capabilities. In the pen settings, you can enable or disable this feature and fine-tune its settings to ensure accurate recognition of your handwritten text, improving the overall efficiency of your digital writing experience.
By customizing your pen settings in Windows Ink, you can create a tailored and personalized digital ink experience. Whether it’s adjusting pressure sensitivity, ink color, or button functions, take the time to explore the available options and find the configuration that suits you best. Customizing your pen settings enhances your productivity, comfort, and overall satisfaction with your digital ink interactions.
Using Windows Ink with Microsoft Edge
Windows Ink seamlessly integrates with Microsoft Edge, the default web browser for Windows devices, providing a range of ink-related features to enhance your browsing experience. Whether you want to annotate web pages, highlight important information, or collaborate with others, Windows Ink in Microsoft Edge offers a powerful set of tools. Here’s how you can make the most of using Windows Ink with Microsoft Edge:
Webpage Annotation: With Windows Ink, you can write directly on web pages in Microsoft Edge, allowing you to highlight important information, make notes, or draw attention to specific elements. This feature is particularly useful for research, studying, or simply adding personal annotations while browsing the internet.
Inking on PDFs: Microsoft Edge also supports ink annotation on PDF documents. Whether you’re reviewing a digital report, signing a contract, or collaborating on a project, Windows Ink enables you to write, draw, and highlight directly on PDF files within the browser. This functionality eliminates the need for external PDF annotation tools.
Text Highlighting: Windows Ink in Microsoft Edge allows you to highlight text on web pages, making it easier to remember or reference important information. Whether you’re conducting research, studying, or collecting quotes, the ability to highlight text directly within the browser helps you stay organized and retain key details.
Ink Clip: Windows Ink in Microsoft Edge includes an Ink Clip feature that allows you to capture screenshots of web pages and annotate them using the available ink tools. This feature is particularly useful when you want to save and share specific sections of a webpage, add comments, or mark up important areas.
Sharing Ink Clips: Once you’ve annotated a webpage or an Ink Clip, you can easily share it with others. With just a few clicks, you can send the annotated image to colleagues, friends, or anyone who needs to view or collaborate on the content. This makes it simpler to communicate ideas, provide feedback, or engage in collaborative discussions.
OneNote Integration: With Windows Ink and Microsoft Edge, you can send inked web pages or Ink Clips directly to OneNote, Microsoft’s note-taking application. This integration allows you to easily organize and save inked content for future reference, creating a centralized digital workspace for all your annotated web materials.
Cortana Integration: Windows Ink in Microsoft Edge extends its functionality with Cortana, Microsoft’s virtual assistant. By highlighting text within a webpage, you can right-click and select “Ask Cortana” to obtain relevant information or perform quick searches without leaving the browser.
Collaboration and Sharing: Windows Ink in Microsoft Edge promotes collaboration by enabling real-time sharing of inked web pages or Ink Clips. Whether you’re working on a group project or providing feedback on a website design, the ability to collaborate and co-annotate with others enhances team productivity and facilitates effective communication.
Using Windows Ink with Microsoft Edge offers a range of ink-related features and functionalities, allowing you to make the most of your browsing experience. Whether you’re annotating web pages, highlighting text, or collaborating with others, Windows Ink in Microsoft Edge brings the power of digital ink directly into your web browsing activities.
Using Windows Ink with OneNote
Windows Ink seamlessly integrates with OneNote, Microsoft’s note-taking application, unlocking a range of powerful ink-related features that enhance your digital note-taking experience. Whether you’re a student, professional, or someone who loves to jot down ideas, using Windows Ink with OneNote provides a flexible and intuitive platform for capturing, organizing, and expressing your thoughts. Here’s how you can make the most of Windows Ink with OneNote:
Inking and Drawing: With Windows Ink, you can write, draw, and annotate directly on your digital notes in OneNote. Whether you’re using a stylus, pen, or even your finger, the ink input is accurately captured, allowing you to create handwritten notes, sketches, and diagrams with ease. The seamless integration between Windows Ink and OneNote ensures a natural and intuitive note-taking experience.
Ink-to-Text Conversion: One of the standout features of Windows Ink with OneNote is the ink-to-text conversion functionality. This powerful tool can convert your handwritten ink into typed text, making it easier to search, organize, and edit your notes. Simply write naturally, select the handwritten ink, and choose the “Ink to Text” option to convert it into editable text.
Ink Shapes and Highlighters: Windows Ink in OneNote allows you to easily create and annotate with shapes and highlighters. From drawing perfect circles and squares to underlining and highlighting important sections, these tools help you visually organize and emphasize key information within your notes.
Ink Effects and Colors: Windows Ink offers a variety of ink effects and colors within OneNote to make your notes more visually appealing and engaging. Choose from different pen styles, colors, and thicknesses to add a personal touch to your digital ink. The ability to switch between various ink options adds versatility and creativity to your note-taking process.
Ink Replay: Windows Ink with OneNote introduces the Ink Replay feature, which allows you to replay your ink strokes in real-time. This feature can be particularly useful for reviewing your notes or explaining concepts. By replaying your inked actions step-by-step, you can reinforce understanding and improve retention of the discussed topics.
Ink Math Assistant: OneNote, with Windows Ink integration, offers the Ink Math Assistant, a powerful tool for solving equations and math problems. Simply handwrite an equation or mathematical expression, and OneNote will convert it into digital text and provide a step-by-step solution or offer related mathematical concepts.
Inserting Images and Files: Windows Ink in OneNote lets you insert images or files directly into your notes. You can effortlessly drag and drop images or files onto your digital notebook, and then annotate and draw on them as needed. This feature makes it easy to incorporate screenshots, diagrams, or external files into your notes.
Sharing and Collaboration: Windows Ink enhances collaboration in OneNote by enabling real-time sharing and co-editing of inked notes. Whether you’re working on a group project or sharing meeting minutes, the ability to collaborate and co-annotate with others fosters effective communication and improves team productivity.
Using Windows Ink with OneNote revolutionizes the way you take and manage digital notes. The seamless integration of Windows Ink’s ink-related features with the powerful note-taking functionalities of OneNote provides an intuitive and versatile platform for capturing ideas, organizing thoughts, and expressing your creativity.
Using Windows Ink with Maps
Windows Ink seamlessly integrates with Maps, the mapping application in Windows, providing a unique and interactive experience for exploring the world. With the power of digital ink, you can mark locations, draw routes, and add personalized notes directly on the maps. Whether you’re planning a trip, navigating to a destination, or simply exploring, using Windows Ink with Maps offers a range of functionalities to enhance your mapping experience. Here’s how you can make the most of it:
Marking Locations: With Windows Ink, you can mark specific locations on the map using digital ink. Whether it’s a favorite restaurant, a must-visit tourist attraction, or the location of an upcoming event, simply use your stylus or pen to draw and annotate directly on the map. This makes it easier to remember and locate important places.
Drawing Routes: Windows Ink in Maps allows you to draw routes directly on the map using digital ink. Whether you’re planning a road trip or simply exploring new paths, trace your desired route with your stylus or pen, and the map will display the selected path. This feature is especially useful for visualizing and customizing your travel routes.
Adding Notes: Windows Ink in Maps lets you add personalized notes directly on the map. Whether it’s a restaurant recommendation, a travel tip, or an interesting fact about a location, write or draw your note using your stylus or pen, and it will be attached to the specific point on the map. This simplifies the process of saving and retrieving information about various locations.
Conducting Local Searches: Windows Ink integration in Maps enables you to conduct local searches for businesses or points of interest. You can write or type your search query using your stylus or pen, and Maps will display relevant results on the map. This feature allows for easy discovery and exploration of nearby places.
Exploring Maps in 3D: Windows Ink with Maps offers the option to view maps in 3D. This immersive experience allows you to rotate, tilt, and zoom the map using touch or your stylus to explore an area from different angles. This feature adds depth and detail to your exploration, making it feel more interactive and engaging.
Planning and Saving Routes: With Windows Ink and Maps, you can plan and save customized routes for future reference. By drawing your desired route and adding notes, you can create personalized itineraries or save alternative routes. This feature is particularly useful for travelers, hikers, or anyone who wants to have a record of their preferred paths.
Collaborating with Others: Windows Ink allows for collaboration in Maps, enabling you to share and co-annotate maps with others in real-time. Whether you’re planning a trip with friends or conducting a business meeting, the ability to work together on a shared map enhances communication, decision-making, and overall productivity.
Using Ink Gestures: Windows Ink in Maps supports touch and stylus gestures. You can use touch gestures, such as pinch-to-zoom and swipe-to-pan, to easily navigate and explore the map. Stylus gestures, such as double-tap and hold, can be used to initiate specific commands or access contextual menus, making your interaction with the map more efficient and intuitive.
Using Windows Ink with Maps offers a dynamic and interactive way to explore the world. Whether you’re marking locations, drawing routes, or adding personalized notes, Windows Ink enhances your mapping experience and aids in planning, navigating, and discovering the places that matter to you.
Using Windows Ink with Photos
Windows Ink seamlessly integrates with Photos, the default image viewer in Windows, providing a unique and creative way to enhance and personalize your photos. With the power of digital ink, you can add annotations, draw, and unleash your creativity directly on your images. Whether you want to highlight special moments, add captions, or simply let your imagination run wild, using Windows Ink with Photos offers a range of functionalities to make your photos more engaging and meaningful. Here’s how you can make the most of it:
Adding Annotations: With Windows Ink, you can add handwritten notes, captions, or personalized messages directly on your photos. Whether you’re marking a special occasion, adding context, or sharing memories, simply use your stylus or pen to write or type directly on the image. This feature adds a personal touch and makes your photos more informative and expressive.
Drawing and Doodling: Windows Ink in Photos allows you to draw, doodle, and create artwork directly on your images. Whether it’s highlighting specific details, adding artistic effects, or simply letting your imagination run wild, the range of drawing tools and colors provide endless creative possibilities for you to enhance your photos.
Emphasizing Details: Windows Ink in Photos enables you to highlight and emphasize specific parts of your images. Whether you want to draw attention to a particular subject, highlight a detail, or enhance an area, using digital ink tools allows you to add emphasis and focus to certain elements within your photos.
Adding Arrows and Shapes: Windows Ink with Photos provides tools to add arrows and shapes to your images. Whether you want to point out something, highlight a specific area, or add stylistic elements, this feature allows you to easily add arrows, circles, rectangles, or other geometric shapes with precision and creativity.
Ink Effects and Filters: Windows Ink in Photos offers a variety of ink effects and filters to apply to your images. From pencil sketches to watercolor or oil paintings, these effects give your photos a unique and artistic touch. Experimenting with different effects can completely transform the mood and appearance of your photos.
Cropping and Resizing: Windows Ink with Photos allows you to crop and resize your photos using digital ink. Whether you want to create custom aspect ratios, crop out unwanted elements, or resize your photos for specific purposes, the ability to draw and define your crop or resize area gives you more control and flexibility in editing and customizing your images.
Sharing and Collaborating: Windows Ink makes it easy to share your inked photos with others. You can simply save the edited image and share it via email, messaging apps, or social media. Windows Ink also enables collaboration by allowing multiple users to ink and edit photos simultaneously. This collaborative feature enhances communication and creativity, making it perfect for team projects or group editing sessions.
Undo and Redo: Windows Ink with Photos offers the ability to undo and redo your ink markings, providing the flexibility to experiment and refine your edits. Whether you’re trying different annotations, drawings, or effects, the undo and redo functionality ensures that you can easily revert or restore changes, giving you the freedom to explore and perfect your edits.
Using Windows Ink with Photos offers a versatile and imaginative approach to editing and personalizing your images. Whether you’re adding annotations, drawing, emphasizing details, or applying creative effects, Windows Ink provides a range of tools and functionalities that empower you to transform your photos into unique and visually captivating works of art.