
Changing the Screenshot Settings
Customizing the screenshot settings on your HP Envy laptop can streamline the process of capturing and saving screenshots. By adjusting the settings according to your preference, you can ensure that the screenshots are saved in the desired location and format. Here’s how to change the screenshot settings on an HP Envy:
1. Open the “Settings” menu on your HP Envy laptop. You can do this by clicking on the Windows icon in the bottom left corner of the screen and selecting “Settings” from the menu.
2. In the “Settings” window, click on the “System” option.
3. From the left sidebar, select “Clipboard.”
4. Under the “Clipboard” section, locate the “Clipboard History” toggle switch and ensure that it is turned on. This allows you to capture multiple screenshots and access them later.
5. To change the screenshot storage location, click on the drop-down menu under the “Screenshot” section and choose your preferred folder or location.
6. In the same section, you can also adjust the format of the screenshots by clicking on the drop-down menu under the “Save as” option. You can choose between JPEG, PNG, or GIF formats.
7. If you want to enable the “Print Screen” key to capture the entire screen, make sure the “Print Screen shortcut” toggle switch is turned on.
8. Once you have made all the desired changes, close the “Settings” window, and the new screenshot settings will be saved.
By customizing the screenshot settings on your HP Envy laptop, you can simplify the process of capturing and managing screenshots. Whether you need to capture a full-screen screenshot or a specific portion of the screen, adjusting these settings will ensure that the screenshots are saved in the format and location that best suit your needs.
Keep in mind that these instructions may vary slightly depending on the version of Windows and the specific model of your HP Envy laptop. However, the general process should be similar across different versions and models.
Using the Print Screen Key
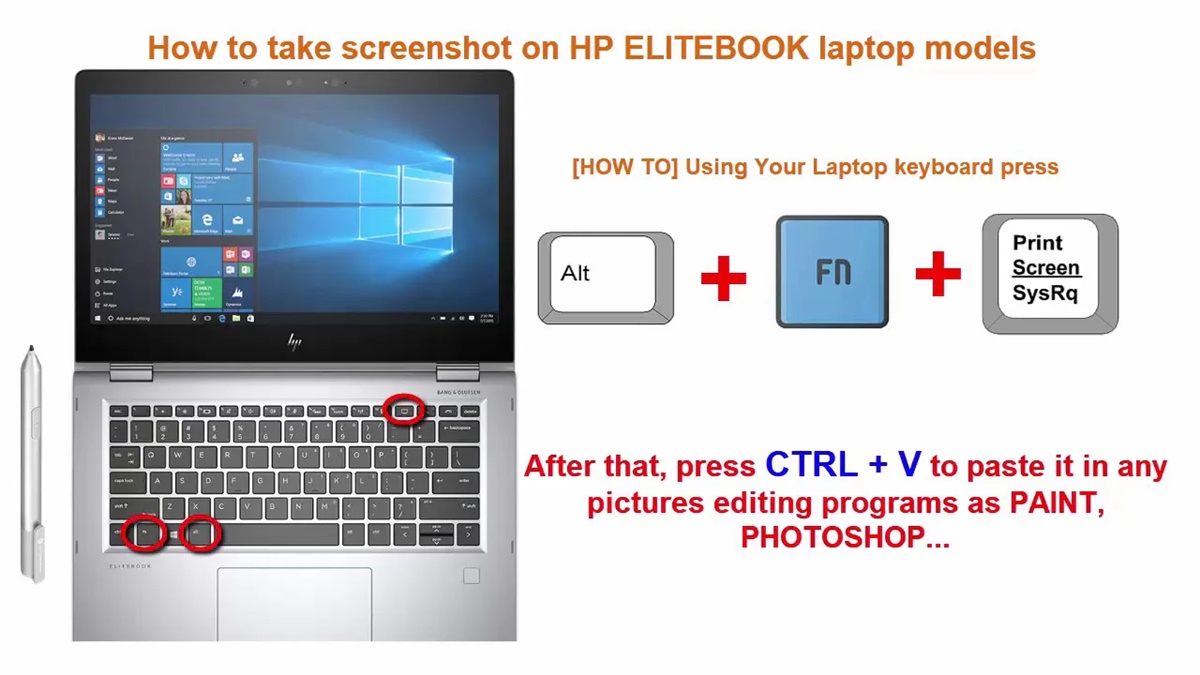
The Print Screen key, often labeled as “PrtScn” on your HP Envy laptop keyboard, is a quick and convenient way to capture the entire screen as a screenshot. Utilizing this key allows you to capture pictures, error messages, or any content displayed on your screen with just a single button press. Here’s how to use the Print Screen key on an HP Envy:
1. Locate the Print Screen key on your HP Envy laptop keyboard. It is usually positioned in the top row, near the function keys (F1, F2, etc.), and may be labeled as “PrtScn” or a variation of that.
2. Ensure that you have the desired content visible on your screen that you want to capture. This could be a webpage, a document, or any other application window.
3. Press the Print Screen key once. You won’t see any visual indication that the screenshot has been taken.
4. Open an application where you can paste the captured screenshot. This can be a photo editing software, Microsoft Word, or even an email draft.
5. Press the Ctrl + V keys simultaneously or right-click and select “Paste” to insert the screenshot into the application. The screenshot will be added as an image.
6. Edit or save the screenshot as required. You can crop, resize, or annotate the screenshot using the editing features of the selected application.
7. To save the screenshot as an image file, click on “File” in the menu bar and select “Save As.” Choose a location on your HP Envy laptop where you want to save the screenshot, give it a name, and select a file format (such as JPEG or PNG).
Using the Print Screen key is a straightforward method to capture the entire screen as a screenshot on your HP Envy laptop. It provides a quick and efficient way to save and share content displayed on your screen without the need for any additional software or tools.
Keep in mind that the Print Screen key may have different functionalities depending on the specific model and version of your HP Envy laptop. If the above method doesn’t work, you can also try using the Print Screen key in combination with the Fn key or other function keys on your keyboard.
Using the Windows Snipping Tool
The Windows Snipping Tool is a built-in screenshot tool available on HP Envy laptops running Windows operating systems. It provides various snipping options to capture specific portions of the screen, making it ideal for highlighting specific information or capturing complex images. Here’s how to use the Windows Snipping Tool on your HP Envy:
1. Open the Windows Snipping Tool by typing “Snipping Tool” into the Windows search bar and selecting it from the search results.
2. Once the Snipping Tool window opens, click on the “New” button. This will activate the snipping mode.
3. The Snipping Tool will give you multiple options to capture a screenshot:
- Rectangular Snip: Allows you to draw a rectangular shape around the desired area to capture.
- Window Snip: Enables you to select a specific window or application to capture.
- Full-screen Snip: Captures the entire screen as a screenshot.
- Free-form Snip: Provides the freedom to draw any shape around the content you want to capture.
4. Select the snipping option that best suits your needs and proceed to capture the desired content by dragging the cursor around the area you want to include in the screenshot.
5. After you release the mouse button, the captured screenshot will open in the Snipping Tool editor. Here, you can make annotations, highlight specific areas, or add text to the screenshot if necessary.
6. To save the screenshot, click on “File” in the Snipping Tool editor’s menu bar and select “Save As.” Choose a location on your HP Envy laptop where you want to save the screenshot, provide a name for the file, and select a file format (such as JPEG or PNG).
The Windows Snipping Tool offers a versatile and user-friendly way to capture specific portions of the screen on your HP Envy laptop. It allows for customization and precise selection, making it an excellent tool for capturing screenshots that require detailed focus.
Note that the Windows Snipping Tool may not be available in newer versions of Windows. In those cases, you can use the Snip & Sketch app or explore third-party screenshot tools for similar functionalities.
Using the Snip & Sketch App
The Snip & Sketch app is a powerful and intuitive screenshot tool available on newer HP Envy laptops running Windows 10. It offers advanced annotation features and multiple snipping options to capture and edit screenshots with ease. Here’s how to use the Snip & Sketch app on your HP Envy:
1. Open the Snip & Sketch app by typing “Snip & Sketch” into the Windows search bar and selecting it from the search results.
2. Once the app is open, click on the “New” button in the top-left corner of the window to start a new snip.
3. The Snip & Sketch app offers several screenshot modes:
- Rectangular Snip: Allows you to draw a rectangular shape around the desired area to capture.
- Window Snip: Enables you to select a specific window or application to capture.
- Full-screen Snip: Captures the entire screen as a screenshot.
- Free-form Snip: Provides the freedom to draw any shape around the content you want to capture.
4. Select the snipping mode that suits your screenshot requirement and capture the desired content by following the on-screen instructions.
5. After capturing the screenshot, the Snip & Sketch app will open a new window with the screenshot displayed. Here, you can use various annotation tools such as a pen, highlighter, and eraser to edit and enhance the screenshot.
6. To save the screenshot, click on the disk icon in the top-right corner of the Snip & Sketch app window. Choose a location on your HP Envy laptop where you want to save the screenshot, provide a name for the file, and select a file format (such as JPEG or PNG).
The Snip & Sketch app provides a seamless and efficient way to capture and edit screenshots on your HP Envy laptop. With its versatile snipping options and powerful annotation tools, you can capture and enhance screenshots to meet your specific needs.
Note that the Snip & Sketch app is available on Windows 10 and may not be pre-installed on older Windows versions. If you are using a different version of Windows, you can explore other built-in or third-party screenshot tools to capture and edit screenshots.
Using the PrtScn Button with Windows Ink Workspace
The PrtScn (Print Screen) button on your HP Envy laptop can be used in combination with the Windows Ink Workspace to capture and annotate screenshots. This feature is particularly useful for those who prefer a more interactive and creative approach to screenshotting. Here’s how to use the PrtScn button with Windows Ink Workspace on your HP Envy:
1. Press the PrtScn button on your keyboard to capture a screenshot of the entire screen. You won’t see any visual indication that the screenshot has been taken.
2. Press the Windows key or click on the Windows icon in the bottom left corner of the screen to open the Start menu.
3. Scroll down the list of apps and select “Windows Ink Workspace.” If Windows Ink Workspace is not visible, type “Windows Ink Workspace” in the search bar and select it from the results.
4. In the Windows Ink Workspace, you will see your captured screenshot displayed as a thumbnail under the “Sketchpad” section.
5. Click on the screenshot thumbnail to open it in the Windows Ink Workspace sketchpad. Here, you can use various ink tools such as the pen, highlighter, and eraser to annotate and mark up the screenshot.
6. To save the annotated screenshot, click on the disk icon in the top-right corner of the Windows Ink Workspace window. Choose a location on your HP Envy laptop where you want to save the screenshot, provide a name for the file, and select a file format (such as JPEG or PNG).
Using the PrtScn button with Windows Ink Workspace offers a unique and interactive way to capture and annotate screenshots on your HP Envy laptop. It allows for creative expression and the ability to add handwritten notes or drawings directly onto the screenshots.
Note that the availability and functionality of Windows Ink Workspace may vary depending on the version of Windows and your specific HP Envy model. If you don’t see Windows Ink Workspace or encounter any issues, refer to the user manual or online resources specific to your laptop model to ensure compatibility and obtain further guidance.
Using Third-Party Software
In addition to the built-in screenshot tools on your HP Envy laptop, there is a wide range of third-party software available that offers advanced features and customization options for capturing and editing screenshots. These tools can provide additional functionality and flexibility depending on your specific needs. Here’s how to use third-party software to take screenshots on your HP Envy:
1. Identify a reliable third-party screenshot software that suits your requirements. Some popular options include Snagit, Greenshot, Lightshot, and ShareX.
2. Go to the official website of the selected software and download it onto your HP Envy laptop. Follow the installation instructions to set up the software on your system.
3. Once installed, open the third-party screenshot software. The user interface may vary depending on the software you choose.
4. Familiarize yourself with the features and settings provided by the software. These can include various capturing modes (such as full-screen, window, or custom area), different file formats, annotation tools, and sharing options.
5. Configure the software’s settings according to your preferences. This may include setting a default saving location, choosing a desired file format, or customizing hotkeys for quick screenshot capture.
6. With the software open and configured, select the desired capturing option, such as full-screen, window, or custom area, to capture the screenshot.
7. Once the screenshot is captured, the software may open an editing interface where you can annotate, crop, or enhance the screenshot as required. Take advantage of the available tools and features to make precise edits or additions.
8. Save the edited screenshot by clicking on the appropriate “Save” or “Export” button within the software. Choose a location on your HP Envy laptop where you want to save the screenshot, provide a name for the file, and select a file format (such as JPEG or PNG).
Using third-party software grants you access to advanced features and greater customization options for capturing and editing screenshots on your HP Envy laptop. These tools often offer a more intuitive and extensive set of options compared to the built-in screenshot tools, allowing you to tailor the screenshot process to your specific workflow and preferences.
When choosing third-party software, ensure that you download it from trusted sources and read user reviews to confirm its reliability and compatibility with your HP Envy laptop and operating system version.