iCloud is a cloud-based service provided by Apple that allows users to store and sync their data across multiple devices. It acts as a central hub for all your digital content, including photos, videos, documents, contacts, calendars, and more. With iCloud, you can conveniently access and manage your files from your iPhone, iPad, Mac, or even a Windows computer.
The main idea behind iCloud is to create a seamless experience across all Apple devices. It enables users to effortlessly share content between their iPhone, iPad, and Mac, ensuring that their data is up to date and readily available no matter which device they are using.
When you store your data in iCloud, it automatically syncs across all your devices, keeping everything in harmony. This means that you can start a document on your Mac and easily continue working on it from your iPhone or iPad without any hassle.
Furthermore, iCloud provides a reliable backup solution for your iOS devices. It automatically backs up your data, making it easy to restore everything in case of a device failure or when setting up a new device.
iCloud also offers various other features that enhance the overall user experience. These include iCloud Drive for storing and accessing files, iCloud Photo Library for managing and sharing photos, iCloud Keychain for secure password management, Find My iPhone (or Find My Device) for locating lost or stolen devices, and more.
What is the Purpose of iCloud?
The purpose of iCloud is to simplify your digital life by securely storing your data and seamlessly syncing it across all your Apple devices. It aims to provide a unified experience, ensuring that your files, photos, contacts, and other important information are always accessible and up to date, no matter which device you are using.
One of the key purposes of iCloud is to offer a convenient backup solution. By enabling iCloud Backup on your iOS devices, your data will be automatically backed up to the cloud on a regular basis. This backup includes your device settings, app data, messages, photos, videos, and more. In case of a device failure, you can easily restore your data from iCloud and pick up where you left off.
Another purpose of iCloud is to enable seamless file sharing and collaboration across your devices. With iCloud Drive, you can securely store your documents, spreadsheets, presentations, and other files in the cloud. This allows you to access them from any device with an internet connection. Additionally, iCloud Drive supports folder sharing, making it easy to collaborate with others by granting them access to specific files or folders.
iCloud also serves the purpose of providing a central location for managing and organizing your photos. With iCloud Photo Library, all your photos and videos are automatically uploaded to your iCloud account, making them accessible and synchronized across all your devices. This feature offers a convenient way to view, edit, and share your memories, eliminating the need for manual transfers or storage limitations.
Furthermore, iCloud serves as a secure repository for your personal information. iCloud Keychain allows you to store and sync your passwords, credit card information, and other confidential data across your devices. This ensures that your sensitive information is readily available when you need it while maintaining robust encryption and protection.
The purpose of iCloud is to provide a seamless and integrated experience for Apple users, allowing them to effortlessly access, manage, and share their data across their devices. It simplifies the way you work, play, and connect by ensuring that your digital content is always within reach.
What are the Main Features of iCloud?
iCloud offers a wide range of features designed to enhance the functionality and convenience of your Apple devices. Let’s take a look at some of the key features of iCloud:
1. iCloud Backup: With iCloud Backup, your iOS devices are automatically backed up to the cloud on a regular basis. This ensures that your important data, including app data, settings, photos, and more, is securely stored and can be easily restored in case of a device failure or when setting up a new device.
2. iCloud Drive: iCloud Drive allows you to store your files in the cloud and access them from any device. You can organize your documents, spreadsheets, presentations, and other files into folders, making it easy to keep everything organized and accessible. iCloud Drive also supports folder sharing, enabling collaboration with others by granting them access to specific files or folders.
3. iCloud Photo Library: iCloud Photo Library automatically uploads and syncs your photos and videos across all your devices. This means that when you capture a photo on your iPhone, it will instantly be available on your iPad and Mac as well. You can also share albums with friends and family, and any edits or changes you make to your photos will be reflected across all your devices.
4. iCloud Keychain: iCloud Keychain securely stores your passwords, credit card information, and other sensitive data across your devices. It allows you to autofill passwords, making it convenient to log in to websites and apps. Your information is encrypted and protected with two-factor authentication, ensuring that your personal data remains secure.
5. Find My iPhone (or Find My Device): This feature helps you locate and track your lost or stolen devices. You can use the Find My app on another Apple device or log in to icloud.com to locate your device on a map, play a sound to help you find it, remotely lock it, or erase your personal data to protect your privacy.
6. iCloud Mail, Contacts, and Calendar: iCloud provides email, contact, and calendar services, allowing you to easily manage your communications and schedule across your devices. Any changes or updates you make to your contacts or events are automatically synced and reflected on all your devices.
7. iCloud Notes: With iCloud Notes, you can create and organize your notes on one device, and they will sync across all your devices, ensuring that you have access to your notes wherever you go. This feature also supports collaboration, allowing you to share notes with others for joint editing.
8. iCloud Safari: With iCloud Safari, your browsing history, bookmarks, and open tabs are synced across all your devices. This means that you can start browsing on your iPhone and seamlessly continue on your Mac or iPad.
These are just a few of the main features that iCloud offers. By utilizing these features, you can enjoy a seamless and integrated experience across all your Apple devices, ensuring that your data is always accessible and up to date.
How to Set Up iCloud on Your Apple Device?
Setting up iCloud on your Apple device is a straightforward process that allows you to access and manage your data across multiple devices. Here’s a step-by-step guide on how to set up iCloud:
1. Update your device: Make sure that your device is running the latest version of iOS, iPadOS, or macOS. To check for updates, go to “Settings” on your iPhone or iPad, or click on the Apple menu and select “System Preferences” on your Mac.
2. Enable iCloud: On your iPhone, iPad, or iPod touch, open the “Settings” app, tap on your name at the top, and then select “iCloud”. On your Mac, go to the Apple menu, click on “System Preferences”, and then choose “iCloud”.
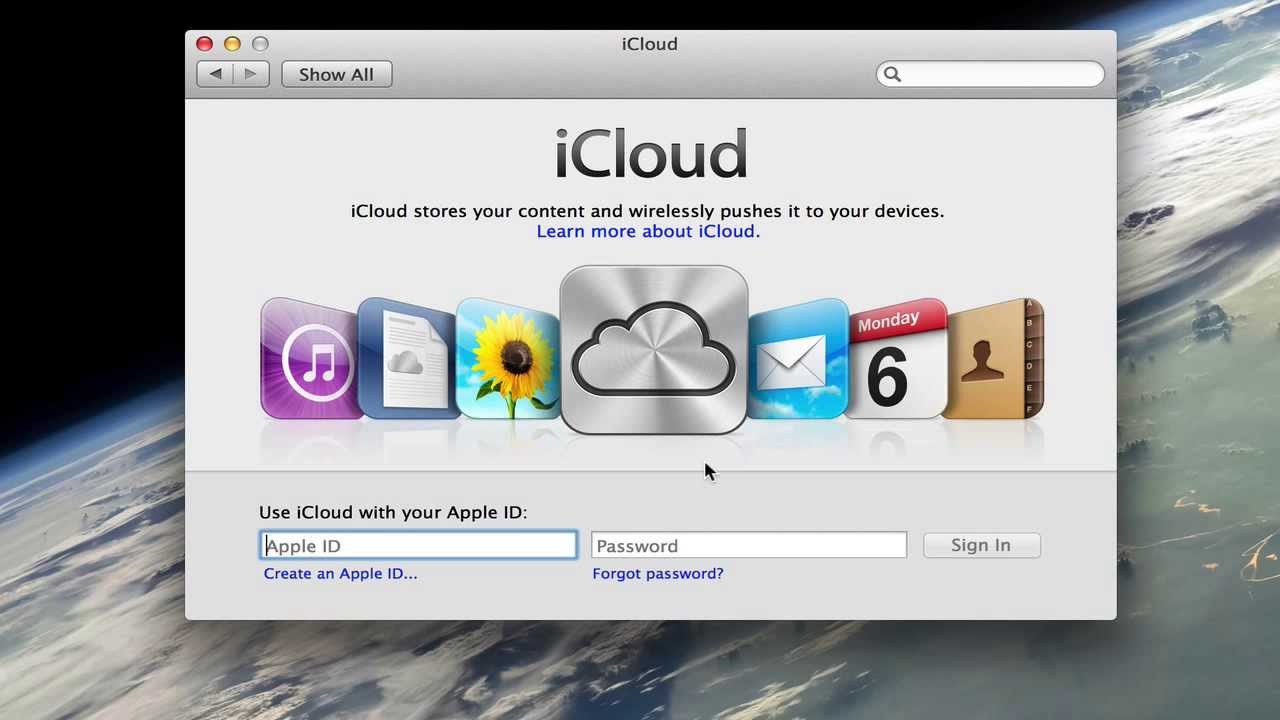
3. Sign in to iCloud: Enter your Apple ID and password to sign in to your iCloud account. If you don’t have an Apple ID, you can create one during the setup process.
4. Select the data to sync: Toggle on or off the options for the types of data you want to sync with iCloud, such as Photos, Contacts, Calendars, Notes, and more. You can also choose to enable iCloud Backup to back up your device automatically.
5. Manage storage: If you need more storage space on iCloud, you can choose to upgrade your storage plan. Alternatively, you can click on “Manage Storage” to see a breakdown of how your storage is being used and delete unnecessary files to free up space.
6. Set up iCloud on other devices: Repeat the above steps on any other Apple devices you want to sync with iCloud. Your data will automatically be synced across all devices logged in to the same iCloud account.
7. Configure iCloud settings: On your device, go to “Settings” or “System Preferences” and select “iCloud” to access further options and settings for specific apps and features. Here, you can customize your iCloud experience according to your preferences.
By following these steps, you can easily set up iCloud on your Apple device and begin enjoying the benefits of seamless data syncing and backup.
How to Access iCloud on a Computer?
Accessing iCloud on a computer allows you to manage your data, view your files, and make changes to your account settings. Whether you’re using a Windows PC or a Mac, here’s how you can access iCloud on your computer:
For Windows PC:
1. Download and Install iCloud for Windows: Visit the Apple website and download iCloud for Windows. Once the download is complete, run the installer and follow the on-screen instructions to install the application on your computer.
2. Sign in to your iCloud Account: Launch iCloud for Windows and sign in using your Apple ID and password. Make sure to use the same Apple ID that you use on your other Apple devices.
3. Select iCloud Features: Choose the features you want to use on your Windows PC, such as iCloud Drive, iCloud Photos, iCloud Mail, and more. You can also set the folder locations for iCloud Drive and Photos if desired.
4. Access and Manage your iCloud Data: Once signed in, you can access your iCloud files and data through File Explorer (Windows Explorer) on your PC. iCloud Drive will appear as a separate folder, and you can browse, upload, download, and manage your files as needed. You can also access your iCloud mail through the Mail app on your PC.
For Mac:
1. Open System Preferences: Click on the Apple menu on the top-left corner of your Mac screen and select “System Preferences” from the drop-down menu.
2. Choose Apple ID: In the System Preferences window, click on “Apple ID” and then select “iCloud” from the sidebar.
3. Sign in to your iCloud Account: Enter your Apple ID and password to sign in to your iCloud account.
4. Select iCloud Features: Enable the features you want to use on your Mac, such as iCloud Drive, iCloud Photos, iCloud Mail, and more. You can also manage your iCloud storage and upgrade your plan if needed.
5. Access and Manage your iCloud Data: Once signed in, you can access your iCloud files, photos, and other data through the Finder app on your Mac. iCloud Drive will appear in the sidebar, allowing you to easily access and manage your files. You can also access your iCloud mail and other services through the respective apps on your Mac.
By following these steps, you can easily access and manage your iCloud data on both Windows PC and Mac, allowing you to seamlessly work with your files and access your iCloud services on a computer.
How to Back Up Your Data to iCloud?
Backing up your data to iCloud is an essential step in ensuring the security and safety of your important files on your Apple devices. Here’s a guide on how to back up your data to iCloud:
Automatic Backup:
1. Enable iCloud Backup: On your iOS device, go to “Settings” and tap on your name at the top. Then, select “iCloud” and choose “iCloud Backup”. Toggle on the “iCloud Backup” switch.
2. Trigger Backup: Your device will automatically back up to iCloud when it is connected to Wi-Fi, locked, and charging. Make sure you have enough iCloud storage space to accommodate the backup.
Manual Backup:
1. On iPhone, iPad, or iPod touch:
– Connect your device to Wi-Fi.
– Go to “Settings” and tap on your name at the top.
– Select “iCloud” and then “iCloud Backup”.
– Tap on “Back Up Now”.
– Stay connected to Wi-Fi until the backup is complete.
2. On Mac:
– Connect your Mac to a reliable Wi-Fi network.
– Click on the Apple menu and select “System Preferences”.
– Choose the Apple ID pane and click on the “iCloud” tab.
– Tick the “iCloud Drive” checkbox to enable it.
– Open Finder, click on “Go” in the menu bar, and select “iCloud Drive”.
– Copy and paste the files or folders you want to back up into your iCloud Drive.
Verify Backup:
1. On iPhone, iPad, or iPod touch:
– Go to “Settings”, tap on your name at the top, and select “iCloud”.
– Choose “iCloud Backup” and review the time and date of your last backup.
2. On Mac:
– Click on the Apple menu, go to “System Preferences”, and choose “Apple ID”.
– Select the “iCloud” tab and click on “Manage”.
– In the left sidebar, click on “Backups”.
– Review the details of your last backup.
Restore From iCloud Backup:
1. On iPhone, iPad, or iPod touch:
– During the device setup process or after a factory reset, choose “Restore from iCloud Backup”.
– Sign in to your iCloud account and select the relevant backup to restore from.
2. On Mac:
– During the setup process or after performing a fresh installation of macOS, choose “Restore from a Time Machine Backup”.
– Sign in to your iCloud account and follow the prompts to restore from your iCloud backup.
By following these steps, you can easily back up your data to iCloud, ensuring that your important files, settings, and app data are safely stored and can be restored whenever needed. Regular backups provide peace of mind and protect your valuable data from potential loss.
How to Sync Your Devices with iCloud?
Syncing your devices with iCloud allows you to keep your data and settings updated across multiple Apple devices. Whether you have an iPhone, iPad, Mac, or other Apple devices, here’s how you can sync them with iCloud:
Enable iCloud Sync:
1. On iPhone, iPad, or iPod touch:
– Go to “Settings”.
– Tap on your name at the top.
– Select “iCloud” and make sure the relevant options, such as Contacts, Calendars, Reminders, Notes, and more, are toggled on.
2. On Mac:
– Click on the Apple menu and select “System Preferences”.
– Choose the Apple ID pane.
– Click on “iCloud” and ensure that the desired options, such as Contacts, Calendars, Notes, and more, are checked.
Sync Contacts, Calendars, and Reminders:
1. On iPhone, iPad, or iPod touch:
– Go to “Settings” and tap on your name at the top.
– Select “iCloud” and make sure “Contacts”, “Calendars”, and “Reminders” are toggled on.
2. On Mac:
– Open the Contacts, Calendar, or Reminders app.
– Click on the “Preferences” option in the app menu.
– Select the “Accounts” tab and make sure “iCloud” is enabled for syncing contacts, calendars, and reminders.
Sync Notes:
1. On iPhone, iPad, or iPod touch:
– Go to “Settings”.
– Tap on your name at the top.
– Select “Notes” and toggle on “Sync”.
2. On Mac:
– Open the Notes app.
– Click on “Notes” in the menu bar and select “Preferences”.
– Choose the “Accounts” tab and make sure “iCloud” is selected for syncing notes.
Sync Safari Bookmarks and Reading List:
1. On iPhone, iPad, or iPod touch:
– Go to “Settings”.
– Tap on your name at the top.
– Select “iCloud”.
– Toggle on “Safari”.
2. On Mac:
– Open Safari.
– Click on “Safari” in the menu bar and select “Preferences”.
– Choose the “General” tab and ensure that “Sync bookmarks” and “Add reading list items” are checked.
By following these steps, you can easily sync your contacts, calendars, reminders, notes, and Safari bookmarks across all your Apple devices. This ensures that your data is always up to date, and any changes made on one device will be reflected on all your other devices. Syncing with iCloud provides a seamless and integrated experience, allowing you to access and manage your information effortlessly.
How to Share Files and Documents Using iCloud?
iCloud provides a convenient and seamless way to share files and documents with others, whether they are using Apple devices or not. Here’s a guide on how to share files and documents using iCloud:
Using iCloud Drive:
1. Upload Files to iCloud Drive: Save your files and documents to iCloud Drive. On iPhone, iPad, or iPod touch, go to the Files app, tap on “Browse”, and select “iCloud Drive”. On Mac, open Finder, and select iCloud Drive from the sidebar.
2. Share Files via the Files App: On your iOS device, locate the file you want to share in the Files app and press-and-hold on it. Select “Share” and choose the sharing method, such as AirDrop, Messages, Mail, or any other compatible app. You can also generate a sharing link that can be sent via any messaging platform.
Using Shared Folders:
1. Create a Shared Folder: On your iPhone, iPad, or iPod touch, open the Files app, go to iCloud Drive, and tap on the “Select” button in the top-right corner. Choose the files and folders you want to share, tap on the share icon, and select “Add People”. Follow the prompts to set up sharing permissions and invite others to collaborate.
2. Access and Collaborate on Shared Folders: Once you’ve shared a folder, others can access it by clicking on the link you shared with them. They can open the link on their iOS device, Mac, or even a Windows PC with iCloud for Windows installed. Collaborators can add, edit, or delete files within the shared folder, making it a powerful tool for collaboration.
Using Keynote, Pages, and Numbers:
1. Collaborate in Real-time on Documents: On your iOS device, open the Keynote, Pages, or Numbers app and create a new document or open an existing one. Tap on the “…” menu and select “Collaborate with Others”. Invite others via their email address or by generating a sharing link. Collaborators can then join in real-time and make edits to the document.
2. Share a Copy of the Document: If you prefer not to collaborate in real-time, you can also share a copy of your Keynote, Pages, or Numbers document. Tap on the “…” menu, select “Share”, and choose the sharing method, such as AirDrop, Messages, Mail, or any other compatible app. This will create a separate copy of the document for the recipient to view or edit.
Using these methods, you can easily share files and documents with others using iCloud. Whether you want to share individual files, collaborate on shared folders, or work on documents in real-time, iCloud offers a seamless and efficient way to collaborate and share information with others.
How to Use iCloud Drive?
iCloud Drive is a powerful feature of iCloud that allows you to store, access, and manage your files across all your Apple devices. Here’s a guide on how to use iCloud Drive:
Accessing iCloud Drive:
1. On iPhone, iPad, or iPod touch: Open the Files app, which is pre-installed on iOS devices. Tap on “Browse” at the bottom and select “iCloud Drive” to access your files.
2. On Mac: Open a Finder window, and you’ll find iCloud Drive listed in the sidebar. Click on it to access your files and folders stored in iCloud Drive.
Uploading Files to iCloud Drive:
1. On iPhone, iPad, or iPod touch:
– Tap on the Files app and select the location where you want to upload the file.
– Tap on the “…” button at the top-right corner and choose “Upload” or “New Folder” if you want to create a new folder for the file.
– Select the file from your device’s storage or from an external source.
– Tap on “Upload” to start uploading the file to iCloud Drive.
2. On Mac:
– Open a Finder window and navigate to the location where you want to upload the file.
– Click on “File” in the menu bar and select “Upload to iCloud Drive” or “New Folder” to create a new folder for the file.
– Choose the file from your Mac’s storage or another location.
– Click on “Upload” to upload the file to iCloud Drive.
Organizing Files and Folders:
1. On iPhone, iPad, or iPod touch:
– In the Files app, tap and hold a file or folder until it enters editing mode.
– Drag the file/folder to move it to a different location within iCloud Drive or into a folder.
– You can also tap on the “…” button and select “Copy”, “Duplicate”, “Rename”, or “Delete” to manage files and folders.
2. On Mac:
– In a Finder window, click and hold a file or folder to activate the drag-and-drop feature.
– Drag the file/folder to move it to a desired location within iCloud Drive or into a folder.
– You can also right-click on a file or folder to access options like “Copy”, “Duplicate”, “Rename”, or “Move to Trash”.
Collaborating on Files:
1. On iPhone, iPad, or iPod touch:
– In the Files app, select the file you want to share or collaborate on.
– Tap on the “…” button and choose “Share”.
– Select the sharing method, such as AirDrop, Messages, Mail, or any other compatible app, to share the file with others.
2. On Mac:
– In a Finder window, select the file you want to share or collaborate on.
– Right-click on the file and choose “Share”.
– Select the sharing method, such as AirDrop, Messages, Mail, or any other compatible app, to share the file with others.
Using iCloud Drive, you can easily access, organize, and share your files across all your Apple devices. Whether you need to upload new files, create folders, or collaborate with others, iCloud Drive provides a seamless and convenient way to manage your files and documents.
What is iCloud Photo Library and How to Use It?
iCloud Photo Library is a feature of iCloud that enables you to store and sync your photos and videos across all your Apple devices. It aims to provide a seamless and convenient way to access, manage, and share your photo library. Here’s a guide on what iCloud Photo Library is and how to use it:
What is iCloud Photo Library?
iCloud Photo Library automatically uploads and stores your photos and videos in your iCloud account. It works by keeping your entire photo library in sync across all your devices, ensuring that any changes or edits made on one device are reflected on all the others. This means that when you capture a photo or shoot a video on your iPhone, it will automatically be available on your iPad, Mac, or any other device logged in to the same iCloud account.
Enabling iCloud Photo Library:
1. On iPhone, iPad, or iPod touch:
– Go to “Settings” and tap on your name at the top.
– Select “iCloud” and then “Photos”.
– Toggle on “iCloud Photos” to enable iCloud Photo Library.
2. On Mac:
– Click on the Apple menu and select “System Preferences”.
– Choose the Apple ID pane and click on “iCloud”.
– Check the box next to “Photos” to enable iCloud Photo Library.
Accessing and Managing your Photos:
1. On iPhone, iPad, or iPod touch:
– Open the Photos app to access your entire photo library.
– You can view your photos in various ways, such as “Years”, “Months”, “Days”, or “All Photos”.
– Tap on a photo to view it in fullscreen and swipe to browse through your collection.
– Use the search feature to find specific photos based on people, places, or categories.
2. On Mac:
– Open the Photos app on your Mac.
– Your entire photo library will be accessible, and you can browse photos using different views, such as “Years”, “Collections”, or “Moments”.
– Double-click on a photo to view it in fullscreen mode.
– Utilize the search option to locate specific photos based on people, places, or keywords.
Editing and Sharing Photos:
1. On iPhone, iPad, or iPod touch:
– Open a photo in the Photos app.
– Tap on the edit icon (three sliders) to access editing tools like crop, filters, adjustments, and more.
– Make the desired changes and tap on “Done” to save your edits.
– To share a photo, tap on the share icon and choose the sharing method, such as Messages, Mail, or social media platforms.
2. On Mac:
– Launch the Photos app on your Mac.
– Select the photo you want to edit and click on the “Edit” button (three sliders) in the toolbar.
– Utilize the editing tools like adjust, crop, filters, and more to enhance your photo.
– Once you’re satisfied with the edits, click on “Done”.
– To share a photo, select it and click on the share button (box with arrow), then choose the sharing method.
Optimizing Storage:
1. iCloud Photos: When enabled, your device will store optimized versions of your photos and videos while keeping the original full-resolution copies in iCloud. This allows you to save storage space on your device while still having access to high-quality images.
2. Download and Keep Originals: If you prefer to have all your original photos and videos stored on your device, you can choose the “Download and Keep Originals” option. This will ensure that your device always stores the full-resolution versions of your media.
Shared Albums:
1. Create a Shared Album: Open the Photos app, go to the “Albums” tab, and select “New Shared Album”. Give it a name and add the contacts with whom you want to share the album.
2. Add Photos to a Shared Album: Open the Shared Album and tap on the “+” button to add photos or videos to it. You can choose photos from your library or capture new ones directly within the shared album.
3. Invite Others to View and Add Photos: Open the Shared Album, select the “People” tab, and tap on “Invite People”. You can send invitations via Messages, Mail, or any other compatible app. Recipients can view and add their own photos to the shared album.
Offline Access:
1. On iPhone, iPad, or iPod touch: To access photos offline, simply open the Photos app and view the photos that have already been downloaded to your device. These photos will be available even when you don’t have an internet connection.
2. On Mac: The Photos app on your Mac will store a local copy of your photo library, allowing you to view and edit photos even when you’re offline. Once you reconnect to the internet, any changes you made will sync across your iCloud devices.
iCloud Photo Library simplifies photo management and ensures that your precious memories are stored securely and accessible across all your Apple devices. By leveraging the features and capabilities of iCloud Photo Library, you can organize, edit, share, and preserve your photos with ease.
How to Use iCloud Keychain for Password Management?
iCloud Keychain is a password management feature provided by iCloud that securely stores your passwords, usernames, and credit card information. It simplifies the process of logging in to websites and apps by autofilling your credentials. Here’s a guide on how to use iCloud Keychain for effective password management:
Enabling iCloud Keychain:
1. On iPhone, iPad, or iPod touch:
– Go to “Settings” and tap on your name at the top.
– Select “iCloud” and toggle on the “Keychain” option.
2. On Mac:
– Click on the Apple menu and select “System Preferences”.
– Choose the Apple ID pane and click on “iCloud”.
– Check the box next to “Keychain” to enable it.
Saving Passwords:
1. On iPhone, iPad, or iPod touch:
– When you log in to a website or app and enter your username and password, iCloud Keychain will ask if you want to save the password.
– Tap on “Save Password” to save it to iCloud Keychain for future use.
– If prompted, authenticate with Face ID, Touch ID, or your device passcode.
2. On Mac:
– When you enter a username and password on a website or app, a pop-up will appear asking if you want to save the password.
– Click on “Save Password” to save it to iCloud Keychain.
– If prompted, authenticate with your Mac’s password or Touch ID.
Autofilling Passwords:
1. On iPhone, iPad, or iPod touch:
– When visiting a website or opening an app that requires a login, tap on the username or password field.
– A list of saved usernames will appear above the keyboard.
– Tap on the desired username to autofill the username field.
– To autofill the password, tap the key icon that appears above the keyboard and authenticate if prompted.
2. On Mac:
– When you visit a website or open an app that requires a login, click on the username or password field.
– A drop-down menu will appear with saved usernames.
– Click on the desired username to autofill the username field.
– To autofill the password, either click on the key icon that appears in the password field or use the “Passwords” option from the Safari menu.
Using Credit Card Information:
1. On iPhone, iPad, or iPod touch:
– When making a purchase on a website or within an app, iCloud Keychain can autofill your credit card information.
– Tap on the credit card field and choose the card you want to use.
– Authenticate with Face ID, Touch ID, or your device passcode if prompted.
2. On Mac:
– When making a purchase on a website, iCloud Keychain can autofill your credit card information.
– Click on the credit card field and choose the card you want to use.
– Authenticate with your Mac’s password or Touch ID if prompted.
Managing Passwords:
1. On iPhone, iPad, or iPod touch:
– Go to “Settings” and tap on your name at the top.
– Select “Passwords” and authenticate with Face ID, Touch ID, or your device passcode.
– Here, you can view and manage your saved passwords, including adding, deleting, or editing entries.
2. On Mac:
– Open Safari preferences by clicking on the Safari menu and selecting “Preferences”.
– Choose the “Passwords” tab and authenticate with your Mac’s password.
– Here, you can view and manage your saved passwords, including adding, deleting, or editing entries.
Syncing Across Devices:
1. On iPhone, iPad, or iPod touch:
– Ensure iCloud Keychain is enabled on all devices using the same Apple ID.
– Your saved passwords will automatically sync across all your iOS and iPadOS devices.
2. On Mac:
– Make sure your Mac is signed in to iCloud with the same Apple ID.
– iCloud Keychain will sync your passwords across all your Mac devices.
By utilizing iCloud Keychain, you can enjoy hassle-free password management across all your Apple devices. It saves time, improves security, and ensures that your passwords and credit card information are readily accessible when needed.
How to Use Find My iPhone or Find My Device with iCloud?
Find My iPhone (or Find My Device on Android) is a powerful feature offered by iCloud that allows you to locate and track your lost or stolen devices. It helps ensure the security of your devices and provides peace of mind. Here’s a guide on how to use Find My iPhone or Find My Device with iCloud:
Setting Up Find My iPhone or Find My Device:
1. On iPhone, iPad, or iPod touch:
– Go to “Settings” and tap on your name at the top.
– Select “Find My” or “Find My iPhone”.
– Toggle on “Find My iPhone” and “Send Last Location”.
2. On Android Device:
– Install the Find My Device app from the Google Play Store (if not pre-installed).
– Launch the app and sign in with your Google account.
– Grant the necessary permissions required for tracking and location services.
Locating a Lost or Stolen Device:
1. Using iCloud.com:
– Open a web browser and visit icloud.com/find.
– Sign in with your Apple ID or Google account.
– Click on “Find iPhone” or “Find My Device”.
– A map will appear, displaying the location of your device if it is online and has location services enabled.
– You can zoom in and out on the map to get a better view of the device’s location.
2. Using Find My iPhone App or Find My Device App:
– On another iOS device or Android device, install the Find My iPhone app or Find My Device app from the App Store or Google Play Store.
– Launch the app and sign in with your Apple ID or Google account.
– Tap on the device you want to locate.
– The app will display the device’s location on a map if it is online and has location services enabled.
Additional Features:
1. Playing a Sound:
– If your device is misplaced nearby, you can play a sound to help locate it.
– In iCloud.com or the Find My iPhone/Find My Device app, select the device and choose the “Play Sound” option.
– Your device will emit a loud sound, even if it is on silent mode.
2. Enabling Lost Mode:
– By activating Lost Mode, you can remotely lock your device, display a custom message with contact information on the lock screen, and track the device’s movement.
– In iCloud.com or the Find My iPhone/Find My Device app, select the device and select “Lost Mode” or “Secure Device”.
– Follow the prompts to enter a phone number and message for the lock screen.
– Your device will be locked with a passcode, and its location will be updated periodically.
3. Erasing Data:
– If you are unable to recover your lost or stolen device, you can remotely erase all content and settings to protect your personal data.
– In iCloud.com or the Find My iPhone/Find My Device app, select the device and choose the “Erase iPhone” or “Erase Device” option.
– Confirm the action, and your device will be reset to its factory settings. Note that this will permanently delete all data on the device.
Locating Offline Devices:
1. Send Last Location:
– If your device’s battery is critically low, it will send its last known location to iCloud before powering off.
– This location will be viewable in iCloud.com or the Find My iPhone/Find My Device app.
2. Check Location History:
– In iCloud.com or the Find My iPhone/Find My Device app, you can view the location history of your device over the past 24 hours.
– This can be useful for tracking the movement of a device that is not currently online.
By using Find My iPhone or Find My Device with iCloud, you can have peace of mind knowing that you have a powerful tool to help locate and secure your lost or stolen devices. These features provide added security and the ability to remotely protect your personal data.
How to Manage Your iCloud Storage and Upgrade if Needed?
iCloud offers users a limited amount of free storage space to store their data. If you find that you’re running out of space, you can manage your iCloud storage and even upgrade to a larger storage plan. Here’s a guide on how to manage your iCloud storage and upgrade if needed:
Checking Your iCloud Storage:
1. On iPhone, iPad, or iPod touch:
– Go to “Settings” and tap on your name at the top.
– Select “iCloud” and then “Manage Storage”.
2. On Mac:
– Click on the Apple menu and select “System Preferences”.
– Choose the Apple ID pane and click on “iCloud”.
– Click on “Manage” next to “iCloud Storage”.
Understanding Your Storage:
1. Storage Breakdown:
– You’ll see a breakdown of your storage usage, including how much space photos, iCloud backups, documents, and app data are taking up.
2. Recommendations:
– iCloud may provide recommendations on how to optimize your storage, such as reviewing large files or deleting unnecessary backups.
Managing Your iCloud Storage:
1. Reviewing Large Files:
– In the iCloud storage management interface, check for large files like videos or documents that you no longer need and delete them if necessary.
2. Deleting Unnecessary Backups:
– Look for old device backups of devices you no longer use or need.
– In the iCloud storage management interface, select “Backups” and choose the backup you want to delete, then click on “Delete”.
3. Managing Photos:
– If you have iCloud Photo Library enabled, you can optimize your photos and videos to save space on your iCloud storage.
– On iPhone, iPad, or iPod touch, go to “Settings”, tap on your name at the top, select “iCloud”, and choose “Photos”. Enable the “Optimize [Device] Storage” option.
– On Mac, open the Photos app, go to “Photos” > “Preferences”, select the “iCloud” tab, and enable “Optimize [Device] Storage”.
Upgrading Your iCloud Storage:
1. Choose a Storage Plan:
– In the iCloud storage management interface, select “Change Storage Plan”.
– You’ll see the available storage plans, ranging from free to paid options.
– Select the plan that suits your needs and click on “Buy” or “Upgrade” to proceed.
2. Apple ID Authentication:
– Authenticate your Apple ID account using your Apple ID password, Touch ID, or Face ID.
3. Payment Information:
– If needed, enter or update your payment information to complete the purchase of the upgraded storage plan.
4. Confirmation:
– Once the transaction is completed, your iCloud storage will be upgraded, and the extra storage space will be available for you to use.
Downgrading Your iCloud Storage:
1. Considerations:
– Before downgrading, ensure that you have enough free space to accommodate your data, as downgrading your storage plan may lead to data loss if you exceed the available storage.
2. Downgrading Process:
– In the iCloud storage management interface, select “Change Storage Plan”.
– Choose a lower storage plan or select “Downgrade Options” to manually manage your storage.
– Follow the prompts to confirm the downgrading process.
By effectively managing your iCloud storage and upgrading if needed, you can ensure that you have enough space to store your data and take advantage of the seamless syncing and backup capabilities provided by iCloud.
How to Troubleshoot Common iCloud Issues?
iCloud is a reliable service, but occasionally you may encounter some issues. Here are some troubleshooting tips to help you resolve common iCloud problems:
Check Connectivity:
1. Ensure Internet Connection: Make sure your device is connected to a stable Wi-Fi or cellular data network to access iCloud services.
Sign Out and Sign In:
1. On iPhone, iPad, or iPod touch:
– Go to “Settings” and tap on your name at the top.
– Scroll down and select “Sign Out”.
– Sign back in by entering your Apple ID and password.
2. On Mac:
– Click on the Apple menu and select “System Preferences”.
– Choose the Apple ID pane and click on “Overview”.
– Click on “Sign Out” and enter your Apple ID and password to sign back in.
Restart Your Device:
1. On iPhone, iPad, or iPod touch:
– Press and hold the side (or top) button until the power off slider appears.
– Slide to power off your device.
– After a few seconds, press and hold the side (or top) button again until the Apple logo appears.
2. On Mac:
– Click on the Apple menu and select “Restart”.
Check iCloud Service Status:
1. Visit Apple’s System Status Page: Go to the Apple System Status page (https://www.apple.com/support/systemstatus/) to check if there are any reported issues with iCloud. If there is an ongoing problem, you may need to wait until it is resolved.
Update Your Device:
1. On iPhone, iPad, or iPod touch:
– Go to “Settings” and select “General”.
– Choose “Software Update” and install any available updates.
2. On Mac:
– Click on the Apple menu and select “System Preferences”.
– Choose “Software Update” and install any available updates.
Reset iCloud Settings:
1. On iPhone, iPad, or iPod touch:
– Go to “Settings” and tap on your name at the top.
– Select “iCloud” and scroll down to the bottom.
– Tap on “Sign Out” and confirm.
– Enter your Apple ID and password to sign back in.
2. On Mac:
– Click on the Apple menu and select “System Preferences”.
– Choose the Apple ID pane and click on “iCloud”.
– Click on “Sign Out” and enter your Apple ID and password to sign back in.
Reset Network Settings:
1. On iPhone, iPad, or iPod touch:
– Go to “Settings” and select “General”.
– Scroll down and tap on “Reset”.
– Choose “Reset Network Settings” and confirm.
– Reconnect to your Wi-Fi network and sign back in to iCloud.
Contact Apple Support:
If you have tried the above troubleshooting steps and are still experiencing issues with iCloud, it may be beneficial to reach out to Apple Support for assistance. They can provide further guidance and help you resolve any persistent problems.
By following these troubleshooting tips, you can address common iCloud issues and ensure a smooth and reliable experience with iCloud services.
How to Ensure the Security of Your iCloud Account?
Ensuring the security of your iCloud account is crucial to protect your personal information, data, and digital identity. Here are some essential steps to help you enhance the security of your iCloud account:
Use a Strong and Unique Password:
1. Create a Strong Password: Choose a password that is at least 8 characters long and includes a mix of uppercase and lowercase letters, numbers, and special characters.
2. Avoid Reusing Passwords: Use a unique password for your iCloud account and avoid using the same password for multiple online services.
Enable Two-Factor Authentication (2FA):
1. On iPhone, iPad, or iPod touch:
– Go to “Settings” and tap on your name at the top.
– Select “Password & Security” and tap on “Turn on Two-Factor Authentication”.
– Follow the on-screen prompts to complete the setup.
2. On Mac:
– Click on the Apple menu and select “System Preferences”.
– Choose the Apple ID pane and click on “Password & Security”.
– Click on “Turn on Two-Factor Authentication” and follow the instructions provided.
Keep Your Devices Updated:
1. On iPhone, iPad, or iPod touch:
– Go to “Settings” and select “General”.
– Choose “Software Update” and install any available updates.
2. On Mac:
– Click on the Apple menu and select “System Preferences”.
– Choose “Software Update” and install any available updates.
Be Vigilant of Phishing Attempts:
1. Avoid Suspicious Links: Be cautious when clicking on email or text message links claiming to be from iCloud. Always verify the source before providing any personal information.
2. Check Email Sender: Double-check the sender’s email address for any signs of suspicious or fake domains.
Regularly Review Your iCloud Account:
1. Monitor Account Activity: Regularly review the activity log for your iCloud account to ensure there are no unauthorized access attempts.
2. Review Connected Apps and Services: Periodically check the list of apps and services connected to your iCloud account. Revoke access for any apps or services that you no longer use or recognize.
Protect Your Devices:
1. Use Device Passcodes: Set a passcode or use Touch ID/Face ID to secure your iPhone, iPad, or iPod touch.
2. Enable Automatic Locking: Set your device to automatically lock after a specified period of inactivity.
3. Encrypt Data: Enable device encryption to add an extra layer of protection for your data.
Ensure App-Specific Passwords for Third-Party Apps:
1. Generate App-Specific Passwords: If you use iCloud with non-Apple apps (like email clients), create app-specific passwords instead of using your Apple ID password. This prevents the need to share your primary password.
Stay Informed:
1. Keep Up with Security Updates and Advisories: Stay informed about the latest security updates and advisories from Apple and take appropriate actions when necessary.
2. Educate Yourself on Online Safety: Regularly educate yourself about online safety practices and techniques to protect your personal information.
By following these security measures, you can better secure your iCloud account and protect your sensitive information from unauthorized access.