
System Requirements
Before you can start enjoying iTunes Movie Rentals on your computer, it’s essential to ensure that your system meets the necessary requirements. Here are the minimum system requirements to use iTunes Movie Rentals:
- A computer running Windows 7 or later, or a Mac running macOS 10.15 Catalina or later
- An internet connection (broadband recommended)
- The latest version of iTunes installed on your computer
- An Apple ID to rent and download movies
- A valid payment method linked to your Apple ID
It’s crucial to have the latest version of iTunes installed to ensure compatibility and access to the full range of features. If you don’t have iTunes installed, you can download it for free from the Apple website.
Additionally, a stable internet connection is necessary for smooth playback and downloading of rented movies. A broadband connection is recommended to avoid interruptions or buffering issues.
To rent and download movies, you’ll need an Apple ID. If you don’t have one, you can create a new Apple ID for free. Remember to have a valid payment method linked to your Apple ID, such as a credit card or PayPal account, to facilitate the rental process.
It’s also worth noting that iTunes Movie Rentals are currently only available in certain countries. Before proceeding, make sure that your country or region is supported by checking the availability of iTunes Movie Rentals in your location.
By ensuring that your computer meets these system requirements, you can seamlessly enjoy the vast selection of movies available for rent through iTunes and have an optimal rental experience without any technical limitations.
How to Access iTunes Movie Rentals
Accessing iTunes Movie Rentals is a straightforward process that allows you to browse, rent, and download movies to enjoy on your computer. Follow these steps to access iTunes Movie Rentals:
- Launch iTunes on your computer. If you don’t have iTunes installed, you can download and install it from the Apple website.
- Sign in to iTunes using your Apple ID. If you don’t have one, create a new Apple ID for free.
- Once signed in, click on the “Movies” tab located at the top left corner of the iTunes window.
- In the Movies section, you will find the “Rent” tab, which will display a wide range of movies available for rental.
- Browse through the movie collection or use the search bar to find a specific movie you’re interested in renting.
- Click on the movie thumbnail to view more details, such as the movie synopsis, cast, and reviews.
- If you decide to rent the movie, click on the “Rent” button. The rental price will be displayed next to the button.
- Confirm your rental by clicking on the “Rent” button again in the pop-up window.
- Enter your Apple ID password when prompted to complete the rental process.
- Once the rental is confirmed, the movie will begin downloading to your computer.
- You can check the progress of the download by clicking on the “Downloads” icon located at the top right corner of the iTunes window.
- Once the download is complete, the movie will be available in the “Library” section of iTunes for you to watch.
You can now enjoy your rented movie by double-clicking on it in the iTunes library and selecting the “Play” button. Remember that iTunes Movie Rentals have a specific rental period, which we will discuss in more detail in the next section.
By following these steps, you can easily access iTunes Movie Rentals and start watching your favorite movies on your computer at your convenience.
Browsing and Searching for Movies
When it comes to exploring the vast selection of movies available on iTunes, you have multiple options to browse and search for your desired films. Here’s how you can easily navigate through the movie collection:
Browsing Movies: You can start browsing movies by clicking on the “Movies” tab in iTunes. This will present you with various options to explore, including popular releases, top charts, genres, and more. You can click on each category to view movies sorted accordingly.
Featured Section: The featured section showcases a curated selection of movies recommended by iTunes. It includes new releases, staff picks, and other noteworthy titles. This section gives you a great way to discover popular and highly-rated movies.
Genres: If you have a specific genre in mind, you can click on the “Genres” tab to access a list of movie genres. Whether you’re in the mood for action, romance, comedy, or thriller, you can easily browse through movies based on your preferred genre.
Charts and Ratings: If you want to explore the most popular movies or discover hidden gems, you can check the charts and ratings section in iTunes. Here, you can find movies based on their box office success, critical acclaim, or user ratings. It’s a great way to ensure you’re watching a well-received film.
Search Functionality: If you already know the title or specific details about the movie you’re looking for, you can use the search bar in iTunes. Simply enter the movie’s title, actor’s name, or any relevant keywords, and iTunes will provide you with a list of relevant search results. This feature is particularly useful if you have a specific movie in mind.
By utilizing these browsing and search features, you can easily navigate through the extensive movie library on iTunes. Whether you prefer to explore different genres, check out what’s trending, or search for a specific film, iTunes provides a user-friendly interface that makes it effortless to find the movies you want to watch.
Renting and Downloading a Movie
To enjoy a movie through iTunes Movie Rentals, you’ll need to rent and download it to your computer. Here’s a step-by-step guide on how to rent and download a movie:
- Browse or search for the movie you want to rent in the iTunes Movie Rentals section.
- Click on the movie thumbnail to view more details.
- On the movie details page, click on the “Rent” button. The rental price will be displayed next to the button.
- Confirm your rental by clicking on the “Rent” button again in the pop-up window.
- Enter your Apple ID password when prompted to complete the rental process.
- Once the rental is confirmed, the movie will start downloading to your computer.
- You can check the progress of the download by clicking on the “Downloads” icon located at the top right corner of the iTunes window.
- Once the download is complete, the movie will be available in the “Library” section of iTunes for you to watch.
During the rental process, it’s important to note that you can choose between standard-definition (SD) and high-definition (HD) options, if available. HD rentals may provide better picture quality with a crisper and more vibrant viewing experience.
Once the download is finished, you can watch the rented movie at your convenience, even offline. However, keep in mind that rental periods have specific time constraints, which we will cover in the next section.
By following these steps, you can easily rent and download movies to enjoy on your computer through iTunes Movie Rentals. Whether you’re in the mood for a recent blockbuster, a classic film, or an independent gem, iTunes offers a wide range of options for your viewing pleasure.
Managing Rental Periods
When renting a movie through iTunes Movie Rentals, it’s essential to be aware of the rental period and manage your viewing time accordingly. Here’s what you need to know about managing rental periods:
Rental Period: The rental period for a movie is typically 48 hours from the moment you start watching it. This means you have 48 hours to complete the movie from the time you click on the “Play” button.
Availability: Once you start watching a rented movie, it will remain available for consecutive viewing for 48 hours. You can pause, resume, or rewatch as many times as you like within that 48-hour window.
Limitations: It’s important to note that once the rental period expires, you will no longer have access to the movie. This means you cannot watch it again, even if you haven’t finished watching it or if you exit the movie before its completion.
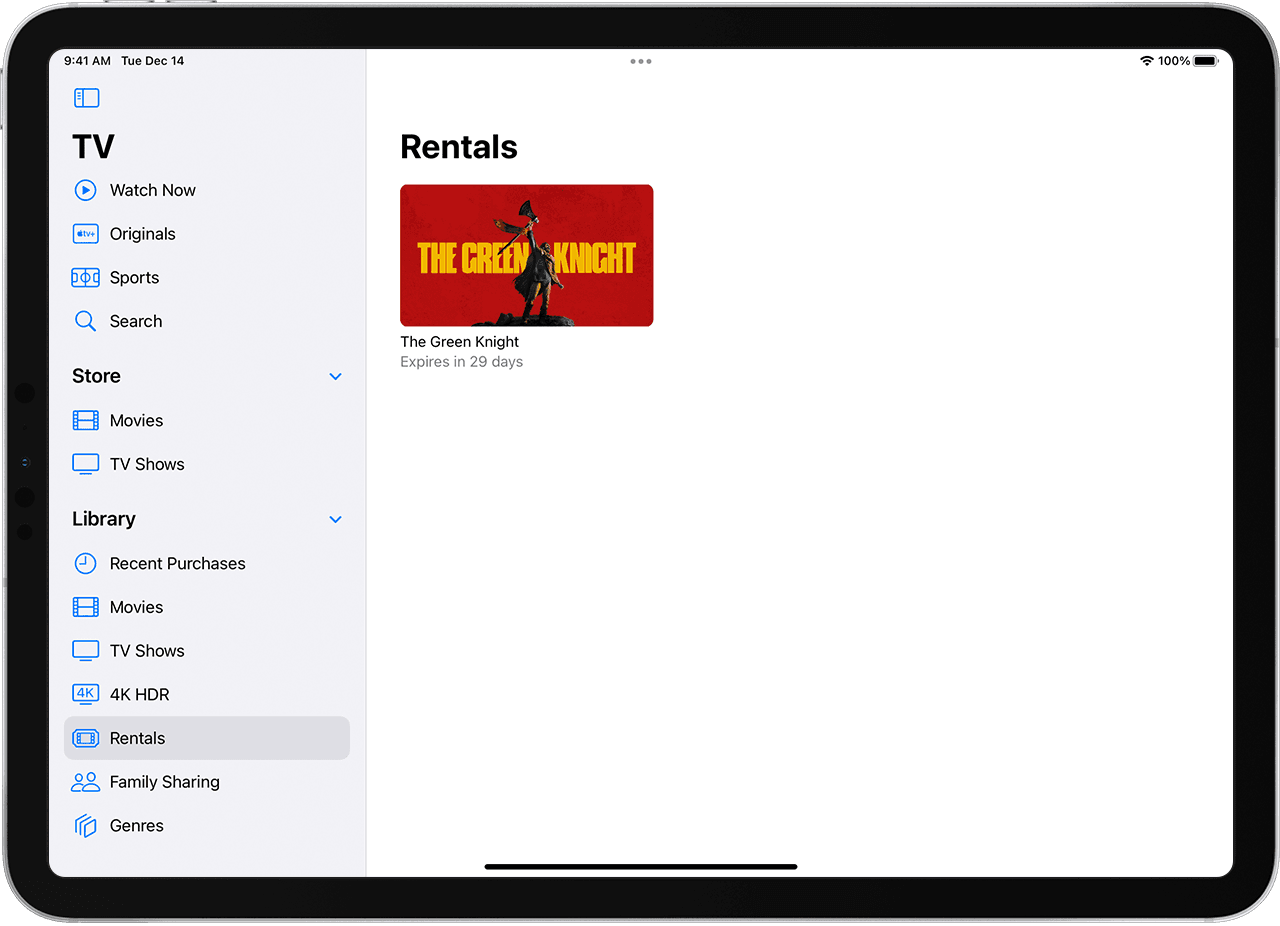
Remaining Time: To keep track of the remaining time of your rental, you can go to the “Library” section in iTunes. It will indicate the remaining hours and minutes you have left to watch the movie before it becomes unavailable.
Optimal Viewing Strategy: To make the most of your rental, it’s advisable to plan your viewing time strategically. Consider factors such as your free time, uninterrupted viewing sessions, and the duration of the movie itself. This way, you can ensure that you watch the rented movie within the rental period and get the most enjoyable experience out of it.
Extensions and Purchases: In certain cases, you may have the option to extend the rental period or purchase the movie permanently. This availability depends on individual movie rights and licensing agreements. If you wish to extend the rental period or purchase the movie, you can explore the options provided within iTunes.
By managing your rental periods effectively, you can enjoy the movies you rent through iTunes Movie Rentals without any interruptions and make the most out of your rental experience. Keep track of the remaining time, plan your viewing sessions, and ensure you watch the movie within the rental period to fully savor your chosen film.
Watching a Rental on Computer
Once you have rented and downloaded a movie through iTunes Movie Rentals, you are ready to watch it on your computer. Here are the steps to watch a rental on your computer:
- Open iTunes on your computer and sign in with your Apple ID.
- Navigate to the “Library” section in iTunes.
- Locate the rented movie you want to watch.
- Double-click on the movie’s thumbnail to start playing it.
Once you start playing the movie, it will launch in the iTunes player on your computer. You can control the playback using the player’s interface. Here are some key features and controls to enhance your viewing experience:
- Play/Pause: The play/pause button allows you to start or pause the movie playback.
- Fast Forward/Rewind: You can fast forward or rewind the movie using the respective buttons. This feature allows you to skip scenes or rewatch particular sections.
- Volume Control: Adjust the volume using the volume control sliders in the iTunes player. You can increase or decrease the volume as per your preference.
- Subtitles and Audio Tracks: If available, you can choose different subtitle options and audio tracks to enhance your movie-watching experience. These options can usually be found in the player’s settings.
- Full-Screen Mode: Enjoy a more immersive viewing experience by switching to full-screen mode. You can activate or exit full-screen mode by clicking on the respective icon in the player’s interface.
While watching the rental movie on your computer, keep track of the remaining rental period to ensure you complete the movie within the allotted time frame. Remember that the rental period is typically 48 hours from the moment you start watching the film.
By following these simple steps and utilizing the provided playback controls and features, you can fully enjoy your rented movies on your computer through iTunes Movie Rentals. Sit back, relax, and immerse yourself in the captivating world of cinema, right from the comfort of your own computer.
Playback Controls and Features
When watching a rented movie on your computer through iTunes Movie Rentals, you have access to a variety of playback controls and features to enhance your viewing experience. Here’s a closer look at the playback controls and features available:
- Play/Pause: The play/pause button is essential for starting or pausing the movie playback. Simply click on the button to begin watching the movie or temporarily pause it whenever needed.
- Fast Forward/Rewind: If you want to skip forward or backward in the movie, use the fast forward and rewind buttons. These controls allow you to navigate through the film and easily rewatch specific scenes or skip parts.
- Volume Control: Adjusting the volume is crucial for a comfortable viewing experience. You can use the volume control sliders in the iTunes player to increase or decrease the volume according to your personal preference.
- Subtitles and Audio Tracks: If the rented movie supports multiple languages or has accompanying subtitles, you can select your desired audio track or subtitles within the player’s settings. This feature is especially useful for non-native language speakers or viewers with hearing impairments.
- Full-Screen Mode: To immerse yourself in the movie, switch to full-screen mode. By clicking on the full-screen icon in the player’s interface, you can enjoy a larger and more immersive view of the film. To exit full-screen mode, press the escape key on your keyboard or click the full-screen icon again.
- Playback Position and Scrubbing: You can easily monitor your playback position within the movie and adjust it using the scrubbing bar. Dragging the playback slider allows you to jump to any desired moment in the movie quickly.
- Playback Speed: Some media players offer the option to adjust the playback speed. If this feature is available, you can try watching the movie at a faster or slower pace. However, ensure that you’re able to understand the dialogues and follow the storyline comfortably.
These playback controls and features provide flexibility and customization options while watching a rented movie on your computer. Experimenting with different settings can help tailor the viewing experience to your preferences and make your movie-watching session more enjoyable.
Remember to be mindful of the rental period and use these controls and features to fully appreciate the film within the allotted time. With the right combination of playback controls, you can savor the rented movie and create a personalized viewing experience on your computer through iTunes Movie Rentals.
Troubleshooting Tips
While using iTunes Movie Rentals on your computer, you may encounter occasional issues or hurdles. Here are some troubleshooting tips to help resolve common problems and ensure a smooth movie rental experience:
- Check Internet Connection: If you’re experiencing difficulties in renting or downloading a movie, make sure you have a stable internet connection. A poor or intermittent connection can cause interruptions or slow downloads. Consider restarting your modem or connecting to a different network if needed.
- Update iTunes: Ensure that you have the latest version of iTunes installed on your computer. Outdated software can sometimes lead to compatibility issues or missing features. Check for updates in the iTunes settings or download the latest version from the Apple website.
- Free Up Storage Space: If you’re unable to download or store rented movies due to insufficient storage space on your computer, consider freeing up some space by deleting unnecessary files or transferring them to an external storage device. This will ensure you have enough room to accommodate the movie downloads.
- Verify Apple ID and Payment Method: If you encounter issues with renting or downloading movies, double-check that your Apple ID is signed in correctly and that you have a valid payment method linked to your account. An incorrect Apple ID or an expired payment method may hinder the rental process.
- Restart iTunes: If you’re experiencing playback or performance issues while watching a rented movie, try closing and reopening iTunes. Restarting the application can resolve minor glitches and refresh the software for smoother playback.
- Seek Help from Support: If you’ve followed the troubleshooting tips but still encounter persistent issues or errors, consider reaching out to Apple Support. They will be able to provide tailored assistance, troubleshoot specific problems, and guide you through any necessary steps to resolve the issue.
By utilizing these troubleshooting tips, you can overcome common challenges and ensure a seamless movie rental experience on your computer through iTunes Movie Rentals. Remember to stay patient and proactive; most issues can be resolved with a few simple steps or by seeking assistance from the dedicated support teams available.