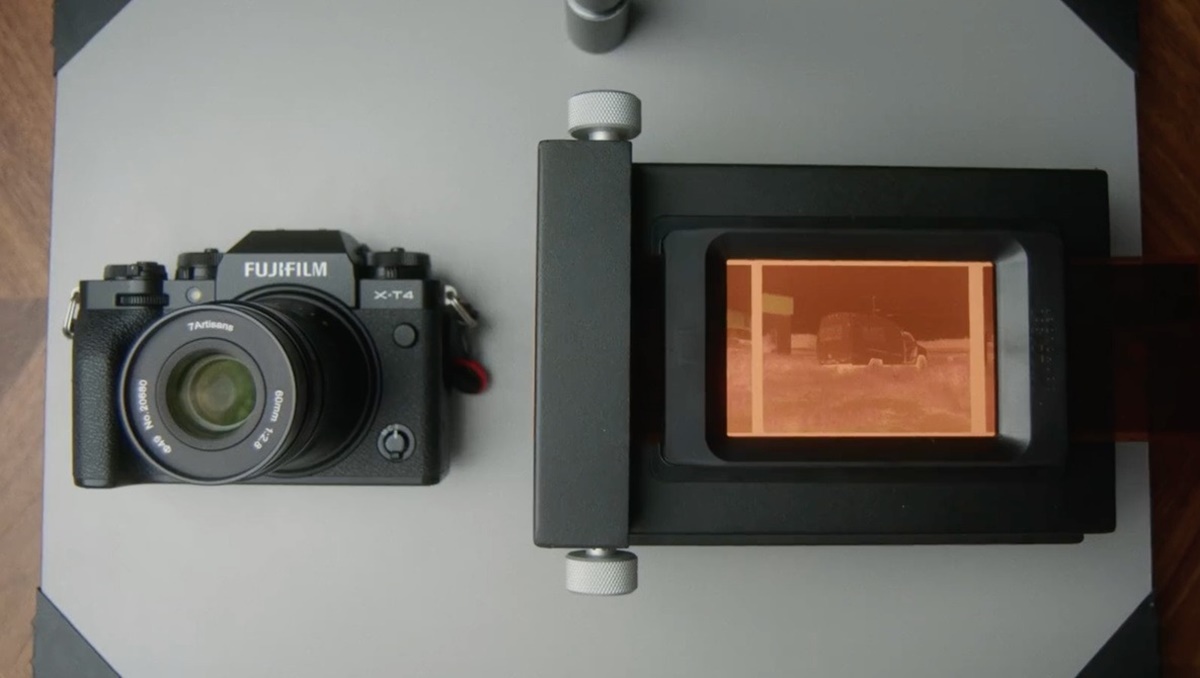
When it comes to using a digital camera as a scanner, one of the crucial steps is selecting the right device. Not all digital cameras are suitable for this purpose, so it’s essential to consider a few key factors before making a decision.
The first thing to keep in mind is the camera’s image sensor resolution. Opt for a camera with a higher resolution, as this determines the level of detail captured in your scans. Look for a camera with at least 10 megapixels to ensure clear and sharp scans.
Another important aspect to consider is the camera’s lens quality. A camera with a high-quality lens will produce better image quality and sharper scans. Look for a camera with a wide aperture and optical zoom to capture details accurately.
Additionally, consider the camera’s size and portability. If you plan to use the camera for scanning on the go, choose a compact and lightweight device. This will allow you to easily carry and position the camera when scanning documents or photos.
Furthermore, make sure the digital camera you choose has manual controls. Manual controls give you greater flexibility to adjust settings such as exposure, aperture, and ISO. These controls are crucial for achieving optimal scan results and ensuring proper lighting and focus.
Lastly, consider connectivity options. Look for a camera that allows for direct transfer of photos to your computer via USB or Wi-Fi. This will streamline the process of transferring scanned images and save you valuable time.
By opting for a digital camera that meets these criteria, you’ll be equipped with a capable scanning tool. It’s important to take your time to research and choose the right camera that fits your scanning needs and budget. With the right camera in hand, you’ll be ready to move on to the next step of setting it up for scanning.
Set up Your Digital Camera for Scanning
Once you have selected the right digital camera for scanning, it’s time to set it up properly to achieve the best results. These steps will help you configure your camera and prepare it for the scanning process.
Firstly, ensure that your camera is fully charged or that you have fresh batteries installed. This will prevent any unexpected interruptions or power issues during the scanning process.
Next, adjust the camera’s settings to optimize it for scanning. Start by setting the camera to aperture priority mode or manual mode, as this will give you more control over the camera’s settings. Then, set a low ISO value to minimize image noise and ensure sharp, clear scans.
Additionally, disable any built-in flash or auto flash settings. Using flash can cause glare or unwanted reflections on the scanned document or photo. It’s best to rely on natural lighting or use external lighting sources for better results.
Position your digital camera above the document or photo you wish to scan. If you can, use a tripod or mount to stabilize the camera and reduce the risk of shake or blurriness in your scans. Ensure the camera is perpendicular to the document being scanned for accurate reproduction.
Experiment with different angles and distances to find the optimal position for scanning. Some cameras have a tilt screen or live view function that allows you to preview the image on the screen while adjusting the camera angle. Take advantage of this feature to fine-tune the position and framing.
Lastly, consider using a flatbed or copy stand to hold the document or photo in place during scanning. This will help maintain stability and ensure consistent results. If you don’t have a stand available, you can use a steady surface and some weights to hold the document steady.
By following these setup steps, you’ll be ready to start scanning with your digital camera. Taking the time to configure your camera properly will lead to better quality scans and a smoother scanning process. Once your camera is set up, it’s time to prepare the documents or photos you want to scan.
Prepare the Document or Photo for Scanning
Before scanning with your digital camera, it’s important to prepare the document or photo to ensure optimal results. Taking a few extra steps can make a significant difference in the quality and clarity of your scans.
Start by cleaning the document or photo you plan to scan. Remove any dust, fingerprints, or smudges that may affect the scan quality. A clean surface will result in sharper and more accurate scans.
If you’re scanning a document, ensure that it is flat and free from any creases or folds. Use weights or clips to hold the document in place if necessary for a smooth scanning surface. This will prevent any distortions or shadows that could impact the scan quality.
In the case of scanning photos or delicate materials, consider using gloves or handling tools to avoid touching the surface directly. Oils from your skin can leave marks or damage the photo, so it’s best to minimize contact.
If you’re scanning photos with glossy or reflective surfaces, it’s important to minimize any glare. Position the lighting carefully to minimize reflections, or use a polarizing filter on your camera lens to reduce glare and improve image clarity.
For documents with multiple pages, organize them in the desired order before scanning. This will save you time when organizing the scanned files on your computer. Numbering or labeling the pages can also help keep things organized and make it easier to refer back to specific pages later.
Consider the size and aspect ratio of the document or photo you’re scanning. If possible, set your camera to match the aspect ratio of the original to avoid any cropping or distortion in the scanned image. It’s also recommended to leave a small margin around the edges to capture the full content of the document or photo.
By taking the time to properly prepare the documents or photos before scanning, you’ll greatly improve the overall scan quality and ensure accurate reproduction of the original content. Ready to move on? The next step is positioning and lighting the document or photo for scanning.
Position and Light the Document or Photo
Proper positioning and lighting are crucial when using a digital camera as a scanner. These steps ensure that your document or photo is captured accurately and with optimal clarity. Paying attention to these details will help produce high-quality scans.
Start by finding a well-lit area to position your document or photo. Natural light is ideal, but if that’s not possible, use a combination of ambient and artificial lighting that provides even illumination. Avoid harsh or direct light sources that can create shadows or glare on the subject.
When positioning the document or photo, make sure it is flat and without any wrinkles or bends. Place it on a clean, flat surface such as a table or scanning bed. If scanning a small object, consider using a neutral-colored background that won’t distract from the subject.
For flat documents, align the edges squarely with the camera frame to maintain proper alignment and prevent any distortion. The document should be parallel to the camera lens to ensure accurate reproduction.
If you’re scanning a 3D object, experiment with different angles to capture the best representation. Move around the object and observe how light interacts with it to highlight its features and texture. Be mindful of any shadows or reflections that may hinder the scan quality.
When using artificial lighting, try diffusing it to create a softer, more even light. This can be achieved by placing a piece of white tissue or parchment paper over the light source. Diffusing the light helps reduce harsh shadows and create a more natural-looking scan.
Consider using a tripod or stabilizing the camera to avoid any camera shake. This will ensure sharp, clear scans without blurriness. If possible, use a remote shutter release or self-timer function to further minimize any camera movement when capturing the image.
Take test shots and review them on your camera’s LCD screen to check the positioning and lighting. Make adjustments as needed to achieve the desired result. It’s worth spending some time experimenting and fine-tuning the setup to capture the best possible scan.
Now that your document or photo is properly positioned and lit, it’s time to adjust the camera settings for the best scan possible. The next section will guide you through the process of optimizing camera settings for optimal results.
Adjust Camera Settings for the Best Scan
After positioning and lighting the document or photo, the next step is to adjust your digital camera’s settings to obtain the best scan possible. Fine-tuning these settings will ensure that your scans are sharp, properly exposed, and accurately represent the original content.
Start by setting the camera to manual mode or aperture priority mode. This will give you more control over the camera’s settings and allow for precise adjustments. Avoid using automatic modes as they may not provide the desired results for scanning.
Adjust the aperture settings to control the depth of field. For most scans, it’s recommended to use a small to medium aperture (higher f-number) to maximize the depth of field and keep the entire document or photo in focus. However, if you want to highlight a specific area or create a shallow depth of field effect, you can experiment with wider apertures (lower f-number).
Next, adjust the shutter speed to ensure a properly exposed scan. Aim for a fast enough shutter speed to eliminate any motion blur caused by camera shake or document movement. However, be cautious not to set the shutter speed too fast, as it may result in underexposed images. Monitor the exposure levels on your camera’s display and adjust accordingly.
Consider using the lowest ISO setting possible to minimize noise and maintain image quality. Higher ISO values can introduce graininess or digital noise, which can reduce the clarity and sharpness of your scans. If necessary, you can increase the ISO slightly to maintain a proper exposure, but it’s best to keep it as low as possible.
White balance is another crucial setting to adjust. It ensures accurate color reproduction in your scans. Depending on the lighting conditions, you can select a pre-set white balance mode such as daylight, cloudy, or tungsten, or manually set the white balance by using a white reference card or object.
Check your camera’s focus mode and ensure it is set to manual focus. This allows you to have full control over focusing on the document or photo. Use autofocus to initially focus on the subject, and then switch to manual focus to lock the focus for consistent scans. Pay attention to the focus point and adjust it to capture the key details of your document or photo.
Once you have adjusted all the necessary settings, take a few test shots and review them on your camera’s display. Analyze the sharpness, exposure, and color accuracy of the scans. Make any necessary tweaks and adjustments until you’re satisfied with the results.
By adjusting these camera settings, you’ll have greater control over the scanning process and be able to capture high-quality, accurate scans. Now that you have optimized your camera settings, it’s time to take the photo and move on to the next steps of transferring and editing the scanned images.
Take the Photo
With the camera settings properly adjusted, it’s time to take the photo and capture the scan. This step requires a steady hand, attention to detail, and a focus on achieving the best possible image quality.
Before taking the photo, double-check that the document or photo is still in the desired position and properly lit. Ensure that there are no obstructions or distractions in the frame that may affect the final scan.
Take a deep breath and steady your hands to avoid any camera shake or unwanted blurriness. If you’re using a tripod, use a remote shutter release or the camera’s self-timer function to minimize any movement during the capture process.
Once you’re ready, gently press the shutter button to take the photo. Take your time and avoid rushing the process to ensure that you get a sharp and well-exposed scan.
If you’re scanning a document, consider capturing multiple shots to account for any potential inconsistencies or variations in lighting. This will provide you with options to choose from when selecting the best final scan.
When scanning photos or objects, experiment with different angles and compositions. Move around the subject and capture it from different perspectives to highlight its unique features. Be patient and take multiple shots to ensure you get the perfect capture.
Review the images on your camera’s LCD screen after each shot. Pay attention to sharpness, clarity, exposure, and any potential issues like reflections or glare. If necessary, make adjustments to lighting, composition, or camera settings before retaking the photo.
Remember to take breaks if you’re scanning a large number of documents or photos. Continuous shooting can lead to fatigue, which may impact the quality of your scans. Take your time and maintain a steady hand throughout the process.
Once you’re satisfied with the captured image, it’s time to transfer the photos to your computer for further processing. This step will enable you to organize, edit, and enhance the scanned images as needed.
Now that you have successfully taken the photo, you’re ready to move on to the next step of transferring the scanned images to your computer.
Transfer the Photos to Your Computer
After capturing the scans with your digital camera, the next step is to transfer the photos to your computer. This will allow you to organize, edit, and enhance the scanned images to achieve the desired results.
There are a few different methods that you can use to transfer the photos from your camera to your computer:
Using a USB cable: Most digital cameras come with a USB cable that allows you to connect the camera directly to your computer. Simply plug one end of the cable into the camera and the other end into a USB port on your computer. Once connected, your computer should recognize the camera as a storage device, allowing you to access and transfer the photos.
Using a memory card reader: If your camera uses a removable memory card, you can remove the card from the camera and insert it into a memory card reader connected to your computer. The card reader will appear as a removable storage device, and you can then access and transfer the photos from the memory card to your computer.
Using wireless transfer: Some digital cameras have built-in Wi-Fi capabilities, allowing you to wirelessly transfer photos to your computer. You can typically use dedicated software provided by the camera manufacturer to initiate the transfer process. Follow the instructions specific to your camera model to establish the Wi-Fi connection and transfer the photos wirelessly.
Whichever method you choose, follow the prompts on your computer to access the files on the camera or memory card. Locate the folder or destination where you want to save the scanned photos on your computer and initiate the transfer process.
Depending on the number of photos and the file size, the transfer may take a few moments or several minutes. Be patient and avoid interrupting the process to ensure the smooth and complete transfer of the photos.
Once the transfer is complete, double-check the destination folder on your computer to confirm that all the photos have been successfully copied. It’s a good practice to create a dedicated folder or subfolder to keep your scanned images organized for easy access and future reference.
Remember to safely disconnect your camera or memory card from your computer before removing the USB cable or memory card reader. This helps prevent data corruption or loss and ensures the longevity of your camera and memory card.
By transferring the photos to your computer, you now have the digital files ready for further editing and enhancement. The next section will guide you through the process of editing and enhancing the scanned images to achieve the desired results.
Edit and Enhance the Scanned Images
Once you have transferred the scanned images to your computer, you can begin the process of editing and enhancing them. Editing allows you to refine the scans, make necessary adjustments, and improve the overall quality of the images.
There are various software options available that can help you edit and enhance your scanned images. Some popular choices include Adobe Photoshop, GIMP, and Lightroom. These programs offer a wide range of tools and features to help you achieve the desired results.
Start by assessing each scanned image and identifying any issues or areas that require improvement. Common adjustments include:
Cropping: Remove any unnecessary or distracting parts of the image to focus on the main subject.
Exposure and brightness: Adjust the exposure and brightness levels to ensure that the image is properly lit and details are visible.
Contrast: Enhance the contrast to make the image appear more vibrant and dynamic.
Color correction: Adjust the color balance and saturation to accurately represent the colors of the original document or photo.
Sharpness and clarity: Enhance the sharpness and clarity of the image to bring out fine details and make it crisper.
Noise reduction: Reduce any visible noise or graininess in the image, especially in low-light conditions or high ISO settings.
Experiment with different editing tools and techniques to achieve the desired look and feel for your scans. It’s always a good practice to work on a copy of the original scan and keep the original file untouched for future reference.
Take advantage of preset filters and effects available in the editing software to quickly enhance the scans. These presets can provide a starting point or inspiration for your editing process, allowing you to create a consistent look across all your scanned images.
Remember to save your edited scans in a high-quality and compatible file format, such as JPEG or PNG, to preserve the changes you’ve made. This will ensure that your edited images can be easily viewed and shared across different platforms and devices.
Once you have completed the edits and enhancements, take a step back and review the final results. Compare the edited scans with the original images to assess the improvements you’ve made. Make any further adjustments if necessary to achieve the desired outcome.
By editing and enhancing the scanned images, you can improve their visual appeal, clarity, and overall quality. Taking the time to refine the scans will ensure that they accurately represent the original documents or photos and meet your specific requirements.
Now that you have successfully edited and enhanced the scanned images, you’re ready to utilize them for various purposes, whether it’s archiving important documents, creating digital copies of precious photos, or sharing them online.