
Back Up Your Old iPhone
Before transferring your SIM card to a new iPhone, it’s crucial to back up your old device to ensure that none of your valuable data is lost in the process. Here’s a step-by-step guide to help you seamlessly back up your old iPhone:
- Connect to Wi-Fi: Ensure that your old iPhone is connected to a stable Wi-Fi network. This is essential for initiating the backup process.
- Access Settings: Open the “Settings” app on your iPhone and tap on your name at the top of the screen.
- Select iCloud: Scroll down and tap “iCloud” to access the iCloud settings.
- Tap iCloud Backup: Within the iCloud settings, tap “iCloud Backup.”
- Initiate Backup: Toggle the “iCloud Backup” option to enable it. Then, tap “Back Up Now” to start the backup process. Ensure that your iPhone remains connected to Wi-Fi and plugged into a power source until the backup is complete.
Once the backup is finished, you can proceed with confidence, knowing that all your important data, including contacts, photos, videos, and app data, has been securely saved to your iCloud account.
Turn Off Your Old iPhone
After successfully backing up your old iPhone, the next step in transferring your SIM card to a new device is to power off your old iPhone. This ensures a smooth transition and prevents any data loss or complications during the SIM card transfer process. Here’s how to turn off your old iPhone:
- Press and Hold the Side Button: On iPhone 8 or later models, press and hold the side button along with one of the volume buttons until the “slide to power off” slider appears on the screen. If you have an iPhone 7 or earlier model, press and hold the top or side button until the slider appears.
- Slide to Power Off: Once the slider appears, drag it from left to right to power off your iPhone.
- Wait for Shutdown: Allow your iPhone to power off completely before proceeding to the next step.
Ensuring that your old iPhone is powered off is essential before ejecting the SIM card and transferring it to your new device. This simple yet crucial step sets the stage for a seamless transition to your new iPhone, allowing you to proceed with confidence as you continue the SIM card transfer process.
Eject the SIM Card Tray
Once your old iPhone is powered off, the next step in transferring your SIM card to a new device is to eject the SIM card tray. This process allows you to safely remove the SIM card from your old iPhone in preparation for its transfer to the new device. Here’s how to eject the SIM card tray:
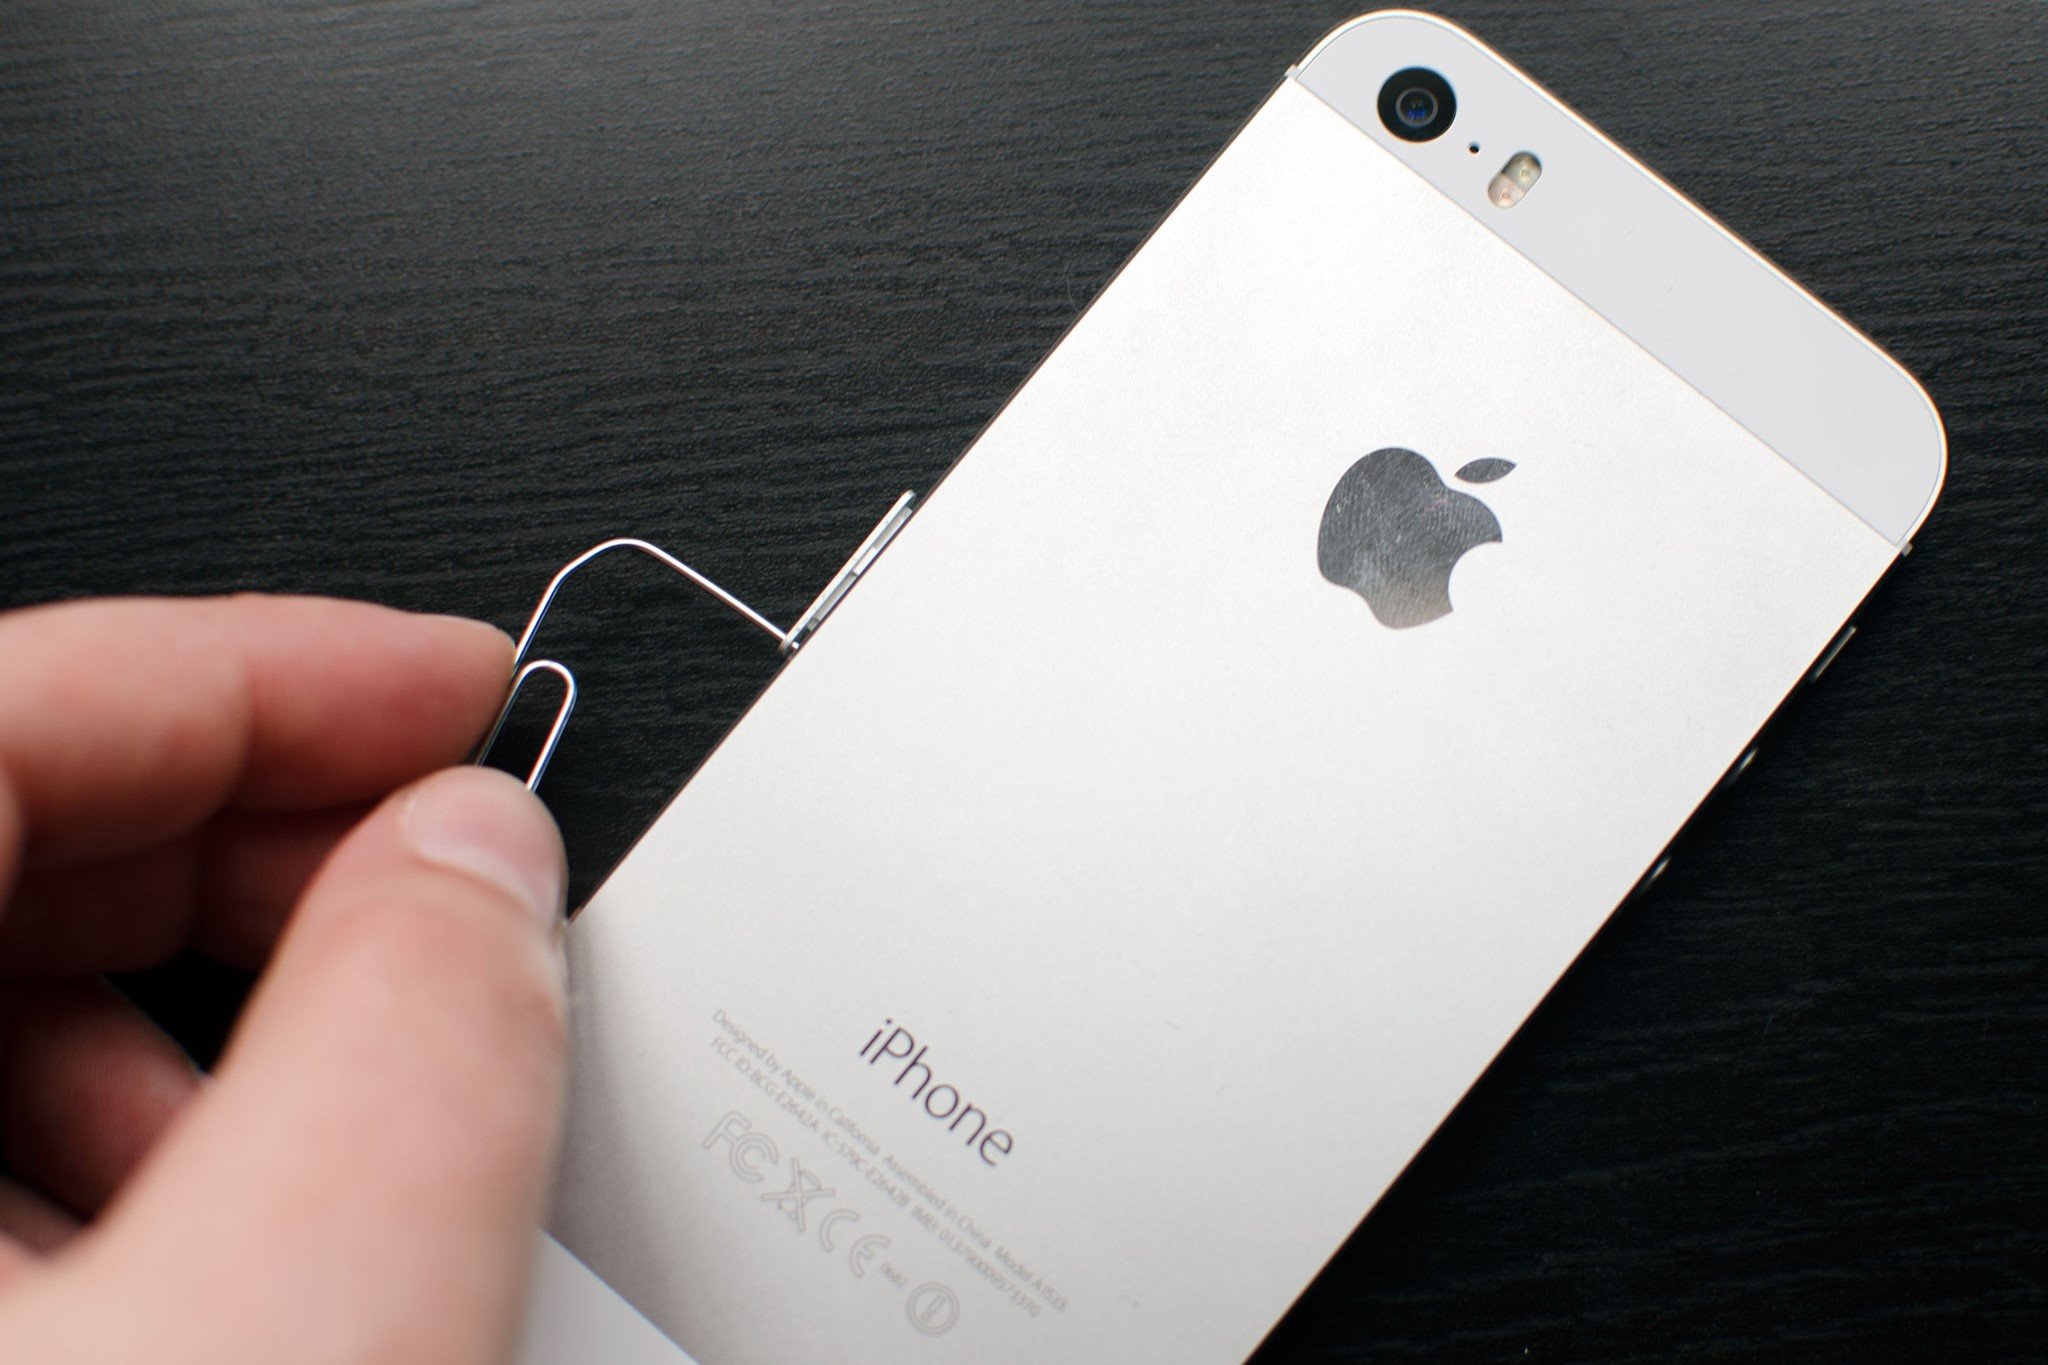
- Locate the SIM Card Tray: Depending on your iPhone model, the location of the SIM card tray may vary. For most iPhone models, the SIM card tray is located on the right side of the device. You can identify it by the small pinhole next to the tray.
- Insert the Ejection Tool: Use the SIM card ejection tool that came with your iPhone, or alternatively, a small paperclip. Gently insert the tool into the pinhole next to the SIM card tray. Apply light pressure until the tray pops out slightly.
- Remove the SIM Card Tray: Once the tray is partially ejected, carefully pull it out the rest of the way, ensuring not to force it. The SIM card will be attached to the tray.
- Remove the SIM Card: Carefully remove the SIM card from the tray and set it aside, ready to be inserted into your new iPhone.
Ejecting the SIM card tray is a straightforward process that prepares the SIM card for transfer to your new iPhone. By following these steps, you can safely remove the SIM card from your old device and proceed with confidence to the next stage of the transfer process.
Insert the SIM Card into Your New iPhone
With the SIM card safely removed from your old iPhone, it’s time to insert it into your new device. This step is essential for ensuring that your new iPhone is ready to connect to your mobile network and receive calls and data. Here’s a simple guide to inserting the SIM card into your new iPhone:
- Locate the SIM Card Tray: On your new iPhone, locate the SIM card tray. The location of the tray may vary depending on the iPhone model, but it is typically found on the right side of the device.
- Insert the SIM Card Ejector Tool: If the SIM card tray is not already ejected, use the SIM card ejector tool or a small paperclip to gently press into the pinhole next to the tray, allowing it to pop out.
- Place the SIM Card in the Tray: Carefully place the SIM card into the designated area on the SIM card tray. Ensure that the card fits securely and aligns with the tray’s shape.
- Insert the Tray into Your iPhone: Once the SIM card is in place, carefully slide the tray back into the iPhone until it is flush with the device’s exterior.
- Power On Your New iPhone: Turn on your new iPhone and wait for it to complete the startup process. Your device should now be ready to connect to your mobile network using the inserted SIM card.
By following these steps, you can seamlessly insert the SIM card into your new iPhone, ensuring that it is ready to connect to your mobile network and function as intended.
Set Up Your New iPhone
After successfully inserting the SIM card into your new iPhone, the next crucial step is to set up your device. This process involves configuring various settings and personalizing your iPhone to suit your preferences. Here’s a step-by-step guide to help you set up your new iPhone:
- Power On Your iPhone: Press and hold the side button until the Apple logo appears, indicating that your iPhone is powering on.
- Select Your Language and Region: Follow the on-screen prompts to select your preferred language and region. This ensures that your iPhone’s interface is displayed in the language you’re comfortable with and tailored to your geographic location.
- Connect to Wi-Fi: Choose a Wi-Fi network and enter the password to connect your iPhone to the internet. This step is essential for downloading updates and setting up your Apple ID.
- Set Up Touch ID or Face ID: Depending on your iPhone model, you may have the option to set up Touch ID or Face ID for secure and convenient access to your device. Follow the on-screen instructions to complete this setup if available.
- Sign in with Your Apple ID: If you have an existing Apple ID, sign in to it to access your iCloud, App Store, and other Apple services. If you don’t have an Apple ID, you can create one during this step.
- Customize Your Settings: Personalize your iPhone by adjusting settings such as display brightness, wallpaper, sound preferences, and more to suit your preferences.
- Restore from iCloud Backup: If you backed up your old iPhone to iCloud, you can choose to restore your data during the setup process. This allows you to seamlessly transfer your apps, photos, contacts, and settings to your new device.
- Agree to Terms and Conditions: Review and agree to Apple’s terms and conditions to proceed with the setup process.
- Complete the Setup: Follow the remaining on-screen prompts to complete the setup of your new iPhone, including setting up Siri, enabling location services, and choosing whether to share app analytics with developers.
By following these steps, you can effectively set up your new iPhone, ensuring that it is configured to your preferences and ready for use.
Restore Your Data from the Backup
Once your new iPhone is set up, the final step in the process of transferring your SIM card to a new device is to restore your data from the backup you created earlier. This ensures that all your important information, including contacts, photos, apps, and settings, is seamlessly transferred to your new iPhone. Here’s a detailed guide to help you restore your data from the backup:
- Access the Apps & Data Screen: During the setup process of your new iPhone, you will encounter the “Apps & Data” screen. Select the option to “Restore from iCloud Backup.”
- Sign in to iCloud: Enter your Apple ID and password to sign in to your iCloud account, which contains the backup of your old iPhone.
- Choose a Backup: Select the most recent backup from the list of available backups. It’s recommended to choose the backup that corresponds to your old iPhone to ensure that all your data is transferred accurately.
- Stay Connected and Patient: Ensure that your new iPhone is connected to Wi-Fi and plugged into a power source. The restoration process may take some time, depending on the size of the backup and the speed of your internet connection. It’s essential to remain patient and keep your device connected until the process is complete.
- Complete the Setup: Once the restoration process is finished, follow the on-screen prompts to complete the setup of your new iPhone. This may involve signing in to various accounts, setting up additional security features, and customizing your device’s settings to your preferences.
By following these steps, you can effectively restore your data from the backup, ensuring that all your important information is seamlessly transferred to your new iPhone. This allows you to continue using your device with confidence, knowing that your data is intact and readily accessible.