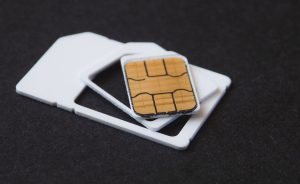
Checking SIM Card Size
Checking SIM Card Size
Before switching your SIM card from an Android to an iPhone, it’s crucial to ensure that the SIM card size is compatible with both devices. Android phones typically use either a standard SIM card, a micro-SIM card, or a nano-SIM card, while iPhones predominantly use nano-SIM cards. To verify the SIM card size in your Android phone, you can refer to the device’s user manual or visit the manufacturer’s website for specifications. Alternatively, you can remove the SIM card from the Android phone and compare it to the SIM card slot on the iPhone to determine if they match.
If the SIM card in your Android phone is larger than the nano-SIM required for the iPhone, you have a few options. You can either visit your mobile carrier’s store to request a new nano-SIM card, or use a SIM card cutter to trim the existing card down to the appropriate size. It’s important to exercise caution when using a SIM card cutter to avoid damaging the card.
On the other hand, if your Android phone already uses a nano-SIM card, you can proceed to the next steps for switching the SIM card to your iPhone. Ensuring that the SIM card size is compatible with the iPhone is an essential first step to facilitate a smooth transition between devices.
Backing Up Data
Before making the switch from your Android to an iPhone, it’s crucial to back up your data to prevent any loss of important information. Both Android and iPhone devices offer built-in backup options that allow you to securely store your data and seamlessly transfer it to your new device. Here’s how to back up your data on your Android phone:
- Open the Settings app on your Android device and navigate to the “System” or “Backup” section.
- Select “Backup” and ensure that the “Back up to Google Drive” option is enabled. If not, toggle the switch to enable it.
- Tap “Back up now” to initiate the backup process. Depending on the amount of data on your device, this may take some time.
- Once the backup is complete, your data, including contacts, photos, app data, and settings, will be securely stored in your Google Drive account.
After successfully backing up your data on your Android device, you can proceed to set up your new iPhone. Apple provides a seamless process for transferring data from an Android device to an iPhone using the “Move to iOS” app. Here’s how to use the app to transfer your data:
- During the initial setup of your iPhone, when prompted to “Apps & Data,” select “Move Data from Android.”
- Download and install the “Move to iOS” app from the Google Play Store on your Android device.
- Open the app and follow the on-screen instructions to connect your Android device to your new iPhone.
- Select the data you want to transfer, such as contacts, messages, photos, videos, and more, and initiate the transfer process.
By following these steps to back up your data on your Android device and using the “Move to iOS” app, you can seamlessly transfer your important information to your new iPhone, ensuring a smooth transition without the risk of data loss.
Turning off Android Phone
Before removing the SIM card from your Android phone, it’s important to properly power it off to avoid any potential issues. Turning off your Android phone is a simple process that ensures the safety of your device and the SIM card removal. Here’s how to turn off your Android phone:
- Press the power button located on the side or top of your Android device until the power menu appears on the screen.
- On the power menu, you will typically see options such as “Power off,” “Restart,” and “Emergency mode.”
- Tap the “Power off” option to initiate the shutdown process. Depending on your device, you may be prompted to confirm the action before the phone powers down.
- Alternatively, some Android devices allow you to press and hold the power button and the volume down button simultaneously until the power off screen appears.
- Once the shutdown process is complete, your Android phone will power off, and it is now safe to proceed with removing the SIM card.
Ensuring that your Android phone is powered off before removing the SIM card is essential to prevent any potential damage to the card or the device. Additionally, it’s a good practice to wait a few seconds after the phone powers off before proceeding with the SIM card removal to allow the device to fully shut down. By following these steps, you can safely power off your Android phone in preparation for switching the SIM card to your new iPhone.
Removing SIM Card from Android Phone
Once your Android phone is powered off, you can proceed to remove the SIM card from the device. The SIM card is typically located in a designated slot, and it’s important to handle it with care to avoid any damage. Here’s a step-by-step guide on how to remove the SIM card from your Android phone:
- Locate the SIM card tray on your Android device. The location of the SIM card tray may vary depending on the phone model, but it is commonly found on the side of the device.
- Insert the SIM eject tool into the small hole located next to the SIM card tray. If you don’t have a SIM eject tool, a small paperclip can be gently straightened and used in its place.
- Gently press the tool into the hole until the SIM card tray is ejected from the phone. Carefully pull out the SIM card tray from the device.
- Remove the SIM card from the tray by gently pushing it out or sliding it out, depending on the design of the tray.
- Inspect the SIM card for any signs of damage, such as scratches or dents. If the SIM card appears to be in good condition, you can proceed to insert it into your new iPhone.
It’s important to handle the SIM card with care and avoid touching the metal contacts to prevent any potential damage. Additionally, storing the SIM card in a safe place, such as the original SIM card holder or a small protective case, can help prevent loss or damage during the transition to your new device. By following these steps, you can safely remove the SIM card from your Android phone in preparation for inserting it into your new iPhone.
Inserting SIM Card into iPhone
After successfully removing the SIM card from your Android phone, the next step is to insert it into your new iPhone. The iPhone utilizes a nano-SIM card, and the insertion process is straightforward. Here’s a guide on how to insert the SIM card into your iPhone:
- Locate the SIM card tray on your iPhone. The SIM card tray is typically located on the side of the device, and the location may vary depending on the iPhone model.
- Insert the SIM eject tool into the small hole next to the SIM card tray. If you don’t have a SIM eject tool, a small paperclip can be used as an alternative.
- Gently push the tool into the hole until the SIM card tray is ejected from the iPhone. Carefully remove the SIM card tray from the device.
- Place the nano-SIM card into the SIM card tray, ensuring that the gold contacts on the SIM card align with the contacts in the tray. The SIM card has a notched corner that aligns with the notch in the tray, ensuring the correct orientation.
- Carefully reinsert the SIM card tray back into the iPhone until it is securely in place.
It’s important to handle the SIM card and the SIM card tray with care to avoid any damage during the insertion process. Additionally, ensuring that the SIM card is properly aligned and securely placed in the tray is essential for the iPhone to recognize the card and establish a connection to the mobile network.
Once the SIM card is inserted into your iPhone, you can proceed to power on the device and initiate the setup process, which includes activating the SIM card with your mobile carrier. By following these steps, you can seamlessly insert the SIM card into your new iPhone and prepare it for activation and use.
Turning on iPhone
After successfully inserting the SIM card into your new iPhone, the next step is to power on the device and initiate the setup process. Turning on your iPhone for the first time involves a few simple steps to activate the device and establish a connection with the inserted SIM card. Here’s a guide on how to turn on your iPhone and begin the setup process:
- Press and hold the power button located on the side of your iPhone until the Apple logo appears on the screen. The power button is typically located on the right side of the device for iPhone 6 and later models, and on the top for earlier models.
- Release the power button once the Apple logo is displayed, and the iPhone will boot up and initialize the setup process.
- Follow the on-screen instructions to select your language, region, and connect to a Wi-Fi network. The iPhone will then prompt you to activate the inserted SIM card with your mobile carrier.
- Enter your Apple ID and password, or create a new Apple ID if you don’t have one, to sign in to your iCloud account and access your backed-up data from your previous device.
- Agree to the terms and conditions, set up Touch ID or Face ID for added security, and customize your preferences for app settings, display settings, and more.
Once the setup process is complete, your iPhone will be ready for use with the newly inserted SIM card. The device will establish a connection to your mobile carrier, and you’ll be able to make calls, send messages, and access mobile data using the activated SIM card.
Turning on your iPhone and completing the initial setup is an exciting step towards using your new device. By following these steps, you can seamlessly power on your iPhone, activate the SIM card, and personalize the device to suit your preferences and needs.
Setting up iPhone with SIM Card
Setting up your iPhone with the inserted SIM card involves a series of essential steps to ensure that the device is fully configured and ready for use. Once the SIM card is activated and the iPhone is powered on, you can proceed with the setup process to personalize the device and optimize its functionality. Here’s a comprehensive guide on how to set up your iPhone with the SIM card:
- Activating the SIM Card: During the initial setup, the iPhone will prompt you to activate the inserted SIM card with your mobile carrier. Follow the on-screen instructions to complete the activation process, which may involve entering your carrier’s provided activation code or confirming your account details.
- Restoring from Backup: If you backed up your data from your previous Android device, you can choose to restore your iPhone from the backup. This will transfer your contacts, photos, messages, and app data to your new device, ensuring a seamless transition.
- Setting up iCloud: Sign in to your iCloud account or create a new account to access Apple’s cloud services, including iCloud Drive, iCloud Photos, Find My, and more. This enables you to securely store your data and access it across your Apple devices.
- Customizing Settings: Personalize your iPhone by adjusting settings such as display brightness, wallpaper, sounds, and notifications. You can also configure privacy and security settings, set up biometric authentication (Touch ID or Face ID), and enable features like Siri and Apple Pay.
- Downloading Apps: Visit the App Store to download your favorite apps, games, and utilities. You can explore a vast selection of applications tailored to enhance your iPhone experience and cater to your specific interests and needs.
By following these steps, you can effectively set up your iPhone with the inserted SIM card, ensuring that the device is configured to your preferences and ready for seamless integration into your daily life. The activation of the SIM card, restoration of data, customization of settings, and access to the App Store collectively contribute to a tailored and personalized iPhone experience.
Transferring Data to iPhone
Transferring data from your previous Android device to your new iPhone is a crucial step in ensuring a smooth transition and retaining important information. Apple provides a convenient method for transferring data, including contacts, photos, messages, and more, using the “Move to iOS” app. Here’s a detailed guide on how to transfer data to your iPhone:
- Download “Move to iOS” App: On your Android device, download and install the “Move to iOS” app from the Google Play Store. This app facilitates the transfer of your data to your new iPhone.
- Initiate the Transfer: During the setup process of your new iPhone, when prompted to “Apps & Data,” select “Move Data from Android.” This will generate a unique code for the transfer process.
- Connect Devices: Open the “Move to iOS” app on your Android device and follow the on-screen instructions to enter the unique code displayed on your iPhone. This establishes a secure connection between the two devices for data transfer.
- Select Data to Transfer: Choose the type of data you want to transfer, such as contacts, messages, photos, videos, calendars, and more. The “Move to iOS” app will begin transferring the selected data to your new iPhone over a secure Wi-Fi network.
- Complete the Transfer: Once the data transfer is complete, you can proceed with the setup of your iPhone. The transferred data will seamlessly integrate into your new device, ensuring that your important information is readily accessible.
By utilizing the “Move to iOS” app, you can efficiently transfer your data from your Android device to your new iPhone, streamlining the process of migrating essential information. This ensures that your contacts, messages, photos, and other data are seamlessly transitioned to your new device, allowing you to continue where you left off and enjoy a familiar and personalized experience on your iPhone.