
What is a SIM Card?
A Subscriber Identity Module (SIM) card is a small, removable card that is inserted into mobile devices such as smartphones to facilitate communication over cellular networks. It serves as the unique identifier for the user and the device, enabling the user to make calls, send messages, and access mobile data services. The SIM card contains essential information, including the user's phone number, network authentication details, and contacts.
SIM cards come in various sizes, including standard, micro, and nano, to accommodate different device specifications. The SIM card's primary function is to securely store the subscriber's identity and network information, allowing the user to switch devices while retaining their mobile service. Additionally, SIM cards can store a limited number of contacts, making them a convenient tool for transferring contacts between compatible devices.
The SIM card also plays a crucial role in international travel, as it allows users to access local networks by inserting a compatible SIM card in their device. This flexibility enables travelers to avoid excessive roaming charges and stay connected while abroad. Moreover, SIM cards are essential for activating and managing mobile service plans, providing a seamless and personalized experience for users.
In essence, a SIM card serves as the gateway to mobile communication, enabling users to connect with others and access essential services. Its portability and versatility make it a fundamental component of modern mobile technology, empowering users to stay connected wherever they go.
How to Import Contacts from SIM Card to iPhone
Importing contacts from a SIM card to an iPhone is a straightforward process that allows users to transfer their contacts from an old device to their new iPhone seamlessly. Whether you’re switching from an Android device or simply want to consolidate your contacts, the iPhone provides easy-to-follow steps for importing SIM card contacts. Here’s a step-by-step guide to help you transfer your contacts efficiently.
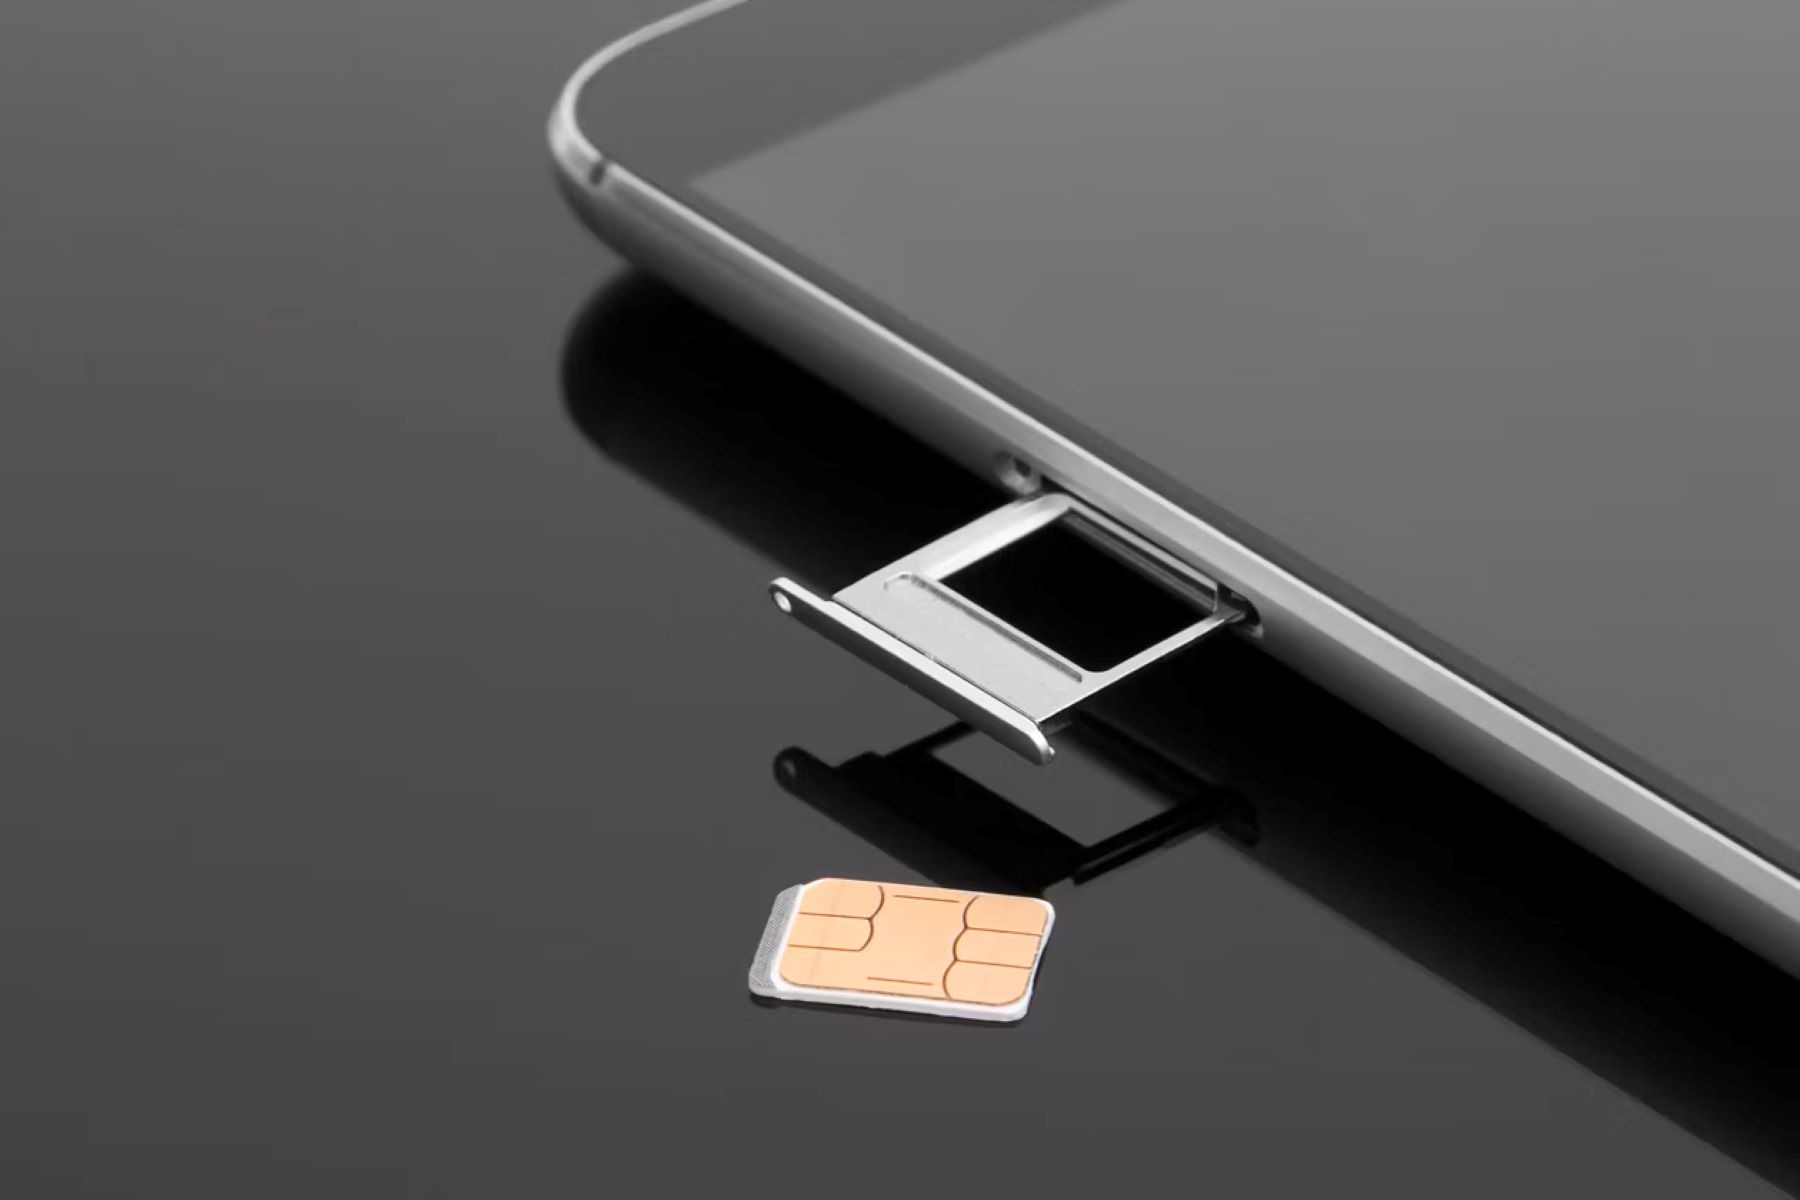
Step 1: Insert the SIM Card
Begin by inserting the SIM card containing the contacts you wish to import into your iPhone. To do this, use the SIM card eject tool to open the SIM tray, then carefully place the SIM card in the provided slot. Once inserted, gently push the tray back into the iPhone until it is securely in place.
Step 2: Access the Contacts App
On your iPhone’s home screen, locate and tap the “Contacts” app to open it. This will allow you to access your contact list and initiate the import process.
Step 3: Tap on "Import SIM Contacts"
Within the Contacts app, navigate to the settings or options menu, where you will find the “Import SIM Contacts” feature. Tap on this option to begin the import process.
Step 4: Choose the Contacts to Import
After selecting the “Import SIM Contacts” option, your iPhone will display a list of contacts available on the SIM card. You can choose to import all contacts or select specific contacts to transfer to your iPhone. Tap on the appropriate option based on your preference.
Step 5: Select "Import" to Complete the Process
Once you have chosen the contacts you want to import, tap the “Import” button to initiate the transfer. Your iPhone will then proceed to import the selected contacts from the SIM card to your device’s contact list.
Alternatively, users can opt to import contacts from a SIM card to their iPhone using iCloud, which offers a convenient and secure method for managing contacts across devices. This alternative method provides users with additional flexibility and control over their imported contacts, ensuring a seamless transition to their new iPhone.
By following these simple steps, users can effortlessly import contacts from a SIM card to their iPhone, streamlining the process of transitioning to a new device and ensuring that essential contacts are readily accessible.
Step 1: Insert the SIM Card
Before initiating the process of importing contacts from a SIM card to an iPhone, it is essential to ensure that the SIM card containing the desired contacts is properly inserted into the iPhone. This step is crucial for establishing the connection between the SIM card and the device, enabling the seamless transfer of contacts. Here’s a detailed guide on how to correctly insert the SIM card into your iPhone:
Locate the SIM Card Tray
Depending on the iPhone model, the SIM card tray is typically located on the side of the device. Use the SIM card eject tool, a small pin-like tool included with the iPhone, or a paperclip to eject the SIM card tray. Insert the tool into the small pinhole next to the SIM card tray and gently apply pressure to release the tray.
Remove the SIM Card Tray
Once the SIM card tray is ejected, carefully remove it from the iPhone. Take note of the orientation of the SIM card tray to ensure that you insert the SIM card correctly. The tray will have a small diagram indicating the proper positioning of the SIM card.
Insert the SIM Card
Place the SIM card into the designated slot on the SIM card tray, ensuring that it fits securely and aligns with the tray’s layout. Be mindful of the orientation of the SIM card, as it should match the diagram on the tray. Carefully slide the SIM card tray back into the iPhone until it is flush with the device’s frame.
Secure the SIM Card Tray
Gently push the SIM card tray back into the iPhone until it is fully inserted and sits flush with the device’s exterior. Ensure that the tray is securely in place to prevent any issues with connectivity or the SIM card becoming dislodged.
By following these steps, users can confidently insert the SIM card into their iPhone, laying the foundation for a successful contact import process. Properly inserting the SIM card ensures that the device can recognize and access the contacts stored on the SIM card, setting the stage for a seamless transfer to the iPhone’s contact list.
Step 2: Access the Contacts App
After successfully inserting the SIM card into the iPhone, the next step in the process of importing contacts is to access the Contacts app. This step is essential for navigating to the appropriate settings and options required to initiate the import process. Here’s a detailed guide on accessing the Contacts app on your iPhone:
Locate the Contacts App Icon
On the iPhone’s home screen, look for the Contacts app icon, which typically features a silhouette of a person or a simple address book symbol. The app icon may be located on the main home screen or within a folder, depending on your device’s organization.
Open the Contacts App
Tap the Contacts app icon to open the application, granting you access to your contact list and related settings. Upon launching the app, you will be able to view your existing contacts and proceed to the next steps for importing contacts from the SIM card.
Familiarize Yourself with the Contacts Interface
Once inside the Contacts app, take a moment to familiarize yourself with the app’s interface and navigation options. This will enable you to navigate through the app’s menus and settings efficiently, ensuring a smooth transition as you proceed with the contact import process.
Prepare for Contact Import
Prior to initiating the import process, ensure that your iPhone is adequately charged and connected to a stable network, as the import process may require access to cloud services or network connectivity. Having your iPhone ready and accessible will streamline the contact import process, allowing you to seamlessly transfer your contacts from the SIM card to your device.
By following these steps, users can easily access the Contacts app on their iPhone, setting the stage for a seamless transition as they proceed to import contacts from the SIM card. Navigating to the Contacts app is a critical initial step that paves the way for a hassle-free contact import process, ensuring that essential contacts are readily available on the iPhone.
Step 3: Tap on “Import SIM Contacts”
Once you have accessed the Contacts app on your iPhone, the next pivotal step in the process of importing contacts from your SIM card is to locate and tap on the “Import SIM Contacts” feature. This action initiates the transfer of contacts from the SIM card to your iPhone, streamlining the process of consolidating your contacts onto a single device. Here’s a comprehensive guide on how to navigate to and activate the “Import SIM Contacts” feature:
Navigate to the Settings or Options Menu
Within the Contacts app, locate the settings or options menu, typically represented by three horizontal lines or a gear icon. Tapping on this menu will provide access to additional features and settings within the Contacts app.
Locate the “Import SIM Contacts” Option
Once inside the settings or options menu, carefully scan the available features and settings for the “Import SIM Contacts” option. This feature is designed to facilitate the seamless transfer of contacts from the SIM card to your iPhone, allowing you to consolidate your contact list effortlessly.
Tap on “Import SIM Contacts”
Upon identifying the “Import SIM Contacts” option, tap on it to activate the import process. This action signals to your iPhone that you intend to transfer contacts from the SIM card to your device, initiating the retrieval of contact information stored on the SIM card.
Allow the Import Process to Commence
After tapping on “Import SIM Contacts,” your iPhone will begin the process of retrieving and transferring the contacts from the SIM card to your device’s contact list. Depending on the number of contacts and the speed of your device, this process may take a few moments to complete.
By following these steps, users can effortlessly navigate to and activate the “Import SIM Contacts” feature on their iPhone, kickstarting the process of transferring contacts from the SIM card to the device. This pivotal step streamlines the consolidation of contacts, ensuring that essential contact information is readily accessible on the iPhone’s contact list.
Step 4: Choose the Contacts to Import
Once you have initiated the import process by tapping on “Import SIM Contacts,” the subsequent step involves selecting the specific contacts you wish to transfer from the SIM card to your iPhone. This step offers users the flexibility to choose individual contacts or opt to import all contacts, providing a tailored approach to consolidating their contact list. Here’s a detailed guide on how to choose the contacts to import:
Review the Available Contacts
Upon activating the “Import SIM Contacts” feature, your iPhone will display a list of contacts available on the SIM card. Take a moment to review the contacts listed, ensuring that you have a clear understanding of the available options for import.
Select Individual Contacts or Choose “Import All”
Depending on your preference, you can choose to import specific contacts by individually selecting them from the list displayed on your iPhone. Alternatively, if you wish to import all contacts from the SIM card, your device may offer an “Import All” option for a comprehensive transfer.
Utilize the “Select All” Feature (If Available)
If your iPhone provides a “Select All” feature, consider using this option if you intend to import all contacts from the SIM card. This streamlined approach eliminates the need to individually select each contact, simplifying the import process.
Opt for Customized Selection
For users who prefer a more customized approach, individually selecting specific contacts from the list allows for a tailored import process. This method enables users to transfer only the contacts they deem essential, providing a personalized approach to consolidating their contact list.
By following these steps, users can effectively choose the contacts they wish to import from the SIM card to their iPhone, tailoring the import process to their specific preferences. This personalized approach ensures that users have full control over the contacts transferred to their iPhone, streamlining the consolidation of their contact list.
Step 5: Select “Import” to Complete the Process
After choosing the contacts you wish to import from the SIM card to your iPhone, the final step in the process involves selecting the “Import” option to initiate the transfer. This action finalizes the import process, ensuring that the chosen contacts are seamlessly transferred to your iPhone’s contact list. Here’s a comprehensive guide on how to complete the import process:
Verify the Selected Contacts
Prior to selecting “Import,” take a moment to verify the contacts you have chosen for transfer. Confirm that the selected contacts align with your preferences and that you have included all essential contacts for import.
Tap on “Import” to Initiate Transfer
Once you are satisfied with the selection, tap on the “Import” option to commence the transfer process. This action signals to your iPhone that you are ready to import the chosen contacts from the SIM card to your device’s contact list.
Monitor the Import Progress
Upon selecting “Import,” your iPhone will begin the process of transferring the selected contacts from the SIM card to your device. Depending on the number of contacts and the speed of your device, this process may take a few moments to complete. It is advisable to monitor the import progress to ensure a successful transfer.
Confirmation of Successful Import
Once the import process is complete, your iPhone will provide a confirmation message or indicator to signify the successful transfer of contacts. This confirmation assures you that the selected contacts from the SIM card are now readily accessible within your iPhone’s contact list.
By following these steps, users can seamlessly complete the import process by selecting “Import,” ensuring that the chosen contacts from the SIM card are successfully transferred to their iPhone. This final step solidifies the consolidation of contacts onto the device, providing users with immediate access to their essential contacts.
Alternative Method: Using iCloud to Import Contacts
In addition to the traditional method of importing contacts from a SIM card to an iPhone, users can leverage iCloud, Apple’s cloud storage and computing service, to seamlessly manage and transfer their contacts across devices. This alternative method offers a convenient and secure approach to importing contacts, providing users with additional flexibility and control over their contact management. Here’s a comprehensive guide on using iCloud to import contacts to your iPhone:
Step 1: Open Settings and Tap on Your Name
Begin by accessing the Settings app on your iPhone and tapping on your name at the top of the settings menu. This action grants you access to your Apple ID, iCloud, and other personalized settings linked to your device.
Step 2: Select “iCloud” and Toggle on “Contacts”
Within the Apple ID settings, locate and tap on “iCloud.” From the list of available iCloud features, ensure that the “Contacts” option is toggled on. Enabling this feature allows your iPhone to sync and store your contacts in iCloud, ensuring that they are accessible across your Apple devices.
Step 3: Tap “Merge” to Import SIM Card Contacts to iCloud
If you have already imported contacts from your SIM card to your iPhone, you may be prompted to merge the existing contacts with those stored in iCloud. Tap on “Merge” to consolidate the imported SIM card contacts with your iCloud contact list, ensuring a unified and up-to-date collection of contacts.
Step 4: Wait for the Import Process to Complete
Once the merging process is initiated, allow your iPhone to complete the import and synchronization of contacts with iCloud. Depending on the number of contacts and the speed of your device and network connection, this process may take a few moments to finalize.
Step 5: Access the Contacts App to Verify Imported Contacts
After the import process is complete, access the Contacts app on your iPhone to verify that the contacts from your SIM card have been successfully imported and synced with iCloud. This step ensures that your contacts are readily accessible and securely stored in iCloud for future use.
By following these steps, users can leverage iCloud as an alternative method to import contacts from a SIM card to their iPhone, offering a seamless and secure approach to managing and accessing their contacts across Apple devices. This method provides users with enhanced control over their contact management, ensuring that essential contacts are seamlessly integrated into their iCloud ecosystem.
Step 1: Open Settings and Tap on Your Name
To begin the process of importing contacts from a SIM card to your iPhone using iCloud, the first step involves accessing the Settings app and tapping on your name to access your Apple ID and iCloud settings. This pivotal step sets the stage for seamlessly managing and syncing your contacts across Apple devices. Here’s a detailed guide on how to navigate to and initiate this step:
Access the Settings App
Locate the Settings app on your iPhone’s home screen, represented by a gear icon. Tap on the Settings app to open the comprehensive menu of device settings and preferences, providing access to various customization options and features.
Tap on Your Name at the Top of the Settings Menu
Within the Settings menu, scroll to the top and tap on your name, which is typically displayed at the top of the settings list. Tapping on your name grants you access to your personalized Apple ID settings, iCloud preferences, and other essential features linked to your device.
Authenticate Your Identity if Required
If prompted, authenticate your identity using your device passcode, Touch ID, or Face ID to access your Apple ID settings. This step ensures the security of your personal information and grants you authorized access to manage your iCloud settings and preferences.
Explore the Apple ID Settings
Once inside the Apple ID settings, take a moment to explore the available options, including iCloud, Media & Purchases, Family Sharing, and other personalized features. Familiarizing yourself with these settings will provide insight into the various functions and capabilities linked to your Apple ID.
By following these steps, users can confidently open the Settings app and tap on their name to access their Apple ID and iCloud settings, laying the groundwork for seamlessly managing and syncing their contacts using iCloud. This initial step sets the stage for a streamlined and secure approach to importing and accessing contacts across Apple devices.
Step 2: Select “iCloud” and Toggle on “Contacts”
After accessing your Apple ID settings, the next crucial step in using iCloud to import contacts from a SIM card to your iPhone involves selecting the “iCloud” option and toggling on the “Contacts” feature. This action enables your iPhone to sync and store your contacts in iCloud, ensuring seamless access and management across your Apple devices. Here’s a comprehensive guide on how to navigate to and activate this step:
Locate and Tap on “iCloud”
Within the Apple ID settings, locate and tap on the “iCloud” option to access the array of features and settings associated with iCloud. This step provides entry to the comprehensive suite of iCloud services, including contacts, calendars, photos, and more.
Ensure “Contacts” is Toggled On
Once inside the iCloud settings, locate the “Contacts” feature and ensure that it is toggled on. Activating this feature allows your iPhone to sync and store your contacts in iCloud, ensuring that they are readily accessible and securely stored in the cloud for future use.
Verify Activation of “Contacts”
After toggling on the “Contacts” feature, verify that it is activated by reviewing the status indicator next to the “Contacts” option. A green indicator signifies that the feature is enabled, indicating that your contacts will be synced and stored in iCloud for seamless access and management.
Understand the Benefits of iCloud Contact Sync
Take a moment to understand the benefits of syncing your contacts with iCloud, including the ability to access and manage your contacts across all your Apple devices, automatic backup and synchronization of contact information, and the seamless integration of contacts with other iCloud services.
By following these steps, users can effectively select “iCloud” and toggle on the “Contacts” feature, ensuring that their contacts are seamlessly synced and stored in iCloud for effortless access and management. This step sets the stage for a streamlined approach to importing and synchronizing contacts across Apple devices using iCloud.
Step 3: Tap “Merge” to Import SIM Card Contacts to iCloud
Upon enabling the “Contacts” feature in iCloud, the subsequent step involves tapping “Merge” to consolidate the contacts imported from the SIM card with your iCloud contact list. This critical step ensures that your existing contacts and those imported from the SIM card are seamlessly integrated and synchronized within iCloud, providing a unified and up-to-date collection of contacts. Here’s a comprehensive guide on how to navigate to and initiate this pivotal step:
Initiate the Contact Merging Process
After enabling the “Contacts” feature in iCloud, your iPhone may prompt you to merge the existing contacts with those imported from the SIM card. This merging process ensures that all contacts are unified and synchronized within iCloud, providing a comprehensive and consolidated contact list.
Tap on “Merge” to Confirm Integration
When prompted, tap on the “Merge” option to confirm the integration of the contacts imported from the SIM card with your existing iCloud contact list. This action signals to your iPhone that you intend to consolidate and synchronize the imported contacts, ensuring a seamless and unified collection of contacts across your Apple devices.
Understand the Implications of Merging Contacts
Take a moment to understand the implications of merging contacts, including the unified storage and synchronization of all contacts within iCloud, the seamless access to a comprehensive contact list across Apple devices, and the elimination of duplicate or fragmented contact entries.
Ensure a Unified and Up-to-Date Contact List
By tapping “Merge,” you ensure that your iCloud contact list is unified and up to date, encompassing all imported contacts from the SIM card and existing contacts. This step streamlines contact management and ensures that your contacts are seamlessly integrated within iCloud for effortless access and synchronization.
By following these steps, users can confidently tap “Merge” to consolidate the contacts imported from the SIM card with their iCloud contact list, ensuring a unified and up-to-date collection of contacts across their Apple devices. This pivotal step solidifies the seamless integration and synchronization of contacts within iCloud, providing users with a comprehensive and streamlined contact management experience.
Step 4: Wait for the Import Process to Complete
After initiating the merging of contacts from the SIM card with your iCloud contact list, it is essential to allow your iPhone to complete the import and synchronization process. This step ensures that all contacts, including those imported from the SIM card, are seamlessly integrated and updated within iCloud, providing a unified and comprehensive contact management experience. Here’s a detailed guide on what to expect and how to manage this critical step:
Patience During the Synchronization Process
Upon initiating the merging process, allow your iPhone to complete the import and synchronization of contacts within iCloud. Depending on the number of contacts and the speed of your device and network connection, this process may take a few moments to finalize. Exercise patience while your device completes the synchronization.
Monitor the Progress Indicator
Keep an eye on the progress indicator or activity status within your iCloud settings to monitor the import and synchronization process. This visual cue provides insight into the status of the contact import, ensuring that you are informed about the progress and completion of the synchronization.
Ensure Stable Network Connectivity
During the import process, ensure that your iPhone is connected to a stable network, as the synchronization of contacts with iCloud may require access to a reliable internet connection. A stable network connection facilitates the seamless and efficient import and synchronization of contacts, ensuring a successful outcome.
Verification of Successful Import
Once the import and synchronization process is complete, verify that the contacts imported from the SIM card are seamlessly integrated and updated within your iCloud contact list. Access your Contacts app to ensure that all contacts, including those from the SIM card, are readily accessible and synchronized across your Apple devices.
By following these steps and exercising patience, users can ensure the successful completion of the import and synchronization process, allowing all contacts, including those imported from the SIM card, to be seamlessly integrated and updated within iCloud. This critical step solidifies the unified and comprehensive contact management experience provided by iCloud, ensuring that essential contacts are readily accessible and synchronized across Apple devices.
Step 5: Access the Contacts App to Verify Imported Contacts
After completing the import and synchronization process using iCloud, the final step involves accessing the Contacts app on your iPhone to verify that the contacts imported from the SIM card are seamlessly integrated and updated within your iCloud contact list. This critical step ensures that all contacts are readily accessible and synchronized across your Apple devices, providing a unified and up-to-date collection of contacts. Here’s a detailed guide on how to navigate to and complete this pivotal step:
Open the Contacts App
Locate and tap on the Contacts app icon on your iPhone’s home screen to open the application. This action grants you access to your contact list, allowing you to verify that the imported contacts from the SIM card are seamlessly integrated and readily accessible within the app.
Review the Contact List
Upon accessing the Contacts app, take a moment to review your contact list to ensure that all contacts, including those imported from the SIM card, are present and accurately updated. Verify that the imported contacts are seamlessly integrated and synchronized with your existing contacts within the app.
Check for Unified and Up-to-Date Contacts
Examine your contact list to ensure that all contacts, including those imported from the SIM card, are unified and up to date. This step confirms that the import and synchronization process using iCloud has successfully integrated the imported contacts within your iCloud contact list, providing a comprehensive and unified collection of contacts.
Verify Accessibility Across Apple Devices
Access your contacts on other Apple devices linked to your iCloud account to verify that the imported contacts are synchronized and accessible across all your devices. This step ensures that the contacts imported from the SIM card are seamlessly integrated and updated within iCloud, providing a cohesive and synchronized contact management experience.
By following these steps and accessing the Contacts app, users can confidently verify that the contacts imported from the SIM card are seamlessly integrated and updated within their iCloud contact list. This final step solidifies the successful import and synchronization process, ensuring that essential contacts are readily accessible and synchronized across their Apple devices for seamless contact management.