
Checking Compatibility
Before connecting your devices to a Dell docking station, it’s crucial to ensure that they are compatible. Compatibility can impact the performance and functionality of the connected devices, so it’s essential to verify the compatibility of your laptop and peripherals with the docking station.
Here’s a step-by-step guide to checking compatibility:
- Review the Laptop Model: Start by identifying the make and model of your laptop. Dell docking stations are designed to be compatible with specific laptop models. You can find this information in the user manual or on the manufacturer’s website.
- Check the Docking Station Specifications: Refer to the specifications of the Dell docking station to ensure that it supports the connections and features you require. Look for details such as the number and type of ports available, maximum resolution supported for external monitors, and compatibility with specific operating systems.
- Verify Port Compatibility: Compare the ports on your laptop with the ports on the docking station. Ensure that the docking station provides the necessary ports to connect your peripherals, such as monitors, USB devices, and audio equipment. Compatibility issues can arise if the docking station lacks the required ports or if the laptop’s ports do not align with the docking station’s connections.
- Check Operating System Compatibility: Confirm that the docking station is compatible with the operating system running on your laptop. Compatibility issues may arise if the docking station’s drivers and software are not supported by your laptop’s operating system.
- Consult Manufacturer Resources: If you’re uncertain about compatibility or need additional information, reach out to Dell’s customer support or consult online resources provided by the manufacturer. Dell’s support website often contains detailed compatibility information and troubleshooting guides.
By carefully reviewing the compatibility of your laptop and peripherals with the Dell docking station, you can mitigate potential issues and ensure a seamless connection experience. Once compatibility is confirmed, you can proceed with confidence to connect your devices and maximize the functionality of your docking station.
Connecting the Docking Station to a Laptop
Once you’ve verified the compatibility of your devices, it’s time to connect the Dell docking station to your laptop. This process allows you to expand your laptop’s capabilities by seamlessly integrating it with various peripherals and accessories.
Follow these steps to connect the docking station to your laptop:
- Position the Docking Station: Choose a suitable location for the docking station on your desk or workspace. Ensure that it is within reach of your laptop’s ports and power source.
- Connect the Power Adapter: Plug the power adapter into the docking station and then connect it to a power outlet. This provides the necessary power for the docking station and charges your laptop if supported.
- Connect the Laptop: Use the appropriate cable to connect your laptop to the docking station. Most Dell docking stations utilize a single USB-C cable for data, power, and video connectivity. Ensure that the cable is securely inserted into both the laptop and the docking station.
- Power On the Docking Station: Press the power button on the docking station to activate it. Some models may power on automatically when the laptop is connected.
- Install Docking Station Drivers: If prompted, install any necessary drivers or software for the docking station on your laptop. These drivers facilitate the seamless operation of the docking station and its connected peripherals.
- Verify Connection: Check your laptop to confirm that it recognizes the docking station and connected peripherals. You can do this by reviewing the device manager or system preferences to ensure that all components are detected and functioning correctly.
By following these steps, you can establish a reliable connection between your laptop and the Dell docking station, unlocking the potential for enhanced productivity and versatility. Once the connection is established, you can proceed to connect external monitors, USB devices, and audio equipment to further customize your workspace.
Connecting External Monitors
Expanding your display setup by connecting external monitors to your Dell docking station can significantly enhance your productivity and multitasking capabilities. With the ability to extend your desktop across multiple screens, you can efficiently manage various applications and streamline your workflow.
Follow these steps to connect external monitors to your docking station:
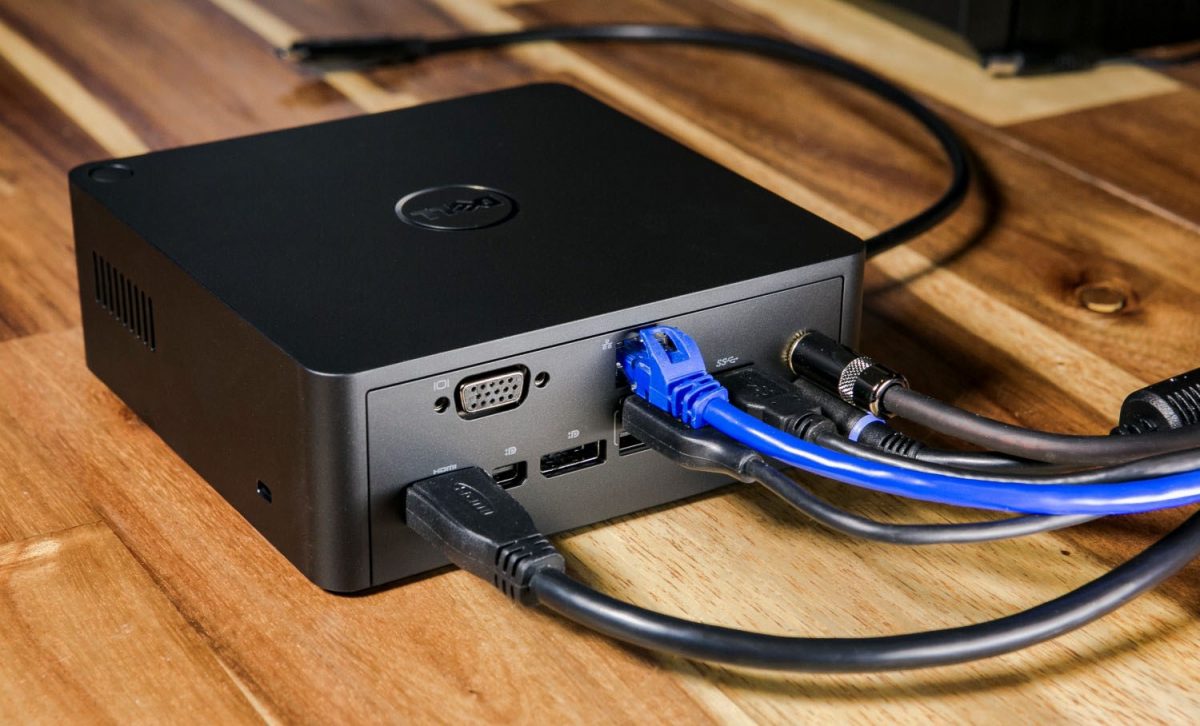
- Identify Monitor Ports: Determine the available video output ports on your docking station and the corresponding input ports on your monitors. Common video output interfaces include HDMI, DisplayPort, and VGA.
- Choose the Connection Type: Select the appropriate cables or adapters based on the available ports on your docking station and the input ports on your monitors. Ensure that the cables support the desired display resolution and refresh rate.
- Connect the Monitors: Use the selected cables to connect the external monitors to the video output ports on the docking station. Ensure a secure connection for each monitor to minimize signal interference and display issues.
- Configure Display Settings: Access your laptop’s display settings or the graphics control panel to configure the arrangement and orientation of the external monitors. You can choose to extend the desktop, duplicate the display, or select a specific monitor as the primary screen.
- Adjust Resolution and Orientation: Fine-tune the display resolution and orientation to suit your preferences and optimize the viewing experience across all connected monitors. This step ensures that content is displayed accurately and consistently across the extended desktop.
- Verify Monitor Detection: Check the display settings to confirm that your laptop recognizes the connected external monitors. Ensure that the monitors are detected and that the desired display configuration is applied without any issues.
By following these steps, you can seamlessly integrate external monitors into your workspace, expanding your visual real estate and creating an immersive multitasking environment. The ability to connect multiple monitors to your Dell docking station empowers you to work more efficiently and effectively across various applications and tasks.
Connecting USB Devices
Expanding the connectivity of your Dell docking station by integrating USB devices allows you to streamline your workflow and enhance productivity. From external storage drives to peripherals such as keyboards and mice, USB connectivity enables you to personalize your workspace and access essential accessories with ease.
Here’s a step-by-step guide to connecting USB devices to your docking station:
- Identify Available USB Ports: Take note of the USB ports available on your Dell docking station. These may include USB-A, USB-C, or a combination of both. Understanding the available ports helps you plan the connection of your USB devices.
- Select USB Devices: Choose the USB devices you intend to connect, such as external hard drives, flash drives, printers, or input devices. Ensure that the devices are compatible with the USB ports on your docking station.
- Connect the USB Devices: Use the appropriate USB cables to connect your devices to the USB ports on the docking station. Ensure a secure connection for each device to avoid data transfer issues or disconnections during operation.
- Install Device Drivers: If necessary, install any required drivers or software for the connected USB devices on your laptop. Some devices may require specific drivers to enable full functionality and compatibility with your system.
- Verify Device Recognition: Check your laptop’s device manager or system information to confirm that the connected USB devices are recognized and operational. Ensure that the devices appear in the list of connected peripherals without any errors.
- Test Device Functionality: Validate the functionality of each connected USB device by performing basic operations, such as transferring files to external storage drives or using input devices to interact with your system. This step ensures that the devices are fully functional and responsive.
By following these steps, you can seamlessly integrate USB devices into your workspace, leveraging the versatility of your Dell docking station to accommodate a wide range of peripherals. The ability to connect USB devices enhances the flexibility and convenience of your workstation, allowing you to access essential tools and resources effortlessly.
Connecting Audio Devices
Integrating audio devices into your Dell docking station can enrich your multimedia experience and enable seamless communication during virtual meetings or presentations. Whether you need to connect speakers, headphones, microphones, or other audio peripherals, the docking station’s audio capabilities offer versatility and convenience.
Follow these steps to connect audio devices to your docking station:
- Identify Audio Ports: Locate the audio input and output ports on your Dell docking station. These may include headphone jacks, microphone inputs, or dedicated audio interfaces. Understanding the available ports helps you plan the connection of your audio devices.
- Select Audio Devices: Choose the audio devices you wish to connect, such as speakers, headphones, microphones, or external audio interfaces. Ensure that the devices are compatible with the audio ports on your docking station.
- Connect the Audio Devices: Use the appropriate audio cables or connectors to link your audio devices to the corresponding audio ports on the docking station. Ensure a secure connection for each device to maintain audio quality and prevent signal interference.
- Configure Audio Settings: Access your laptop’s audio settings or control panel to configure the input and output devices. Select the connected audio peripherals as the default input or output sources based on your preferences and usage scenarios.
- Test Audio Playback and Recording: Play audio content through the connected speakers or headphones to verify the output quality and functionality. Additionally, test the recording capabilities of connected microphones to ensure that they capture sound accurately.
- Adjust Volume and Settings: Fine-tune the volume levels and audio settings to optimize the playback and recording experience. Adjust equalizer settings or sound enhancements based on your preferences and the requirements of your audio devices.
By following these steps, you can seamlessly integrate audio devices into your workspace, leveraging the audio capabilities of your Dell docking station to enhance your multimedia and communication experiences. The ability to connect audio devices empowers you to enjoy immersive sound quality and engage in clear, effective communication without the hassle of managing multiple connections.
Configuring Display Settings
Once you have connected your Dell docking station to external monitors, configuring the display settings enables you to optimize the visual experience and tailor the arrangement of your extended desktop to suit your workflow. By customizing the display settings, you can maximize productivity and create a seamless multi-monitor environment.
Follow these steps to configure the display settings after connecting external monitors to your docking station:
- Access Display Settings: Navigate to your laptop’s display settings or graphics control panel. You can typically access these settings by right-clicking on the desktop and selecting the display settings option.
- Identify Connected Monitors: Review the display settings to identify the connected external monitors. Each monitor should be detected and displayed within the settings interface, allowing you to manage them individually.
- Arrange Monitor Layout: Arrange the position and orientation of the external monitors within the display settings. You can drag and drop the monitor icons to reflect the physical layout of your monitors on your desk, ensuring that the on-screen arrangement matches the physical setup.
- Set Primary Monitor: Designate a primary monitor within the display settings. The primary monitor serves as the main display where your desktop icons and primary taskbar appear. This selection is essential for organizing your workspace effectively.
- Configure Display Modes: Choose the desired display mode, such as extending the desktop across multiple monitors or duplicating the display on all connected screens. Selecting the extended display mode enables you to utilize the additional screen real estate for multitasking and application management.
- Adjust Resolution and Scaling: Fine-tune the display resolution and scaling settings to ensure that content is displayed clearly and proportionally across all connected monitors. This step optimizes the visual clarity and legibility of on-screen elements.
By following these steps, you can customize the display settings to create an efficient and visually cohesive multi-monitor setup. Configuring the display settings optimizes the utilization of your extended desktop, allowing you to work seamlessly across multiple applications and tasks with enhanced visibility and organization.
Disconnecting Devices from the Docking Station
When it’s time to disconnect your devices from the Dell docking station, following proper procedures ensures a smooth transition and helps maintain the integrity of your peripherals and the docking station itself. Whether you’re preparing to travel or reconfiguring your workspace, safely disconnecting devices is essential to prevent damage and data loss.
Here’s a step-by-step guide for disconnecting devices from your docking station:
- Close Applications and Save Work: Before disconnecting any devices, ensure that you save your work and close any open applications that may be using the connected peripherals. This step prevents data loss and minimizes the risk of file corruption.
- Eject External Storage Devices: If you have connected external storage drives or USB devices, safely eject them from your laptop’s operating system. Use the designated eject or safely remove hardware option to ensure that data is written and cached properly before removal.
- Power Off the Docking Station: If your docking station has a power button, power it off before disconnecting any devices. This prevents potential electrical surges or disruptions when removing connected peripherals.
- Disconnect Cables and Peripherals: Carefully disconnect the cables and peripherals from the docking station. Gently remove each cable or device to avoid damaging the ports or connectors. If you encounter resistance, check for any locking mechanisms or release buttons on the connectors.
- Organize and Store Cables: As you disconnect the cables, take the opportunity to organize and store them neatly. Proper cable management reduces the risk of tangling and makes it easier to reconnect devices in the future.
- Power Down the Laptop: If you’re disconnecting the docking station from your laptop, power down the laptop before removing the connection cable. This ensures a safe disconnection and prevents potential data loss or hardware damage.
By following these steps, you can safely and efficiently disconnect devices from your Dell docking station, minimizing the risk of damage and ensuring a seamless transition. Properly disconnecting devices also contributes to the longevity of your peripherals and the docking station, allowing you to maintain a reliable and functional workspace.