
Share your photo album directly from the Photos app
Sharing your favorite photo album with friends and family has never been easier with the Photos app on your iPad. Whether it’s a collection of vacation memories, special events, or even just everyday moments, you can easily share your photo album directly from the app itself. Here’s how:
1. Open the Photos app on your iPad and navigate to the album you want to share. You can choose an existing album or create a new one specifically for sharing.
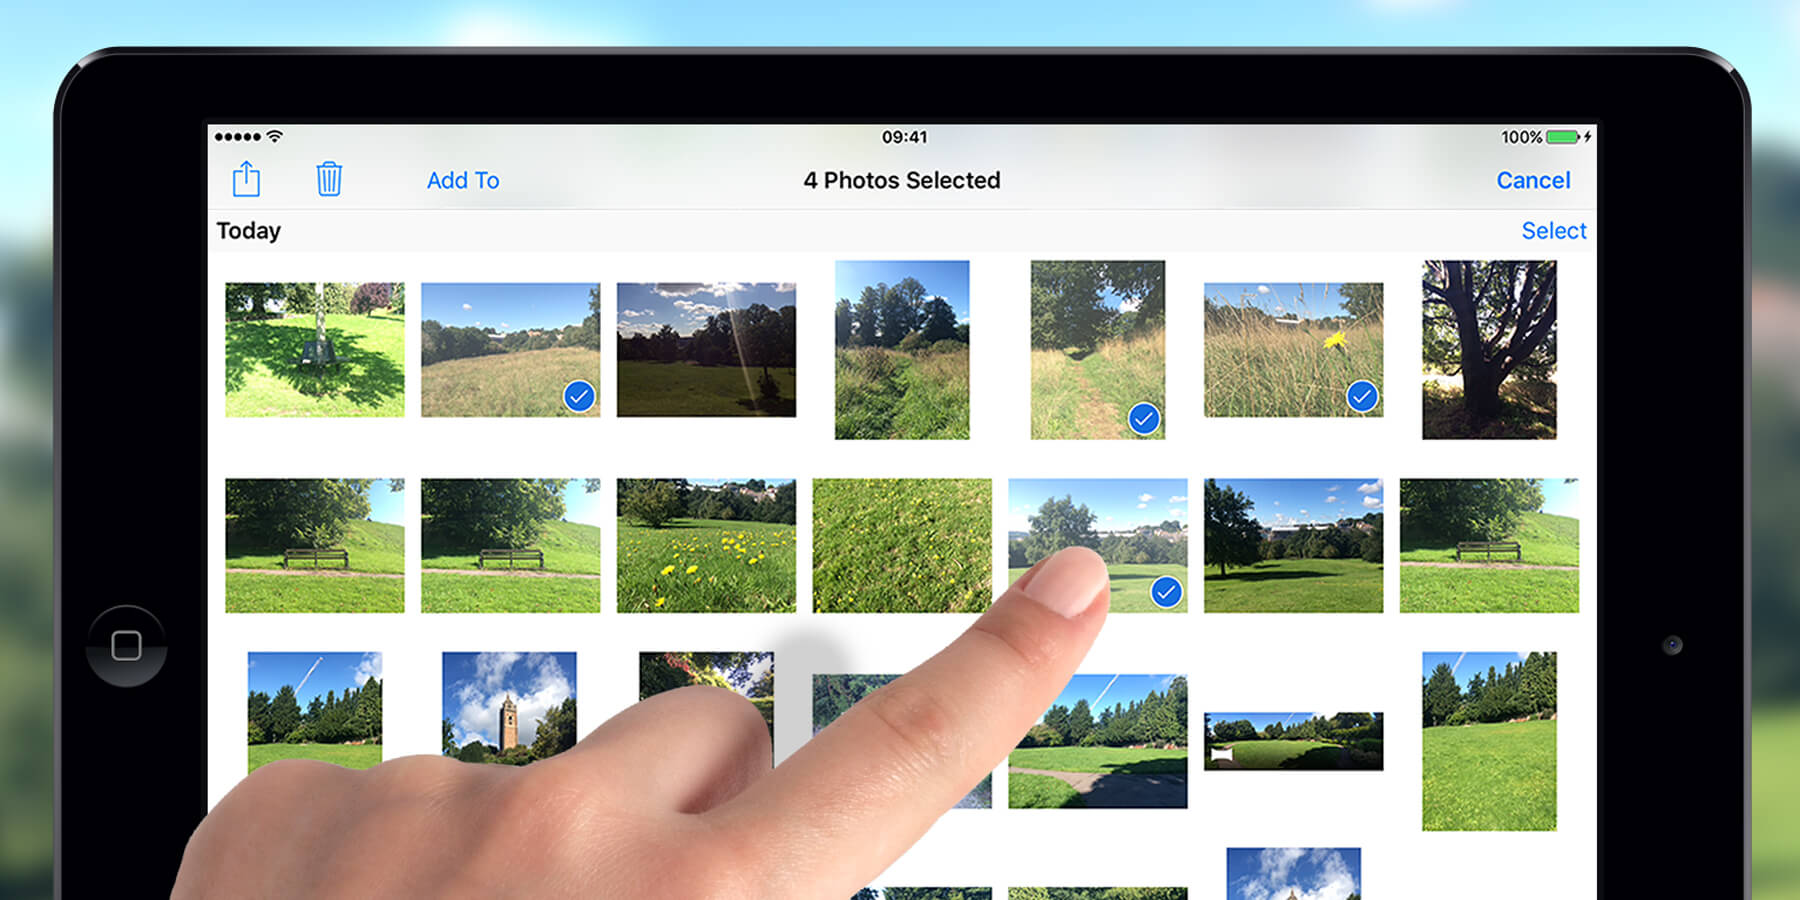
2. Once you’re in the album, tap on the “Select” button located at the top right corner of the screen. This will allow you to select the photos you want to include in your shared album.
3. After selecting the photos, tap on the “Share” button located at the bottom left corner of the screen. This will bring up a menu of different sharing options.
4. From the sharing options menu, select “Shared Album.” This will prompt you to enter a name for your shared album.
5. After naming the album, you’ll have the option to invite specific friends to view the album or create a public link that can be shared with anyone. If you choose to invite friends, you can enter their email addresses or select them from your contacts list.
6. Once you’ve set the sharing preferences, tap on “Create” to create the shared album. The app will then generate a link or send invitations to the selected friends.
7. Your shared album is now ready to be enjoyed by your friends. They can view the album directly from their own Photos app on their iPad or other Apple devices.
By sharing your photo album directly from the Photos app, you can effortlessly spread the joy of your cherished memories with your loved ones. They can like and comment on the photos, allowing for an interactive and engaging experience. Best of all, you have full control over the shared album, with the ability to remove photos or stop sharing at any time.
So go ahead, start sharing your favorite photo albums with friends and family, and keep the memories alive for years to come!
Use the iCloud Photo Sharing feature to share albums
If you want to share your photo albums with friends and family who are not using an iPad or iOS device, the iCloud Photo Sharing feature is a perfect solution. With this feature, you can create shared albums and invite people to view and contribute to them, regardless of the device they are using. Here’s how to use the iCloud Photo Sharing feature:
1. Open the Photos app on your iPad and select the album you want to share. You can either choose an existing album or create a new one.
2. Tap on the “Select” button at the top-right corner of the screen to choose the photos you want to include in the shared album.
3. Once you have selected the photos, tap on the “Share” button at the bottom-left corner of the screen, and then select “Shared Albums” from the sharing options menu.
4. You will be prompted to create a new shared album or select an existing one. If it’s your first time using iCloud Photo Sharing, you will need to set it up by tapping on “Create Shared Album” and following the on-screen instructions.
5. After creating or selecting the shared album, you can then invite people to view it. You can enter their email addresses or simply select them from your contacts list.
6. You also have the option to allow others to contribute to the shared album by toggling on the “Subscribers Can Post” option. This way, your friends and family can add their own photos and videos to the album.
7. Once you have set all the sharing preferences, tap on “Post” to publish the shared album to the iCloud Photo Sharing service.
By using the iCloud Photo Sharing feature, you can easily share your albums with people who don’t have an iPad or iOS device. They can view the shared album on their devices, whether it’s an Android phone, a Windows computer, or even on the web. This makes it convenient for everyone to enjoy and contribute to the album, no matter what platform they are using.
Moreover, any changes or additions made to the shared album by you or your friends will automatically sync across all devices. This ensures that everyone stays up-to-date and can enjoy the latest photos and videos in the shared album.
So, take advantage of the iCloud Photo Sharing feature to share your albums with a wider audience and create memorable experiences together, regardless of the devices they use.
Invite specific friends or create a public link to share the album
When sharing your photo album on your iPad, you have the flexibility to choose how you want to share it. You can either invite specific friends to view the album or create a public link that can be shared with anyone. Here’s how you can invite friends or create a public link:
1. Open the Photos app on your iPad and navigate to the album you want to share.
2. Once you’re in the album, tap on the “Select” button located at the top right corner of the screen to choose the photos you want to include in the shared album.
3. After selecting the photos, tap on the “Share” button at the bottom left corner of the screen to bring up the sharing options menu.
4. From the sharing options menu, select “Shared Album”. You will then be prompted to enter a name for your shared album.
5. After naming the album, you have the option to invite specific friends to view it. To do so, tap on the “Invite People” option and enter their email addresses or select them from your contacts list.
6. If you prefer to create a public link to the album, simply tap on the “Copy Link” button. This will generate a unique public link that you can share with anyone you want.
7. Along with inviting friends or creating a public link, you can also choose whether you want to allow subscribers to post their own photos and videos to the shared album. Toggle on the “Subscribers Can Post” option if you want to enable this feature.
8. Once you have set your sharing preferences, tap on “Create” to create the shared album. The app will then generate the invitations or the public link, depending on the option you chose.
By inviting specific friends, you can ensure that only those individuals can view the album and contribute to it if you have enabled that option. This is ideal for sharing personal and private memories with a select group of people.
On the other hand, creating a public link allows anyone with the link to access the album. This is useful when you want to share the album with a wider audience, such as on social media or with acquaintances who may not be part of your inner circle.
Whichever option you choose, the Photos app on your iPad provides you with a convenient way to share your photo albums and connect with others through your favorite memories.
Allow friends to like and comment on your shared album
Sharing your photo album on your iPad goes beyond just viewing images. With the Photos app, you can invite friends to not only see your collection but also engage with it by liking and commenting on the shared album. This interactive feature adds an extra layer of enjoyment and connection. Here’s how you can allow friends to like and comment on your shared album:
1. Open the Photos app on your iPad and navigate to the shared album that you want to enable likes and comments for.
2. Once you’re in the shared album, tap on the “People” tab located at the bottom of the screen. This will bring up a list of the people who have access to the album.
3. Find the name of the person you want to allow to like and comment on the album, and tap on it to open their profile.
4. In their profile, toggle on the “Allow Subscribers to Post” option. This will grant them the ability to like and comment on the shared album.
5. Repeat this process for each friend you want to give permission to like and comment on the album.
Once you have enabled likes and comments, your friends can now interact with your shared album directly from their own devices. They can leave comments to express their thoughts or add personal anecdotes related to specific photos. They can also like the images to show their appreciation and support.
By allowing friends to like and comment on your shared album, you nurture a sense of community and engagement around your photos. It creates a platform for shared experiences and conversations, making the album more than just a collection of images but a living and evolving memory.
It’s important to note that as the owner of the shared album, you have the ability to moderate the likes and comments. You can remove any inappropriate or unwanted content, ensuring a safe and positive environment for everyone involved.
So, encourage your friends to like and comment on your shared album, and enjoy the meaningful connections and conversations that it fosters.
Stay in control with the ability to remove photos or stop sharing at any time
When sharing your photo album on your iPad, it’s important to have complete control over what you share and with whom. The Photos app gives you the flexibility to remove photos from a shared album or stop sharing the album altogether, ensuring that you remain in control of your memories. Here’s how you can exercise this control:
1. Open the Photos app on your iPad and navigate to the shared album that you want to manage.
2. Once you’re in the shared album, tap on the “People” tab located at the bottom of the screen. This will display a list of the people who have access to the album.
3. To remove a specific photo from the shared album, tap on the photo to open it in full view. Then, tap on the trash can icon located at the bottom-right corner of the screen. Confirm your action, and the photo will be removed from the shared album.
4. If you want to stop sharing the entire album, go back to the list of people who have access to the album and tap on the “Options” button located at the top-right corner of the screen. From the options menu, select “Remove Subscriber” to revoke access for a specific individual, or choose “Stop Sharing” to completely stop the sharing of the album.
By having the ability to remove photos or stop sharing at any time, you can ensure that your shared album reflects your current preferences and privacy concerns. Whether you change your mind about certain photos, want to revise the collection, or simply no longer wish to share it, the Photos app empowers you to make those decisions instantaneously.
It’s worth mentioning that when you remove a photo or stop sharing the album, the changes will be reflected on the devices of the individuals who have access to the shared album. This synchronicity ensures that everyone remains up-to-date with the current state of the album.
So, take advantage of the control features provided by the Photos app on your iPad and manage your shared albums with ease, ensuring that your memories are always curated to your liking.
Collaborate with friends in creating a shared album
Creating a shared album on your iPad doesn’t have to be a solo endeavor. With the Photos app, you can collaborate with your friends and loved ones to create a collective memory that everyone can contribute to. This collaborative feature allows for a more interactive and engaging experience. Here’s how you can collaborate with friends in creating a shared album:
1. Open the Photos app on your iPad and navigate to the album you want to turn into a shared album.
2. Once you’re in the album, tap on the “Select” button located at the top right corner of the screen to choose the photos you want to include in the shared album.
3. After selecting the photos, tap on the “Share” button at the bottom left corner of the screen and select “Shared Album” from the sharing options menu.
4. Give your shared album a name and tap on “Next”.
5. On the next screen, you have the option to invite specific friends to collaborate on the album. Tap on “Invite People” and enter their email addresses or select them from your contacts list.
6. Once you have invited your friends, tap on “Post” to create the shared album.
Now, your friends can start contributing to the shared album. They can add their own photos and videos, providing a unique perspective and enhancing the overall collection. Through collaboration, you can bring together different experiences and viewpoints, creating a richer and more diverse shared album.
One of the great benefits of collaborating with friends is that they can add photos to the shared album even if they are not using an iPad or iOS device. They can use their own smartphones, tablets, or even desktop computers to add their contributions, ensuring that everyone can actively participate, regardless of their device preferences.
As the creator of the shared album, you have control over the contributions made by your friends. You can choose whether to keep their additions as they are or remove them if they don’t align with your vision for the album. This way, you can maintain a cohesive and curated collection that represents the shared memories in the best possible way.
So, seize the opportunity to collaborate with your friends in creating a shared album, and watch as the collective creativity unfolds, making the album a truly collaborative and memorable experience.
Automatically sync changes made by you or your friends to the shared album
When collaborating on a shared album with friends on your iPad, it’s essential that everyone stays updated with the latest changes and additions. The Photos app takes care of this by automatically syncing any modifications made by you or your friends to the shared album. This seamless synchronization ensures that everyone is on the same page and enjoys a cohesive and up-to-date collection. Here’s how the automatic sync works:
1. Open the Photos app on your iPad and navigate to the shared album you are collaborating on.
2. Any changes you make to the shared album, such as adding or removing photos, will be automatically synced to the other devices of your friends who have access to the album. This includes changes you make on your iPad or any changes made on their devices.
3. Similarly, any additions or modifications your friends make to the shared album will also be automatically synced to your iPad and all other devices with access to the album.
This automatic synchronization ensures that everyone stays in the loop with the latest updates and developments in the shared album. Whether you or your friends add new photos, remove existing ones, or make any other changes, those changes will be reflected across all devices, maintaining consistency and coherence.
By having a synchronized shared album, you can engage in real-time collaboration with your friends, even if you are physically apart. This allows for a dynamic and interactive experience, where you can collectively curate and shape the shared memories.
Furthermore, this automatic sync feature saves time and effort by eliminating the need for manual updates or re-sharing of the album. You and your friends can focus on enjoying and contributing to the shared album, knowing that any changes or additions made will be seamlessly synchronized for everyone’s enjoyment.
So, embrace the automatic sync capability of the Photos app on your iPad and let it handle the behind-the-scenes work of keeping your shared album up-to-date. Now you can collaborate with ease, knowing that your shared memories are constantly evolving and reflecting the contributions of everyone involved.
Use AirPlay to display the shared album on a bigger screen
While sharing your photo album on your iPad is a great experience, sometimes you may want to showcase those cherished memories on a bigger screen. With the AirPlay feature on your iPad, you can easily display the shared album on a larger display, such as a television or projector. This allows you to enjoy the photos and videos in a more immersive and captivating way. Here’s how you can use AirPlay to display the shared album on a bigger screen:
1. Make sure that your iPad and the device you want to AirPlay to are connected to the same Wi-Fi network.
2. Open the Photos app on your iPad and navigate to the shared album that you want to display.
3. Once you’re in the shared album, tap on the “People” tab at the bottom of the screen to see the list of people who have access to the album.
4. Tap on the “Options” button at the top-right corner of the screen. From the options menu, select “Play Slideshow”.
5. On the following screen, you will see the “On” and “Off” options under “AirPlay & Bluetooth Devices”. Tap on “On” to enable AirPlay.
6. Your iPad will now search for available AirPlay devices. Once it detects the compatible device you want to use, tap on it to establish the connection.
7. The shared album will now be displayed on the bigger screen. You can sit back and enjoy the photos and videos with a larger audience.
Using AirPlay to display the shared album on a bigger screen allows you to showcase your favorite memories in a more immersive and engaging manner. Whether you’re sharing with family and friends or presenting in a professional setting, the larger display enhances the visual experience and makes the photos come to life.
AirPlay also provides flexibility in terms of what you can display on the bigger screen. You have the option to play a slideshow of the entire album, or you can manually navigate through the photos and videos, adding a personal touch to the viewing experience.
So, take advantage of the AirPlay feature on your iPad and bring your shared album to life on a larger screen. Immerse yourself in the memories and enjoy the visual feast with a bigger audience.
Access the shared album on your iPad, iPhone, Mac, or even on the web
When you share a photo album on your iPad, it’s not limited to just that device. The beauty of the Photos app is that it allows you to access your shared album on a variety of platforms, ensuring that you can enjoy your cherished memories anytime, anywhere. Here’s how you can access your shared album on different devices:
1. iPad: To access the shared album on your iPad, simply open the Photos app and navigate to the “Shared” tab at the bottom of the screen. You’ll find all your shared albums listed there. Tap on the one you want to view, and you can start exploring the photos and videos.
2. iPhone: If you have an iPhone, you can access the shared album in a similar way. Open the Photos app on your iPhone and go to the “Shared” tab. You should see the shared album there, and you can tap on it to view and interact with the content.
3. Mac: If you have a Mac computer, you can access the shared album through the Photos app as well. Open the app, and you’ll find the shared album listed in the sidebar. Click on it to view the photos and videos, and even make changes or additions if you have the necessary permissions.
4. Web: The Photos app also allows you to access your shared album on the web. Simply open a browser on any device, go to iCloud.com, and sign in with your Apple ID. Then, click on the “Photos” icon to access your shared album and view the content from the web interface.
By allowing you to access the shared album on various devices and platforms, the Photos app ensures that you can enjoy your memories no matter where you are. Whether you’re on your iPad, iPhone, Mac, or even using a web browser, you have the flexibility to view, interact with, and contribute to the shared album.
This multi-device accessibility is particularly beneficial when you want to share your photo album with friends and family who may be using different devices. Everyone can access the shared album using their preferred device, creating a seamless and inclusive experience for all.
So, take advantage of the versatile accessibility options provided by the Photos app and enjoy your shared album on your favorite devices or even on the web, ensuring that your cherished memories are always at your fingertips.
Keep memories alive by sharing your photo album with loved ones
One of the most precious aspects of our photos is the memories they hold. They capture special moments, milestones, and experiences that we want to share and preserve with our loved ones. With the Photos app on your iPad, you have the power to keep those memories alive by easily sharing your photo album. Here’s why sharing your album with loved ones is so meaningful:
1. Connection: Sharing your photo album with loved ones is a way to stay connected, no matter the distance. Whether you’re apart due to circumstances or living in different parts of the world, sharing your album allows you to bridge the gap and feel closer to one another. It’s a way to share your experiences, adventures, and everyday moments, creating a bond that transcends physical distance.
2. Joyful reminiscing: Going through a shared photo album with loved ones brings about joyful reminiscing. It’s a chance to relive precious memories and create new conversations. Each photo becomes a catalyst for storytelling, laughter, and the relishing of shared experiences. It’s a beautiful way to strengthen relationships and create lasting bonds through shared nostalgia.
3. Celebrating milestones together: Sharing your photo album with loved ones allows them to be a part of your important milestones, even if they couldn’t physically be there. Whether it’s a graduation, a birthday, a wedding, or the birth of a child, sharing photos enables your loved ones to celebrate these milestones alongside you. It’s a way to include them in your joy and make them feel connected to the significant moments in your life.
4. Preserving family history: By sharing your photo album with loved ones, you contribute to preserving your family history. Each photo tells a story, and by sharing them, you pass down memories, traditions, and a sense of heritage to future generations. The shared album becomes a digital time capsule that keeps your family history alive, ensuring that it will be cherished and enjoyed for years to come.
5. Strengthening relationships: When you share your photo album with loved ones, you’re not just sharing images, but you’re sharing a piece of yourself. It’s a vulnerable and intimate act that fosters deep connections with your loved ones. It allows them to see and understand what is important to you, creating opportunities for empathy, understanding, and a deeper appreciation for one another.
So, take advantage of the Photos app on your iPad and share your photo album with loved ones. Share the memories, the laughter, and the milestones. Keep those cherished moments alive and strengthen your relationships, knowing that the power of shared memories will always bring you closer, no matter the distance.