
Checking the Contents of the Package
Upon receiving your Google Wireless HDMI Dongle, it's essential to inspect the contents of the package to ensure that you have all the necessary components for a seamless setup process.
What to Expect in the Package
-
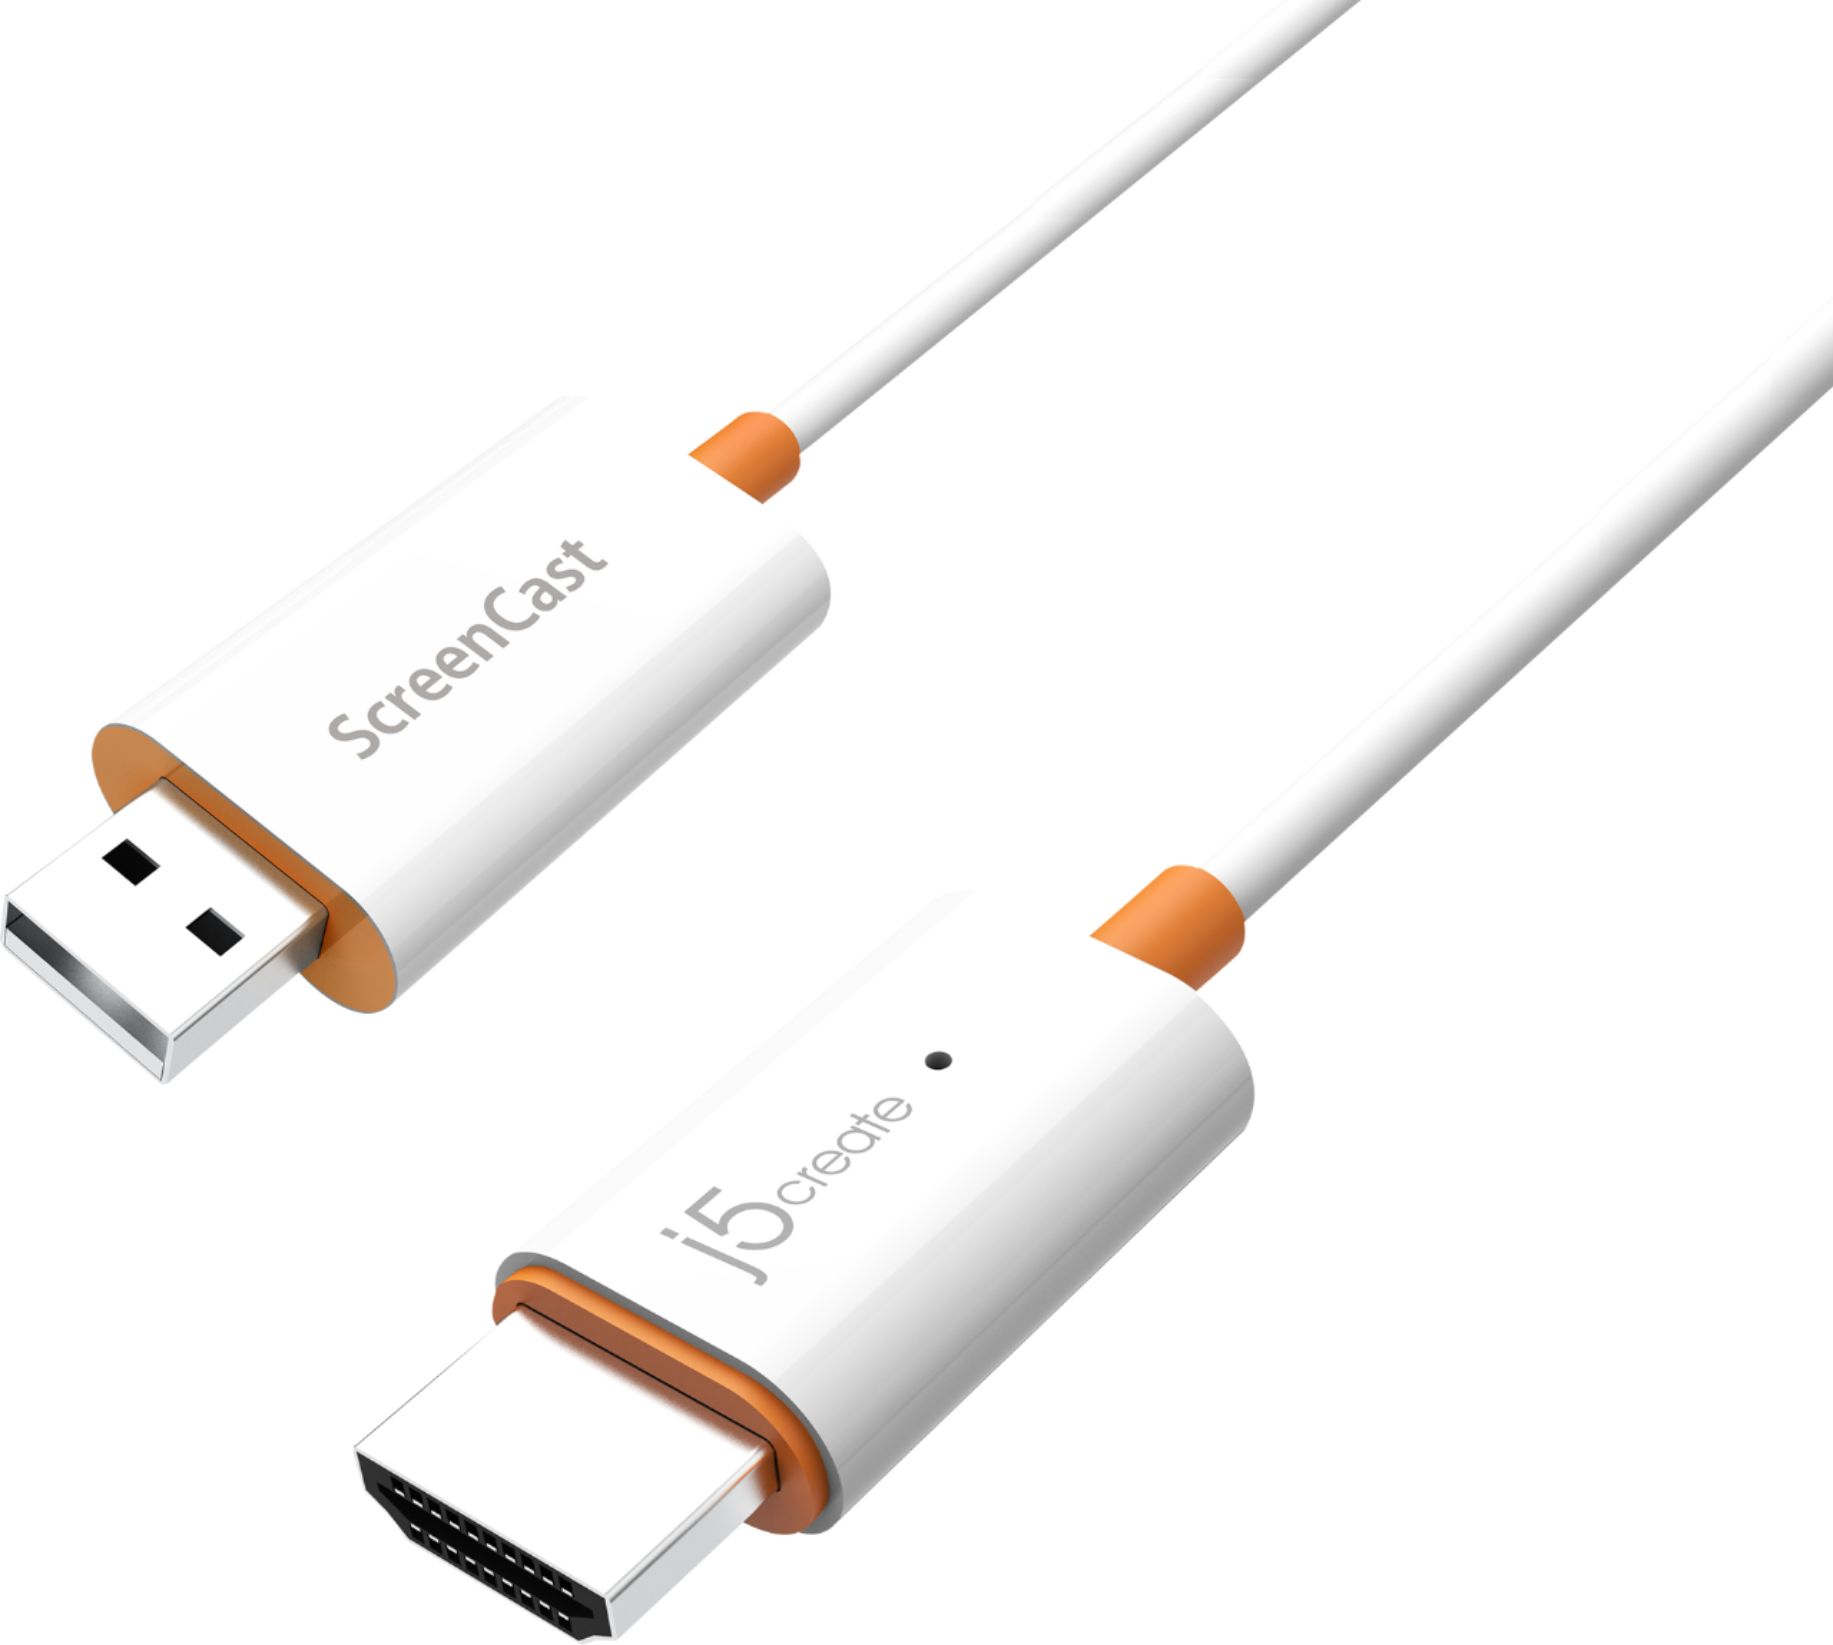
Google Wireless HDMI Dongle: The main device that allows you to stream content from your device to your TV wirelessly.
-
Power Adapter and Cable: A power adapter and cable are included to provide the necessary power supply to the Google Wireless HDMI Dongle.
-
HDMI Extension Cable: This cable allows for flexible placement of the Google Wireless HDMI Dongle, especially when the HDMI port on your TV is difficult to access.
-
User Manual: The user manual contains important instructions for setting up and troubleshooting the Google Wireless HDMI Dongle.
-
Additional Accessories: Depending on the specific model, there may be additional accessories included, such as an Ethernet adapter for a wired internet connection.
Verifying the Contents
-
Inspect the Packaging: Carefully examine the exterior of the package for any signs of damage during transit. Ensure that the package is sealed and undamaged.
-
Check the Contents: Open the package and verify that all the aforementioned components are included. If anything is missing or appears to be damaged, it's important to contact the retailer or Google's customer support for assistance.
Why This Step Is Important
By confirming the contents of the package, you can address any missing or damaged components promptly, avoiding delays in the setup process. Additionally, familiarizing yourself with the included items will prepare you for the subsequent steps in setting up your Google Wireless HDMI Dongle.
Before proceeding to the setup, it's crucial to have all the necessary components at hand to ensure a smooth and hassle-free installation process.
Inspecting the package contents is the first step towards an enjoyable and trouble-free experience with your Google Wireless HDMI Dongle.
Connecting the Google Wireless HDMI Dongle to Your TV
Once you have verified the contents of the package, the next step is to connect the Google Wireless HDMI Dongle to your TV. This process involves establishing the physical link between the dongle and your TV, setting the stage for the seamless streaming of content.
Locating the HDMI Port on Your TV
Begin by identifying the HDMI port on your TV where you will connect the Google Wireless HDMI Dongle. Most modern TVs feature multiple HDMI ports, typically located at the back or side of the TV. Take note of the HDMI port number for reference during the setup process.
Using the HDMI Extension Cable (If Necessary)
If the HDMI port on your TV is difficult to access due to its location or the proximity of other connected devices, utilize the HDMI extension cable included in the package. This allows for more flexibility in positioning the Google Wireless HDMI Dongle for optimal wireless connectivity.
Connecting the Google Wireless HDMI Dongle
-
Insert the HDMI Connector: Plug the HDMI connector of the Google Wireless HDMI Dongle into the HDMI port on your TV. Ensure a secure connection to prevent any signal interruptions during usage.
-
Power Connection: If the Google Wireless HDMI Dongle requires a power supply, connect the provided power adapter to the dongle and a power outlet. This step may vary depending on the specific model of the dongle.
-
Positioning the Dongle: Place the dongle in a location that allows for optimal wireless signal reception. Avoid obstructing the dongle or placing it in areas with potential signal interference, such as behind large metal objects or electronic devices.
Why This Step Is Important
Establishing a solid physical connection between the Google Wireless HDMI Dongle and your TV sets the stage for seamless content streaming. Proper positioning and secure connections ensure reliable wireless transmission, enhancing the overall user experience.
By following these steps, you are one step closer to enjoying the convenience of wirelessly streaming content from your device to the TV, unlocking a new level of entertainment and productivity.
Powering Up the Google Wireless HDMI Dongle
After connecting the Google Wireless HDMI Dongle to your TV, the next crucial step is to power up the device. This ensures that the dongle is ready to receive and transmit content wirelessly, enabling you to seamlessly mirror your device’s screen or stream media to the TV.
Applying Power to the Dongle
Depending on the specific model of the Google Wireless HDMI Dongle, the power requirements may vary. Some dongles draw power directly from the TV’s HDMI port, while others require a separate power supply using the provided adapter and cable. Refer to the user manual for your particular model to determine the power source required.
Powering Up the Dongle
-
Using the TV’s USB Port (if applicable): If your Google Wireless HDMI Dongle is designed to draw power from the TV’s USB port, simply connect the dongle to the USB port using the provided cable. This eliminates the need for a separate power adapter and streamlines the setup process.
-
Using the Power Adapter: For dongles that require a separate power supply, connect the provided power adapter to the dongle and plug it into a power outlet. Ensure that the power source is stable and reliable to support uninterrupted operation of the dongle.
-
Indicator Lights: Once the dongle is powered up, observe any indicator lights on the device to confirm that it is receiving power. These lights may provide valuable feedback on the status of the dongle, such as power status and connectivity.
Why This Step Is Important
Properly powering up the Google Wireless HDMI Dongle is essential for enabling its wireless streaming capabilities. The choice of power source, whether from the TV’s USB port or a separate power adapter, ensures that the dongle receives the necessary power to function optimally.
By following these steps, you are ensuring that the Google Wireless HDMI Dongle is ready to deliver a seamless streaming experience, allowing you to enjoy your favorite content on the big screen with ease.
Setting Up the Google Wireless HDMI Dongle with Your Device
Once the Google Wireless HDMI Dongle is connected to your TV and powered up, the next step is to pair it with your device, whether it’s a smartphone, tablet, or computer. This pairing process establishes the wireless connection that enables you to mirror your device’s screen or stream media to the TV effortlessly.
Preparing Your Device for Connection
Prior to initiating the pairing process, ensure that your device is ready for the connection. This may involve activating the screen mirroring or casting feature, depending on the device’s operating system and manufacturer. Refer to the user manual or online guides for your specific device to prepare it for pairing with the Google Wireless HDMI Dongle.
Pairing Your Device with the Dongle
-
Accessing the Screen Mirroring or Casting Feature: On your device, navigate to the settings or quick access menu to find the screen mirroring or casting feature. This may be labeled differently depending on the device and operating system, such as “Smart View,” “Screen Cast,” or “AirPlay.”
-
Selecting the Google Wireless HDMI Dongle: Once the screen mirroring or casting feature is activated, your device will scan for available wireless display devices. Select the Google Wireless HDMI Dongle from the list of available devices to initiate the pairing process.
-
Confirming the Connection: After selecting the dongle, your device will establish a wireless connection with the dongle. Depending on the device, you may be prompted to confirm the connection or enter a PIN displayed on the TV screen to complete the pairing process.
Verifying the Connection
Once the pairing process is complete, verify that your device is successfully connected to the Google Wireless HDMI Dongle. Your device’s screen may be mirrored on the TV, or you may be able to stream media directly to the TV, depending on the capabilities of your device and the dongle.
Why This Step Is Important
Pairing your device with the Google Wireless HDMI Dongle establishes the wireless connection necessary for seamless content streaming. This step unlocks the ability to mirror your device’s screen or stream media to the TV, enhancing your viewing and productivity experience.
By following these steps, you are poised to enjoy the convenience of wirelessly sharing content from your device to the TV, expanding your entertainment and presentation capabilities with ease.
Troubleshooting Common Issues with the Google Wireless HDMI Dongle
While setting up and using the Google Wireless HDMI Dongle, you may encounter common issues that can hinder the seamless streaming experience. Understanding how to troubleshoot these issues can help you resolve them efficiently, ensuring that you can fully enjoy the capabilities of the device.
No Signal on the TV
If the TV does not display any signal from the Google Wireless HDMI Dongle, consider the following troubleshooting steps:
- Check HDMI Connection: Ensure that the HDMI connector is securely plugged into the TV’s HDMI port. If using the HDMI extension cable, verify the connection integrity.
- Power Supply: Confirm that the dongle is receiving power either from the TV’s USB port or the provided power adapter. A lack of power can result in no signal output.
- Input Selection: Use the TV’s remote control to select the correct HDMI input where the dongle is connected. Some TVs have multiple HDMI inputs, and selecting the wrong one can lead to no signal display.
Intermittent Wireless Connection
If the wireless connection between your device and the Google Wireless HDMI Dongle is inconsistent, consider the following troubleshooting steps:
- Signal Interference: Ensure that the dongle is positioned in an area with minimal signal interference. Avoid placing the dongle near large metal objects or electronic devices that can disrupt the wireless signal.
- Device Compatibility: Verify that your device is compatible with the screen mirroring or casting feature and supports the necessary wireless protocols. Some older devices may have limited compatibility.
- Network Congestion: If using a crowded Wi-Fi network, consider switching to a less congested channel or using a dedicated network for streaming to improve wireless connectivity.
Audio or Video Quality Issues
If you experience issues with audio or video quality during streaming, consider the following troubleshooting steps:
- Signal Strength: Ensure that the wireless signal between your device and the dongle is strong and stable. Weak signals can result in audio or video stuttering and degradation.
- Resolution Settings: Adjust the resolution settings on your device to match the capabilities of the TV and the dongle. Incompatibility in resolution settings can lead to quality issues.
- Audio Output: Verify that the audio output settings on your device are compatible with the TV’s audio input. Mismatched settings can lead to audio playback issues.
Why Troubleshooting is Important
Effective troubleshooting of common issues with the Google Wireless HDMI Dongle ensures that you can overcome technical challenges and fully utilize the device’s wireless streaming capabilities. By understanding how to address these issues, you can maintain a seamless streaming experience and maximize the enjoyment of content sharing between your device and the TV.
By familiarizing yourself with these troubleshooting steps, you are equipped to address common issues that may arise during the setup and usage of the Google Wireless HDMI Dongle, enabling you to make the most of its wireless streaming features.