
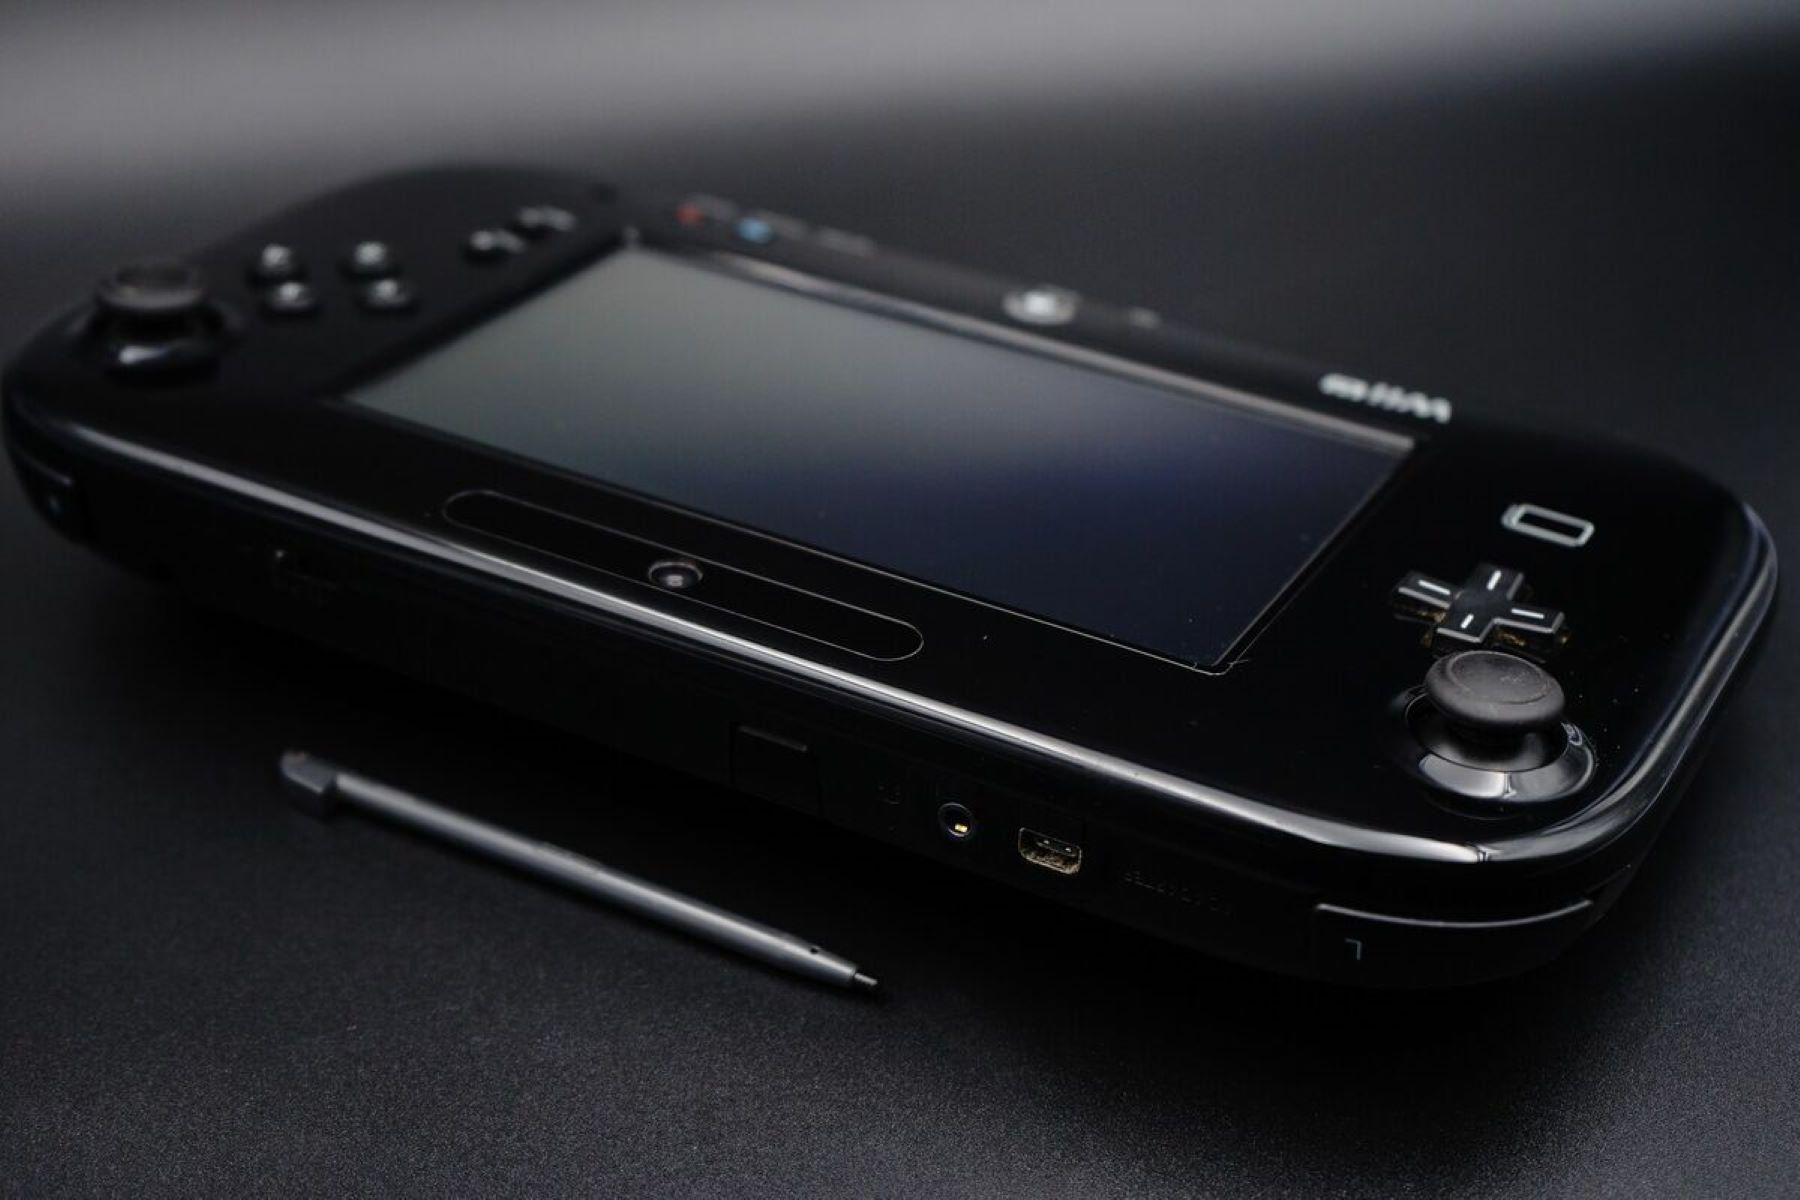
Common Issues with Wii U Gamepad
The Wii U Gamepad is a crucial component of the gaming experience, but like any electronic device, it is susceptible to various issues over time. Understanding the common problems that can arise with the Wii U Gamepad is essential for any avid gamer. Here are some of the most prevalent issues that users may encounter:
- Unresponsive touchscreen: The touchscreen may stop registering touch inputs, making it challenging to navigate menus or play certain games.
- Drained battery: Over time, the battery of the Wii U Gamepad may lose its capacity to hold a charge, leading to frequent recharging or a shortened playtime.
- Sticky or unresponsive buttons: The buttons and joysticks on the Gamepad may become sticky or unresponsive, hindering gameplay and user experience.
- Audio and video glitches: Users may encounter issues such as distorted audio, flickering screen, or complete loss of audio/video output.
- Physical damage: Accidental drops or impacts can result in physical damage to the Gamepad, affecting its functionality.
These issues can be frustrating for gamers, but the good news is that many of them can be addressed through DIY repair solutions. By familiarizing yourself with the common problems associated with the Wii U Gamepad, you can take proactive steps to troubleshoot and resolve these issues, ensuring an uninterrupted gaming experience.
Tools and Materials Needed for Repair
Before embarking on the repair of your Wii U Gamepad, it’s essential to gather the necessary tools and materials to ensure a smooth and efficient process. Here’s a comprehensive list of what you’ll need:
- Tri-wing screwdriver: This specialized screwdriver is crucial for opening the Gamepad without causing damage to the screws.
- Phillips head screwdriver: Used for removing standard screws that secure various components of the Gamepad.
- Spudger or plastic opening tools: These non-conductive tools are ideal for prying apart the Gamepad’s casing without causing damage.
- Cotton swabs and isopropyl alcohol: Essential for cleaning the internal components and connectors of the Gamepad.
- New battery: If your Gamepad is plagued by battery issues, having a replacement battery on hand is crucial for a quick fix.
- Replacement parts: Depending on the specific issues your Gamepad is facing, you may need replacement buttons, joysticks, or touchscreen components.
- Clean cloth: For wiping down the exterior and interior components of the Gamepad.
- Small containers: Useful for organizing and storing the tiny screws and components removed during disassembly.
By ensuring you have these tools and materials at your disposal, you’ll be well-prepared to tackle the repair of your Wii U Gamepad. Additionally, having a clean and well-lit workspace will contribute to a more successful repair process. With the right resources and a methodical approach, you can effectively address the issues plaguing your Gamepad and restore it to optimal functionality.
Disassembling the Wii U Gamepad
Disassembling the Wii U Gamepad is the first step towards identifying and addressing any internal issues. Before you begin, it’s crucial to proceed with caution and attentiveness to avoid causing further damage. Here’s a step-by-step guide to disassembling the Gamepad:
- Prepare the Workspace: Find a clean, well-lit area to work in, and gather all the necessary tools and materials as outlined in the previous section.
- Power Off the Gamepad: Ensure that the Gamepad is completely powered off and disconnected from any power source.
- Remove the Screws: Using the tri-wing screwdriver, carefully remove the screws securing the back panel of the Gamepad. Place the screws in a small container to prevent loss.
- Separate the Casing: With the screws removed, gently pry apart the back panel using a spudger or plastic opening tool. Take care not to force the casing apart, as it may still be connected by internal cables.
- Disconnect Internal Cables: Once the back panel is removed, you may encounter internal cables connecting the rear casing to the Gamepad’s motherboard. Use caution and a spudger to carefully disconnect these cables to fully separate the casing.
- Access Internal Components: With the casing removed, you’ll have access to the internal components of the Gamepad, including the battery, buttons, joysticks, and touchscreen.
Disassembling the Wii U Gamepad requires precision and patience. It’s essential to take note of the disassembly process, including the placement and orientation of components, to ensure a smooth reassembly later on. By following these steps diligently, you’ll be ready to address the specific issues affecting your Gamepad and work towards a successful repair.
Cleaning and Maintenance Tips
Maintaining the cleanliness and functionality of your Wii U Gamepad is vital for ensuring an optimal gaming experience. Here are some essential cleaning and maintenance tips to keep your Gamepad in top condition:
- Regular Exterior Cleaning: Use a clean, slightly damp cloth to wipe down the exterior of the Gamepad, removing any smudges, fingerprints, or debris. Avoid using harsh chemicals or excessive moisture, as these can damage the device.
- Screen Care: Gently clean the touchscreen with a microfiber cloth to remove dust and fingerprints. If stubborn smudges persist, lightly dampen the cloth with water or screen-cleaning solution specifically designed for electronic devices.
- Button and Joystick Maintenance: Periodically inspect the buttons and joysticks for any debris or buildup that may impede their functionality. Use compressed air to gently blow away dust and particles, and follow up with a cotton swab lightly moistened with isopropyl alcohol for more stubborn residue.
- Battery Care: If your Gamepad’s battery is removable, periodically remove it and clean the battery contacts with a dry cotton swab. This helps maintain a strong connection and optimal charging performance.
- Preventative Maintenance: Consider investing in a protective case or cover for your Gamepad to shield it from accidental damage and minimize exposure to dust and debris.
- Storage Practices: When not in use, store your Gamepad in a clean, dust-free environment, away from direct sunlight and extreme temperatures.
By incorporating these cleaning and maintenance practices into your routine, you can prolong the lifespan of your Wii U Gamepad and minimize the likelihood of encountering common issues. A well-maintained Gamepad not only delivers a better gaming experience but also reduces the need for frequent repairs and replacements.
Fixing the Touchscreen
The touchscreen of the Wii U Gamepad is a central interface for navigating menus and interacting with games, making its functionality crucial to the overall gaming experience. If you encounter issues such as unresponsiveness or erratic behavior with the touchscreen, there are several DIY solutions you can explore to address the problem:
- Calibration: Begin by recalibrating the touchscreen through the Gamepad’s settings menu. This process can help resolve issues related to misalignment or inaccurate touch input.
- Cleaning: Dust, dirt, and oil from fingerprints can hinder the touchscreen’s responsiveness. Gently clean the touchscreen with a microfiber cloth to remove any debris and smudges, ensuring that it remains free from obstructions.
- Inspect for Damage: Carefully examine the touchscreen for any visible cracks, scratches, or physical damage. If present, consider replacing the touchscreen component to restore full functionality.
- Reset the Gamepad: Performing a full system reset on the Gamepad can sometimes resolve software-related issues affecting the touchscreen. Be sure to back up any important data before proceeding with a reset.
- Check for Interference: Nearby electronic devices or sources of electromagnetic interference can disrupt the touchscreen’s performance. Ensure that the Gamepad is used in an environment free from such interference.
- Seek Professional Repair: If the touchscreen issues persist despite your DIY efforts, consider consulting a professional repair service or the manufacturer for further assistance and potential replacement of the touchscreen component.
By systematically exploring these troubleshooting steps, you can potentially resolve touchscreen issues with your Wii U Gamepad and restore seamless functionality. However, if the problem persists or appears to be hardware-related, seeking professional assistance may be the most effective course of action to ensure a lasting solution.
Replacing the Battery
The battery of the Wii U Gamepad is essential for powering the device during gaming sessions, and over time, it may exhibit signs of diminished capacity or fail to hold a charge effectively. If you’re experiencing frequent battery-related issues, replacing the battery can breathe new life into your Gamepad. Here’s a guide to replacing the battery:
- Procure a Replacement Battery: Before beginning the replacement process, ensure that you have a compatible replacement battery specifically designed for the Wii U Gamepad.
- Power Off and Prepare the Gamepad: Turn off the Gamepad and ensure it is disconnected from any power source. Place the Gamepad on a clean, flat surface, and gather the necessary tools, including a tri-wing screwdriver.
- Remove the Back Panel: Using the tri-wing screwdriver, carefully remove the screws securing the back panel of the Gamepad. Set the screws aside in a secure location to prevent loss.
- Access the Battery: With the back panel removed, you’ll gain access to the Gamepad’s internal components, including the battery. Depending on the model, the battery may be connected via a cable or positioned within a compartment.
- Disconnect and Remove the Old Battery: If the battery is connected via a cable, carefully detach the connector to free the old battery. If the battery is housed in a compartment, use caution to remove it, taking note of its orientation and placement.
- Install the New Battery: Insert the replacement battery into the designated compartment or reconnect it using the appropriate cable, ensuring a secure and proper fit.
- Reassemble the Gamepad: Once the new battery is in place, reattach the back panel of the Gamepad using the previously removed screws. Take care to secure the panel evenly and firmly without over-tightening the screws.
By following these steps, you can successfully replace the battery of your Wii U Gamepad, revitalizing its power capacity and extending its usability. A fresh battery can significantly enhance your gaming experience by providing extended playtime and reliable performance, allowing you to immerse yourself in your favorite games without interruption.
Repairing the Buttons and Joysticks
The buttons and joysticks of the Wii U Gamepad are integral to gameplay, facilitating precise control and interaction with games. If you encounter issues such as sticky buttons, unresponsive inputs, or drifting joysticks, addressing these issues through DIY repair can restore the full functionality of your Gamepad. Here’s how you can tackle the repair of buttons and joysticks:
- Cleaning and Debris Removal: Use compressed air to gently blow away dust and debris that may be affecting the buttons and joysticks. Follow up with a cotton swab lightly moistened with isopropyl alcohol to clean the areas around the buttons and beneath the joystick caps.
- Button and Joystick Calibration: Some issues with buttons and joysticks can be resolved through calibration. Access the Gamepad’s settings menu to recalibrate the buttons and joysticks, ensuring accurate and responsive inputs.
- Inspect for Physical Damage: Carefully examine the buttons and joysticks for any visible damage, such as wear, cracks, or misalignment. If damage is detected, consider replacing the affected components to restore optimal functionality.
- Button and Joystick Replacement: If cleaning and calibration do not resolve the issues, replacing the buttons or joysticks with new components may be necessary. Ensure that the replacement parts are compatible with your specific Gamepad model.
- Check for Interference: Nearby electronic devices or sources of electromagnetic interference can disrupt the performance of buttons and joysticks. Ensure that the Gamepad is used in an environment free from such interference to maintain optimal functionality.
- Professional Repair Consideration: If the issues persist or appear to be related to internal hardware or wiring, seeking professional repair services or consulting the manufacturer may provide a more comprehensive solution.
By addressing button and joystick issues through these DIY repair methods, you can effectively restore the precise and responsive control essential for an enjoyable gaming experience. Taking proactive steps to maintain and repair the buttons and joysticks ensures that your Wii U Gamepad remains a reliable and immersive gaming companion.
Troubleshooting Audio and Video Problems
Audio and video issues can significantly impact the immersive gaming experience offered by the Wii U Gamepad. If you encounter problems such as distorted audio, flickering screen, or complete loss of audio/video output, troubleshooting these issues can help restore the Gamepad’s full functionality. Here are several troubleshooting steps to address audio and video problems:
- Check Connections: Ensure that all cables connecting the Gamepad to the TV or audio output are securely plugged in. Loose connections can lead to audio and video glitches.
- Adjust Display Settings: Access the Gamepad’s display settings to verify that the resolution and display options are correctly configured for your TV or monitor. Incorrect settings can result in visual anomalies.
- Update Firmware and Software: Ensure that the Gamepad’s firmware and any associated software are up to date. Manufacturers often release updates to address compatibility issues and improve overall performance.
- Audio Output Selection: Verify that the Gamepad’s audio output settings are correctly configured to channel sound through the desired output, whether it’s the Gamepad’s internal speakers, headphone jack, or external speakers.
- Power Cycle the Gamepad: Turn off the Gamepad, disconnect any external power sources, and then power it back on. A simple reset can sometimes resolve temporary audio and video glitches.
- Test with Another Display or Audio Device: Connect the Gamepad to an alternative TV or audio device to determine if the issues persist. This can help isolate whether the problem lies with the Gamepad or the original display/audio setup.
- Factory Reset: As a last resort, consider performing a factory reset on the Gamepad to return it to its default settings. Be sure to back up any important data before proceeding with a reset.
By systematically troubleshooting audio and video problems using these steps, you can identify and address the underlying issues affecting your Wii U Gamepad. Restoring clear and consistent audio output and visual display ensures that you can fully immerse yourself in your favorite games without distraction or interruption.
Putting It All Back Together
After successfully addressing the specific issues affecting your Wii U Gamepad through cleaning, maintenance, and repair, reassembling the Gamepad is the final step in the DIY repair process. Here’s a comprehensive guide to putting it all back together:
- Organize the Components: Lay out all the components, including the Gamepad’s casing, screws, and any replacement parts, in an organized manner to facilitate a smooth reassembly process.
- Reconnect Internal Cables: If you disconnected any internal cables during the disassembly process, carefully reconnect them to their respective ports on the Gamepad’s motherboard. Take care to align and seat the connectors properly.
- Position the Battery: If you replaced the Gamepad’s battery, ensure that the new battery is securely positioned within its compartment and connected to the appropriate cable, if applicable.
- Align and Secure the Casing: Gently position the rear casing of the Gamepad, aligning it with the front casing to ensure a proper fit. Press the casing together firmly to engage the internal clips and ensure a seamless exterior appearance.
- Secure the Screws: Using the appropriate screwdriver, reinsert and tighten the screws to secure the rear casing in place. Take care not to over-tighten the screws, as this can cause damage to the casing or internal components.
- Test the Gamepad: Power on the Gamepad and verify that all buttons, joysticks, and the touchscreen are functioning as expected. Additionally, test the audio and video output to ensure that the issues have been successfully resolved.
- Final Inspection: Conduct a thorough visual inspection of the Gamepad to ensure that all components are properly reassembled, and there are no loose screws or misaligned parts.
By meticulously following these reassembly steps, you can ensure that your Wii U Gamepad is fully restored to optimal functionality, ready to deliver an exceptional gaming experience. A methodical and attentive approach to reassembly is essential for achieving a successful repair outcome and enjoying uninterrupted gameplay with your revitalized Gamepad.