
Step 1: Gather the Necessary Tools
Before embarking on the PS Vita joystick replacement process, it’s crucial to gather all the essential tools. Having the right tools at your disposal will ensure a smooth and efficient replacement procedure. Here’s a list of the necessary items you’ll need:
- Replacement Joystick: Ensure you have the correct replacement joystick compatible with your PS Vita model. It’s advisable to purchase a high-quality replacement part from a reliable supplier to guarantee optimal performance.
- Small Phillips Head Screwdriver: This tool is essential for removing the screws securing the PS Vita’s casing. A precision screwdriver set with various head sizes can be beneficial for accessing different parts of the device.
- Plastic Opening Tools: These non-conductive and durable tools are designed to safely pry open electronic devices without causing damage. They are instrumental in separating the PS Vita’s casing and accessing the internal components.
- Tweezers: Fine-pointed tweezers are indispensable for handling small screws and delicate components within the PS Vita. They aid in precise maneuvering and placement during the replacement process.
- Clean Workspace: Prepare a clean and well-lit workspace to carry out the replacement procedure. A clutter-free environment minimizes the risk of misplacing small components and ensures better visibility while working on the device.
- Container for Screws: Utilize a small container or magnetic mat to organize and store the screws removed from the PS Vita. This prevents loss and confusion when reassembling the device.
- Cloth or Microfiber Towel: Having a soft cloth or microfiber towel on hand is useful for gently wiping the PS Vita’s exterior and screen during the disassembly and reassembly process.
By assembling these tools, you’ll be well-prepared to commence the PS Vita joystick replacement with confidence and precision.
Step 2: Disassemble the PS Vita
Disassembling the PS Vita is a critical step in the joystick replacement process. Careful and methodical disassembly ensures that the internal components are accessible for the replacement procedure. Follow these steps to disassemble the PS Vita:
- Power Off the Device: Before starting the disassembly, ensure the PS Vita is powered off to prevent any potential damage to the device or injury to yourself.
- Remove the Screws: Using the small Phillips head screwdriver, carefully remove the screws securing the PS Vita’s casing. Keep the screws organized in a container to avoid misplacement.
- Separate the Casing: Gently use the plastic opening tools to pry open the PS Vita’s casing. Start from a corner and work your way around the device, ensuring not to apply excessive force to avoid damaging the casing or internal components.
- Disconnect the Battery: Once the casing is removed, locate the battery connector on the motherboard and carefully disconnect it to ensure the device is completely powered down.
- Access the Joystick Assembly: With the casing removed and the battery disconnected, the internal components, including the joystick assembly, are now accessible for the replacement process.
By methodically disassembling the PS Vita and taking the necessary precautions, you’ll be ready to proceed with removing the old joystick and installing the new one.
Step 3: Remove the Old Joystick
Removing the old joystick from your PS Vita is a delicate process that requires precision and attention to detail. Follow these steps to safely remove the old joystick:
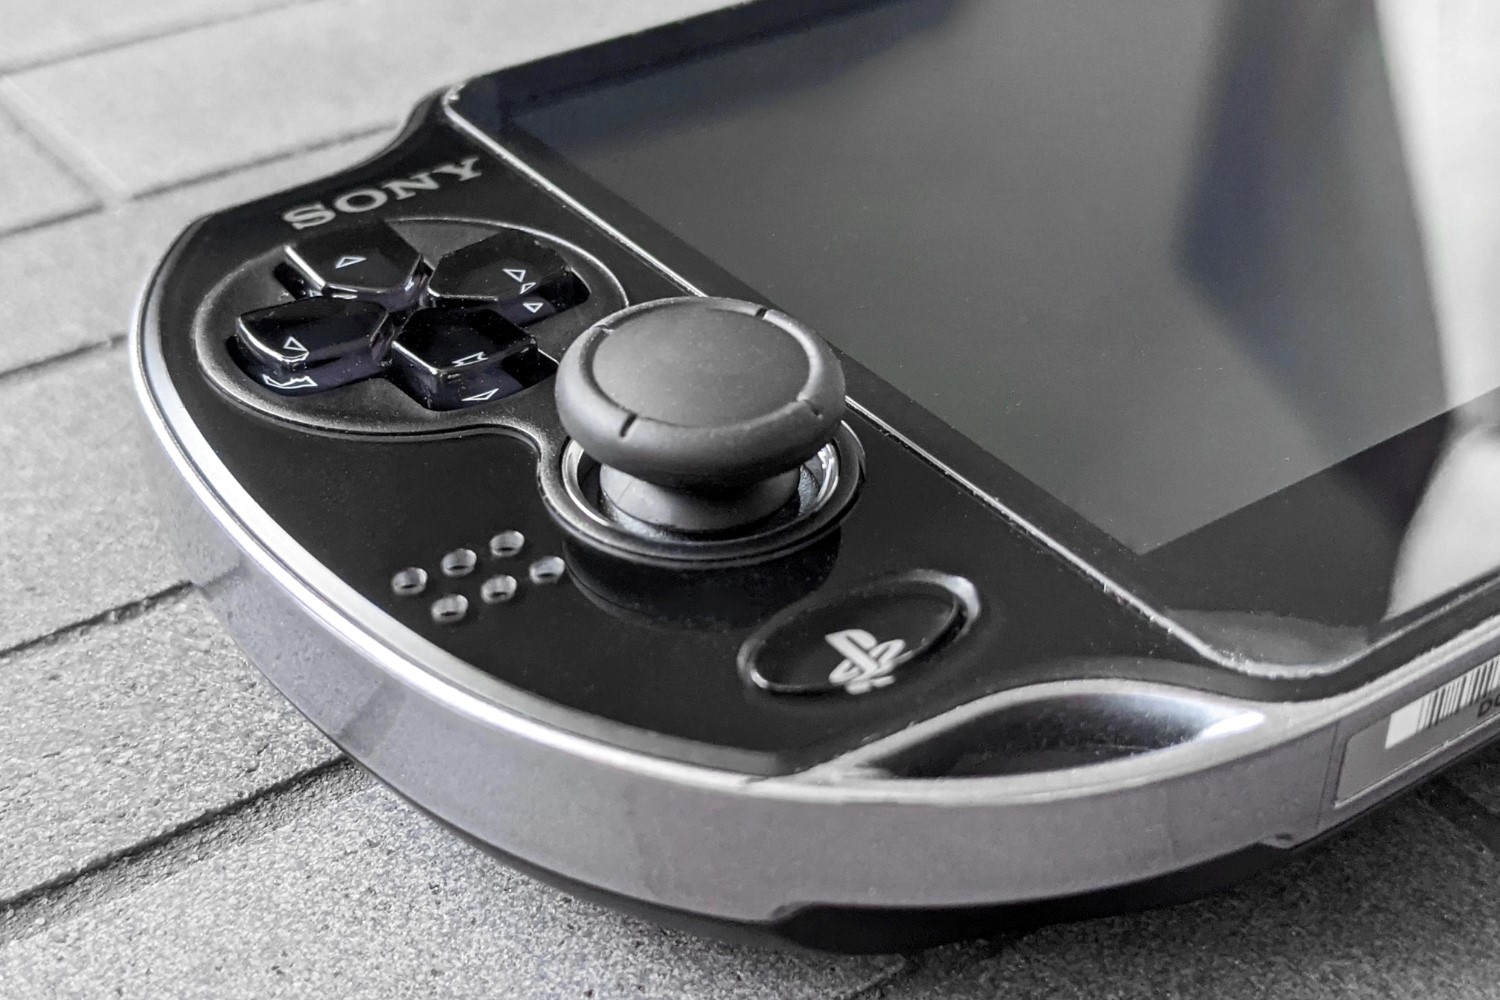
- Identify the Joystick Assembly: Locate the joystick assembly within the PS Vita. It is typically positioned in the center of the device and connected to the motherboard.
- Disconnect the Ribbon Cable: Carefully detach the ribbon cable that connects the old joystick to the motherboard. Use gentle and deliberate movements to avoid damaging the cable or the connector.
- Release the Joystick Assembly: Depending on the model of the PS Vita, the joystick assembly may be secured in place with screws or clips. Use the appropriate tools to release the assembly from its mounting, ensuring not to apply excessive force that could cause damage.
- Remove the Old Joystick: Once the assembly is released, carefully lift out the old joystick from its position within the device. Take care to avoid any unnecessary strain on the surrounding components.
- Inspect for Damage: As you remove the old joystick, take a moment to inspect the surrounding area for any signs of damage or wear. This is an opportune time to address any issues that may have contributed to the need for replacement.
By following these steps meticulously, you can safely remove the old joystick from your PS Vita, paving the way for the installation of the new joystick.
Step 4: Install the New Joystick
Installing the new joystick into your PS Vita is a crucial step that demands precision and attention to detail. Follow these steps to seamlessly install the new joystick:
- Prepare the Replacement Joystick: Ensure the new joystick is compatible with your PS Vita model and free from any defects or damage. Familiarize yourself with the orientation and positioning of the new joystick to facilitate a smooth installation.
- Position the New Joystick: Carefully place the new joystick into its designated position within the device, aligning it correctly with the mounting points and ensuring that the ribbon cable can be easily connected to the motherboard.
- Secure the Joystick Assembly: If the new joystick assembly requires screws or clips for securing, use the appropriate tools to fasten it in place. Exercise caution to avoid over-tightening, which may cause damage to the assembly or surrounding components.
- Connect the Ribbon Cable: Gently attach the ribbon cable from the new joystick to the motherboard, ensuring a secure and snug connection. Take care to align the cable correctly to prevent any strain or damage during the reassembly process.
- Perform a Functionality Check: Before proceeding with reassembling the PS Vita, perform a quick functionality check to ensure that the new joystick responds accurately to movements and commands. This preliminary check can help identify any potential issues before completing the reassembly.
By meticulously following these steps, you can successfully install the new joystick into your PS Vita, setting the stage for the reassembly process and the final testing phase.
Step 5: Reassemble the PS Vita
Reassembling your PS Vita after replacing the joystick is a critical phase that requires patience and precision. Follow these steps to effectively reassemble the device:
- Reconnect the Battery: Begin by reconnecting the battery to the motherboard, ensuring a secure connection. This step is essential for restoring power to the device and enabling the functionality test of the new joystick.
- Position the Casing: Carefully position the PS Vita’s casing, ensuring that all edges align correctly before gently pressing it into place. Take care to avoid trapping any cables or components between the casing and the device.
- Secure the Screws: Using the small Phillips head screwdriver, reinsert and tighten the screws to secure the PS Vita’s casing. Ensure that each screw is fastened snugly but not overtightened to prevent damage to the casing or the internal components.
- Conduct a Visual Inspection: Once the casing is secured, conduct a thorough visual inspection of the device to verify that all components, including buttons and ports, are properly aligned and seated within the casing.
- Clean the Exterior: Before completing the reassembly, use a soft cloth or microfiber towel to gently clean the exterior of the PS Vita, removing any smudges or fingerprints acquired during the replacement process.
By meticulously following these steps, you can effectively reassemble your PS Vita, bringing the device one step closer to being fully operational with the new joystick in place.
Step 6: Test the New Joystick
Testing the new joystick in your PS Vita is the final and crucial step in the replacement process. This phase ensures that the replacement has been successful and that the joystick functions as intended. Follow these steps to thoroughly test the new joystick:
- Power On the Device: Power on your PS Vita and navigate to the home screen to prepare for testing the new joystick. Ensure that the device powers up without any issues following the reassembly.
- Calibrate the Joystick: Access the device’s settings or calibration tools to calibrate the new joystick, if necessary. This step ensures that the joystick’s movements are accurately registered by the device.
- Test Joystick Responsiveness: Launch a game or application that utilizes the joystick for navigation or control. Test the responsiveness and accuracy of the new joystick by navigating menus, controlling characters, or performing in-game actions.
- Check for Smooth Movement: Pay attention to the smoothness and precision of the joystick’s movements. Verify that it responds to subtle inputs and registers movements without any lag or erratic behavior.
- Verify Button Functions: If the joystick incorporates buttons or triggers, ensure that these functions operate correctly and register inputs accurately during gameplay or navigation.
- Repeat Testing: Conduct thorough and repeated testing of the new joystick across various applications and games to ensure consistent performance and reliability.
By meticulously testing the new joystick, you can confirm its functionality and integration within the PS Vita, providing assurance that the replacement process has been successful and that the device is ready for regular use.