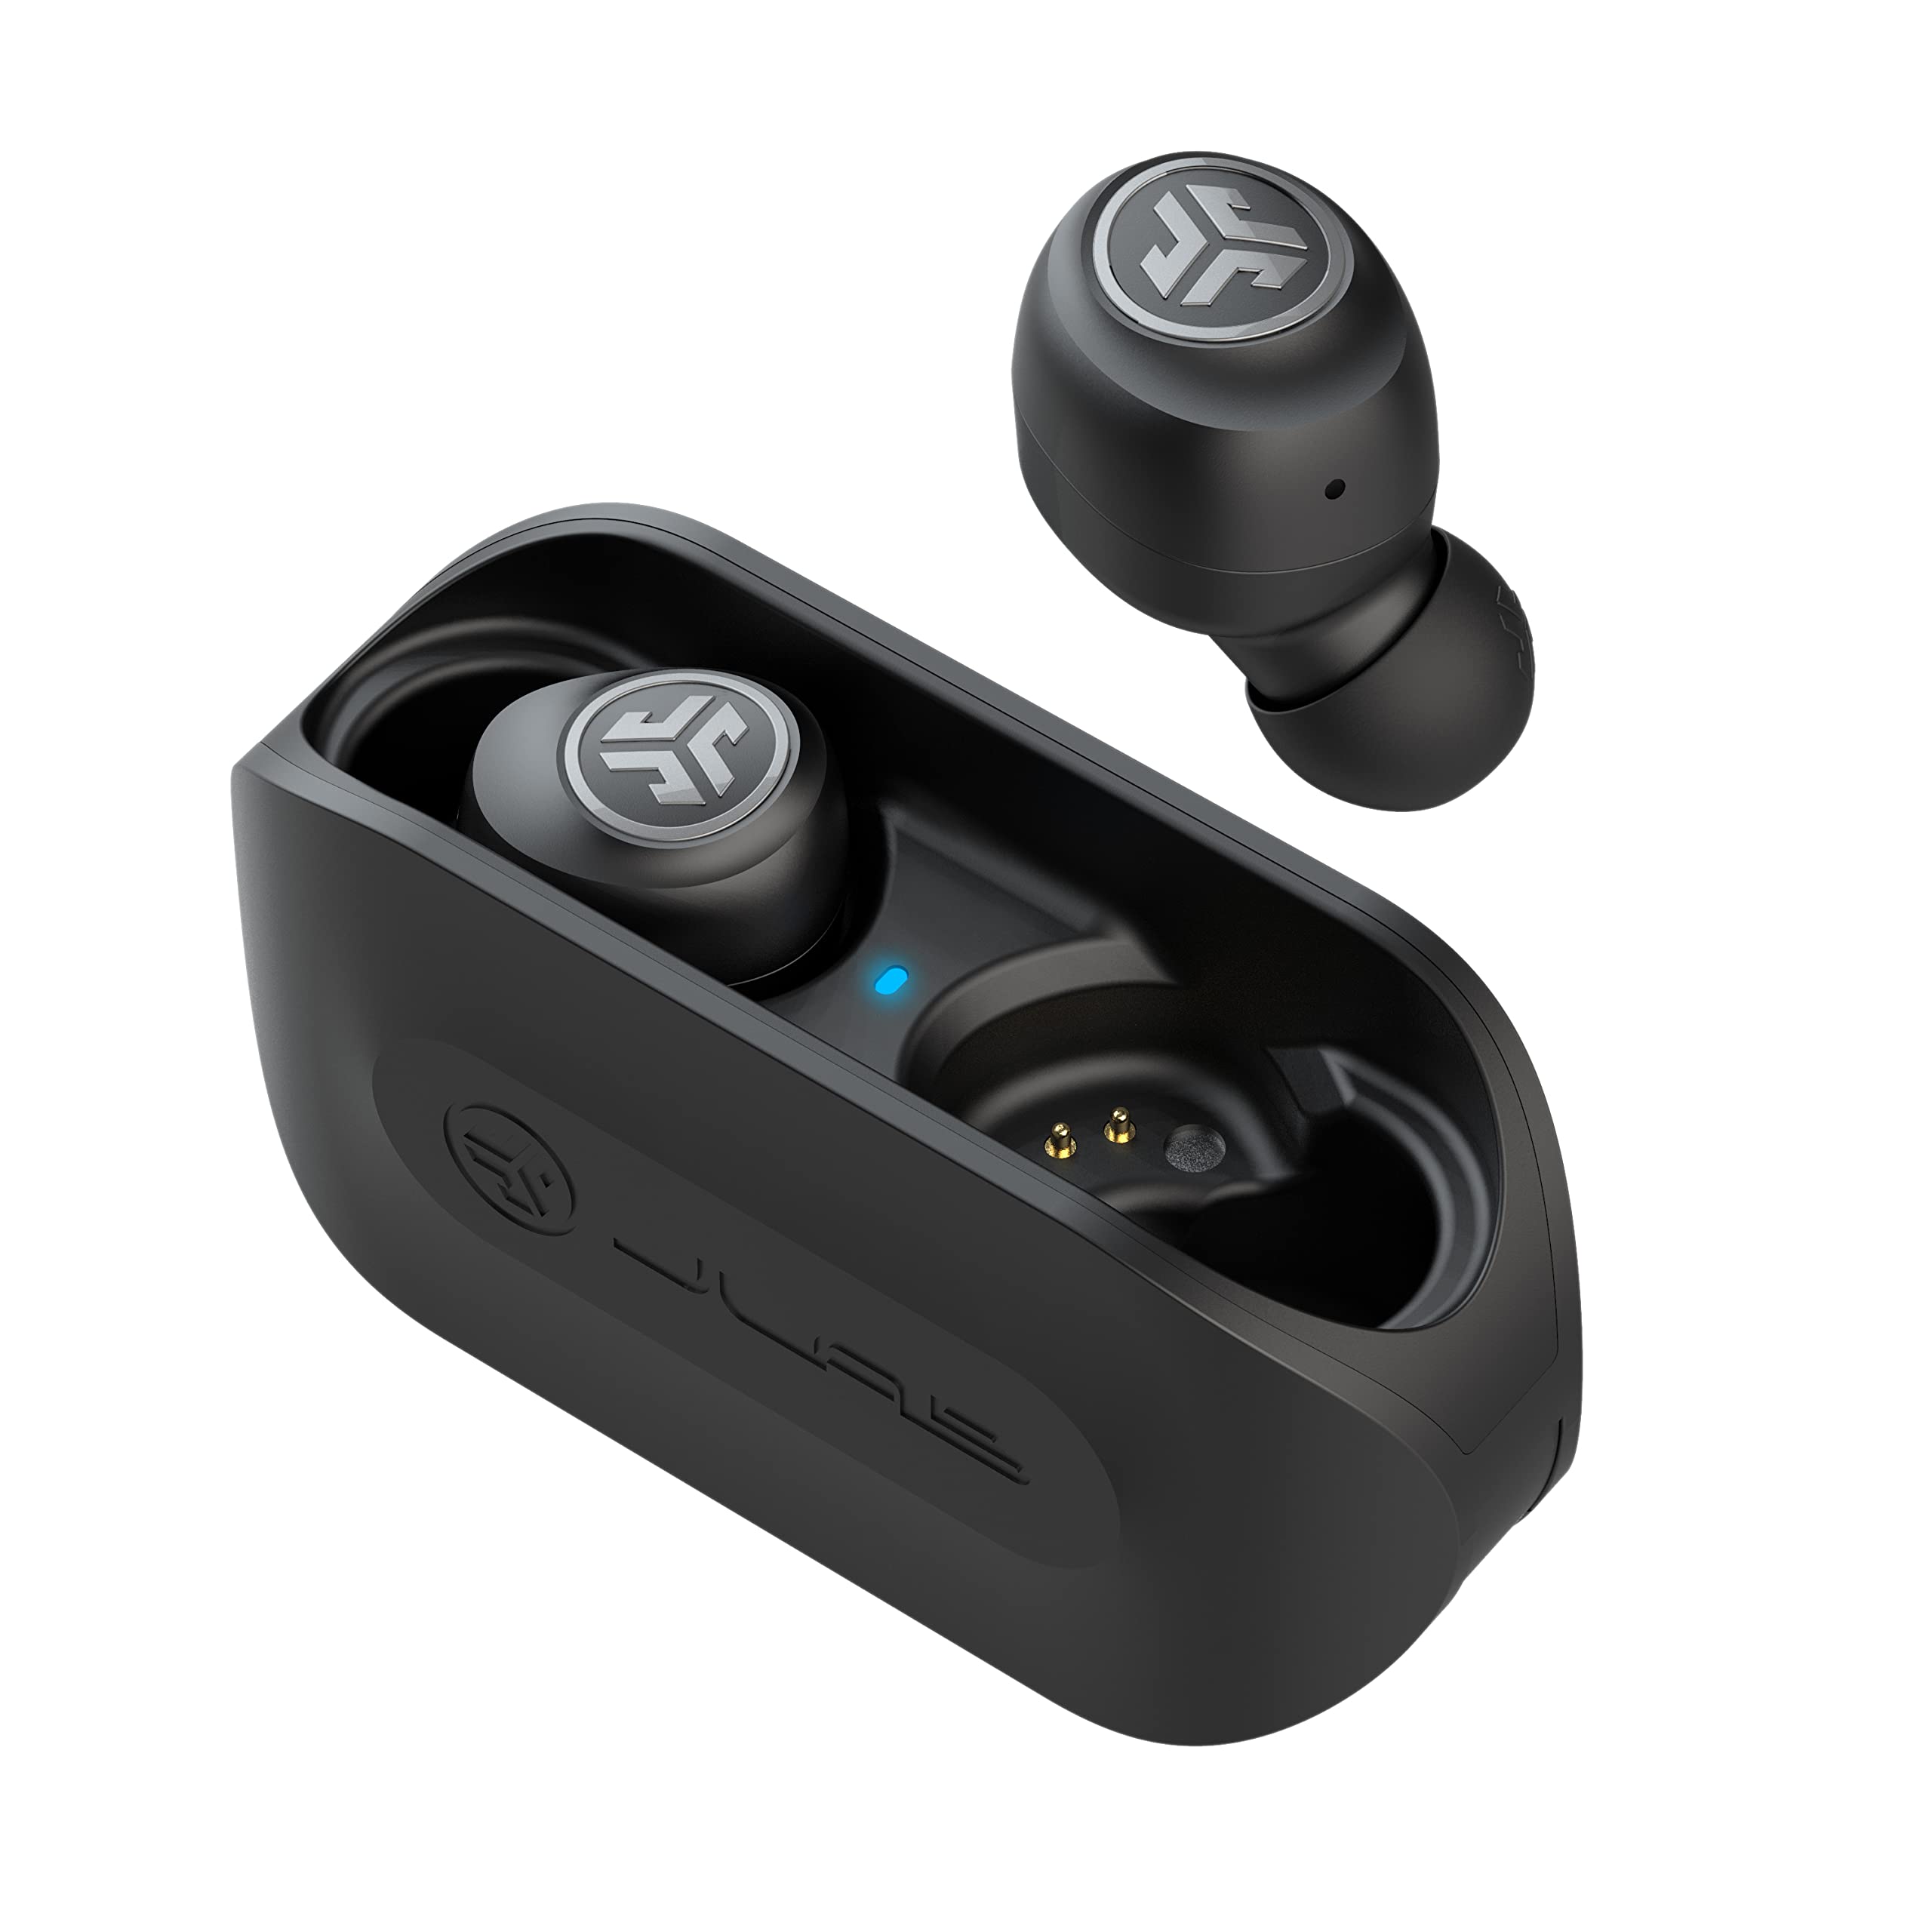
Charging Your Jlab Wireless Earbuds
When it comes to keeping your Jlab wireless earbuds ready for action, understanding the charging process is essential. Here's a step-by-step guide to ensure your earbuds are always powered up and ready to go.
Using the Charging Case
-
Connect the Charging Cable: Start by connecting the provided charging cable to the charging case. The other end of the cable can be plugged into a USB power source. This can be a computer, a USB wall adapter, or a portable power bank.
-
Place the Earbuds in the Case: Open the charging case and carefully place the earbuds inside. Ensure they are seated properly and make contact with the charging points.
-
Charging Indicator: Once the earbuds are in the case and the case is connected to power, a charging indicator light should illuminate. This light indicates that the earbuds are receiving power and are charging.
-
Charging Time: Allow the earbuds to charge fully. The charging time may vary depending on the model and the current battery level. Typically, it takes around 1-2 hours for the earbuds to fully charge.
-
Checking the Battery Level: Some charging cases have a built-in battery indicator that shows the remaining charge in the case. This can be useful for determining when the case itself needs to be recharged.
Additional Tips
- Regular Charging: It's a good practice to keep your earbuds charged when not in use, ensuring they are ready for use when you need them.
- Avoid Overcharging: Once the earbuds are fully charged, disconnect them from the power source to prevent overcharging, which can potentially affect the battery life over time.
- Keep the Case Clean: Periodically clean the charging case and the charging contacts on the earbuds to ensure a good connection for charging.
By following these simple steps, you can keep your Jlab wireless earbuds charged and ready to provide you with hours of high-quality audio enjoyment.
Turning On Your Jlab Wireless Earbuds
Before you can immerse yourself in your favorite music or take calls with your Jlab wireless earbuds, you’ll need to power them on. Here’s a straightforward guide to getting your earbuds up and running.
Initial Setup
-
Remove from Charging Case: If your earbuds were in the charging case, take them out and ensure they are free from any obstructions.
-
Ensure Sufficient Charge: It’s important to check that your earbuds have sufficient charge to power on. If in doubt, place them back in the charging case to top up the battery.
Powering On
-
Press and Hold the Power Button: Most Jlab wireless earbuds have a power button located on each earbud. Press and hold this button for a few seconds until you see an indicator light or hear a power-on sound. Refer to your earbuds’ manual for the specific location of the power button.
-
Indicator Light: Upon powering on, you should see an indicator light on the earbuds. This light may blink or emit a steady glow to signify that the earbuds are powered on and ready to connect.
Automatic Pairing
Some Jlab earbud models feature automatic pairing, meaning they will enter pairing mode once powered on if they have not been previously paired with a device. This allows for seamless and quick connections to your preferred devices.
Power-Off Function
To conserve battery life, it’s essential to power off your earbuds when not in use. Most models allow you to power them off by pressing and holding the power button until the indicator light turns off or by placing them back in the charging case.
By following these simple steps, you can easily power on your Jlab wireless earbuds and prepare for an immersive audio experience.
Pairing Your Jlab Wireless Earbuds with a Device
Pairing your Jlab wireless earbuds with a compatible device, such as a smartphone, tablet, or computer, allows you to enjoy the freedom of wireless audio. Here’s a comprehensive guide to help you seamlessly pair your earbuds with your preferred device.
Entering Pairing Mode
-
Power On the Earbuds: Ensure that your Jlab wireless earbuds are powered on. If not, refer to the previous section for instructions on how to do so.
-
Activate Pairing Mode: Most Jlab earbuds will automatically enter pairing mode when powered on for the first time or if they have been reset. If not, consult the user manual for specific instructions on how to activate pairing mode.
Device Settings
-
Open Bluetooth Settings: On your device, navigate to the Bluetooth settings. This can usually be found in the settings menu or quick access panel.
-
Enable Bluetooth: If Bluetooth is not already enabled, switch it on to allow your device to discover nearby Bluetooth devices.
Pairing Process
-
Select Jlab Earbuds: In the list of available Bluetooth devices, locate and select the Jlab earbuds. The device name may vary depending on the specific model of your earbuds.
-
Confirm Pairing: Once selected, your device will initiate the pairing process. You may be prompted to confirm the pairing request.
-
Successful Pairing: Upon successful pairing, your device will display a confirmation message, and the earbuds’ indicator light may change to indicate a successful connection.
Additional Considerations
-
Multiple Device Pairing: Some Jlab earbud models support pairing with multiple devices, allowing you to seamlessly switch between different devices without the need for repetitive pairing.
-
Automatic Reconnection: Once paired, your device will automatically attempt to reconnect to the earbuds when they are within range and powered on, providing a hassle-free user experience.
By following these steps, you can effortlessly pair your Jlab wireless earbuds with your preferred device, unlocking the convenience of wireless audio streaming and communication.
Troubleshooting Power Issues with Your Jlab Wireless Earbuds
Encountering power-related issues with your Jlab wireless earbuds can be frustrating, but with a few troubleshooting steps, you can often resolve these issues and get back to enjoying your audio experience. Here are some common power-related problems and their potential solutions:
No Power or Failure to Turn On
-
Check Battery Level: Ensure that the earbuds have sufficient charge. If not, place them in the charging case and allow them to charge for at least 15-20 minutes before attempting to power them on again.
-
Clean Charging Contacts: Over time, dirt or debris may accumulate on the charging contacts of the earbuds or the charging case, hindering the charging process. Use a clean, dry cloth to gently wipe the contacts and ensure a clean connection for charging.
-
Reset the Earbuds: Some models may benefit from a reset if they are unresponsive. Refer to the user manual for specific instructions on how to reset your earbuds.
Intermittent Power Loss
-
Check for Interference: Nearby electronic devices or strong wireless signals can sometimes interfere with the connectivity and power of the earbuds. Try moving to a different location to see if the issue persists.
-
Re-pair the Earbuds: If the earbuds are experiencing intermittent disconnections, consider re-pairing them with your device to establish a fresh connection.
-
Update Firmware: Check for firmware updates for your earbuds. Manufacturers often release updates to address performance and connectivity issues.
Rapid Battery Drain
-
Avoid Overcharging: Leaving the earbuds connected to the charger for extended periods can potentially degrade the battery life. Disconnect them from the charger once fully charged.
-
Limit High-Volume Usage: Listening to audio at high volumes can accelerate battery drain. Consider lowering the volume to extend the battery life.
-
Replace the Earbud Batteries: If the earbuds’ battery life significantly diminishes over time and is not remedied by other troubleshooting steps, it may be necessary to replace the batteries. Contact the manufacturer for guidance.
By addressing these common power-related issues and implementing the suggested solutions, you can often restore the functionality and reliability of your Jlab wireless earbuds, ensuring uninterrupted enjoyment of your audio content.


