
Understanding Philips Hue Night Light Settings
The Philips Hue lighting system offers a variety of features and settings to enhance your home’s ambiance, including the convenient Night Light function. Understanding how this feature works is essential if you want to add another Night Light setting to your setup.
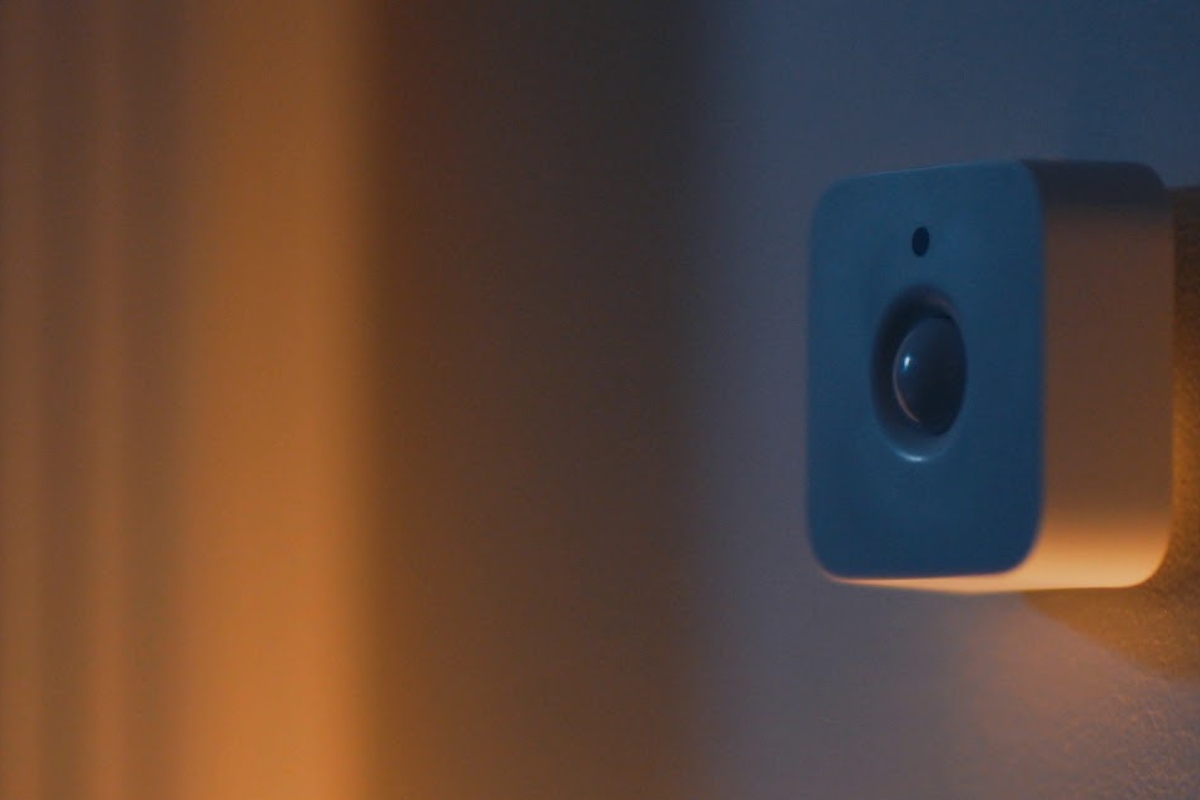
The Night Light setting allows you to have a low-intensity light source that gently illuminates a room during the night, providing enough brightness to move around comfortably without harsh lighting. This feature is particularly useful in hallways, bedrooms, and nurseries, creating a safe and soothing environment during nighttime hours.
To enable the Night Light setting, you will need a Philips Hue Bridge, which acts as the central control hub for your Philips Hue lights. The Bridge connects to your home Wi-Fi network and allows you to control your lights through the Philips Hue mobile app.
Once you have set up your Philips Hue Bridge and connected your lights, you can access the Night Light settings in the app. You can choose the specific lights you want to turn on and set their brightness level to create the desired ambiance for your Night Light setting.
Additionally, the app allows you to schedule the Night Light to turn on and off automatically at specific times or create custom automation rules. For example, you can set the Night Light to turn on in the evening and turn off in the morning, ensuring a peaceful environment during sleep hours.
It is worth noting that the Night Light feature works best with compatible Philips Hue bulbs, such as the Philips Hue White Ambiance or Philips Hue White and Color Ambiance bulbs. These bulbs offer a wide range of white light shades, allowing you to create the perfect atmosphere for your Night Light setting.
Overall, understanding how the Philips Hue Night Light settings function is crucial when adding another Night Light setting to your system. By leveraging the app’s controls and utilizing compatible bulbs, you can create a comfortable and soothing environment with the right level of brightness during nighttime hours in any room of your home.
Checking Compatibility with Additional Night Light Settings
Before adding another Night Light setting to your Philips Hue system, it is important to ensure compatibility between your existing setup and the new lights you plan to incorporate. This step will help you avoid any compatibility issues and guarantee a seamless integration of the additional Night Light.
The first thing you should take into consideration is whether your Philips Hue Bridge has enough capacity to support the additional lights. Each Philips Hue Bridge has a maximum number of bulbs it can connect to, so make sure you have not exceeded this limit. If you have reached the maximum number, you may need to upgrade to a more advanced Bridge model or remove some existing lights to make room for the new Night Light.
Next, check the specific requirements and compatibility of the additional Night Light you wish to add. Philips Hue offers a wide range of Night Light options, including different bulb types and form factors. Ensure that the new Night Light is compatible with the Philips Hue system and can be controlled through the Hue mobile app.
If you are planning to use different models or generations of Philips Hue bulbs for your Night Light settings, check if they are compatible with each other. Certain features and functionalities might not be available when mixing different bulb types or generations. It’s always recommended to choose bulbs from the same generation to ensure a consistent experience.
Additionally, consider the connectivity requirements of the new Night Light. Some Philips Hue bulbs require a direct connection to your Philips Hue Bridge, while others can be connected indirectly through other Hue bulbs acting as a bridge. Verify the specific connectivity options of the new Night Light and ensure that it aligns with your setup and preferences.
Lastly, if you have any other smart home devices or systems integrated with your Philips Hue setup, ensure that the new Night Light is compatible and can be seamlessly integrated with those devices. Compatibility with popular smart home platforms like Amazon Alexa, Google Assistant, or Apple HomeKit will allow you to control your Night Light using voice commands or through automation routines.
By checking the compatibility of the additional Night Light settings with your existing setup, you can avoid any issues and ensure a smooth integration. Taking these compatibility factors into account will help you make an informed decision and select the right Night Light to expand your Philips Hue lighting system.
Adding Another Philips Hue Night Light to Your System
Expanding your Philips Hue system with an additional Night Light is a straightforward process that allows you to create more ambient lighting in your home. Here are the steps to follow when adding another Philips Hue Night Light to your system:
1. Ensure that your Philips Hue Bridge is connected and powered on. The Bridge should be connected to your home Wi-Fi network as well.
2. Place the new Night Light in the desired location. It could be a hallway, bedroom, or any other area where you want to add a gentle and dim light source.
3. Open the Philips Hue mobile app on your smartphone or tablet. Make sure you have the latest version of the app installed.
4. Tap on the “+” icon or navigate to the “Settings” menu within the app.
5. Select the option to “Add Device” or “Add New Lights” depending on your app version.
6. The app will start searching for new devices. It may take a few seconds for the app to detect the new Night Light.
7. Once the app identifies the new Night Light, follow the on-screen prompts to connect it to your Philips Hue Bridge. This usually involves pressing the button on the Night Light so that it connects to the Bridge.
8. After successful pairing, the app will ask you to assign a name to the new Night Light. Choose a descriptive name that reflects the location or purpose of the light.
9. You can now customize the settings for the new Night Light, including brightness and color, if applicable. The app provides intuitive controls for adjusting these settings to your preference.
10. Finally, test the new Night Light to ensure it functions as expected. You can turn it on or off through the app or use voice commands if you have a compatible smart speaker or virtual assistant.
By following these steps, you can easily add another Philips Hue Night Light to your system. The app’s user-friendly interface and the seamless integration of the new device will allow you to expand your smart lighting setup and create a warm and welcoming atmosphere in your home.
Connecting the New Night Light to Your Bridge
After you have physically placed the new Philips Hue Night Light in your desired location, the next step is to connect it to your Philips Hue Bridge. This process ensures that the new Night Light can communicate with the Bridge and be controlled through the Philips Hue app. Here’s how you can connect the new Night Light to your Bridge:
1. Make sure your Philips Hue Bridge is connected to a power source and your home Wi-Fi network. The Bridge should be on and ready for pairing.
2. Open the Philips Hue mobile app on your smartphone or tablet. Ensure that you have the latest version of the app installed, as it often includes bug fixes and improvements.
3. Tap on the “+” icon or navigate to the “Settings” menu within the app.
4. Select the option to “Add Device” or “Add New Lights” depending on the version of the app you are using.
5. The app will initiate a search for new devices. It may take a few moments for the app to detect the new Night Light.
6. Once the app identifies the new Night Light, follow the on-screen instructions provided. Typically, this involves pressing the button on the Night Light to initiate the pairing process.
7. The Night Light will then connect to your Philips Hue Bridge. The app will display a message confirming the successful pairing of the new device.
8. After the Night Light is successfully connected to the Bridge, you can assign it a name within the app. Choose a name that best describes the location or purpose of the Night Light.
9. You may now proceed to customize the settings for the new Night Light, such as adjusting the brightness or choosing a specific color if applicable. The Philips Hue app provides an intuitive interface for adjusting these settings to your liking.
10. Test the Night Light to ensure it is functioning as desired. You can turn it on or off through the app or use voice commands if you have a compatible smart speaker or virtual assistant connected to your Philips Hue system.
By following these steps, you can easily connect the new Philips Hue Night Light to your Bridge, allowing you to control it seamlessly through the Philips Hue app. Once connected, you can enjoy the added convenience and ambiance of your new Night Light in your home.
Adjusting the Settings for the New Night Light
Once you have successfully connected the new Philips Hue Night Light to your Bridge, you can begin adjusting the settings to customize its behavior and create the desired ambiance in your home. Here’s how you can adjust the settings for the new Night Light:
1. Open the Philips Hue mobile app on your smartphone or tablet. Ensure that you are on the home screen or the section that displays all your connected lights.
2. Locate the newly added Night Light within the app. It should appear alongside your other Philips Hue lights.
3. Tap on the Night Light to access its settings. This will open a dedicated screen where you can control various aspects of the light.
4. Adjust the brightness of the Night Light to your preferred level. The app provides a slider or numeric input to customize the brightness. Slide the bar or enter a specific value to set the brightness accordingly.
5. If your Night Light supports color changing capabilities, you can select the desired color from a palette or choose from preset scenes available in the app. Experiment with different colors to create the perfect ambiance for your space.
6. Some Night Lights offer additional settings, such as the option to choose between different shades of white light or adjust the warmth of the light. Explore these settings to find the combination that suits your preferences.
7. Take advantage of the app’s grouping and room feature to easily manage and control multiple Night Lights in one area or room. This allows you to control all the lights in a specific location simultaneously, simplifying the process of adjusting settings for multiple Night Lights.
8. Test the settings to ensure they match your expectations. Turn the Night Light on and off, adjust the brightness and color, and observe the changes. Make any necessary adjustments until you achieve the desired ambiance.
9. If you have set up schedules or automation rules for your Philips Hue lights, ensure that the new Night Light is included in those routines. This will allow the Night Light to automatically turn on and off based on your predefined schedules.
10. Remember that you can always revisit the settings for your Night Light and make adjustments as your needs and preferences change. The flexibility offered by the Philips Hue system allows you to fine-tune your lighting setup over time.
By adjusting the settings for your new Philips Hue Night Light, you can create a personalized lighting experience in your home. Whether it’s adjusting the brightness, exploring different colors, or integrating the Night Light into automation routines, the app provides a user-friendly interface to achieve the desired ambiance with ease.
Customizing the Color and Brightness of the New Night Light
One of the key features of the Philips Hue lighting system is the ability to customize the color and brightness of your Night Light. This allows you to create the perfect ambiance and set the mood in your living spaces. Here’s how you can customize the color and brightness of your new Philips Hue Night Light:
1. Open the Philips Hue mobile app on your smartphone or tablet. Ensure that you are on the home screen or the section that displays all your connected lights.
2. Locate the newly added Night Light within the app. It should appear alongside your other Philips Hue lights.
3. Tap on the Night Light to access its settings. This will open a dedicated screen where you can control various aspects of the light.
4. Adjusting the brightness: Look for a brightness control feature, which is usually represented by a slider or numeric value. Slide the bar or enter a specific value to increase or decrease the brightness of the Night Light. Experiment with different brightness levels until you find the perfect setting for your needs.
5. Customizing the color: If your Night Light supports color-changing capabilities, you can customize the color to match your preferences or set the desired ambiance. Access the color control feature, which is typically represented by a color wheel or a palette. Tap or slide your finger across the color wheel to select the hue you desire. Some apps also offer preset color scenes or allow you to create your own customized scenes.
6. Consider using pre-set scenes: Many Philips Hue apps come with pre-set scenes that instantly change the color and brightness of your lights to match different moods or scenarios. These scenes include options like “Relax,” “Energize,” “Concentrate,” and more. Explore the available scenes and choose the one that suits your desired ambiance for the Night Light.
7. Save your customized settings: Once you have adjusted the color and brightness to your liking, consider saving the settings as a preset or favorite for easy access in the future. This saves you time and allows you to switch to your preferred settings with a single tap.
8. Create dynamic lighting experiences: If you have multiple Night Lights or other Philips Hue lights in the same room, you can synchronize their colors and brightness levels to create a dynamic lighting experience. Apps like Philips Hue Sync and third-party integrations allow you to sync your lights with music, movies, and other media for an immersive experience.
9. Consider using voice commands or smart home integrations: If you have a compatible smart speaker or virtual assistant, you can control the color and brightness of your Night Light using voice commands. Simply ask your assistant to adjust the color or brightness of the Night Light, and it will respond accordingly.
10. Regularly experiment and explore: Don’t be afraid to try new color combinations and brightness levels. The Philips Hue ecosystem offers endless possibilities, so take the time to explore and find the settings that create the desired ambiance in your living spaces.
By customizing the color and brightness of your new Philips Hue Night Light, you can create a personalized lighting experience that suits your mood and desired ambiance. Whether you prefer a warm and cozy atmosphere or a vibrant and colorful setting, the flexibility of the Philips Hue system allows you to achieve it with ease.
Creating Schedules and Automations for the Additional Night Light
Adding an additional Night Light to your Philips Hue system not only enhances the ambiance of your home but also presents an opportunity to create schedules and automations. By configuring automated routines, you can conveniently control when the Night Light turns on and off, ensuring maximum convenience and energy efficiency. Here’s how you can create schedules and automations for your additional Philips Hue Night Light:
1. Open the Philips Hue mobile app on your smartphone or tablet. Ensure that you are on the home screen or the section that displays all your connected lights.
2. Locate the newly added Night Light within the app. It should appear alongside your other Philips Hue lights.
3. Tap on the Night Light to access its settings. This will open a dedicated screen where you can control various aspects of the light.
4. Look for the “Routines,” “Schedules,” or “Automation” section within the app. The exact location and terminology may vary depending on the app version.
5. Create a schedule: In the scheduling section, you can define specific times for the Night Light to turn on and off automatically. Set the desired time for the Night Light to activate and choose the days of the week when the schedule should apply. For example, you can schedule the Night Light to turn on at sunset and turn off at sunrise every day.
6. Customize behavior with sunset/sunrise: Some apps offer the option to synchronize the Night Light’s schedule with the actual sunset and sunrise times in your location. This ensures that the Night Light adjusts its activation and deactivation times based on the changing daylight hours throughout the year.
7. Explore advanced scheduling features: Depending on the app, you may have access to more advanced scheduling options. For instance, you can create randomized schedules to mimic human presence when you’re away from home or create different schedules for weekdays and weekends.
8. Set up automations: Automations allow you to trigger the Night Light based on specific events or conditions. For example, you can set the Night Light to turn on automatically when motion is detected in a particular area or when you arrive home using geofencing technology. Explore the automation options available in your app and choose the ones that fit your needs.
9. Integrate with smart home platforms: If you have other smart home devices, you can integrate your Philips Hue Night Light with platforms like Amazon Alexa, Google Assistant, or Apple HomeKit. This enables you to control the Night Light through voice commands or incorporate it into broader smart home routines.
10. Test and refine: It’s essential to test the schedules and automations you create for your Night Light to ensure they function as expected. Make adjustments as needed to fine-tune the activation and deactivation times or modify the triggers for automations to optimize their performance.
By creating schedules and automations for your additional Philips Hue Night Light, you can effortlessly control its activation and deactivation, enhancing convenience and energy efficiency. The flexibility of the Philips Hue system allows you to tailor the lighting experience to your lifestyle, saving you time and enhancing the ambiance of your living spaces.
Troubleshooting Common Issues with Additional Night Light Settings
While adding an additional Night Light to your Philips Hue system is usually a smooth process, you may encounter some common issues along the way. By familiarizing yourself with these potential challenges and the corresponding troubleshooting steps, you can quickly resolve any problems that arise. Here are some common issues and how to troubleshoot them:
1. Connection issues: If you’re experiencing difficulties connecting the new Night Light to your Philips Hue Bridge, ensure that both devices are powered on and within range of each other. Try resetting the Night Light by turning it off and on again, then attempt the connection process once more. It may also be helpful to restart your Philips Hue Bridge by unplugging it and plugging it back in.
2. Unresponsive Night Light: If the Night Light doesn’t respond to commands from the Philips Hue app or voice control, make sure the Night Light is powered on and connected to the Bridge. Check that the Night Light is not switched off manually or unplugged from the power source. In case of unresponsiveness, you can try resetting the Night Light by following the manufacturer’s instructions.
3. Color or brightness issues: If the color or brightness of the Night Light is not matching your settings, confirm that you have selected the correct Night Light in the app and adjusted the settings accordingly. Ensure that you have the latest firmware update for both the Night Light and the Philips Hue Bridge. It is also worth checking if the Night Light’s color and brightness are affected by any other pre-set scenes or automation rules that may be overriding your individual settings.
4. Interference from other devices: If you notice inconsistent performance or intermittent connectivity issues with the Night Light, there may be interference from other devices or Wi-Fi networks in the vicinity. Try temporarily disabling or moving such devices to see if it improves the performance of the Night Light. If possible, consider adjusting the Wi-Fi channel on your router to reduce interference.
5. Bridge capacity limitations: Each Philips Hue Bridge has a maximum capacity for the number of connected lights it can support. If you have reached this limit with existing lights, adding another Night Light may cause connectivity issues. In such cases, consider upgrading to a higher-capacity Bridge or removing some lights that are less frequently used to make room for the additional Night Light.
6. Software updates: Ensure that you have the latest version of the Philips Hue app installed on your device and that your Night Light firmware is up to date. Software updates often include bug fixes and performance improvements. So, updating the app and the Night Light’s firmware may resolve any compatibility issues or glitches that you are facing.
7. Network connection problems: If your Night Light relies on a stable Wi-Fi connection, verify that your home network is functioning properly. Restart your router or modem if necessary, or try reconnecting the Bridge to the Wi-Fi network. If you continue to experience network-related issues, consider contacting your internet service provider for assistance.
8. Resetting the Night Light or Bridge: If all else fails and you’ve exhausted other troubleshooting options, you can try resetting the Night Light or the Philips Hue Bridge. Refer to the manufacturer’s instructions for the specific reset procedures. Keep in mind that performing a reset will erase any personalized settings or configurations, so you may need to set up the Night Light again from scratch.
By familiarizing yourself with these troubleshooting steps, you can quickly resolve common issues that may arise when adding an additional Night Light to your Philips Hue system. Remember to refer to the manufacturer’s documentation and seek support from Philips Hue customer service if necessary, as they can provide more specific guidance for your particular situation.
Exploring Advanced Philips Hue Night Light Features
While the basic functionality of a Philips Hue Night Light provides added convenience and ambiance to your home, the Philips Hue ecosystem offers several advanced features that can take your lighting experience to the next level. Here are some advanced features worth exploring:
1. Sync with entertainment: Philips Hue Sync allows you to synchronize your Night Light with movies, music, and games, creating a captivating and immersive experience. Sync your Night Light with your favorite movies or music, and watch as the colors and brightness change along with the media, enhancing the overall sensory experience.
2. Create dynamic scenes: Expand your creative possibilities by using the Philips Hue app or third-party Hue-compatible apps to create dynamic scenes. These scenes allow you to automate color and brightness changes in real-time, transitioning smoothly between different settings. For example, you can set your Night Light to gradually shift from a warm yellow to a cool blue throughout the evening hours.
3. Geo-fencing and location-based triggers: Take advantage of the geo-fencing feature to automate your Night Light based on your location. With location-based triggers, you can set your Night Light to turn on or off automatically when you leave or arrive home. This ensures that your Night Light activates or deactivates based on your proximity to your home, adding convenience and energy efficiency.
4. Voice control and smart home integration: Philips Hue Night Lights are compatible with popular voice control platforms such as Amazon Alexa, Google Assistant, and Apple HomeKit. By integrating your Night Light with your preferred smart home ecosystem, you can control its color, brightness, and other settings using simple voice commands, making your lighting experience effortless and hands-free.
5. Routines and schedules beyond basic on/off: Explore the extensive routines and scheduling capabilities offered by the Philips Hue system to create customized lighting experiences. Program your Night Light to simulate sunrise in the morning, gradually increasing the brightness to wake you up naturally. Similarly, you can create a bedtime routine that gradually dims the Night Light, signaling your body to wind down and prepare for sleep.
6. Integration with other smart devices: Philips Hue Night Lights can be integrated with other smart devices in your home. For instance, you can set your Night Light to turn on automatically when motion is detected by a connected motion sensor, or have it respond to environmental cues like the weather or sunrise/sunset data from weather apps or online services.
7. Third-party app support: Explore a wide range of third-party apps that offer additional features and functionalities for your Night Light. These apps often provide more advanced controls, creative lighting effects, and integration with various platforms and services. Some popular third-party apps for Philips Hue include Hue Essentials, iConnectHue, and Hue Disco.
8. Scene sharing and community creations: Philips Hue offers a platform for users to share their custom scenes and lighting creations with others in the Hue community. Browse through the community creations to get inspired and discover unique lighting setups for your Night Light. You can also share your own creations and contribute to the vibrant Hue community.
Take the time to explore these advanced Philips Hue Night Light features and unlock new possibilities for creating the perfect lighting experience in your home. Experiment with different combinations, integrate with other smart devices, and let your creativity shine as you fully maximize the capabilities of your Night Light within the Philips Hue ecosystem.