
Choosing the Right Beanbag
When it comes to photography, stability is key to capturing sharp, clear images. Mounting a beanbag on your monopod can significantly enhance stability, especially in situations where using a tripod is impractical. However, not all beanbags are created equal. Here's how to choose the right beanbag for your monopod to achieve optimal stability.
Weight and Size
The weight and size of the beanbag are crucial factors to consider. Opt for a beanbag that is large enough to provide a stable base for your monopod while still being lightweight and portable. Look for a beanbag that can easily fit into your camera bag or backpack for convenient transportation.
Material
The material of the beanbag plays a significant role in its effectiveness. Choose a beanbag made from durable, high-quality fabric that can withstand outdoor conditions and provide reliable support for your monopod. Additionally, select a beanbag with a water-resistant or waterproof exterior to protect it from moisture and ensure longevity.
Fill Material
The fill material of the beanbag is essential for stability and versatility. Opt for a beanbag filled with materials that can mold to uneven surfaces, such as plastic pellets, rice, or dried beans. These materials provide a level of flexibility, allowing the beanbag to conform to the terrain and provide a solid foundation for your monopod.
Versatility
Consider the versatility of the beanbag. Look for a beanbag that can be used not only to mount your monopod but also as a support for your camera when shooting from various angles. A versatile beanbag can serve multiple purposes, making it a valuable addition to your photography gear.
Customization Options
Some beanbags come with customizable features, such as adjustable straps or compartments for adding or removing fill material. These options allow you to tailor the beanbag to your specific needs, ensuring optimal stability and support for your monopod in various shooting environments.
By considering these factors, you can select a beanbag that is well-suited for mounting on your monopod, providing the stability and support necessary for capturing stunning photographs in diverse settings.
Attaching the Beanbag to Your Monopod
Once you have chosen the right beanbag for your monopod, the next step is to securely attach it to your monopod. Proper attachment ensures that the beanbag effectively stabilizes your monopod, allowing you to capture clear and steady shots. Here’s how to attach the beanbag to your monopod for optimal stability.
Positioning the Beanbag
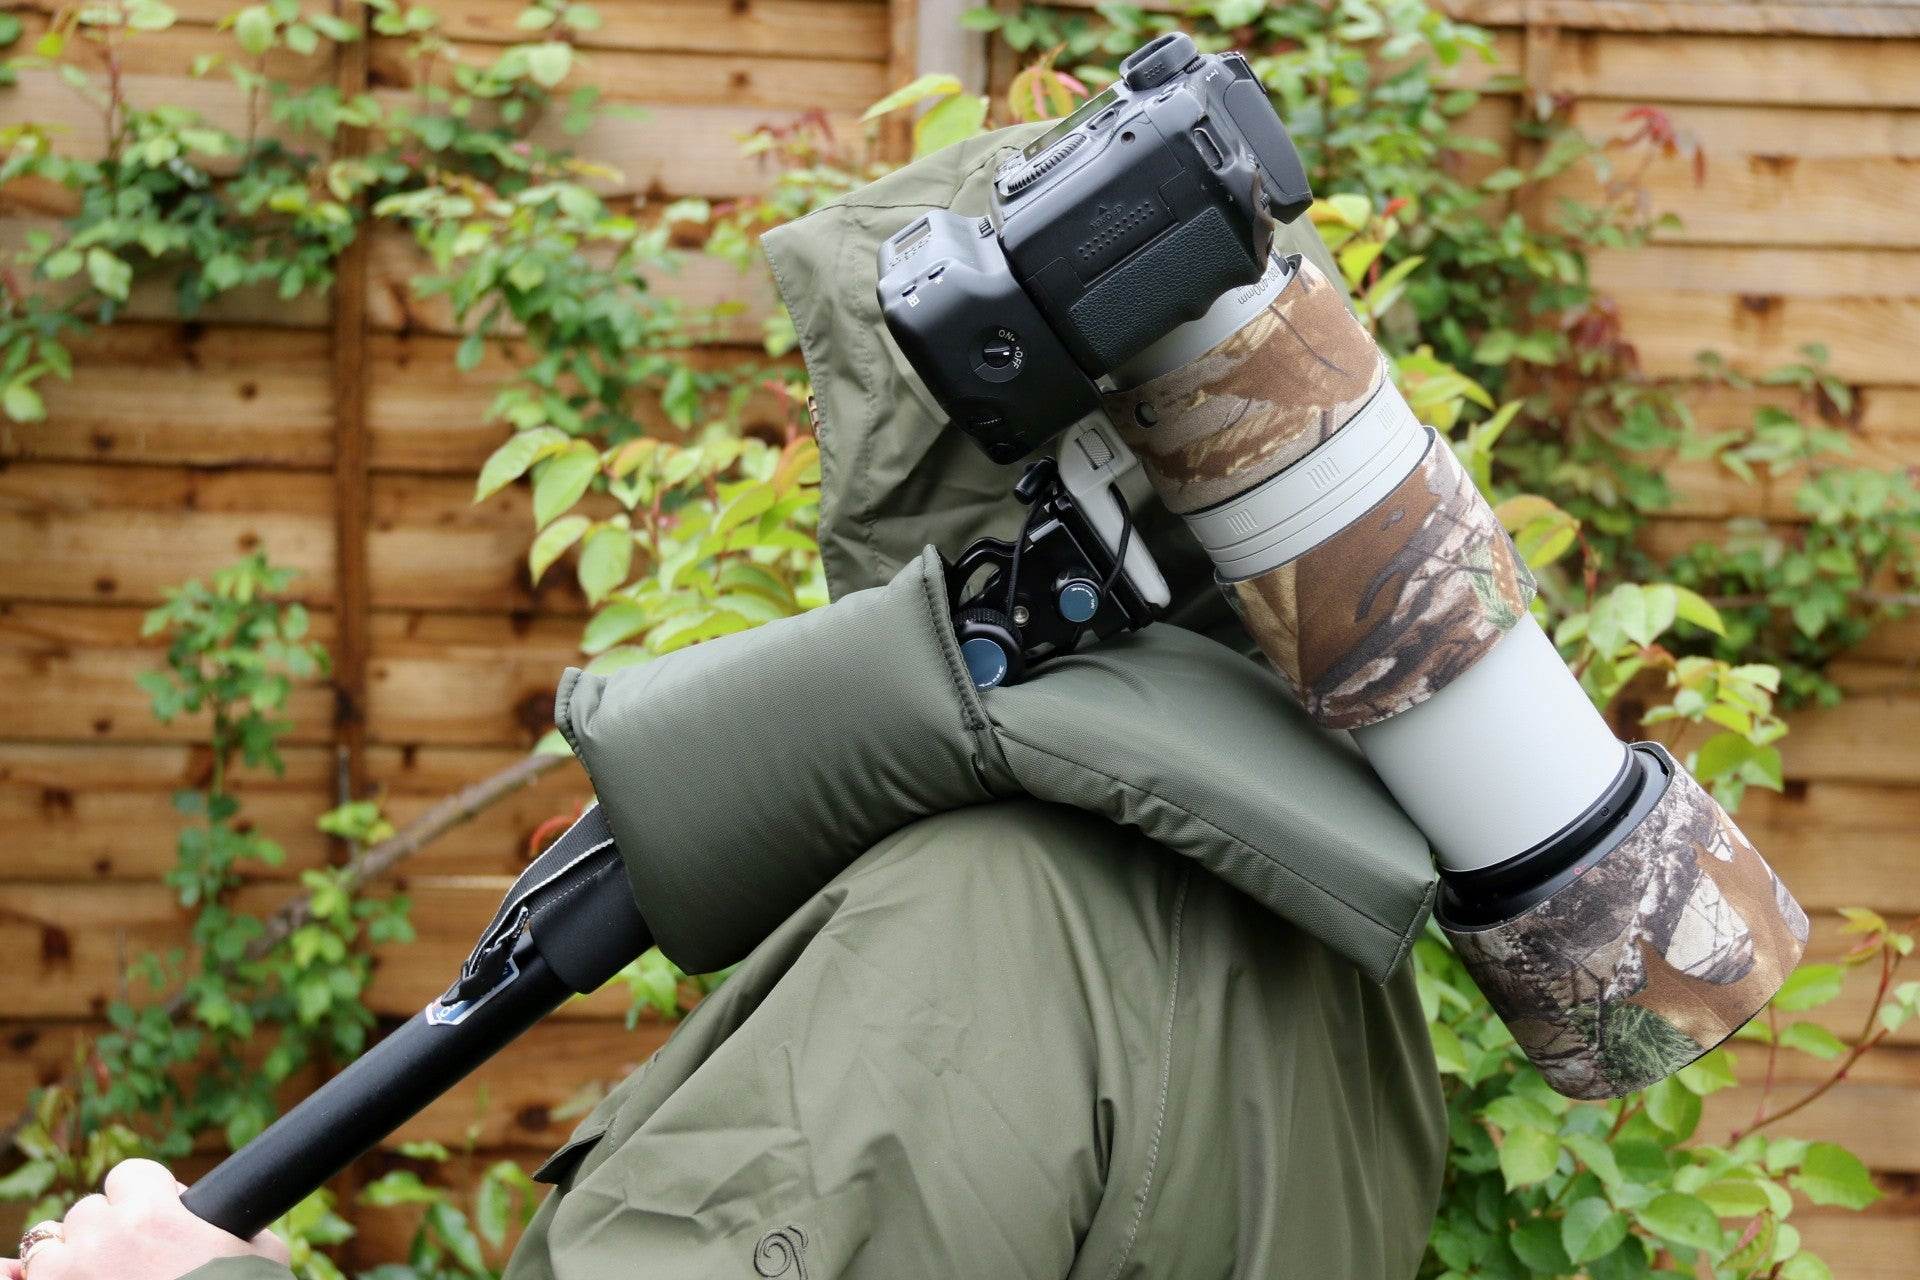
Before attaching the beanbag, determine the ideal placement on your monopod. The beanbag should be positioned in a way that allows it to support the monopod’s base while providing a stable foundation. Place the beanbag near the bottom of the monopod, ensuring that it rests securely on the ground when the monopod is in an upright position.
Securing the Beanbag
Once you have identified the optimal position, secure the beanbag to the monopod using adjustable straps or Velcro fasteners, if available. Ensure that the attachment is firm and stable, preventing any movement or slippage during use. A snug and secure attachment is essential for maintaining stability and preventing the monopod from tipping over.
Ensuring Even Distribution
After securing the beanbag, check that the fill material is evenly distributed within the beanbag. An even distribution of the fill material ensures uniform support for the monopod, minimizing any potential wobbling or instability. Adjust the fill material as needed to achieve a balanced and consistent foundation for your monopod.
Testing Stability
Once the beanbag is attached and the fill material is evenly distributed, test the stability of the monopod. Gently apply pressure to the monopod to simulate the weight of your camera and lens. Ensure that the monopod remains steady and balanced, indicating that the beanbag is effectively supporting the monopod’s weight.
Repositioning for Balance
If necessary, make minor adjustments to the position of the beanbag to achieve optimal balance and stability. Fine-tune the placement to ensure that the monopod stands upright without any tilting or leaning. Proper positioning is essential for maximizing the stability provided by the mounted beanbag.
By following these steps, you can securely attach the beanbag to your monopod, creating a stable and reliable support system for your camera equipment. With the beanbag properly mounted, you are ready to capture sharp, shake-free images in various shooting conditions.
Adjusting the Beanbag for Balance
After attaching the beanbag to your monopod, it’s essential to ensure that the beanbag is properly adjusted to achieve optimal balance and stability. Fine-tuning the position and fill material within the beanbag can significantly enhance the overall support provided to your monopod. Here’s how to adjust the beanbag for balance, allowing you to capture steady and clear images in various shooting scenarios.
Assessing Monopod Stability
Before making any adjustments, assess the initial stability of the monopod with the mounted beanbag. Stand the monopod upright and observe any signs of tilting or instability. This initial assessment provides a baseline for determining the necessary adjustments to the beanbag for improved balance.
Fill Material Redistribution
If the monopod exhibits slight instability, consider redistributing the fill material within the beanbag. Gently manipulate the beanbag to ensure that the fill material is evenly distributed, providing consistent support across the base of the monopod. This redistribution can help eliminate any potential wobbling or uneven weight distribution.
Adding or Removing Fill Material
Depending on the shooting environment and the weight of your camera setup, you may need to adjust the amount of fill material in the beanbag. Adding or removing fill material allows you to customize the support provided by the beanbag, catering to the specific weight and balance requirements of your equipment. Experiment with different fill material quantities to achieve the desired stability.
Testing Stability and Adjustment
After making adjustments to the beanbag, test the stability of the monopod once again. Apply gentle pressure to the monopod to simulate the weight of your camera and lens. Observe how the monopod responds to the added pressure, ensuring that it remains steady and balanced. Repeat the adjustment process as needed until the desired stability is achieved.
Environmental Adaptation
Consider the terrain and shooting conditions when adjusting the beanbag for balance. In uneven or sloped terrain, you may need to position the beanbag to compensate for the surface irregularities, ensuring that the monopod maintains stability. Adapt the beanbag’s position and fill material distribution to accommodate the specific challenges posed by the shooting environment.
By carefully adjusting the beanbag for balance, you can optimize the stability and support provided to your monopod, empowering you to capture sharp and shake-free images in a wide range of photography settings.
Using the Mounted Beanbag for Added Stability
With the beanbag securely attached and properly adjusted on your monopod, you can leverage this setup to achieve enhanced stability and capture stunning, shake-free photographs. The mounted beanbag serves as a valuable tool for stabilizing your monopod in various shooting scenarios, allowing you to maintain control and precision. Here’s how to make the most of the mounted beanbag for added stability in your photography endeavors.
Low-Light Photography
In low-light conditions, maintaining stability is crucial to avoid camera shake and blur. The mounted beanbag provides a reliable foundation for your monopod, minimizing the risk of unintentional movement during long exposures. This stability is particularly beneficial when capturing nightscapes, astrophotography, or indoor scenes with limited lighting.
Telephoto Lens Support
When using a telephoto lens, the slightest movement can result in noticeable image blur. The mounted beanbag offers essential support for your monopod, effectively dampening vibrations and ensuring steady control over your telephoto shots. Whether photographing wildlife, sports, or distant subjects, the added stability provided by the beanbag contributes to sharper and more detailed images.
Unpredictable Environments
When shooting in dynamic or unpredictable environments, such as crowded events or bustling urban settings, the mounted beanbag helps counteract external movements and vibrations. It stabilizes your monopod, allowing you to navigate through crowds or capture fleeting moments with confidence, knowing that your equipment remains steady and secure.
Long Exposures and Time-Lapse Photography
For long exposure photography and time-lapse sequences, the mounted beanbag ensures consistent stability throughout the duration of the capture. It minimizes any subtle shifts or swaying, resulting in precise and uninterrupted image sequences. Whether capturing the flow of water, cloud movements, or urban traffic trails, the added stability enhances the overall quality of your long exposure and time-lapse compositions.
Versatile Shooting Angles
The mounted beanbag facilitates shooting from versatile angles, allowing you to adapt to diverse compositions and perspectives. Whether shooting at ground level, from elevated positions, or in confined spaces, the stability provided by the beanbag-equipped monopod enables you to explore creative vantage points with confidence and precision.
By utilizing the mounted beanbag for added stability, you can elevate the quality of your photography by capturing sharp, steady, and visually compelling images across a wide range of shooting scenarios. The stability and control afforded by the beanbag-mounted monopod empower you to unleash your creativity and achieve exceptional results in your photographic pursuits.