
Setting up Apple Pay on Your iPhone 11
Apple Pay is a convenient and secure way to make payments using your iPhone 11. Setting it up is a straightforward process that allows you to streamline your transactions and enjoy the benefits of contactless payments. Here's a step-by-step guide to help you get started with Apple Pay on your iPhone 11:
-
Accessing the Wallet App: To begin, locate the Wallet app on your iPhone 11. It typically comes pre-installed and features a white background with a colorful depiction of credit and debit cards.
-
Adding Your Cards: Once you've opened the Wallet app, tap the "+" sign to add a new card. You'll have the option to add credit or debit cards from participating banks. You can also add store cards, transit cards, and more.
-
Verifying Your Cards: After entering your card details, your bank will need to verify the card. This can often be done by receiving a verification code via text, email, or a phone call.
-
Setting Up Face ID or Touch ID: For an added layer of security, you can set up Face ID or Touch ID to authorize Apple Pay transactions. This ensures that only you can make payments using your device.
-
Agreeing to Terms and Conditions: Once your card is verified, you may need to agree to the terms and conditions provided by your bank and Apple to complete the setup process.
-
Adding Multiple Cards: You can add multiple cards to your Wallet app, allowing you to choose which card to use for different transactions.
-
Ready to Go: With your cards added and verified, you're now ready to use Apple Pay for in-store, in-app, and online purchases.
By following these simple steps, you can set up Apple Pay on your iPhone 11 and enjoy the convenience of making secure, contactless payments with just a tap of your device.
Adding Credit or Debit Cards to Apple Pay
Adding credit or debit cards to Apple Pay is a seamless process that empowers iPhone 11 users to experience the convenience and security of contactless payments. With just a few simple steps, you can digitize your physical cards and streamline your transactions. Here's a detailed guide to help you add your credit or debit cards to Apple Pay:
-
Accessing the Wallet App: To begin, locate the Wallet app on your iPhone 11. The Wallet app features a white background with a colorful depiction of credit and debit cards, making it easily recognizable.
-
Initiating the Card Addition Process: Once you've opened the Wallet app, tap the "+" sign to add a new card. This action will prompt your iPhone 11 to guide you through the process of adding your credit or debit card to Apple Pay.
-
Scanning Your Card: One of the convenient methods for adding your card is by using the iPhone's camera to scan the card details. This feature eliminates the need to manually input the card information, ensuring accuracy and saving time.
-
Manual Card Entry: Alternatively, you can choose to manually enter your card details if scanning is not feasible. This involves inputting the card number, expiration date, and security code, as well as the cardholder's name.
-
Verification Process: After entering your card details, your bank will need to verify the card. This verification step is crucial for security purposes and typically involves receiving a verification code via text, email, or a phone call.
-
Agreeing to Terms and Conditions: Once your card is verified, you may need to agree to the terms and conditions provided by your bank and Apple to complete the setup process. This step ensures that you understand the usage guidelines and security measures associated with Apple Pay.
-
Adding Multiple Cards: Apple Pay allows you to add multiple credit and debit cards to your Wallet app. This feature provides flexibility, allowing you to choose which card to use for different transactions based on your preferences or rewards programs.
By following these steps, you can effortlessly add your credit or debit cards to Apple Pay, transforming your iPhone 11 into a powerful digital wallet. This process not only simplifies your payment methods but also enhances security by replacing physical card details with encrypted digital tokens. With your cards securely added to Apple Pay, you are now ready to enjoy the convenience of contactless payments in stores, apps, and online platforms.
Using Apple Pay in Stores
Using Apple Pay in stores revolutionizes the way you make purchases, offering a seamless and secure payment experience. With your iPhone 11 and Apple Pay, you can leave your physical wallet at home and rely on the convenience of contactless transactions. Here's a comprehensive guide on how to use Apple Pay for in-store purchases:
Step-by-Step Guide:
-
Locate the Contactless Payment Terminal: When you're ready to make a purchase, look for the contactless payment symbol at the checkout terminal. It typically resembles a sideways Wi-Fi symbol. This indicates that the store accepts contactless payments, including Apple Pay.
-
Authorize Payment with Face ID or Touch ID: Once you've selected your items and are ready to pay, hold your iPhone 11 near the contactless reader. Your device will prompt you to authenticate the transaction using Face ID or Touch ID, depending on your device settings. This ensures that only you can authorize the payment.
-
Wait for Confirmation: After authenticating the transaction, wait for a confirmation message on your iPhone 11's screen. This indicates that the payment was successful and the transaction is complete. You may also receive a subtle vibration from your device, providing additional feedback.
-
Keep Your Device Secure: It's important to keep your iPhone 11 secure during the transaction. Ensure that your device remains within your sight and that you retrieve it promptly after the payment is processed. This precaution helps safeguard your device and prevents unauthorized access.
-
Enjoy the Convenience: With the transaction completed, you can gather your purchases and be on your way. Using Apple Pay in stores streamlines the checkout process, eliminating the need to fumble for physical cards or cash. It's a swift and efficient way to make payments, especially during busy shopping periods.
Benefits of Using Apple Pay in Stores:
-
Security: Apple Pay employs advanced security features, including tokenization and biometric authentication, to protect your payment information. Your actual card details are never shared with merchants, reducing the risk of fraud.
-
Speed and Convenience: The speed of contactless transactions combined with the convenience of not needing to carry physical cards make Apple Pay an attractive option for in-store purchases. It's particularly beneficial in situations where you want to minimize contact with surfaces.
-
Privacy: Apple Pay enhances privacy by minimizing the exposure of your payment details. Each transaction is authorized using a unique, one-time code, adding an extra layer of security and privacy to your purchases.
By leveraging the capabilities of Apple Pay on your iPhone 11, you can elevate your shopping experience and embrace the future of secure, contactless payments in stores.
Using Apple Pay in Apps and on Websites
Utilizing Apple Pay in apps and on websites extends the convenience and security of contactless payments to the digital realm, offering a streamlined and secure checkout process for online purchases. With your iPhone 11 and Apple Pay, you can seamlessly complete transactions within apps and on websites, eliminating the need to manually enter payment and shipping details. Here's a detailed exploration of how to leverage Apple Pay for digital purchases:
In Apps:
-
Selecting Apple Pay as the Payment Method: When making a purchase within a supported app, look for the Apple Pay option at checkout. It is often presented alongside other payment methods, providing a quick and secure way to complete the transaction.
-
Authorizing the Payment: Upon choosing Apple Pay, your iPhone 11 will prompt you to authenticate the transaction using Face ID or Touch ID. This ensures that only authorized users can initiate payments, adding an extra layer of security to the process.
-
Confirmation and Completion: After successfully authorizing the payment, the app will provide confirmation of the transaction. This seamless process eliminates the need to manually input card details and expedites the checkout experience within the app.
On Websites:
-
Selecting Apple Pay at Checkout: When shopping on a website that supports Apple Pay, look for the Apple Pay button at the checkout stage. This button signifies that you can utilize Apple Pay to complete your purchase.
-
Authorizing the Transaction: Upon selecting Apple Pay, your iPhone 11 will prompt you to authenticate the payment using Face ID or Touch ID. This step ensures that the transaction is securely authorized before proceeding.
-
Streamlined Checkout Process: With Apple Pay, the checkout process on websites becomes remarkably efficient. Your payment and shipping details are securely transmitted, eliminating the need to manually enter this information and reducing the risk of errors.
Benefits of Using Apple Pay in Apps and on Websites:
-
Enhanced Security: Apple Pay employs tokenization and biometric authentication to safeguard your payment information, reducing the risk of unauthorized access and fraud in both app and web-based transactions.
-
Simplified Checkout: By eliminating the need to manually input payment and shipping details, Apple Pay streamlines the checkout process, saving time and enhancing the overall user experience within apps and on websites.
-
Privacy Protection: Each Apple Pay transaction generates a unique, one-time code, minimizing the exposure of your actual card details and enhancing privacy and security in digital transactions.
By embracing Apple Pay for digital purchases within apps and on websites, iPhone 11 users can enjoy a secure, efficient, and seamless payment experience, whether they are shopping for goods, services, or digital content online.
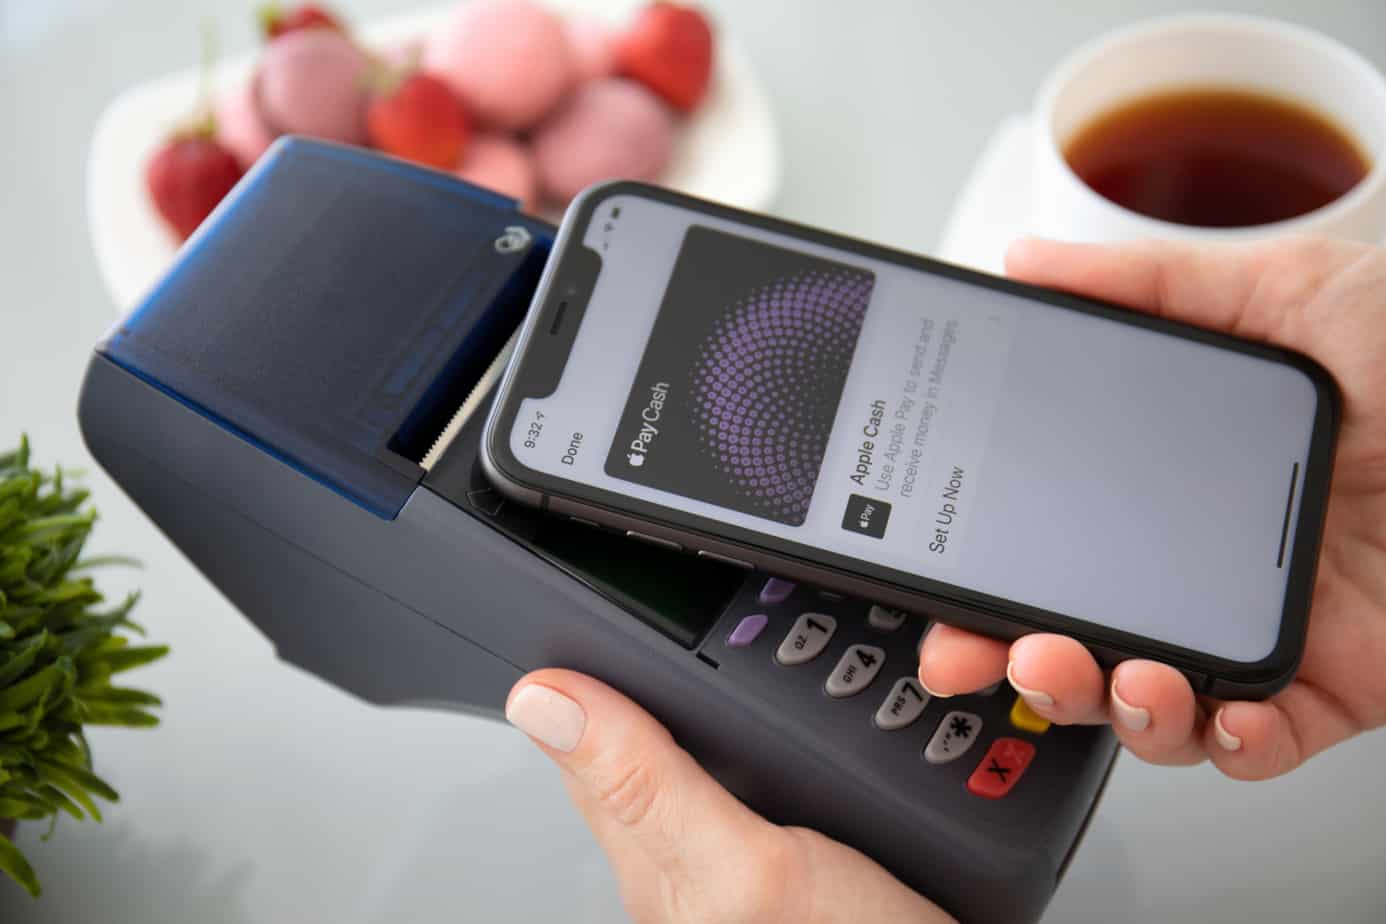
Sending and Receiving Money with Apple Pay
Apple Pay offers a convenient and secure way to send and receive money, allowing iPhone 11 users to effortlessly manage peer-to-peer transactions. Whether you need to split a bill, reimburse a friend, or receive funds, Apple Pay simplifies the process with its intuitive features. Here's a comprehensive overview of how you can utilize Apple Pay for seamless money transfers:
Sending Money:
- Accessing the Messages App: To initiate a money transfer, open the Messages app on your iPhone 11 and select the conversation with the recipient.
- Tapping the Apple Pay Icon: Within the conversation, tap the Apple Pay icon, which resembles a dollar sign, and enter the amount you wish to send.
- Authorizing the Payment: After entering the amount, authenticate the transaction using Face ID or Touch ID to confirm the transfer. This ensures that the transaction is securely authorized.
- Confirmation and Completion: Once the payment is authorized, a confirmation message will be sent within the conversation, indicating that the money transfer is complete.
Receiving Money:
- Acknowledging the Payment Request: If someone sends you money using Apple Pay, you will receive a payment request within the Messages app. Simply tap the request to review the details.
- Authenticating the Receipt: After reviewing the payment request, authenticate the receipt using Face ID or Touch ID to accept the funds. This step ensures that you have control over the funds you receive.
- Confirmation and Acknowledgment: Upon accepting the funds, a confirmation message will be sent to the sender, acknowledging the successful receipt of the money.
Benefits of Using Apple Pay for Money Transfers:
- Convenience: Sending and receiving money through Apple Pay is seamlessly integrated into the Messages app, streamlining the process and eliminating the need for third-party payment platforms.
- Security: Apple Pay employs robust security measures, including tokenization and biometric authentication, to safeguard money transfers, reducing the risk of unauthorized access.
- Speed and Simplicity: The intuitive interface and quick authentication process make money transfers swift and straightforward, enhancing the overall user experience.
By leveraging the capabilities of Apple Pay for sending and receiving money, iPhone 11 users can efficiently manage peer-to-peer transactions while benefiting from the convenience and security of the platform.
Managing Your Apple Pay Transactions and Settings
Managing your Apple Pay transactions and settings empowers you to maintain control over your digital payments and customize the functionality of this innovative platform. With your iPhone 11, you can seamlessly oversee your transactions, fine-tune security features, and tailor your payment preferences. Here's an in-depth exploration of how you can effectively manage your Apple Pay transactions and settings:
Transaction History:
- Accessing Transaction Records: To review your recent transactions, open the Wallet app and locate the card associated with the transaction. Tap on the card to view the transaction history, including the date, time, and location of each payment.
- Tracking Expenditure: By regularly monitoring your transaction history, you can gain insights into your spending patterns and track your expenditure across various merchants and categories.
Managing Cards:
- Adding and Removing Cards: Within the Wallet app, you can add new cards or remove existing ones as per your preference. This flexibility allows you to streamline your digital wallet and manage the cards linked to your Apple Pay account.
- Setting Default Cards: You have the option to designate a default card for Apple Pay transactions, ensuring that your preferred card is automatically selected for payments unless you choose otherwise.
Security and Settings:
- Customizing Security Features: Navigate to the settings section of the Wallet app to customize security features such as transaction notifications, passcode settings, and authorization preferences.
- Managing Contactless Payment Preferences: You can adjust settings related to contactless payments, including the ability to enable or disable the "Double-Click to Pay" feature for added security.
Managing Payment Methods:
- Organizing Payment Methods: Apple Pay allows you to organize your payment methods within the Wallet app, providing a convenient way to prioritize and manage the cards you use for different types of transactions.
- Editing Payment Details: You can edit the details of your added cards, such as updating expiration dates or cardholder names, to ensure that your information is current and accurate.
Privacy and Data Management:
- Reviewing Privacy Settings: Within the Wallet app settings, you can review and manage privacy settings related to Apple Pay, including data sharing preferences and privacy controls.
- Managing Saved Payment Information: Apple Pay offers the ability to manage and delete saved payment information, providing control over the data stored within the platform.
By actively managing your Apple Pay transactions and settings, you can optimize your digital payment experience, enhance security measures, and tailor the platform to align with your preferences and financial management goals. This proactive approach ensures that you are well-equipped to leverage the full potential of Apple Pay while maintaining control over your digital transactions and security settings.