Locating the SIM Card Slot on iPhone XS
The iPhone XS is a powerhouse of a smartphone, boasting impressive features and a sleek design. However, when it comes to inserting or replacing the SIM card, many users find themselves puzzled about where to locate the SIM card slot. Rest assured, the process is relatively straightforward once you know where to look. In this guide, we'll walk you through the steps to locate the SIM card slot on your iPhone XS.
The SIM card slot on the iPhone XS is a crucial component that allows you to connect to your cellular network and access voice, data, and messaging services. Whether you're setting up your new device or swapping out your SIM card, knowing how to find and access the SIM card slot is essential.
With the iPhone XS in hand, it's time to dive into the process of locating the SIM card slot. Whether you're a first-time iPhone user or simply need a refresher, this guide will equip you with the knowledge to tackle this task with confidence.
Understanding the physical layout of your iPhone XS is the first step in locating the SIM card slot. The device features a stunning display and a compact, minimalist design. To uncover the SIM card slot, you'll need to familiarize yourself with the exterior of the phone and identify the key components that house the SIM card.
Stay tuned as we embark on a visual journey to uncover the SIM card slot on your iPhone XS. Armed with this knowledge, you'll be ready to seamlessly manage your SIM card and ensure that your iPhone XS stays connected to your network of choice. Let's get started!
Step 1: Gather the Necessary Tools
Before embarking on the process of accessing the SIM card slot on your iPhone XS, it’s essential to gather the necessary tools to ensure a smooth and hassle-free experience. While the task itself is relatively simple, having the right tools at your disposal will make the process more efficient. Here’s what you’ll need:
- SIM Card Ejector Tool: This small, metal tool is specifically designed for ejecting the SIM card tray from your iPhone. It typically comes with the device when purchased new, but if you’ve misplaced it, a paperclip can serve as a makeshift alternative.
- Good Lighting: Ensuring that you have ample lighting will make it easier to locate the SIM card slot and properly insert or remove the SIM card. Natural light or a well-lit room will suffice for this task.
- Steady Hands: While not a physical tool, having steady hands is crucial when handling the delicate components of your iPhone XS. This will help prevent accidental damage to the device or the SIM card.
By gathering these essential tools, you’ll be well-prepared to proceed with locating the SIM card slot and completing the subsequent steps with confidence. With the right tools in hand, you’re ready to move on to the next phase of the process.
Step 2: Find the SIM Card Slot
Now that you have the necessary tools at your disposal, it’s time to locate the SIM card slot on your iPhone XS. The SIM card slot is a vital element of the device, allowing you to connect to your mobile carrier’s network and access its services. Follow these steps to find the SIM card slot:
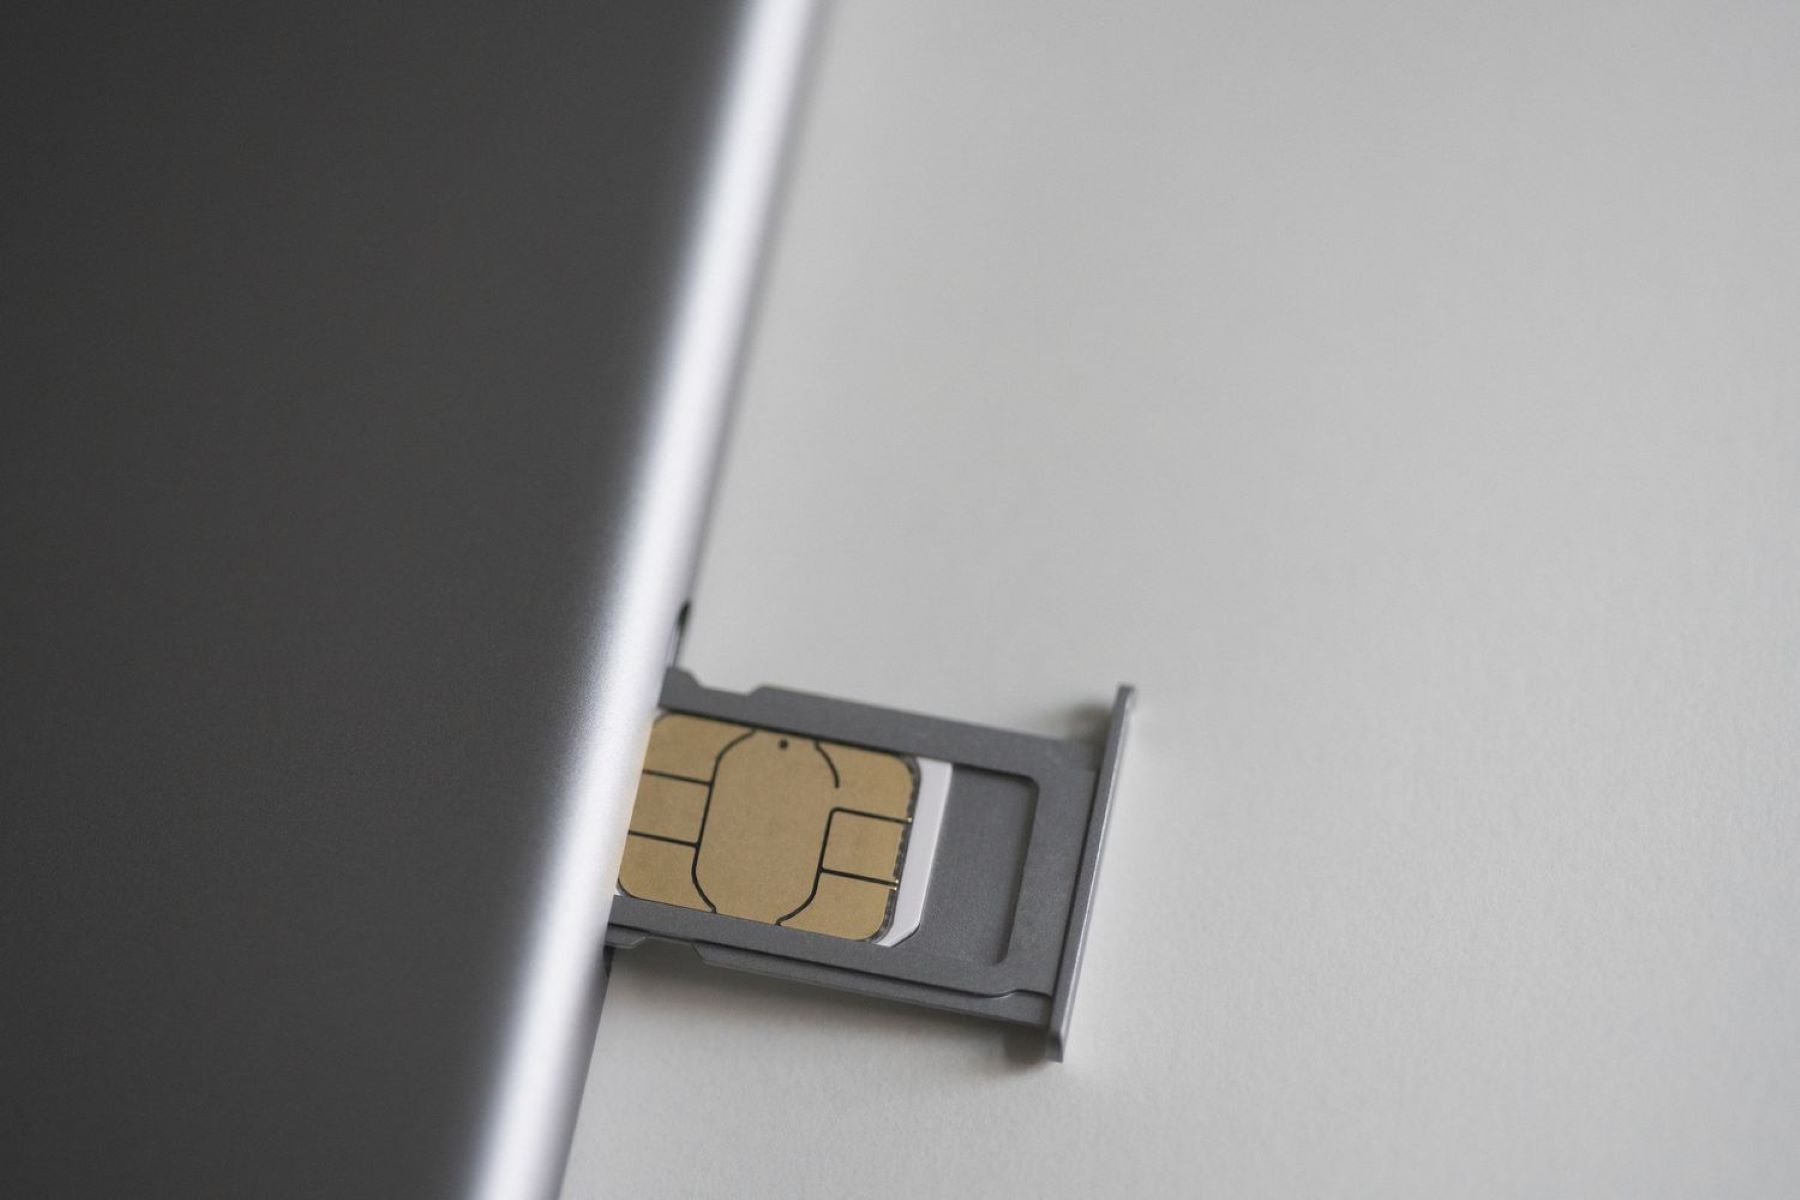
- Locate the SIM Card Tray: The SIM card tray on the iPhone XS is typically located on the right-hand side of the device. It is important to handle your iPhone XS with care to avoid accidental damage during this process.
- Identify the SIM Card Tray Ejector Hole: On the same side as the SIM card tray, you’ll find a small pinhole. This is where the SIM card ejector tool or a paperclip will be inserted to release the SIM card tray.
- Insert the SIM Card Ejector Tool: Take the SIM card ejector tool or unfolded paperclip and insert it into the pinhole. Apply gentle pressure until the SIM card tray begins to protrude.
- Remove the SIM Card Tray: Once the SIM card tray is partially ejected, carefully pull it out from the iPhone XS. The SIM card tray will house the SIM card and can be easily identified by its shape and size.
By following these steps, you’ll successfully locate the SIM card slot on your iPhone XS. It’s important to handle the SIM card tray and the SIM card itself with care to avoid any damage. With the SIM card tray in hand, you’re ready to proceed to the next step of inserting the SIM card into your iPhone XS.
Step 3: Insert the SIM Card
With the SIM card tray in hand, it’s time to proceed with inserting the SIM card into your iPhone XS. This step is crucial for establishing a connection to your mobile carrier’s network and enabling your device to make calls, send messages, and access mobile data. Follow these steps to insert the SIM card:
- Inspect the SIM Card Tray: Take a moment to examine the SIM card tray and identify the position where the SIM card will be placed. The tray will have a designated area for the SIM card, typically with a diagram illustrating the correct orientation.
- Position the SIM Card: Carefully place the SIM card into the designated area on the SIM card tray. Ensure that the SIM card is aligned with the tray’s slot and that it fits securely without any forceful pressure.
- Reinsert the SIM Card Tray: Once the SIM card is in place, gently slide the SIM card tray back into the iPhone XS. Ensure that it is inserted in the correct orientation and that it sits flush with the device’s exterior.
- Power On Your iPhone XS: After inserting the SIM card tray, power on your iPhone XS to initiate the setup process. Your device will detect the SIM card and establish a connection to your mobile carrier’s network.
By following these steps, you’ll successfully insert the SIM card into your iPhone XS, paving the way for seamless connectivity and communication. It’s important to handle the SIM card with care and ensure that it is inserted correctly to avoid any potential issues. With the SIM card securely in place, your iPhone XS is ready to be powered on and utilized to its full potential.
Step 4: Restart Your iPhone
After successfully inserting the SIM card into your iPhone XS, it’s important to restart the device to ensure that the changes take effect and that the SIM card is recognized by the phone. Restarting your iPhone XS will allow the device to detect the newly inserted SIM card and establish a connection to your mobile carrier’s network. Follow these steps to restart your iPhone XS:
- Power Off Your iPhone XS: Press and hold the side button along with either volume button until the power off slider appears on the screen.
- Slide to Power Off: Use your finger to slide the power off slider from left to right. Your iPhone XS will power down and the screen will go dark.
- Power On Your iPhone XS: Once your iPhone XS is powered off, press and hold the side button again until the Apple logo appears on the screen. Release the button and allow the device to boot up.
- Unlock Your iPhone XS: After the restart is complete, unlock your iPhone XS using your passcode or Face ID. Your device will now be ready to use with the newly inserted SIM card.
By restarting your iPhone XS, you ensure that the SIM card is recognized and that your device is fully configured to operate with your mobile carrier’s network. This step is essential for enabling voice, data, and messaging services on your iPhone XS. With the restart complete, you can now enjoy seamless connectivity and take full advantage of your device’s capabilities.


