Step 1: Power Off the iPhone XS
Before removing the SIM card from your iPhone XS, it’s crucial to power off the device to prevent any potential damage or data loss. Follow these simple steps to safely power off your iPhone XS:
1. Press and Hold the Side Button
To begin, locate the side button on the right-hand side of your iPhone XS. Press and hold this button along with either volume button simultaneously until the “slide to power off” slider appears on the screen.
2. Slide to Power Off
Once the “slide to power off” slider is displayed, use your finger to slide it from left to right. This action will power down your iPhone XS. Wait for the device to completely shut down before proceeding to the next step.
By powering off your iPhone XS, you ensure that the SIM card removal process is carried out without any risk of damage to the device or the SIM card itself. This precautionary measure also reduces the likelihood of any data corruption or loss.
Step 2: Locate the SIM Card Tray
Locating the SIM card tray is the next step in safely removing the SIM card from your iPhone XS. The SIM card tray on the iPhone XS is designed to securely hold the SIM card and can be found on the device’s exterior. Follow these steps to find the SIM card tray:
1. Identify the SIM Card Tray Slot
Inspect the sides of your iPhone XS to locate the SIM card tray slot. On the right-hand side of the device, you will notice a small pinhole or slot. This is where the SIM card tray is housed.
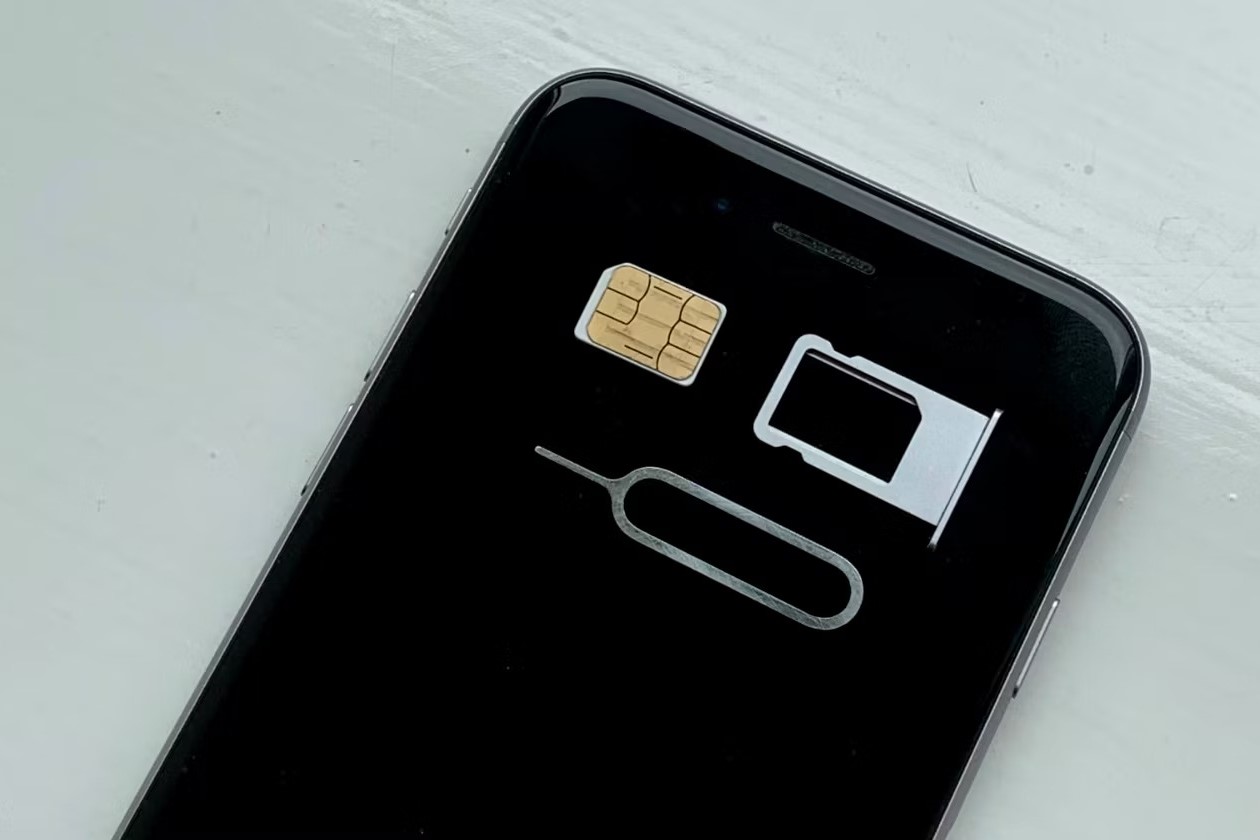
2. Use the SIM Card Ejector Tool
Apple provides a SIM card ejector tool with the iPhone XS. This small, metal tool is essential for safely removing the SIM card tray. If you don’t have the ejector tool, a small paperclip can be used as an alternative. Insert the ejector tool or paperclip into the pinhole or slot on the side of the iPhone XS to initiate the SIM card removal process.
By locating the SIM card tray and being prepared with the ejector tool, you are ready to proceed with the next steps in safely removing the SIM card from your iPhone XS.
Step 3: Insert the Ejector Tool
Inserting the ejector tool is a crucial step in the process of removing the SIM card from your iPhone XS. The ejector tool, provided by Apple, is specifically designed to safely and effectively release the SIM card tray. Here’s how to insert the ejector tool:
1. Prepare the Ejector Tool
Take the ejector tool that came with your iPhone XS or a suitable alternative, such as a paperclip, and hold it securely between your fingers. Ensure that you have a firm grip on the tool before proceeding to insert it into the SIM card tray slot.
2. Align the Ejector Tool
Position the pointed end of the ejector tool into the pinhole or slot on the side of the iPhone XS. Gently insert the tool into the slot until you feel a slight resistance, indicating that the tool has engaged with the SIM card tray.
By carefully inserting the ejector tool into the designated slot, you are ready to proceed with the next steps in removing the SIM card tray from your iPhone XS.
Step 4: Remove the SIM Card Tray
Once the ejector tool is properly inserted into the designated slot, you are ready to remove the SIM card tray from your iPhone XS. This step requires precision and caution to ensure the safe extraction of the SIM card tray. Follow these steps to remove the SIM card tray:
1. Apply Gentle Pressure
With the ejector tool in place, apply gentle and even pressure to the tool. The pressure should be directed straight into the pinhole or slot, aiming to push the SIM card tray out of its housing within the iPhone XS.
2. Retrieve the SIM Card Tray
As you apply pressure, you will feel the SIM card tray start to protrude from the device. Once the tray is partially ejected, carefully pull it out using the ejector tool. Be mindful of the SIM card that is seated within the tray, ensuring that it remains securely in place during the removal process.
3. Set Aside the SIM Card Tray
Once the SIM card tray is fully removed from the iPhone XS, set it aside in a safe and easily accessible location. This will facilitate the next step of extracting the SIM card from the tray itself.
By following these steps, you can safely remove the SIM card tray from your iPhone XS, setting the stage for the extraction of the SIM card itself in the subsequent step.
Step 5: Take Out the SIM Card
Now that the SIM card tray has been safely removed from your iPhone XS, the next step is to carefully take out the SIM card from the tray. It’s essential to handle the SIM card with care to avoid any damage during this process. Follow these steps to take out the SIM card:
1. Inspect the SIM Card Tray
Upon removing the SIM card tray, locate the SIM card within the tray. Take a moment to inspect the position of the SIM card and ensure that it is seated securely in its designated slot within the tray.
2. Gently Remove the SIM Card
Using your fingers, carefully remove the SIM card from the tray. Apply gentle pressure to slide the SIM card out of its slot, taking care not to bend or damage the card during the extraction process.
3. Handle the SIM Card with Caution
As you take out the SIM card, handle it with caution and avoid touching the metal contacts on the card’s surface. These contacts are essential for the SIM card’s functionality, and any damage to them could impair the card’s performance.
By following these steps, you can safely and effectively take out the SIM card from the tray, preparing it for reinsertion or replacement as needed.
Step 6: Reinsert the SIM Card Tray
After safely removing the SIM card from your iPhone XS, the final step is to reinsert the SIM card tray back into the device. Properly securing the SIM card tray is crucial to ensure the smooth functioning of the SIM card and the iPhone XS. Follow these steps to reinsert the SIM card tray:
1. Position the SIM Card Tray
Take the SIM card tray and position it carefully, ensuring that the tray aligns with the slot on the side of the iPhone XS. The tray should fit snugly into the slot, with the ejector tool hole facing outward.
2. Gently Slide In the SIM Card Tray
Once the tray is correctly aligned, gently slide it back into the iPhone XS. Apply even pressure to the tray, ensuring that it smoothly re-enters the device without resistance. Take care to avoid forcing the tray, as this could cause damage to the SIM card or the device.
3. Power On Your iPhone XS
After reinserting the SIM card tray, power on your iPhone XS by pressing and holding the side button until the Apple logo appears on the screen. Once the device is powered on, ensure that the SIM card is recognized and that you have a stable cellular signal.
By following these steps, you can successfully reinsert the SIM card tray into your iPhone XS, completing the process of safely removing and replacing the SIM card.