Why is it important to keep your iPhone number when switching phone companies?
When it comes to switching phone companies, one of the most important factors to consider is whether or not you can keep your current iPhone number. While it may seem like a small detail, keeping your existing number offers a range of benefits that can greatly enhance your overall phone-switching experience. Let’s delve into why it’s crucial to retain your iPhone number when making the switch.
1. Convenience and Familiarity: Your phone number is not just a random set of digits; it’s a significant part of your identity. It’s the number your friends, family, and colleagues are familiar with, making it easier for them to reach you. By keeping your iPhone number, you eliminate the need to inform everyone about a new number, saving you time and hassle.
2. Seamless Transition: Switching phone companies can be a complex process, involving transferring contacts, data, and settings. By retaining your iPhone number, you ensure a seamless transition. You don’t have to worry about updating your number across various accounts and services or losing important contacts. It allows you to maintain your digital footprint without any disruptions.
3. Business and Personal Associations: If you use your iPhone number for business purposes, changing it can create confusion and potentially impact your professional relationships. Clients, colleagues, and suppliers who have your old number may face difficulties reaching you, leading to missed opportunities and potential inconvenience. By keeping your iPhone number, you maintain consistent and uninterrupted communication in both your personal and professional life.
4. Avoiding Costs: Transferring your iPhone number when switching phone companies can save you money. If you have an established number with a particular identity, you won’t need to reprint business cards or update advertising materials with a new number. This can be a considerable cost, especially for businesses that rely heavily on marketing and promotion.
5. Retaining Features and Services: Some phone numbers are connected to specific features and services, such as call forwarding or voicemail. By keeping your iPhone number, you can continue to enjoy these features seamlessly without any disruption. Switching numbers may require you to set up and configure these services again, consuming valuable time and effort.
6. Personal Preference: Lastly, there is the sentimental attachment that people have to their phone number. Whether it’s a sequence of digits with a special meaning or a number that has been with you for a long time, keeping your iPhone number is a matter of personal preference. It offers a sense of continuity and keeps a part of your identity intact.
Overall, keeping your iPhone number when switching phone companies is essential for convenience, familiarity, and cost-saving reasons. It ensures a smooth transition, maintains your personal and professional associations, and allows you to retain valuable features and services. So, before you make the switch, check with your new phone company about their number porting policies to ensure you can keep enjoying the benefits of your trusted iPhone number.
Understanding the process of transferring your iPhone number
Transferring your iPhone number from one phone company to another may seem like a daunting task, but understanding the process can help alleviate any confusion or concerns. Whether you’re switching carriers or upgrading to a new iPhone, here’s what you need to know about transferring your iPhone number.
1. Number Porting: The process of transferring your iPhone number is known as number porting. It involves moving your existing phone number from your current carrier to the new one. This allows you to keep the same phone number even when you switch phone companies.
2. Eligibility: Not all iPhones are eligible for number porting. Before initiating the process, check if your iPhone is compatible with the new carrier’s network. Different carriers and countries may have specific requirements, so it’s essential to verify your iPhone’s eligibility beforehand.
3. Contacting Your Current Carrier: To start the transfer, reach out to your current carrier and inform them about your intention to switch. They will provide you with the necessary instructions and requirements for porting your iPhone number. It’s important to request your number port at least a few days before you plan to switch to ensure a smooth transition.
4. Required Information: When porting your iPhone number, you’ll need to provide specific information to your new carrier. This may include your current phone number, account information, billing details, and the exact name associated with the account. Make sure to have these details readily available to expedite the transfer process.
5. Porting Fees and Timelines: Some carriers may charge a fee for transferring your iPhone number, while others offer this service for free. Additionally, the time it takes to complete the transfer can vary. It can range from a few hours to several days, depending on various factors such as carrier processes and demand.
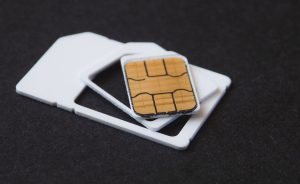
6. SIM card: When switching to a new carrier, you may need to change your SIM card. Your new carrier will provide you with a SIM card specific to their network. Make sure to follow the instructions provided to install the SIM card correctly and activate your new service.
7. Activation and Testing: Once the number transfer is complete and your new SIM card is installed, activate your new service on your iPhone. Test the phone to ensure that all features, including calling, texting, and data, are functioning correctly. If you encounter any issues, contact your new carrier for assistance.
8. Canceling Your Previous Service: After successfully transferring your iPhone number, contact your previous carrier to cancel the service. Be sure to settle any outstanding bills or fees to avoid any complications or additional charges.
By understanding these key points, you can navigate the process of transferring your iPhone number smoothly. It’s crucial to follow the instructions provided by your current and new carriers, gather the required information, and be patient during the porting process. Soon enough, you’ll be enjoying your new carrier’s network while keeping your trusted iPhone number intact.
Checking if your iPhone is eligible for number porting
Before you begin the process of transferring your iPhone number to a new phone company, it’s important to check if your iPhone is eligible for number porting. While most iPhones can be ported to another carrier, there are a few key factors to consider. Here’s how to determine if your iPhone is eligible for number porting.
1. Unlocked iPhone: The first step is to ensure that your iPhone is unlocked. An unlocked iPhone allows you to use it with different carriers by inserting their SIM card. To check if your iPhone is unlocked, contact your current carrier or check the status in the settings of your iPhone. If your iPhone is locked to a specific carrier, you’ll need to contact them to request an unlock before you can transfer your number.
2. GSM Compatibility: Determine if your iPhone is compatible with the new carrier’s network technology. Most carriers use GSM (Global System for Mobile Communication) technology, but some still use CDMA (Code Division Multiple Access). Check the new carrier’s website or contact their customer service to confirm if your iPhone model supports their network technology.
3. Carrier Policies: Different carriers have varying policies and restrictions when it comes to number porting. Some carriers may have specific requirements or limitations on porting numbers, such as outstanding bill payments or contractual obligations. Contact your desired new carrier to understand their porting policies and any potential restrictions that may apply to your iPhone number transfer.
4. IMEI and ESN Check: The IMEI (International Mobile Equipment Identity) is a unique identifier for your iPhone, while the ESN (Electronic Serial Number) is used for CDMA devices. You can find your iPhone’s IMEI or ESN in the settings or by dialing a specific code on your iPhone. Use online tools or contact the new carrier to verify if your iPhone’s IMEI or ESN is compatible with their network and eligible for number porting.
5. Check with Carrier: To ensure accuracy and eligibility, it’s always best to directly contact your desired new carrier. They have access to the most up-to-date information regarding their network compatibility and number porting policies. A customer service representative will be able to guide you through the process, answer any questions you may have, and provide you with accurate information specific to your situation.
6. Consider New iPhone: If your current iPhone is not eligible for number porting, you may need to consider purchasing a new iPhone that is compatible with the new carrier. This ensures a seamless transition and allows you to take advantage of the new network’s features and capabilities.
By following these steps and checking the eligibility of your iPhone for number porting, you can save time and avoid potential issues during the transfer process. It’s crucial to gather accurate information, contact the new carrier directly, and adhere to their requirements and policies. With a compatible iPhone, you can smoothly transfer your number and continue enjoying the benefits of your trusted device with your new phone company.
Preparing your iPhone for number porting
Before you initiate the process of transferring your iPhone number to a new phone company, it’s important to ensure that your iPhone is prepared for the porting process. Taking the necessary steps to prepare your iPhone will help ensure a smooth and successful transfer. Here are the key preparations to make before porting your iPhone number.
1. Backup Your iPhone: It’s always a good practice to back up your iPhone before making any significant changes or transfers. This ensures that your data, contacts, photos, and other important information are safely preserved. Backing up your iPhone can be done through iCloud or by connecting your iPhone to your computer and using iTunes or Finder.
2. Update iOS: Make sure your iPhone is running the latest version of iOS. Having the most up-to-date operating system ensures compatibility with the new carrier and reduces the risk of any potential issues during the number transfer process. You can check for updates by going to Settings > General > Software Update on your iPhone.
3. Gather Account Information: Before initiating the porting process, gather all the necessary account information from your current carrier. This may include your account number, billing details, and any other relevant information that the new carrier may require for the transfer. Having this information readily available will expedite the porting process.
4. Clear Outstanding Balances: Ensure that you have settled any outstanding balances or fees with your current carrier. Failure to do so can result in delays or denials in transferring your iPhone number to the new carrier. Verify with your current carrier if you have any pending payments and make sure they are settled before proceeding with the porting process.
5. Remove Activation Lock: If you use Apple’s Activation Lock (Find My iPhone) feature, disable it before initiating the number porting process. Activation Lock prevents anyone from activating your iPhone without your Apple ID and password. You can turn off Activation Lock by going to Settings > [Your Name] > Find My > Find My iPhone and toggling off the switch.
6. Contact Current Carrier: Once you have completed the necessary preparations, contact your current carrier to inform them that you plan to transfer your iPhone number to a new carrier. They will guide you through their specific process and may provide you with a unique code or instructions to facilitate the number transfer.
7. Remove SIM Card: Before switching to the new carrier, remove the SIM card from your iPhone. The SIM card is a small card that contains your phone number and is provided by the carrier. Removing the SIM card ensures that your iPhone is ready to accept the new carrier’s SIM card, facilitating a smooth transition.
8. Keep Your iPhone Active: During the number porting process, it’s crucial to keep your iPhone active. Avoid canceling your service or deactivating your iPhone until the transfer is complete. Keeping your iPhone active ensures a seamless transition and minimizes the chances of any disruptions during the transfer period.
By following these preparations, you can ensure that your iPhone is ready for the number porting process. Preparing your iPhone in advance will help streamline the transfer and minimize any potential issues or delays. Take the time to back up your iPhone, update the operating system, gather necessary information, settle outstanding balances, and inform your current carrier of your intention to transfer. With a prepared iPhone, you’ll be one step closer to enjoying your phone number with your new phone company.
How to initiate the number transfer process
Initiating the number transfer process to switch your iPhone number from one phone company to another is relatively straightforward. By following these steps, you can kick-start the transfer and begin enjoying your trusted phone number with your new carrier.
1. Choose a New Phone Company: Research and select the phone company you wish to switch to. Compare different carriers based on factors such as coverage, pricing plans, and customer reviews to ensure that the new company aligns with your needs and preferences.
2. Check Number Porting Policy: Review the number porting policy of the new carrier. Most carriers have dedicated webpages or support articles that provide information about the porting process. Verify their requirements, eligibility criteria, and any associated fees or timelines for transferring your iPhone number.
3. Contact New Phone Company: Reach out to the new phone company and inform them that you want to initiate the number transfer process. They will guide you through their specific procedures and requirements. Be prepared to provide your current phone number and any additional information requested by the new carrier.
4. Complete New Carrier’s Documentation: The new carrier may require you to complete specific documentation to initiate the number transfer process. This may include filling out forms, providing identification documents, and signing agreements. Ensure that you provide accurate information and carefully review any terms and conditions before proceeding.
5. Keep Current Service Active: Until the number transfer is complete, it’s important to keep your current phone service active. Cancelling your service prematurely may result in losing your number or experiencing a disruption in phone service. Maintain your current service until you receive confirmation that the transfer is successful.
6. Porting Authorization Code: Your current carrier will provide you with a porting authorization code or PAC (Porting Authorization Code). This code is essential for initiating the number transfer. Contact your current carrier and request the porting authorization code, as it is usually required by the new carrier to validate the transfer.
7. Provide Required Information: The new carrier will require specific information to initiate the number transfer. This may include your current phone number, account details, billing information, and the porting authorization code. Gather all the necessary information and promptly provide it to the new carrier to expedite the process.
8. Await Confirmation: After submitting the required information, await confirmation from the new carrier that the number transfer is underway. The transfer process typically takes a few hours to a few days, depending on the carrier and other factors. Be patient and wait for confirmation before making any changes to your phone or service.
9. Test New Service: Once you receive confirmation that the number transfer is complete, test your new service. Make calls, send texts, and browse the internet to ensure that all features are functioning properly. If you encounter any issues, contact your new carrier for assistance.
By following these steps, you can successfully initiate the number transfer process and switch your iPhone number to a new phone company. Remember to research your options, understand your new carrier’s policies, provide accurate information, and keep your current service active until the transfer is complete. With a smooth number transfer, you’ll be able to enjoy your trusted iPhone number with your new carrier seamlessly.
Potential roadblocks and how to overcome them
While transferring your iPhone number to a new phone company is generally a smooth process, there may be certain roadblocks that can arise along the way. Understanding these potential challenges and knowing how to overcome them can help ensure a successful number transfer. Here are some common roadblocks and strategies to overcome them:
1. Incorrect Information: Providing incorrect or inaccurate information can delay the number transfer process. Double-check all the details you provide, such as your current account information, phone number, and porting authorization code. Contact both your current and new carriers to verify that the information you have is correct and matches their records.
2. Outstanding Balances: Outstanding balances with your current carrier can pose a roadblock to successful number porting. Before initiating the transfer, settle any unpaid bills or outstanding fees with your current carrier. Verify with them that your account is in good standing and that there are no financial obligations that could impede the number transfer.
3. Active Contracts or Obligations: If you’re still under contract with your current carrier or have specific obligations, such as paying off your device installment plan, this can complicate the number transfer process. Check with your current carrier about any contractual obligations and determine if there are any early termination fees or other charges that need to be addressed before you can transfer your number.
4. Incompatible Network Technology: Some carriers may operate on different network technologies, such as GSM or CDMA. If your iPhone is not compatible with the new carrier’s network technology, it can prevent a successful number transfer. Verify the network technology requirements of the new carrier before initiating the transfer and ensure that your iPhone model supports their network.
5. Transfer Delays: Number transfers can sometimes experience delays, especially during peak periods or due to unforeseen technical issues. If you’re experiencing delays in the transfer process, communicate with both your current and new carriers for updates. They can provide you with more information on the status of the transfer and offer assistance to help expedite the process.
6. Technical Compatibility: Occasionally, technical compatibility issues can arise during the number transfer process. This can include issues with activating the new SIM card, activating your new service, or ensuring proper network configuration. If you encounter any technical difficulties, reach out to your new carrier’s customer support for guidance and troubleshooting steps.
7. Loss of Service: There may be a brief period of time during the number transfer process when your phone service is interrupted. This can result in a temporary loss of connectivity or an inability to make or receive calls. It’s important to be prepared for this possibility and have an alternate means of communication available, such as a secondary phone or a landline, during the transition period.
8. Contact Carrier for Support: If you encounter any roadblocks during the number transfer process, don’t hesitate to contact your new carrier’s customer support. They have the expertise to assist you and troubleshoot any issues that may arise. Be patient and communicate openly with them to ensure a smooth resolution.
By being aware of these potential roadblocks and knowing how to overcome them, you can navigate the number transfer process with confidence. Take the necessary steps to provide accurate information, settle any outstanding obligations, and address any technical issues promptly. With perseverance and proactive communication, you can overcome roadblocks and successfully transfer your iPhone number to your new phone company.
What to do if your number transfer is not successful
In some cases, despite your best efforts, the number transfer process may not be successful. Instead of getting discouraged, there are steps you can take to resolve the issue and ensure a successful transfer of your iPhone number. Here’s what to do if your number transfer is not successful:
1. Contact New Carrier: Reach out to your new carrier’s customer support and inform them that the number transfer was not successful. Explain the situation and provide them with any relevant information, such as error messages or confirmation codes. They will guide you through the next steps to troubleshoot the issue.
2. Verify Information: Double-check all the information you provided during the number transfer process. Ensure that the details, including your current phone number, account information, and porting authorization code, are accurate and match the records of both your current and new carriers. If there are any discrepancies, rectify them with the respective carriers.
3. Resolve Outstanding Issues: Address any outstanding balances or contractual obligations with your current carrier. Settlement of unpaid bills or fulfillment of contractual commitments can be crucial to a successful number transfer. Communicate with your current carrier to ensure that there are no roadblocks preventing the transfer.
4. Escalate the Issue: If you’ve been in contact with customer support and the issue remains unresolved, don’t hesitate to escalate the matter. Ask to speak to a supervisor or request to be transferred to a higher-level support team. This will give you the opportunity to explain your situation and seek a resolution from a higher authority.
5. Porting Rejection Reason: If your number transfer was rejected, ask your new carrier for the specific reason behind the rejection. It could be due to technical issues, incompatible network technology, or other factors that need to be addressed. By understanding the reason, you can work towards finding a solution that meets the requirements for successful number porting.
6. Consider Alternate Options: If the number transfer remains unsuccessful, explore alternative options to retain your desired phone number. This may involve reaching out to your current carrier to inquire about alternative solutions or considering a different phone company that supports successful number porting for your iPhone.
7. Document Communication: Throughout the process of resolving the number transfer issue, keep a record of all your communication with both your current and new carriers. Note down dates, times, names of representatives, and important details discussed. This documentation can be helpful if you need to escalate the issue further or seek assistance from regulatory authorities, if necessary.
8. Seek Regulatory Assistance: If all else fails and you believe there has been a violation of regulations or unfair practices, you can reach out to regulatory authorities responsible for overseeing telecommunications in your country. They can provide guidance and potentially intervene to help resolve the issue with your number transfer.
Remember to remain patient and persistent throughout the process. Effective communication and a proactive approach will greatly increase the chances of resolving the issue and achieving a successful number transfer. Keep exploring potential solutions, leverage customer support channels, and be prepared to pursue escalation or regulatory assistance if needed. With determination, you can overcome obstacles and ensure a successful transfer of your iPhone number.
Tips for a smooth transition when switching phone companies
Switching phone companies can feel overwhelming, but with the right approach, you can ensure a smooth and hassle-free transition. Follow these tips to make your switch seamless and stress-free:
1. Research and Compare: Before making the switch, thoroughly research and compare different phone companies. Consider factors such as coverage, pricing plans, customer reviews, and additional features. Ensure that the new company aligns with your needs and preferences.
2. Check Network Coverage: Verify network coverage in your area with the new phone company. Use their online coverage map or contact their customer support to ensure that the coverage is reliable in the places you frequent most. Nothing is more frustrating than having a poor network signal or dropped calls.
3. Timing: Choose the right time to switch. Consider any remaining contractual obligations with your current carrier to avoid incurring early termination fees. You may also want to time the switch based on billing cycles to ensure a smooth transition of payments and account balances.
4. Plan Ahead: Plan ahead and give yourself enough time to prepare for the switch. A seamless transition requires proper planning, such as gathering necessary documentation, contacting both carriers, and understanding the porting process.
5. Keep your current phone: If you intend to keep your current phone, ensure that it is unlocked and compatible with the new carrier’s network technology. This allows you to switch SIM cards easily and maintain your device without incurring additional costs.
6. Inform your contacts: Notify your contacts about the upcoming switch and provide them with your new contact information. Update your email signature, social media profiles, and any online accounts where your phone number is listed to ensure a smooth transition in communication.
7. Update automatic payments: If you have any automatic payments or subscriptions tied to your current phone number, update them with your new contact details. This ensures that there are no interruptions in services, such as utility payments or online subscriptions.
8. Test new service: Once you’ve made the switch, test your new service immediately. Make calls, send texts, and test mobile data to ensure that all features are functioning properly. Report any issues to your new carrier’s customer support for immediate attention.
9. Setup Voicemail and Call Forwarding: Configure your voicemail and call forwarding settings on your new device. This ensures that you don’t miss any important calls and that your voicemail messages are accessible to you and your contacts.
10. Contact customer support: Throughout the transition process, don’t hesitate to reach out to your new carrier’s customer support for assistance. They can address any questions or concerns you may have, guide you through the process, and provide troubleshooting steps if needed.
11. Be patient: Keep in mind that some minor hiccups may occur during the transition process. Be patient and allow some time for the changes to fully take effect. Most issues can be easily resolved with the help of customer support.
By following these tips, you can ensure a smooth transition when switching phone companies. Proper research, preparation, and effective communication with both carriers will help make the process seamless and minimize any inconveniences. With a little planning and patience, you’ll be enjoying your new phone company’s services in no time.
Frequently Asked Questions about Keeping Your iPhone Number when Switching Phone Companies
Switching phone companies while keeping your iPhone number can raise a lot of questions. To help clear up any confusion, here are answers to some commonly asked questions regarding the process of transferring your iPhone number:
1. Can I keep my iPhone number when switching phone companies?
Yes, in most cases, you can keep your iPhone number when switching phone companies. This process is called number porting, and it allows you to retain your existing phone number with your new carrier.
2. Is there a fee for transferring my iPhone number?
Some carriers may charge a fee for transferring your iPhone number, while others offer this service for free. Contact your new carrier to inquire about any associated fees or promotional offers they may have regarding number porting.
3. How long does it take to transfer my iPhone number?
The time it takes to transfer your iPhone number can vary. In most cases, the process is completed within a few hours or a few days. However, it’s important to note that there may be external factors that can cause delays, such as high demand or technical issues.
4. Will transferring my iPhone number cause service interruptions?
While it is rare, there may be a temporary service interruption during the number transfer process. However, you should be able to use your iPhone again with your new carrier once the transfer is complete. It’s advisable to have an alternate means of communication available during this transition period.
5. What information do I need to provide to transfer my iPhone number?
You will need to provide specific information to your new carrier, including your current phone number, account details, billing information, and porting authorization code. It’s important to ensure the accuracy of this information to avoid any issues during the transfer process.
6. Can I transfer my iPhone number if I still owe money on my current device?
Yes, you can generally transfer your iPhone number even if you still owe money on your current device. However, you may need to settle any outstanding payments or contractual obligations with your current carrier before initiating the transfer.
7. Can I switch carriers if my iPhone is still under contract?
Yes, you can switch carriers even if your iPhone is still under contract. However, be aware that terminating your contract early may result in early termination fees. Contact your current carrier to inquire about the specific terms and fees associated with switching before the contract term ends.
8. What happens to my previous carrier’s service once the number transfer is complete?
Once the number transfer is complete, your previous carrier’s service will be deactivated. It’s important to settle any outstanding bills or fees with your previous carrier to avoid any issues or additional charges.
9. Can I transfer my iPhone number internationally?
Number transfer processes may vary when transferring your iPhone number internationally. It’s best to contact both your current and new carriers to understand their international number porting policies and any additional requirements that may apply.
10. Can I transfer my iPhone number to a different type of phone, such as an Android device?
No, number porting is typically specific to the phone number itself and not the type of device. You can generally transfer your iPhone number to another iPhone or any other compatible device with the new carrier.
By addressing these frequently asked questions, you should have a better understanding of the process of keeping your iPhone number when switching phone companies. If you have any additional questions or concerns, it’s recommended to contact both your current and new carriers for further assistance and guidance.