
Required Tools
Before you begin installing a CD/DVD drive in your computer, it is important to gather all the necessary tools. Having the right tools on hand will ensure a smooth and hassle-free installation process. Here are the tools you will need:
- Screwdriver: A small screwdriver is essential for opening the computer case and mounting the drive. Make sure to choose the right size based on the screws used in your computer.
- Anti-static wrist strap: This wrist strap will prevent any static electricity from damaging the delicate components of the drive or your computer. It is highly recommended to use one to protect your equipment.
- CD/DVD drive: Of course, you will need the actual drive that you want to install in your computer. Ensure that it is compatible with your system and has the necessary features that you require.
- SATA cables: These cables are used to connect the CD/DVD drive to the motherboard. Make sure to have the required number of cables based on the number of drives you are installing.
- Power cables: These cables are used to provide power to the CD/DVD drive. Double-check that you have the appropriate cables for connecting to your power supply.
- Mounting screws: You will need some screws to secure the CD/DVD drive to the case. Depending on the design of your case, you may need different types of screws.
Having these tools ready before you start will save you time and frustration. Make sure they are easily accessible and in good condition. With the right tools in hand, you are now ready to move on to the next steps of installing your CD/DVD drive.
Step 1: Choosing the Right Drive
When it comes to installing a CD/DVD drive in your computer, the first step is to choose the right drive for your needs. This involves considering various factors such as compatibility, features, and budget. Here are some points to keep in mind:
- Compatibility: Ensure that the CD/DVD drive you choose is compatible with your computer’s operating system and interface. Most modern drives use the Serial ATA (SATA) interface, but older computers may still have the older IDE (Integrated Drive Electronics) interface. Double-check your motherboard’s specifications to determine which interface you need.
- Speed: CD/DVD drives come in different speeds, such as 16x, 24x, or even higher. Consider your requirements and choose a drive with a speed that meets your needs. Keep in mind that higher speeds usually come with a higher price tag.
- Read and write capabilities: Determine if you need a drive that can both read and write CDs and DVDs, or if a read-only drive will suffice. If you plan on burning discs or creating backups, make sure to choose a drive that offers read and write capabilities.
- Form factor: Consider the size of the drive and ensure that it will fit into your computer case. Most CD/DVD drives follow the standard 5.25-inch form factor, but some smaller form factors are also available for compact cases.
- Budget: Set a budget for your CD/DVD drive and look for options that fit within that range. There are drives available at various price points, so find one that offers the features you need without breaking the bank.
Take your time to research and compare different drive models before making a decision. Read reviews from reliable sources and consider the feedback of other users. This will help ensure that you choose a CD/DVD drive that meets your requirements and provides reliable performance.
Step 2: Opening the Computer Case
Before you can install the CD/DVD drive, you need to open up your computer case. Follow these steps to safely open the case:
- Power off your computer: Shut down your computer and unplug it from the power source. This will prevent any accidental electrical shocks or damage to your components.
- Ground yourself: To prevent any static discharge that could damage sensitive components, it’s important to ground yourself. You can do this by touching a metal part of your computer case, or by wearing an anti-static wrist strap.
- Remove any peripherals: Disconnect all peripherals such as keyboards, mice, and external devices from your computer.
- Locate the case screws: Look for the screws securing the case panels. They are usually located at the back or sides of the case. Use a screwdriver to remove these screws.
- Remove the side panel: Gently slide or lift the side panel of the case to remove it. Be careful not to force it, as different cases have different mechanisms for removing the panel.
- Identify the drive bays: Once the side panel is removed, you will see the internal components of your computer. Locate the drive bays, which are usually located towards the front of the case. These bays are designed to hold the CD/DVD drive securely.
With the computer case open, you are now ready to proceed with installing the CD/DVD drive. Take a moment to familiarize yourself with the internal layout of your computer and ensure that you have easy access to the drive bays. This will make the installation process much smoother.
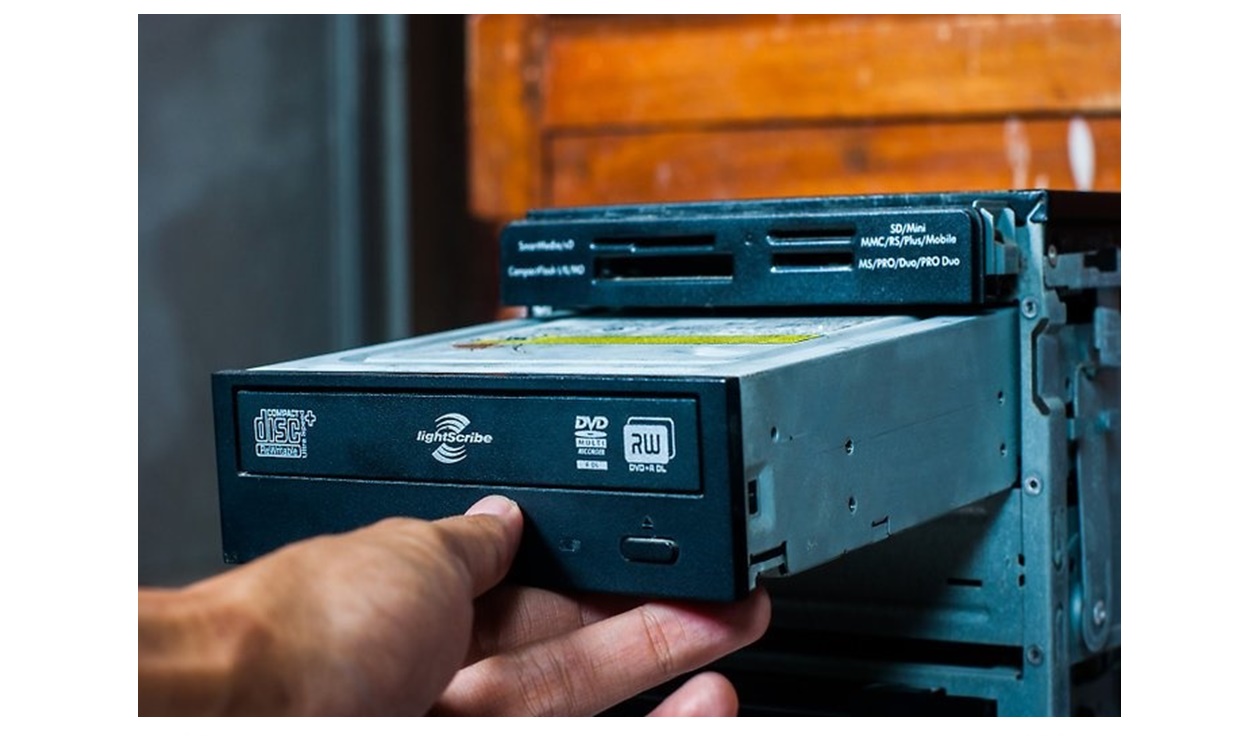
Step 3: Mounting the Drive
Now that you have opened your computer case, it’s time to mount the CD/DVD drive securely in one of the drive bays. Follow these steps:
- Choose an available drive bay: Identify an empty drive bay where you want to install the CD/DVD drive. Most cases have multiple drive bays, so choose one that is easily accessible and suits your preference.
- Prepare the drive: If your CD/DVD drive is not pre-mounted in a removable tray, you may need to prepare it for installation. To do this, remove any unnecessary brackets or covers from the drive.
- Align the drive: Carefully align the CD/DVD drive with the chosen drive bay. The connectors on the back of the drive should be facing towards the rear of the case.
- Slide the drive in: Gently slide the drive into the drive bay until it is fully inserted. Ensure that it fits snugly and aligns with the screw holes on the sides of the bay.
- Secure the drive: Once the drive is in position, use the appropriate mounting screws to secure it in place. Tighten the screws just enough to hold the drive firmly but avoid overtightening, as this could damage the drive or the case.
With the CD/DVD drive securely mounted in the drive bay, you have completed the crucial step of physically installing the drive. Take a moment to ensure that the drive is properly aligned and securely attached. This will ensure stability and proper functionality when you connect the necessary cables in the next step.
Step 4: Connecting the Cables
Now that the CD/DVD drive is securely mounted in the drive bay, the next step is to connect the necessary cables for data and power. Follow these steps:
- Data cable connection: Locate the SATA connectors on your motherboard. Connect one end of a SATA cable to the SATA port on the CD/DVD drive and the other end to an available SATA port on the motherboard. Ensure a snug and secure connection.
- Power cable connection: Locate the appropriate power connector coming from the power supply unit. Connect one end of a SATA power cable to the power port on the CD/DVD drive and the other end to an available power connector from the power supply unit. Again, ensure a secure connection.
- Additional drives: If you are installing multiple CD/DVD drives, repeat the above steps to connect the necessary data and power cables for each additional drive. Ensure that each drive is connected in the correct order based on your desired configuration.
- Cable management: Once all the cables are connected, take a moment to organize and manage the cables inside your case. This will help improve airflow and prevent them from obstructing other components.
Double-check all cable connections to ensure they are secure and properly aligned. Loose connections can lead to data transfer issues or lack of power to the CD/DVD drive. With the cables connected, you are now ready to proceed to the next step of configuring the drive.
Step 5: Configuring the Drive
After connecting the necessary cables, the next step is to configure the CD/DVD drive in your computer’s BIOS or UEFI settings. Follow these steps:
- Restart your computer: Save any open files and restart your computer.
- Access the BIOS/UEFI settings: During the boot-up process, you will need to press a specific key (usually the Delete, F2, or F10 key) to access the BIOS or UEFI settings. The key to press may vary depending on your computer’s manufacturer, so consult your motherboard or computer manual if you’re unsure.
- Navigate to the boot order: Once in the BIOS/UEFI settings, navigate to the Boot or Boot Order section. Look for an option that lists the available boot devices or disk drives.
- Select the CD/DVD drive as a boot device: In the boot order settings, ensure that the CD/DVD drive is listed and set as a boot device. This will allow your computer to recognize and boot from the drive when necessary.
- Save and exit: After making the necessary changes, save the settings and exit the BIOS/UEFI. Your computer will restart.
Once your computer has restarted, it should recognize the newly installed CD/DVD drive. You can now proceed to the next step of installing drivers and software specific to your CD/DVD drive.
Note: If you encounter any issues or the drive is not recognized in the BIOS/UEFI settings, double-check the cable connections and make sure they are properly seated. If the problem persists, consult your computer or motherboard manual for troubleshooting guidance.
Step 6: Closing the Computer Case
Now that you have installed and configured the CD/DVD drive, it’s time to close the computer case to ensure everything is properly enclosed and protected. Follow these steps:
- Ensure all cables are properly positioned: Before closing the computer case, make sure that all cables connected to the CD/DVD drive and other components are neatly organized and not blocking any fans or obstructing the airflow.
- Align the case panels: Gently slide or lower the side panel back into its original position. Ensure that it aligns properly with the case and the screw holes on the back or sides of the case.
- Secure the case panels: Use the screws that were removed earlier to secure the side panel(s) of the computer case. Tighten them firmly, but avoid overtightening to prevent stripping the screws or damaging the case.
- Double-check: Once the case panels are secure, give the computer case a gentle shake to ensure that nothing is loose or rattling inside. Listen for any unusual sounds or vibrations that may indicate a loose component or improperly secured drive.
With the computer case closed, your CD/DVD drive is now safely enclosed and protected. Take a moment to admire your work and ensure that everything appears to be in place. Your computer is now ready for use and you can proceed to the next step of installing drivers and software specific to your CD/DVD drive.
Note: If you ever need to access the CD/DVD drive or make changes to your computer’s internal components, simply repeat the steps to open the case.
Step 7: Installing Drivers
After installing and closing the computer case, the next step is to install the necessary drivers for your CD/DVD drive. Drivers are software components that allow your operating system to communicate and properly interact with the hardware. Here’s how to install the drivers:
- Check the manufacturer’s website: Visit the website of the CD/DVD drive’s manufacturer to find the latest drivers for your specific model. Look for a “Support” or “Downloads” section on the website.
- Locate the appropriate driver: Search for the driver that corresponds to your CD/DVD drive model and your operating system. Download the driver to a location on your computer where you can easily access it.
- Run the driver installer: Once the driver is downloaded, double-click on the installer file to launch the installation process. Follow the on-screen instructions to complete the driver installation.
- Restart your computer: After the driver installation is complete, it is often recommended to restart your computer. This allows the changes to take effect and ensures proper functionality of the CD/DVD drive.
- Test the CD/DVD drive: After restarting your computer, test the functionality of the CD/DVD drive. Insert a CD or DVD and make sure it is recognized by your operating system. Attempt to read or write data to ensure the drive is functioning correctly.
Installing the appropriate drivers for your CD/DVD drive is crucial to ensure optimal performance and compatibility with your operating system. By following these steps, you can ensure that your CD/DVD drive is properly recognized and functions as intended.
Note: In some cases, the drivers for CD/DVD drives may be pre-installed with the operating system, and additional driver installation may not be necessary. However, it is always a good idea to check for the latest drivers from the manufacturer to ensure you have the most up-to-date software.
Step 8: Testing the Drive
Once you have installed the drivers for your CD/DVD drive, it’s important to test its functionality before fully relying on it for your needs. Follow these steps to test your CD/DVD drive:
- Insert a CD or DVD: Gently insert a CD or DVD into the CD/DVD drive. Make sure it is properly inserted and seated in the tray or slot.
- Wait for recognition: Give your computer a moment to recognize the inserted disc. It should appear on your computer’s desktop or in the file explorer.
- Read data from the disc: Open the CD/DVD drive in your file explorer or media player software and attempt to read the data on the disc. Check if the files and folders are displayed correctly.
- Write data to the disc: If your CD/DVD drive supports write capabilities, try burning a disc or creating a backup. Use appropriate software to write data to the blank disc and verify if the process completes successfully.
- Check disc compatibility: Confirm that your CD/DVD drive can read various types of discs, including different formats such as CD-R, CD-RW, DVD±R, and DVD±RW. Test the compatibility by inserting different discs and ensuring they are recognized and readable.
Testing the functionality of your CD/DVD drive ensures that it is working properly and allows you to address any issues or errors early on. If you encounter any problems during the testing process, double-check the connections and try using different discs to determine if the issue lies with the drive or the specific disc.
By thoroughly testing your CD/DVD drive, you can have confidence in its performance and functionality. It ensures that you can seamlessly use the drive for reading, writing, or accessing various types of optical media.
Note: If you encounter persistent issues with the drive, such as it not being recognized or read errors, it may be necessary to seek further assistance from the manufacturer or a qualified technician.