
What is an ISO file?
An ISO file, also known as an ISO image or disc image, is a digital replica or snapshot of the content and structure of a CD, DVD, or Blu-ray disc. It contains all the files and folders that are found on the original disc, including the bootable information if applicable. The term “ISO” is derived from the ISO 9660 standard, which is the file system used for optical disc media.
ISO files can be used for various purposes, such as creating backups of your physical discs, distributing software or operating systems, or running virtual machines. They are commonly used in the gaming industry for distributing game installation files. With an ISO file, you can easily recreate the original disc on a new blank disc or use it as a virtual disc by mounting it on your computer.
One of the advantages of ISO files is their versatility. They can be easily shared and transferred over the internet, making it convenient to distribute large files. Additionally, ISO files retain the original file structure and metadata of the disc, ensuring that all the files and folders are preserved during the burning process.
ISO files can be burned to various types of optical discs, such as CD-R, CD-RW, DVD-R, DVD+R, DVD-RW, DVD+RW, and Blu-ray discs. By burning an ISO file to a disc, you create a functional copy of the original disc that can be used in the same way as the original media.
It’s important to note that not all ISO files are intended to be burned to discs. Some ISO files are designed to be mounted directly on your computer or used in virtual environments, such as ISO files for operating systems or software installations. In those cases, you can use software to mount the ISO file as a virtual drive or extract its contents without the need to burn it to a disc.
Why would you want to burn an ISO file to a disc?
Burning an ISO file to a disc offers a range of benefits and applications. Here are some of the common reasons why you might want to burn an ISO file to a disc:
- Installation of operating systems: Many operating systems, such as Windows, Linux, and macOS, are distributed as ISO files. By burning these ISO files to discs, you can install or reinstall the operating system on a computer easily. This is especially useful when setting up a new system or recovering from a system crash.
- Creating physical backups: Burning an ISO file to a disc allows you to create a physical backup of important files or software. This serves as an additional layer of protection against data loss. Rather than relying solely on digital backups, having a physical disc provides a tangible and reliable backup solution.
- Software distribution: ISO files are commonly used for distributing software, particularly large applications or programs. By burning the ISO file to a disc, you can provide users with an easy-to-install medium that contains all the necessary files and folders. This is beneficial for software developers, who can distribute their software on physical discs that users can install without a direct internet connection.
- Archiving media: If you have a collection of valuable media, such as photos, videos, or music, you can burn them to a disc as an archival method. By creating ISO files and burning them to discs, you can ensure the long-term preservation of your media. This is useful for storing precious memories and ensuring that they remain accessible even if digital storage devices fail or become obsolete.
- Gaming and entertainment: Many game developers distribute their games as ISO files. By burning these ISO files to discs, you can create physical copies of the games that can be played on consoles or personal computers without the need for internet connections or digital downloads. This is especially helpful for gamers with slow internet speeds or limited data allowances.
Overall, burning an ISO file to a disc offers convenience, data security, and flexibility. Whether you need to install an operating system, distribute software, create backups, archive media, or enjoy gaming, burning ISO files to discs provides a reliable and efficient solution.
What do you need to burn an ISO file to a disc?
Burning an ISO file to a disc requires a few essential components to ensure a successful process. Here’s what you’ll need:
- A computer with a CD/DVD burner: To burn an ISO file to a disc, you need a computer equipped with a CD/DVD burner. Most modern computers come with built-in optical drives that can read and write CDs and DVDs. If your computer doesn’t have a burner, you can purchase an external CD/DVD burner that connects to your computer via USB.
- Blank discs: You’ll need blank discs that are compatible with your CD/DVD burner. The type of disc you’ll need depends on the size of the ISO file and the capabilities of your burner. Common types of blank discs include CD-R, CD-RW, DVD-R, DVD+R, DVD-RW, DVD+RW, and Blu-ray discs. Make sure to use high-quality discs from reputable brands to ensure reliable burning and longevity.
- CD/DVD burning software: You’ll need CD/DVD burning software to facilitate the burning process. There are many options available, both free and paid, such as Nero Burning ROM, ImgBurn, Ashampoo Burning Studio, and CDBurnerXP. Choose software that is compatible with your operating system and has the features you require, such as disc verification, burning speed control, and multi-session support.
Once you have these essential components, you’re ready to begin the burning process. Ensure that your computer meets the system requirements specified by the CD/DVD burning software you choose. It’s also a good idea to close any unnecessary applications to maximize system resources and minimize the chances of errors during burning.
Having a stable internet connection can be helpful, especially when downloading or updating CD/DVD burning software. Additionally, it’s advisable to ensure that your computer’s antivirus software is up-to-date to prevent any potential malware or security risks during the burning process.
With the right hardware, blank discs, and CD/DVD burning software in place, you’re fully equipped to burn ISO files to discs and enjoy the benefits of having physical copies of your favorite software, operating systems, media, and more.
Step 1: Choose the right CD/DVD burner software
Choosing the right CD/DVD burner software is crucial for a successful burning process. There are numerous options available, each with its own features and capabilities. Here are some considerations to help you choose the right software:
- Compatibility: Ensure that the CD/DVD burning software you choose is compatible with your operating system. Whether you’re using Windows, Mac, or Linux, there are software options available for each platform. Check the system requirements of the software to ensure that your computer meets the necessary specifications.
- User-friendly interface: Look for software that has a user-friendly interface with intuitive controls and a clear layout. This will make the burning process easier, especially if you’re a beginner. A well-designed interface enhances the user experience and reduces the chances of errors during the burning process.
- Multi-format support: Consider software that supports a wide range of disc formats, including CD-R, CD-RW, DVD-R, DVD+R, DVD-RW, DVD+RW, and Blu-ray discs. This flexibility ensures that you can burn ISO files to the appropriate disc format based on your needs and the capabilities of your CD/DVD burner.
- Burning options and features: Evaluate the burning options and features offered by the software. Look for features such as disc verification, which ensures that the burned disc is error-free and reliable. Other useful features include burning speed control, multi-session support, label printing, and disc spanning for large ISO files that exceed the capacity of a single disc.
- Reliability and reputation: Consider the reliability and reputation of the CD/DVD burning software. Read reviews and user feedback to gauge the software’s performance, stability, and customer support. Opt for software that is frequently updated and supported by a reputable developer to ensure ongoing compatibility and bug fixes.
Some popular CD/DVD burning software options include Nero Burning ROM, ImgBurn, Ashampoo Burning Studio, and CDBurnerXP. Each of these software choices offers a range of features and capabilities to suit different needs and preferences.
Take your time to research and evaluate the available CD/DVD burning software options before making a decision. Consider your specific requirements, the ease of use, and the features that best align with your needs. Choosing the right software at the beginning will greatly enhance your ISO file burning experience and ensure successful results.
Step 2: Insert a blank disc into your CD/DVD burner
Once you have chosen the right CD/DVD burning software, the next step is to insert a blank disc into your CD/DVD burner. Follow these simple steps:
- Check the disc compatibility: Ensure that the blank disc you are using is compatible with your CD/DVD burner. Check the disc packaging or refer to the manufacturer’s specifications to verify the supported disc formats. Using an incompatible disc may result in errors during the burning process or produce unreadable discs.
- Locate the CD/DVD drive: Locate the CD/DVD drive on your computer. This can vary depending on the type of computer you have. In most cases, the CD/DVD drive is a slot on the front of a desktop computer or a tray that pops out on laptops.
- Eject any existing disc: If there is a disc already in the CD/DVD drive, eject it by pressing the eject button on the drive or right-clicking the drive icon on your computer and selecting the “Eject” option. Make sure the drive is empty and ready to accept the blank disc.
- Prepare the blank disc: Remove the blank disc from its packaging, ensuring you hold it by the edges to avoid fingerprints or smudges on the recording surface. Check for any visible scratches or damage on the surface of the disc. A clean and undamaged surface ensures optimal writing quality.
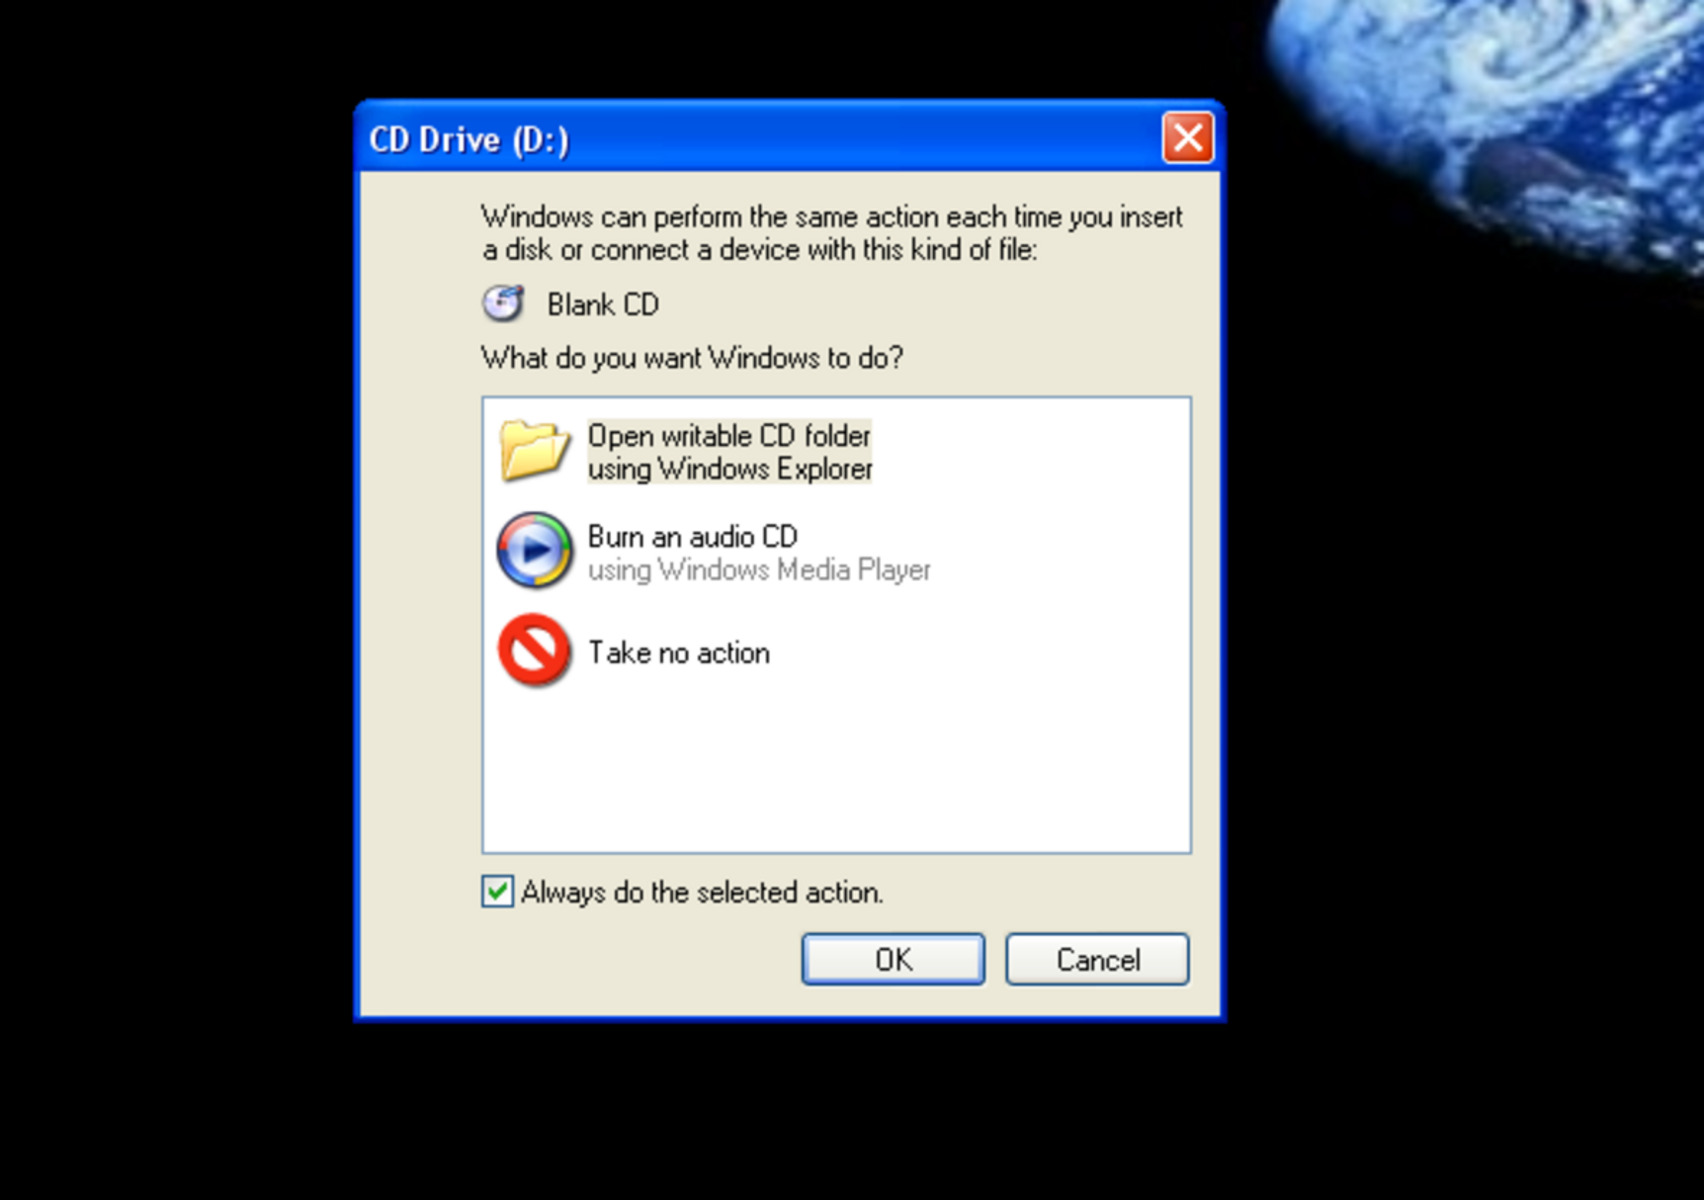
- Insert the blank disc: Carefully insert the blank disc into the CD/DVD drive, making sure it is inserted properly. The drive should automatically detect the disc and secure it in place. If the drive doesn’t automatically close, gently push the tray back into the closed position.
- Wait for the disc to be recognized: Give your computer a moment to recognize the inserted disc. The CD/DVD burning software you installed should detect the blank disc and display its properties, such as available space and capacity. You may need to wait for a pop-up or navigate to the software interface to view the disc information.
With the blank disc successfully inserted into your CD/DVD burner, you’re now ready to proceed to the next steps of the ISO file burning process. It’s important to use high-quality blank discs and handle them with care to ensure reliable burning and optimal disc playback in the future.
Step 3: Open the CD/DVD burner software
After inserting a blank disc into your CD/DVD burner, the next step is to open the CD/DVD burner software you have installed on your computer. Follow these steps to open the software:
- Locate the CD/DVD burning software: Look for the CD/DVD burning software on your computer. You can typically find it in the “Programs” or “Applications” folder, depending on your operating system.
- Double-click the software icon: Once you have located the CD/DVD burning software, double-click on its icon to launch the program. Alternatively, you can right-click the icon and select “Open” from the context menu.
- Wait for the software to initialize: Give the CD/DVD burning software a few moments to initialize. During this time, the software may perform a quick system check and load necessary components. Depending on the software, you may see a splash screen or a loading window indicating that the program is starting.
- Ensure the software detects the CD/DVD burner: Once the CD/DVD burning software is open, verify that it recognizes the CD/DVD burner. This information is usually displayed on the main interface or in a settings menu. Make sure the software is connected to and communicating with the correct burner device.
- Familiarize yourself with the software interface: Take a moment to familiarize yourself with the CD/DVD burning software’s interface. Look for key features, such as the ability to select and add files or folders, adjust burning settings, and start the burning process. Understand the layout and navigation options to make it easier to navigate through the software during the burning process.
- Keep the CD/DVD burning software open: Leave the CD/DVD burning software open throughout the ISO file burning process. You may need to refer back to it for various steps, such as selecting the ISO file, configuring burning options, and initiating the burning process. Keeping the software open ensures a seamless and hassle-free experience.
Opening the CD/DVD burning software is an important step in the ISO file burning process. It allows you to access the necessary tools and features to complete the remaining steps successfully. Make sure you have the software installed and readily available on your computer, ensuring a smooth and efficient burning process for your ISO file.
Step 4: Locate and select the ISO file you want to burn
After opening the CD/DVD burning software, the next step is to locate and select the ISO file that you want to burn to the disc. Follow these steps to locate and select the ISO file:
- Navigate to the file selection area: Look for an option or tab within the CD/DVD burning software that allows you to select files or add the ISO file for burning. This is typically labeled as “File,” “Add,” or “Browse.”
- Browse your computer for the ISO file: Click on the designated button to browse your computer’s file system. A file explorer window will appear, allowing you to navigate through your computer’s folders and directories.
- Locate the ISO file: Within the file explorer window, navigate to the location where the ISO file is saved. This could be on your desktop, in a specific folder, or on an external storage device. If you are unsure of the exact location, you can use the search function within the file explorer to locate the file by name.
- Select the ISO file: Once you have located the ISO file, click on it to select it. Most CD/DVD burning software uses highlighting or checkboxes to indicate the selected file. Additionally, some software allows you to select multiple ISO files at once if you want to burn multiple discs or create a compilation.
- Confirm the ISO file selection: After selecting the ISO file, review the file name or path displayed within the CD/DVD burning software to confirm that the correct file has been chosen. Double-check that the selected ISO file matches the one you intend to burn to the disc.
- Import the ISO file into the software: Click “Open” or a similar option in the file explorer window to import the selected ISO file into the CD/DVD burning software. Upon importing, the software will display the ISO file and provide additional information, such as its size and available space on the disc.
Locating and selecting the ISO file is a crucial step before proceeding with the burning process. Take your time to ensure that you have selected the correct ISO file to avoid any mistakes. With the ISO file imported into the CD/DVD burning software, you’re ready to proceed with the next steps to burn the ISO file to the disc.
Step 5: Choose the appropriate burning options
After selecting the ISO file, the next step in burning an ISO file to a disc is to choose the appropriate burning options within the CD/DVD burning software. These options allow you to customize the burning process according to your preferences. Follow these steps to choose the appropriate burning options:
- Access the burning options: Look for a tab or menu within the CD/DVD burning software that provides access to the burning options. This is often labeled as “Settings,” “Options,” “Burning Preferences,” or something similar.
- Explore the available options: Within the burning options, you will find various settings and configurations that can be adjusted based on your needs. These options may include the burning speed, file system format, disc label, burn method (such as Track-at-Once or Disc-at-Once), and more.
- Select the burning speed: The burning speed determines how quickly the ISO file is burned to the disc. Choose a burning speed based on the capabilities of your CD/DVD burner and the quality of the blank disc. Higher speeds result in faster burning, but choosing a slower speed can minimize the chances of errors or data corruption.
- Choose the file system format: Depending on your requirements, you can select the file system format for the burned disc. The most common options are ISO 9660, which is compatible with various operating systems, and UDF (Universal Disk Format), which offers more advanced features and compatibility with newer systems.
- Provide a disc label (optional): If you want to give your burned disc a specific label or name, look for an option to enter the desired label in the burning options. This label will be displayed when you insert the disc into a computer or disc drive and can help you identify the content of the disc.
- Review and confirm the chosen options: Before proceeding with the burning process, carefully review the selected options to ensure they match your preferences. Confirm that the burning speed, file system format, disc label, and other chosen settings are as desired.
Choosing the appropriate burning options allows you to customize the burning process according to your specific requirements. The available options may vary depending on the CD/DVD burning software you are using. Take your time to explore and select the options that best suit your needs before proceeding to the next steps of the ISO file burning process.
Step 6: Configure the burning speed
Configuring the burning speed is an important step in the process of burning an ISO file to a disc. The burning speed setting determines how quickly the data from the ISO file is written onto the disc. Follow these steps to configure the burning speed:
- Access the burning speed setting: Look for the burning speed option within the CD/DVD burning software. This setting is typically found in the burning options or preferences menu. It may be labeled as “Burning Speed” or “Write Speed.”
- Select an appropriate burning speed: Evaluate the available burning speed options and choose the appropriate speed for your specific requirements. The options will typically include a range of speeds such as 2x, 4x, 8x, 16x, or maximum speed.
- Consider the capabilities of your CD/DVD burner: Take into account the capabilities of your CD/DVD burner when selecting the burning speed. Consult the manufacturer’s specifications or documentation to determine the supported burning speeds. Choosing a speed that is too high for your burner may result in errors or disc readability issues.
- Quality versus speed considerations: It’s important to strike the right balance between burning speed and burning quality. While higher speeds may allow for faster burning, they can also increase the chances of errors or data corruption. Slower burning speeds generally result in more accurate and reliable burns.
- Burning speed recommendations: As a general guideline, it is often recommended to start with a lower burning speed when burning important data or if you’re experiencing issues with previous burns. This allows for a more controlled and accurate burn, minimizing the risks of errors. You can experiment with different speeds to find the optimal balance between speed and quality.
- Advanced options: Some CD/DVD burning software may offer advanced options related to burning speed, such as “Burn-proof” or “Buffer underrun protection.” These options help prevent disc burning failures caused by interruptions or fluctuations in the data flow to the burner. It is advisable to enable these options for a smoother and more reliable burning process.
Configuring the burning speed is an important step in ensuring a successful ISO file burn. Take your time to select an appropriate burning speed that matches the capabilities of your CD/DVD burner while considering the desired burn quality. With the burning speed configured, you’re prepared to proceed to the next steps and start the burning process.
Step 7: Start the burning process
Once you have configured the burning options and set the appropriate burning speed, you are ready to begin the burning process. Follow these steps to start burning the ISO file to the disc:
- Review your settings: Before initiating the burning process, double-check that all the settings, including the selected ISO file, burning speed, and any other customizable options, are accurately set as desired. This ensures that the disc is burned correctly and according to your preferences.
- Locate the “Burn” or “Start” button: Look for a button within the CD/DVD burning software that initiates the burning process. This button is often labeled as “Burn,” “Start,” or an icon resembling a disc with a flame or arrow. Click on this button to begin the burn.
- Confirm the burning process: When prompted, confirm that you want to proceed with the burning process. Some software may display a confirmation dialog or prompt to verify the selected options and disc burner.
- Monitor the burning process: Once the burning process starts, keep an eye on the progress indicator provided by the CD/DVD burning software. This indicator shows the status and progress of the burning process, including the elapsed time and estimated time remaining.
- Avoid interruptions: To ensure a successful burn, avoid interrupting the burning process. Make sure your computer remains powered on and connected to a stable power source. Avoid closing the CD/DVD burning software, ejecting the disc, or performing any resource-intensive tasks during the burn, as this may cause errors or interruptions.
- Wait for the burn process to complete: The burn process duration depends on various factors, including the size of the ISO file and the selected burning speed. Be patient and allow the CD/DVD burner to complete the process. It’s essential to be mindful of the estimated time remaining but note that it’s an estimate and may vary slightly.
- Verify the completion: Once the burning process is finished, the CD/DVD burning software will indicate the completion. You may see a notification or message confirming the successful burn, or the progress indicator may disappear. Some software may automatically eject the disc, while others may require manual ejection.
- Inspect the burned disc: Carefully remove the burned disc from the CD/DVD burner and inspect it for any visible signs of damage or errors. Check the disc surface for scratches, smudges, or unusual discoloration. If the disc appears intact and without any visible damage, it is likely a successful burn.
Starting the burning process is an exciting step as you see your ISO file being transformed into a physical disc. By following these steps and proper monitoring, you can ensure a successful burn and have a functional disc that contains the content of your ISO file.
Step 8: Wait for the burning process to complete
After initiating the burning process, it’s important to patiently wait for it to complete to ensure a successful burn. Here are some key points to keep in mind while waiting for the burning process to finish:
- Monitor the progress: Keep an eye on the CD/DVD burning software to monitor the progress of the burning process. Most software will display a progress bar or a countdown timer to indicate the current status of the burn. This will give you an idea of how much time is remaining for the process to complete.
- Avoid interruptions: It’s crucial to avoid any interruptions during the burning process. Ensure that your computer remains powered on and connected to a stable power source. Avoid using other intensive programs, as this may cause buffer underruns or errors during the burn. Interrupting the process can lead to a failed burn or a disc that is unusable.
- Be patient: The duration of the burning process can vary depending on factors like the size of the ISO file, the burning speed, and the performance of your CD/DVD burner. Have patience and allow the software and hardware to complete the burn. Avoid impatience and resist the temptation to interrupt or cancel the process prematurely.
- Avoid physical movement: It’s best not to move your computer or jostle the CD/DVD burner while the burning process is taking place. Any physical movement can cause vibrations that may affect the quality of the burn or even result in a failed burn. Keep the computer and the burner in a stable and secure position throughout the process.
- Monitor system resources: It’s advisable to monitor your computer’s system resources during the burning process. Some burning software may be resource-intensive, and high CPU or RAM usage could slow down the process or cause instability. Close any unnecessary programs running in the background to ensure that sufficient resources are available for the burning software.
- Stay vigilant: While waiting for the burning process to complete, occasionally check the CD/DVD burner for any signs of issues or errors. If you notice any error messages or warnings, refer to the software’s documentation or online support resources for troubleshooting steps. Addressing any issues promptly can help prevent a failed burn or the creation of a faulty disc.
Waiting for the burning process to complete requires patience and attention to detail. By closely monitoring the progress, avoiding interruptions, and being mindful of system resources, you can ensure a smooth and successful burn. Once the burning process is complete, you can move on to the next steps to verify the burned disc and ensure its integrity.
Step 9: Verify the burned disc
After the burning process completes, it is essential to verify the burned disc to ensure its integrity and readability. Verifying the disc helps to confirm that the burn was successful and that the contents of the ISO file were accurately transferred onto the disc. Follow these steps to verify the burned disc:
- Eject the burned disc: Depending on your CD/DVD burner software, the disc may automatically eject once the burning process is complete. If it doesn’t, use the software’s interface or the physical eject button on the CD/DVD drive to safely remove the disc from the burner.
- Inspect the disc surface: Examine the surface of the burned disc for any visible signs of damage, scratches, or smudges. Verify that the disc appears clean and free of any physical defects that might affect its readability.
- Insert the burned disc: Insert the burned disc back into the CD/DVD drive. Ensure it is inserted correctly and securely to allow the computer to recognize and access the disc.
- Access the disc content: Open the file explorer or a media player software and navigate to the burned disc. Check if you can access the contents of the disc without encountering any errors. Double-click on files or folders to ensure their readability and completeness.
- Confirm file integrity: Compare the files and folders on the burned disc with the original ISO file. Ensure that the size, number, and arrangement of files match. Check individual files to make sure they can be opened and accessed without any issues.
- Test functionality (if applicable): If the burned disc contains software, an operating system, or multimedia content, test its functionality. For example, install software from the disc, boot from the disc to test the operating system, or play media files to verify their playback quality.
- Repeat verification process (if necessary): If any errors or issues arise during the verification process, you may need to repeat the burn or use a different disc. Check for any error messages displayed by the CD/DVD burner software or your computer’s operating system.
Verifying the burned disc is crucial to ensure that the burn was successful and the content is accurately transferred onto the disc. By carefully inspecting the disc surface, accessing the disc content, confirming file integrity, and testing functionality (if applicable), you can be confident in the quality and reliability of the burned disc.
Step 10: Safely remove the burned disc from your CD/DVD burner
After verifying the burned disc and ensuring its integrity, it is important to safely remove the disc from your CD/DVD burner. Following the proper removal procedure reduces the risk of damaging the disc or the burner. Follow these steps to safely remove the burned disc:
- Close any applications: Ensure that no applications or programs are accessing the burned disc before attempting to remove it. Close any file explorer windows or media player software that may still have the disc open.
- Eject the disc: Locate the eject button on your CD/DVD burner. This button is usually located on the front panel of the burner or can be triggered through the software interface. Press the eject button to release the disc tray or drive, allowing you to safely retrieve the burned disc.
- Wait for the disc to fully eject: Give the burner a moment to fully eject the disc. Wait until you hear a click, and the tray or drive is fully extended. This ensures that the disc is properly released and ready for removal.
- Handle the disc with care: Grasp the burned disc gently by its edges, taking care not to touch the shiny recording surface. Touching the surface can potentially leave fingerprints or smudges that may affect the disc’s readability or cause errors during playback.
- Store the disc properly: After removing the disc, place it in a protective covering or a CD/DVD case to prevent scratches or damage. Avoid placing the disc face down on surfaces to prevent scratches or debris from affecting the recording surface.
- Store the burned disc in a suitable location: Choose an appropriate location to store the burned disc. Ideally, store it in a cool, dry place away from direct sunlight, excessive heat, or humidity. Avoid storing the disc in areas prone to dust, moisture, or extreme temperature changes.
- Clean the CD/DVD burner (optional): If desired, you can use a CD/DVD drive cleaner or a soft, lint-free cloth to clean the CD/DVD burner’s tray or drive. Follow the instructions provided with the cleaning product, if applicable, to ensure safe and effective cleaning.
By following these steps, you can safely remove the burned disc from your CD/DVD burner without causing any damage to the disc or the burner itself. Proper handling and storage will help preserve the quality and longevity of the burned disc, ensuring that it remains playable and accessible in the future.