
Check for dirt or smudges on the camera lens
One common reason why your iPhone camera might not be focusing is due to dirt or smudges on the lens. Over time, dust, fingerprints, and other debris can accumulate on the camera lens, affecting the quality of your photos and causing focusing issues. Fortunately, this can be easily resolved by cleaning the lens.
To check for dirt or smudges on the camera lens, first, make sure your iPhone is turned off. Then, inspect the lens closely for any visible dirt or fingerprints. You can use a soft, lint-free cloth or a microfiber cloth to gently wipe the lens in a circular motion, removing any dirt or smudges. Avoid using abrasive materials or harsh cleaning solutions as they can damage the lens coating.
It’s worth noting that newer iPhone models, such as the iPhone X and later, have a dual-camera system. In this case, you’ll need to clean both lenses, as well as the surrounding areas. Take extra care when cleaning around the camera module to avoid causing any damage.
After cleaning the lens, turn your iPhone back on and open the Camera app to see if the focusing issue has been resolved. If not, proceed to the next troubleshooting step.
Restart your iPhone
When your iPhone camera is not focusing properly, a simple solution that often works is to restart your device. Restarting your iPhone can help refresh the system and resolve any minor software glitches that might be causing the focusing issue.
To restart your iPhone, follow these steps:
- Press and hold the power button (located on the side or top of your iPhone, depending on the model) until the power-off slider appears on the screen.
- Drag the slider to turn off your iPhone.
- Once your iPhone is off, wait for a few seconds.
- Press and hold the power button again until you see the Apple logo appear on the screen.
Once your iPhone has restarted, open the Camera app and check if the focusing issue has been resolved. In many cases, a simple restart can fix temporary software problems affecting the camera’s performance.
If restarting your iPhone doesn’t solve the focusing problem, don’t worry. There are still other troubleshooting steps you can try to get your camera working properly again.
Update your iPhone’s software
Another possible solution to fix the focusing issue on your iPhone is to ensure that your device is running the latest software version. Software updates often include bug fixes and improvements that can address camera-related problems.
To check for software updates on your iPhone, follow these steps:
- Go to the “Settings” app on your iPhone and tap on “General”.
- Scroll down and tap on “Software Update”.
- If an update is available, tap on “Download and Install”.
- Follow the on-screen instructions to complete the update process.
It’s important to note that you’ll need a stable internet connection and sufficient battery power to download and install the update. It’s recommended to connect your iPhone to a Wi-Fi network and plug it into a power source before initiating the software update.
Once the update is installed, restart your iPhone and open the Camera app to check if the focusing issue has been resolved. If not, proceed to the next troubleshooting step.
Updating your iPhone’s software not only helps in fixing camera issues but also provides new features and enhanced security. It’s a best practice to regularly check for and install software updates to keep your iPhone running smoothly.
Reset your iPhone’s settings
If the previous solutions haven’t resolved the focusing issue on your iPhone camera, you can try resetting your device’s settings. This process will not erase your data but will restore all settings to their default values, potentially eliminating any configuration issues that may be causing the problem.
Here’s how you can reset your iPhone’s settings:
- Open the “Settings” app on your iPhone.
- Tap on “General” and scroll down to find “Reset”.
- Tap on “Reset” and select “Reset All Settings”.
- Enter your passcode if prompted and confirm your decision.
Keep in mind that resetting your iPhone’s settings will revert all personalized settings to their default state. This includes network settings, display settings, privacy settings, and more. Your apps and data will not be affected, so you don’t have to worry about losing any information.
Once the reset process is complete, set up your preferences again and open the Camera app to see if the focusing issue has been resolved. If not, continue to the next troubleshooting step.
Resetting your iPhone’s settings can be an effective way to resolve stubborn software-related issues. However, if the focusing issue persists, it may be time to consider more advanced troubleshooting steps or seeking assistance from Apple Support.
Remove any iPhone case or accessories
Sometimes, the problem with the iPhone camera not focusing properly can be attributed to an obstruction caused by the iPhone case or any attached accessories. The case or accessories might interfere with the camera’s autofocus mechanism, resulting in blurry or out-of-focus images.
To troubleshoot this issue, try removing any iPhone case or accessories and observe if the focusing problem persists. Remove the case carefully, ensuring you don’t accidentally drop or damage your device.
Once you have removed the case or accessories, open the Camera app and test the camera’s focusing capabilities. If the focusing issue is resolved, it is likely that the obstruction caused by the case or accessory was affecting the camera’s ability to focus.
If removing the case or accessories resolves the problem, consider using a different case or accessory that is specifically designed for your iPhone model. Look for cases that have precise cutouts for the camera lens and avoid bulky cases that might obstruct the camera’s view.
Keep in mind that cases designed for older iPhone models may not fit properly on newer models, potentially causing issues with the camera lens alignment. It’s essential to choose a case or accessory that is compatible with your specific iPhone model to ensure optimal camera performance.
If removing the case or accessory does not resolve the focusing issue, proceed to the next troubleshooting step.
Calibrate the iPhone camera’s autofocus
If your iPhone camera is still not focusing properly, it’s possible that the autofocus system may need calibration. Calibrating the autofocus can help fine-tune the camera’s focusing capabilities and improve overall image quality.
To calibrate the iPhone camera’s autofocus, you can follow these steps:
- Open the Camera app on your iPhone.
- Select a subject or object at a close distance and hold your iPhone steady.
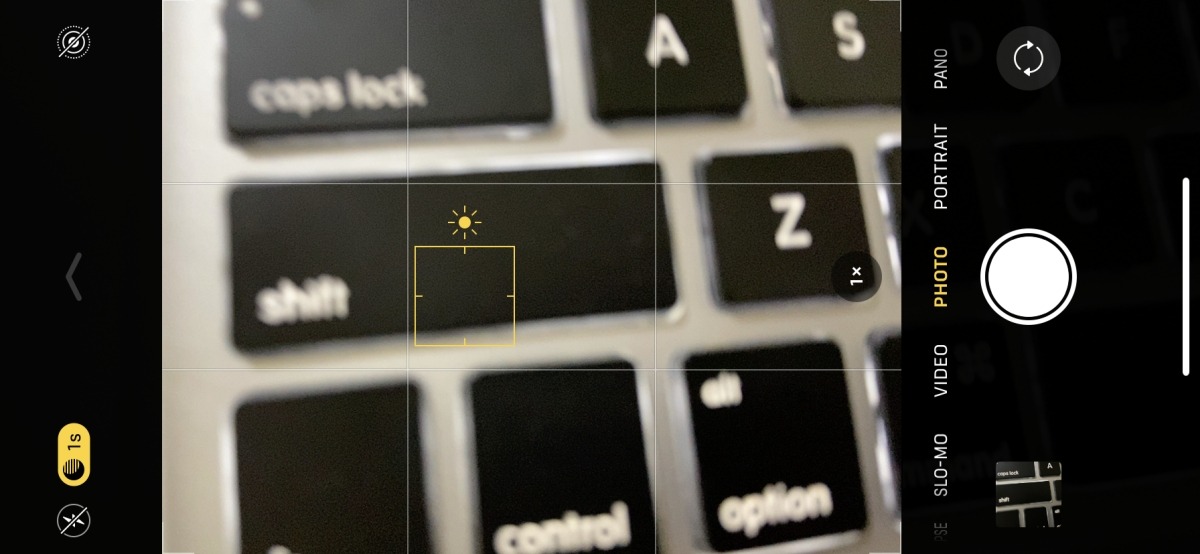
- Tap and hold on the screen until you see an AE/AF (Auto Exposure/ Auto Focus) lock indicator.
- Move your iPhone slightly towards and away from the subject, allowing the camera to adjust its focus.
- Once you’re satisfied with the focus, release your finger from the screen.
This process helps the iPhone camera understand the desired focus position and recalibrate itself accordingly. By manually adjusting the focus using the AE/AF lock, you can help the camera relearn and adapt to your specific preferences.
After calibrating the autofocus, test the camera by capturing a few photos or videos to check if the focusing issue has been resolved. If the issue persists, proceed to the next troubleshooting step.
Keep in mind that calibrating the autofocus may improve focusing performance in most cases, but it may not completely fix hardware-related problems. If the focusing issue continues, it’s recommended to explore other potential solutions or consult with Apple support for further assistance.
Force close the Camera app
If you’re still experiencing focusing issues with your iPhone camera, a simple yet effective troubleshooting step is to force close the Camera app. Occasionally, the app may encounter a glitch or temporary software issue that can hinder proper autofocus functionality.
To force close the Camera app on your iPhone, you can follow these steps:
- On iPhones with a Home button, double-click the Home button to open the app switcher. For iPhones with Face ID, swipe up from the bottom of the screen and hold until the app switcher appears.
- Swipe left or right to locate the Camera app in the app switcher.
- Swipe up or off the screen to force close the Camera app.
Once you’ve force closed the Camera app, wait for a few moments, then relaunch it from your home screen or app drawer.
By force closing the Camera app, you allow it to restart and potentially clear any temporary issues that were affecting the autofocus functionality. Now, test the camera’s focusing capabilities by capturing a few photos or videos to check if the issue has been resolved.
If the focusing issue still persists, proceed to the next troubleshooting step for further solutions.
Force closing the Camera app is a quick and easy troubleshooting method that can often help resolve minor software glitches. However, if the problem persists, it may be necessary to explore additional troubleshooting steps or seek assistance from Apple Support.
Try a different camera app
If your iPhone’s default Camera app is consistently having focusing issues, it may be worth trying a different camera app. Third-party camera apps can offer additional features and settings that could potentially improve the overall focusing performance of your device.
Browsing the App Store, you’ll find numerous camera apps available for download. Look for apps with positive reviews and high ratings, as these are good indicators of their reliability and performance.
Once you’ve chosen a camera app to try, follow these steps:
- Open the App Store on your iPhone and search for the camera app you want to download.
- Select the app from the search results and tap on “Get” or the app’s price to initiate the download and installation process.
- After the app is installed, locate and open it from your home screen or app drawer.
Once you’re in the new camera app, test the focusing capabilities by capturing a few photos or videos. Pay attention to whether the focusing issue persists or if it improves with the new app.
If the focusing issue is resolved with the alternative camera app, it suggests that the problem may be specific to the default Camera app on your iPhone. You can continue using the new camera app as an alternative or seek further troubleshooting methods for the default app.
However, if the focusing issue persists even with a different camera app, it may indicate a more significant underlying issue. In such cases, it’s recommended to explore other troubleshooting steps or contact Apple Support for further assistance.
Clean the camera sensor using an air blower
If your iPhone camera continues to have focusing issues, it’s possible that dust or debris may have accumulated on the camera sensor. Cleaning the sensor can help improve the overall performance and focusing capabilities of your device.
To clean the camera sensor using an air blower, follow these steps:
- Ensure your iPhone is turned off to prevent any accidental damage.
- Locate the camera lens on the back of your iPhone.
- Gently squeeze the air blower to create a burst of air.
- Point the nozzle of the air blower towards the camera lens and sensor area.
- Blow short bursts of air onto the camera sensor to dislodge any dust or debris.
- Avoid getting too close or applying excessive pressure to prevent damage to the lens or sensor.
After using the air blower, inspect the camera lens and sensor area to ensure they are clean. If necessary, you can also use a soft brush or microfiber cloth to gently wipe away any remaining debris.
Once the camera sensor is clean, turn on your iPhone and open the Camera app to test the focusing capabilities. You should notice an improvement in focus and clarity if the issue was related to a dirty sensor.
It’s important to note that cleaning the camera sensor should be done with caution and precision. If you’re unsure or uncomfortable performing the cleaning yourself, it may be best to seek professional assistance or visit an authorized service provider.
If the focusing issue persists even after cleaning the camera sensor, it’s recommended to explore other troubleshooting methods or contact Apple Support for further assistance.
Restore your iPhone to factory settings
If all else fails and your iPhone camera still won’t focus properly, you can consider restoring your device to factory settings. This step will erase all data and settings on your iPhone, so it’s crucial to back up your important information beforehand.
Here’s how you can restore your iPhone to factory settings:
- Make sure you have a recent backup of your iPhone’s data, either through iCloud or iTunes.
- Open the “Settings” app on your iPhone and tap on “General”.
- Scroll down and tap on “Reset”.
- Select “Erase All Content and Settings”.
- Enter your passcode and confirm your decision.
- Your iPhone will go through the restoration process, which may take some time.
- After the process is complete, set up your iPhone as new or restore from your previous backup.
Restoring your iPhone to factory settings can help resolve complex software-related issues that may be affecting the camera’s focus. However, ensure that you have backed up all necessary data before proceeding, as this process will erase everything on your device.
After restoring your iPhone, open the Camera app and test the focusing functionality. If the issue persists, it’s advisable to contact Apple Support or visit an authorized service provider for further assistance.
Keep in mind that restoring your iPhone to factory settings should be considered as a last resort if other troubleshooting steps have been unsuccessful. Be cautious and ensure you have all the necessary backups in place before proceeding.