
Preparing to Wipe a MacBook Air
Before you wipe your MacBook Air and erase all the data on it, it is crucial to properly prepare for the process. This will help ensure that you have everything you need and that you won’t lose any important data in the process. Here are some essential steps to take before wiping your MacBook Air:
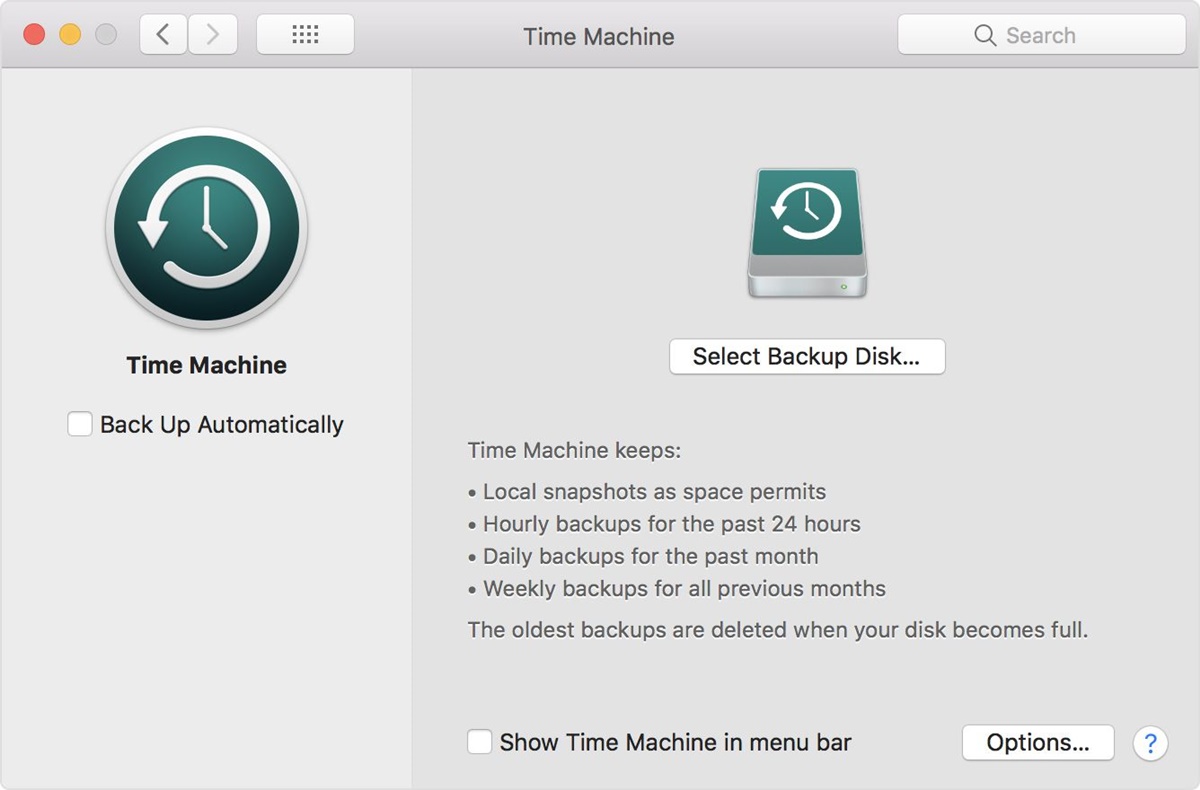
- Back up your data: It is important to create a backup of all your files, documents, photos, and any other important data that you want to keep. You can use Time Machine, an external hard drive, or cloud storage services like iCloud or Dropbox to back up your data. This will ensure that you can easily restore your files after the wiping process is complete.
- Deauthorize your MacBook Air: If you have any software or apps that are authorized for use on your MacBook Air, be sure to deauthorize them before wiping the device. This will prevent any licensing or activation issues when you reinstall your apps on the wiped MacBook Air or on a new device.
- Disable Find My MacBook: Before erasing your MacBook Air, make sure to disable the Find My feature. This will prevent anyone from tracking or accessing your device remotely. To disable Find My MacBook, go to System Preferences, click on Apple ID, and then click on iCloud. Uncheck the box next to Find My Mac.
- Verify your internet connection: Make sure you have a stable internet connection before proceeding with the wiping process. This is necessary for reinstalling macOS and restoring your data.
- Gather necessary tools and peripherals: Before wiping your MacBook Air, ensure that you have all the necessary tools and peripherals such as a compatible USB or external hard drive for backing up and reinstalling macOS.
By carefully following these steps and properly preparing your MacBook Air, you can ensure a smooth and successful wiping process. Taking the time to back up your data and disable certain features will help protect your personal information and make it easier to restore your MacBook Air once the wiping process is complete.
Backing Up Your Data
Before wiping your MacBook Air, it is crucial to back up all your important data to ensure that you don’t lose any valuable information. Here are the steps to back up your data:
- Use Time Machine: Apple’s built-in Time Machine feature makes it easy to back up your files. Connect an external hard drive to your MacBook Air and follow the on-screen prompts to set up Time Machine. It will automatically create regular backups of your files, ensuring that you have a recent copy of your data.
- Use cloud storage services: Cloud storage services like iCloud, Google Drive, or Dropbox provide an additional layer of security for your files. You can upload your important documents, photos, and other files to the cloud, allowing you to access them from any device. Check that your files are synchronized and up to date before proceeding with the wiping process.
- Manually transfer files: If you prefer not to use Time Machine or cloud storage, you can manually transfer your files to an external hard drive or USB flash drive. Simply copy and paste the files or drag them onto the external storage device. Be sure to organize and label the files appropriately to facilitate the restore process later.
- Verify your backups: Double-check that your backups are complete and error-free before proceeding with the wiping process. Take a moment to open some files from your backup and ensure that they open without any issues.
Backing up your data is an essential step in preparing to wipe your MacBook Air. It provides peace of mind knowing that your important files are securely stored and can be easily restored after the wiping process. By following these steps, you can safeguard your data and ensure a smooth transition to a clean MacBook Air.
Deauthorizing Your MacBook Air
Before wiping your MacBook Air, it is important to deauthorize it to prevent any licensing or activation issues when reinstalling apps or using them on a new device. Here’s how you can deauthorize your MacBook Air:
- Open iTunes: Launch iTunes on your MacBook Air.
- Sign in to your Apple ID: Click on “Account” in the menu bar and then select “Sign in.” Enter your Apple ID and password to proceed.
- Deauthorize your computer: In the iTunes menu bar, go to “Account” and choose “Authorizations.” Select “Deauthorize This Computer.” If prompted, enter your Apple ID and password again to confirm the deauthorization process.
- Repeat for other services: Some apps or services may require separate deauthorization. Check the documentation or support resources for those specific apps or services to ensure a complete deauthorization process.
Deauthorizing your MacBook Air ensures that you won’t encounter any authorization issues when reinstalling apps on the wiped MacBook Air or on a new device. By following these steps, you can easily deauthorize your MacBook Air and avoid potential complications during the restore process.
Disabling Find My MacBook
Before wiping your MacBook Air, it is important to disable the Find My feature to prevent anyone from tracking or accessing your device remotely. Here’s how you can disable Find My MacBook:
- Go to System Preferences: Click on the Apple menu in the top-left corner of your screen and select “System Preferences” from the drop-down menu.
- Click on Apple ID: In the System Preferences window, click on “Apple ID” to access your Apple ID settings.
- Access iCloud settings: In the Apple ID settings, click on “iCloud” to access the iCloud settings for your MacBook Air.
- Uncheck Find My Mac: In the iCloud settings, locate the “Find My Mac” option and uncheck the box next to it. You will be prompted to enter your Apple ID and password to confirm this action.
By disabling the Find My feature on your MacBook Air, you ensure that your location and personal information remain private during and after the wiping process. This extra layer of security prevents unauthorized access to your device and safeguards your privacy.
Erasing Your MacBook Air
Once you have taken the necessary precautions, it’s time to erase your MacBook Air and remove all the data from it. Follow these steps to securely erase your MacBook Air:
- Shut down your MacBook Air: Click on the Apple menu in the top-left corner of your screen and choose “Shut Down” from the drop-down menu. Wait for your MacBook Air to completely shut down before proceeding.
- Power on your MacBook Air: Press the power button to turn on your MacBook Air.
- Hold Command + R: Immediately press and hold the Command (⌘) + R keys on your keyboard. Keep holding the keys until you see the Apple logo or a spinning globe on the screen. This will boot your MacBook Air into Recovery Mode.
- Access Disk Utility: Once in Recovery Mode, select “Disk Utility” from the macOS Utilities window and click “Continue.”
- Select your startup disk: In Disk Utility, select your startup disk (usually named “Macintosh HD” or similar) from the list on the left side of the window.
- Erase the startup disk: Click on the “Erase” button at the top of the Disk Utility window. Follow the prompts to confirm and securely erase your startup disk. This process will permanently delete all data on your MacBook Air.
- Quit Disk Utility: Once the erase process is complete, quit Disk Utility to return to the macOS Utilities window.
By securely erasing your MacBook Air, you ensure that all your personal data is completely removed and cannot be recovered. This step is essential if you plan to sell, recycle, or transfer ownership of your MacBook Air. Make sure you have backed up all necessary data before proceeding with this step.
Reinstalling macOS
After securely erasing your MacBook Air, you will need to reinstall macOS to restore the operating system. Follow these steps to reinstall macOS on your MacBook Air:
- Make sure you are connected to the internet: Ensure that your MacBook Air is connected to a stable internet connection for the reinstallation process.
- Return to the macOS Utilities window: If you are still in the Disk Utility, click on the red “Close” button to return to the macOS Utilities window.
- Select “Reinstall macOS”: In the macOS Utilities window, click on “Reinstall macOS” and then click “Continue.”
- Follow the on-screen prompts: The reinstallation process will guide you through the necessary steps. Make sure to read and follow the instructions carefully.
- Choose your disk: Select your startup disk when prompted to choose the location where you want to install macOS. This is usually named “Macintosh HD” or similar.
- Wait for the installation to complete: The reinstallation process may take some time. Your MacBook Air will restart during the process, so be patient and allow it to complete.
- Set up macOS: Once the reinstallation is complete, follow the on-screen prompts to set up macOS. This will include selecting your language, time zone, creating a user account, and setting up various preferences.
Reinstalling macOS on your MacBook Air will bring back the fresh operating system along with the default apps and settings. It is important to reinstall macOS to ensure a clean and optimized system after wiping your MacBook Air.
Restoring Your Data
After reinstalling macOS on your MacBook Air, you can now proceed with restoring your data. Depending on how you backed up your data, there are a few different methods to restore it:
- Time Machine backup: If you used Time Machine to back up your data, connect the external hard drive that contains your Time Machine backup. During the macOS setup process, select the option to restore from a Time Machine backup. Follow the on-screen prompts to select the specific backup you want to restore and let the process complete.
- Cloud storage: If you used cloud storage services like iCloud, Google Drive, or Dropbox to back up your files, log in to your account and download the files you need. Organize and transfer them back to your MacBook Air manually.
- External storage: If you manually transferred your files to an external hard drive or USB flash drive, connect the drive to your MacBook Air and copy the files back to their respective locations on your computer.
Regardless of the method you used, take the time to carefully organize your restored data and ensure that everything is in its proper place. Check that all your documents, photos, music, and other files have been successfully restored before proceeding further.
By restoring your data, you ensure that all your important files and documents are back on your MacBook Air, allowing you to resume your work or personal activities seamlessly.
Resetting System Preferences
After reinstalling macOS and restoring your data, it is a good idea to reset your system preferences to ensure that your MacBook Air is optimized and set to your desired settings. Here’s how you can reset your system preferences:
- Open System Preferences: Click on the Apple menu in the top-left corner of your screen and select “System Preferences” from the drop-down menu.
- Reset individual preferences: Within the System Preferences window, navigate through each category (such as General, Display, Keyboard, etc.) and review the settings. If you want to reset any specific preference, simply click the “Reset” button usually located at the bottom of each preference pane.
- Reset all preferences (optional): If you want to reset all your system preferences to the default settings, navigate to the “User & Groups” preference pane and click on your username on the left side. Then, click on the “Login Items” tab and remove any startup items that you don’t need. Finally, log out of your user account and log back in to apply the changes.
Resetting your system preferences allows you to customize your MacBook Air according to your preferences, ensuring a seamless and personalized user experience. Take the time to review each preference and reset them as needed to enhance your productivity and enjoyment on your MacBook Air.
Signing Out of iCloud and Apple ID
When wiping your MacBook Air, it is important to sign out of iCloud and your Apple ID to ensure the security and privacy of your account. Here’s how you can sign out of iCloud and your Apple ID:
- Open System Preferences: Click on the Apple menu in the top-left corner of your screen and select “System Preferences” from the drop-down menu.
- Click on Apple ID: In the System Preferences window, click on “Apple ID” to access your Apple ID settings.
- Sign out of iCloud: In the Apple ID settings, click on “Overview” on the left side of the window. Then, click on the “Sign Out” button next to iCloud. Follow the prompts to sign out of iCloud and confirm all necessary details.
- Sign out of Apple ID: After signing out of iCloud, stay in the Apple ID settings and go to the “Media & Purchases” tab. Click on the “Sign Out” button next to Apple ID to complete the sign-out process.
By signing out of iCloud and your Apple ID, you remove any personal information and ensure that your account is no longer linked to your MacBook Air. This prevents unauthorized access to your account and protects your privacy.
Once you have signed out of iCloud and your Apple ID, you can securely proceed with wiping your MacBook Air, knowing that your personal information is safeguarded from any potential risks or unauthorized access.
Resetting Your MacBook Air
If you have completed all the necessary steps to back up your data, deauthorize your MacBook Air, disable Find My MacBook, erase your MacBook Air, reinstall macOS, restore your data, reset system preferences, and sign out of iCloud and your Apple ID, you are ready to perform a full reset of your MacBook Air. Here’s how you can reset your MacBook Air:
- Shut down your MacBook Air: Click on the Apple menu in the top-left corner of your screen and choose “Shut Down” from the drop-down menu. Wait for your MacBook Air to completely shut down before proceeding.
- Power on your MacBook Air: Press the power button to turn on your MacBook Air.
- Hold Command + R: Immediately press and hold the Command (⌘) + R keys on your keyboard. Keep holding the keys until you see the Apple logo or a spinning globe on the screen. This will boot your MacBook Air into Recovery Mode.
- Access Disk Utility: Once in Recovery Mode, select “Disk Utility” from the macOS Utilities window and click “Continue.”
- Select your startup disk: In Disk Utility, select your startup disk (usually named “Macintosh HD” or similar) from the list on the left side of the window.
- Erase the startup disk: Click on the “Erase” button at the top of the Disk Utility window. Follow the prompts to confirm and securely erase your startup disk. This process will permanently delete all data on your MacBook Air.
- Quit Disk Utility: Once the erase process is complete, quit Disk Utility to return to the macOS Utilities window.
- Select “Reinstall macOS”: In the macOS Utilities window, click on “Reinstall macOS” and then click “Continue.” Follow the on-screen prompts to reinstall macOS on your newly erased MacBook Air.
- Set up macOS: Once the reinstallation is complete, follow the on-screen prompts to set up macOS. This will include selecting your language, time zone, creating a user account, and setting up various preferences.
By performing a full reset of your MacBook Air, you are restoring it to its factory settings, ensuring that all data and settings are completely erased. This process is helpful when preparing to sell or transfer ownership of your MacBook Air or if you want to start fresh with a clean and optimized system.
Remember, resetting your MacBook Air is irreversible, so make sure you have successfully backed up your data and performed all the necessary steps to ensure a smooth restoration process.