
What is the Display Calibrator Assistant?
The Display Calibrator Assistant is a built-in tool on Mac computers that allows users to adjust and optimize the display settings for better color accuracy and visual quality. It is especially useful for graphic designers, photographers, and anyone who requires precise color representation on their Mac’s screen.
By calibrating your display using the Display Calibrator Assistant, you can ensure that the colors you see on your screen are consistent and accurate. This is important because each display has its own unique characteristics that can cause colors to appear differently. Calibrating your display helps to compensate for these variations, resulting in more realistic and vibrant visuals.
Moreover, a properly calibrated display can also reduce eye strain and fatigue, as it provides a more comfortable viewing experience. When the colors are accurately represented, you can work for longer periods without experiencing eye discomfort.
The Display Calibrator Assistant offers various calibration options to accommodate different users’ needs. It allows you to adjust the gamma level, white point, brightness, and contrast settings of your display. By fine-tuning these settings, you can achieve the desired color accuracy and visual performance.
Using the Display Calibrator Assistant is relatively easy and straightforward. It provides step-by-step instructions along with visual samples to help you make the necessary adjustments. Whether you are a professional graphic designer or an average user who wants optimal display quality, this tool can significantly enhance your viewing experience on a Mac.
Keep in mind that the Display Calibrator Assistant is available on all Mac computers and can be accessed through the System Preferences menu. So, if you haven’t used the tool before, now is the perfect time to give it a try and enjoy the benefits of a calibrated display.
Why is it important to calibrate your Mac’s display?
Calibrating your Mac’s display may not be a top priority for many users, but it plays a crucial role in ensuring accurate and consistent color representation. Here are some reasons why it is important to calibrate your Mac’s display:
1. Color Accuracy: Display calibration ensures that the colors you see on your screen are true to life and accurately represent the original content. This is especially important for professionals in creative fields, such as graphic designers and photographers, who rely on accurate color reproduction for their work. Calibrating your display helps eliminate any color shifts or inaccuracies, allowing you to trust what you see on your screen.
2. Consistency: Without calibration, your Mac’s display can exhibit inconsistency in color reproduction. This means that the same image or design may appear differently on other devices or when printed. By calibrating your display, you can achieve consistent color representation across various platforms, ensuring that your work looks the same to others as it does on your screen.
3. Improved Visual Experience: A calibrated display enhances your overall visual experience. With accurate color representation, images and videos appear more vibrant, realistic, and engaging. Whether you’re watching movies, editing photos, or browsing the web, a calibrated display ensures that you see content as intended, providing a more enjoyable and immersive viewing experience.
4. Eye Comfort: An improperly calibrated display can strain your eyes, leading to discomfort and fatigue. This is often caused by overly bright or harsh colors, incorrect contrast levels, or an inaccurate white point. By calibrating your Mac’s display, you can adjust these settings to ensure optimal eye comfort, making long hours of work or media consumption less tiring on your eyes.
5. Accurate Representation: Calibrating your display ensures that your work is represented as intended to your target audience. Whether you’re designing a website, creating digital artwork, or editing photographs, a calibrated display allows you to make informed decisions about color choices and adjustments. It ensures that the final output accurately represents your creative vision, regardless of the device or medium in which it is viewed.
How to Access the Display Calibrator Assistant
Accessing the Display Calibrator Assistant on your Mac is a straightforward process. Here are the steps to follow:
1. Open System Preferences: Click on the Apple menu in the top-left corner of your screen and select “System Preferences” from the drop-down menu. Alternatively, you can use the keyboard shortcut “Command + Spacebar” to open Spotlight and search for “System Preferences.”
2. Go to Displays: In the System Preferences window, locate and click on the “Displays” icon. It is represented by a computer monitor and is usually located in the Hardware section.
3. Access the Color Tab: Once you are in the Displays settings, navigate to the “Color” tab. It should be the second tab from the left.
4. Open the Display Calibrator: At the bottom of the Color tab, you will find a button labeled “Open Display Calibrator.” Click on this button to launch the Display Calibrator Assistant.
5. Authenticate if Required: Depending on your Mac’s security settings, you may be prompted to enter your administrator password before proceeding. This is to ensure that only authorized users can access and adjust the display settings.
6. Begin the Calibration Process: Once the Display Calibrator Assistant is open, you can start calibrating your Mac’s display by following the instructions provided. The Assistant will guide you through a series of steps to adjust various settings, such as gamma, white point, brightness, and contrast.
7. Save and Apply the Calibration: After completing the calibration process, you will be prompted to save the calibration profile. Give the profile a descriptive name and click on the “Continue” or “Apply” button to apply the calibration to your Mac’s display.
8. Optional: Fine-Tune Settings: If you feel that the initial calibration is not to your liking, you can return to the Display Calibrator Assistant and make further adjustments. Simply follow the same steps to access the Assistant and modify the settings as per your preference.
That’s it! You have successfully accessed the Display Calibrator Assistant and calibrated your Mac’s display for optimal color accuracy and visual performance.
Step 1: Selecting the Display to Calibrate
Before you can calibrate your Mac’s display using the Display Calibrator Assistant, you need to select the specific display you want to calibrate. This is particularly relevant if you have multiple external monitors connected to your Mac or if you’re using a MacBook with an external display.
Here’s how you can select the display to calibrate:
1. Open the Display Calibrator Assistant: Follow the steps mentioned in the previous section to access the Display Calibrator Assistant through the System Preferences menu.
2. Identify the Displays: Once the Display Calibrator Assistant is open, you will see a list of available displays connected to your Mac. This list includes built-in displays, external displays, and any connected projectors.
3. Choose the Display: From the list of displays, select the one you want to calibrate. You can identify the displays by their names, resolution, and arrangement. If you’re unsure about which display to choose, you can click on the “Identify” button, and a number will briefly appear on each display to help you identify them physically.
4. Check Mirror Displays: If you have enabled the “Mirror Displays” option, which duplicates the same content across all displays, the Display Calibrator Assistant will show only one display to calibrate. However, if you have disabled this option and are using extended desktop mode, you will see individual displays listed for calibration.
5. Confirm Selection: Once you have selected the display you want to calibrate, click on the “Continue” or “Calibrate” button to proceed to the next step of the calibration process.
It is important to select the appropriate display to calibrate, especially if you’re working with different models or if they display colors differently. Each display has its own unique characteristics that affect color reproduction, so calibrating each display individually ensures accurate and consistent results.
By carefully selecting the display to calibrate, you can ensure that calibrations are applied only to the desired display and avoid any unintended changes to other connected displays.
Step 2: Choosing the Calibration Type
Once you have selected the display you want to calibrate using the Display Calibrator Assistant on your Mac, the next step is to choose the calibration type that best suits your needs. The Display Calibrator Assistant provides several calibration options to accommodate different preferences and requirements.
Here’s how you can choose the calibration type:
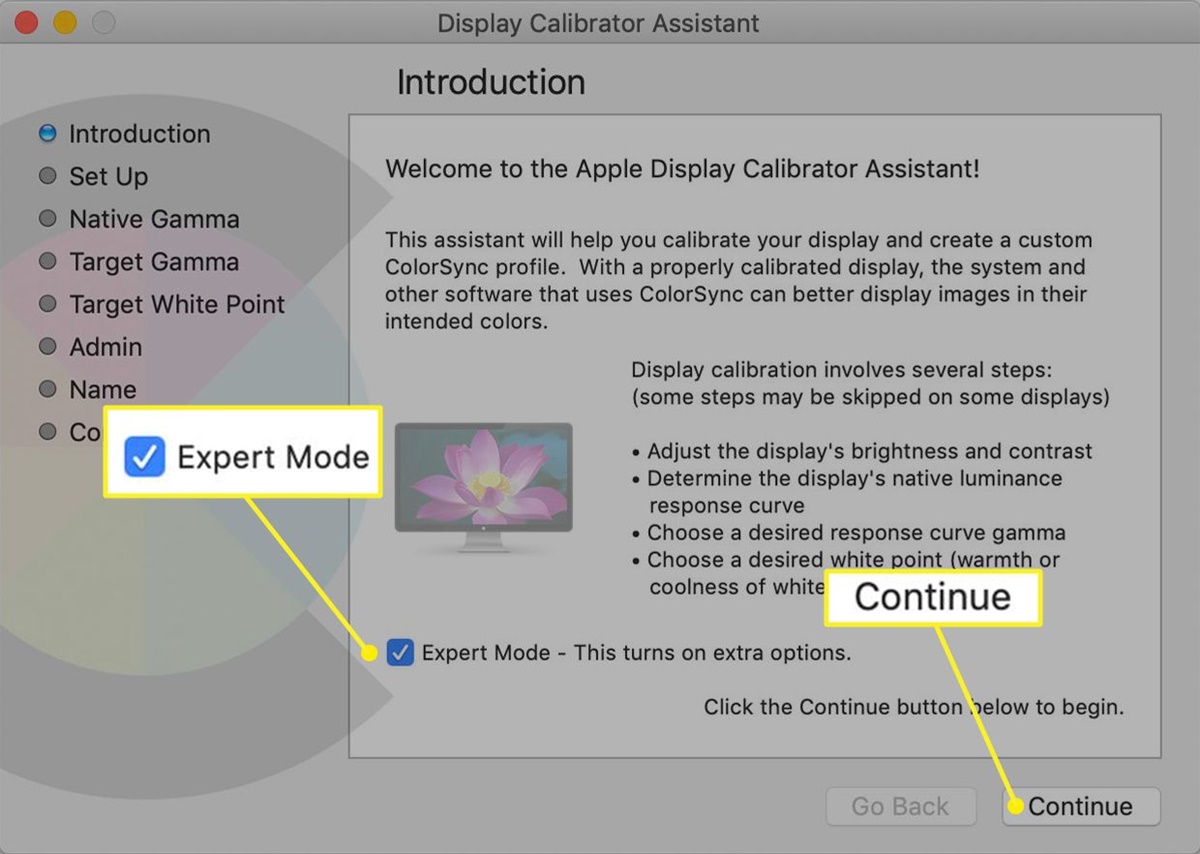
1. Identify the Calibration Options: After selecting the display, the Display Calibrator Assistant will present you with a list of available calibration types. These options may vary depending on the macOS version and the capabilities of your display. Generally, you will find calibration types such as “Easy” or “Expert.”
2. Easy Calibration: If you’re new to display calibration or prefer a quick and hassle-free calibration process, the Easy Calibration option may be suitable for you. This option provides a simplified and automated calibration process that adjusts the key display settings for improved color accuracy.
3. Expert Calibration: If you have experience with display calibration or require more control over the calibration process, the Expert Calibration option is ideal. It offers additional settings and customization options for fine-tuning the display’s gamma, white point, brightness, and contrast.
4. Review the Descriptions: To make an informed decision, read the descriptions provided for each calibration type. These descriptions give an overview of what to expect from each option and can help you choose the one that aligns with your needs.
5. Select the Calibration Type: Based on your understanding of the calibration types and your specific requirements, choose the calibration type that best suits your needs. Click on the corresponding option to proceed to the next step of the calibration process.
Remember, the choice of calibration type may vary depending on factors such as the purpose of calibration, the level of precision you desire, and your familiarity with display calibration. It’s important to choose a calibration type that aligns with your goals and comfort level to achieve the desired results.
By carefully selecting the calibration type, you can ensure that the display settings are adjusted in a way that best suits your requirements, resulting in improved color accuracy and visual performance.
Step 3: Adjusting the Target Gamma Level
After choosing the calibration type in the Display Calibrator Assistant, it’s time to adjust the target gamma level. Gamma refers to the relationship between the luminance input and output of your display. It affects how images and colors are displayed, particularly in terms of brightness and contrast.
Here’s how you can adjust the target gamma level:
1. Set the Target Gamma: The Display Calibrator Assistant will provide a slider or numeric input field to adjust the target gamma level. The gamma value typically ranges from 1.8 to 2.2, with 2.2 being the most common target value for Mac displays. However, the optimal gamma level may vary depending on your personal preference and the requirements of your work.
2. Understand Gamma Adjustments: Moving the slider or entering a gamma value affects the overall brightness and contrast of your display. A lower gamma value, such as 1.8, enhances shadow detail and provides a darker display appearance. On the other hand, a higher gamma value, like 2.2, increases overall brightness and contrast for a brighter display appearance.
3. Assess the Visual Samples: As you make adjustments to the gamma level, the Display Calibrator Assistant will display visual samples to help you evaluate the changes. These samples often include grayscale gradients or test images that showcase different shades of gray or color. Use these samples to determine which gamma level best represents the desired brightness and contrast for your work.
4. Aim for Balance: While adjusting the gamma level, aim for a balance that provides accurate representation without compromising detail. Look for a gamma value that maintains good visibility of shadows and highlights while preserving the intended visual experience. It’s important to strike a balance that enhances both image detail and overall vibrancy.
5. Fine-Tune if Necessary: If you’re not satisfied with the initial adjustment, you can fine-tune the gamma level to better meet your needs. Make small adjustments, reevaluate the visual samples, and iterate until you achieve a gamma value that suits your desired display appearance and enhances color accuracy.
Remember that the optimal gamma level can differ depending on various factors, such as ambient lighting conditions and personal preference. The goal is to adjust the gamma level to create a visually pleasing and accurate representation of your work on the display.
By carefully adjusting the target gamma level, you can ensure that your Mac’s display provides the desired brightness, contrast, and shadow detail for an enhanced viewing experience during your creative endeavors.
Step 4: Adjusting the White Point
After setting the target gamma level in the Display Calibrator Assistant, the next step is to adjust the white point. The white point refers to the color temperature of white displayed on your Mac’s screen. It determines the overall warmth or coolness of the display, affecting how colors are perceived.
Here’s how you can adjust the white point:
1. Understand Color Temperature: Color temperature is measured in Kelvin (K) and indicates the warmth or coolness of white light. Lower Kelvin values (e.g., 6500K) result in a cooler, bluish-white appearance, while higher Kelvin values (e.g., 5000K) create a warmer, yellowish-white appearance.
2. Set the White Point: The Display Calibrator Assistant will provide a slider or numerical input field to adjust the white point. It allows you to modify the color temperature and achieve the desired white balance. Experiment with different values and evaluate the visual samples to determine the ideal white point settings.
3. Evaluate the Visual Samples: As you make adjustments, the Display Calibrator Assistant will display visual samples that showcase different shades of white and other colors. Use these samples to assess the perceived warmth or coolness and how it affects the overall color reproduction. Look for a white point setting that aligns with your intended visual experience.
4. Consider the Surrounding Environment: Take into account the lighting conditions of your work environment when adjusting the white point. For example, if you work in a room with warm artificial lighting, a cooler white point may help balance the overall appearance. Conversely, if you work in a room with cooler natural light, a warmer white point can create a more visually appealing display.
5. Fine-Tune for Accuracy: If necessary, fine-tune the white point to achieve better color accuracy. Minor adjustments can make a significant difference in color representation. Continuously evaluate the visual samples and make small iterative changes until you achieve the desired white point settings.
Remember that the goal is to adjust the white point to create a visually pleasing and accurate representation of colors on your Mac’s display. By manipulating the white point, you can calibrate the display to match your preferences and ensure that colors are represented as accurately as possible.
By carefully adjusting the white point, you can achieve a visually balanced and accurate display that enhances the overall color reproduction and visual experience during your creative projects.
Step 5: Adjusting the Brightness and Contrast
Once you have set the target gamma level and adjusted the white point in the Display Calibrator Assistant, it’s time to fine-tune the brightness and contrast settings. These settings directly impact the overall visual quality and perception of images on your Mac’s display.
Here’s how you can adjust the brightness and contrast:
1. Understand Brightness and Contrast: Brightness and contrast are interrelated settings that affect the luminance levels and differentiation between dark and light areas on the display. Brightness controls the overall lightness or darkness of the screen, while contrast adjusts the distinction between the brightest and darkest elements.
2. Evaluate the Visual Samples: The Display Calibrator Assistant will provide visual samples that display various shades of gray or color to help you assess the impact of brightness and contrast adjustments. Pay close attention to the details and balance between light and dark elements in the samples.
3. Adjust Brightness: Use the provided slider or numerical input field to adjust the brightness setting. Increasing the brightness makes the display brighter, while decreasing it results in a darker display. Find a level that allows for clear visibility without causing discomfort or eye strain.
4. Fine-Tune Contrast: Similarly, adjust the contrast setting using the provided controls. Increasing the contrast enhances the distinction between light and dark elements, while reducing it reduces the differentiation. Aim for a contrast level that provides good separation between colors and tonal range without sacrificing detail or causing visual artifacts.
5. Find the Right Balance: When adjusting brightness and contrast, strive to strike a balance that suits your visual preference and the requirements of your work. Consider factors such as ambient lighting conditions, the type of content you typically work with, and any specific color or tonal characteristics you need to emphasize or maintain.
6. Revisit Previous Steps: Keep in mind that adjusting the brightness and contrast may have an impact on the previous calibration settings. After making changes, you may want to revisit the target gamma and white point adjustments to ensure all the elements work together harmoniously.
Remember, the goal is to achieve a balanced and visually appealing display that accurately represents your work. By adjusting the brightness and contrast, you can enhance the details, tonal range, and overall visual experience on your Mac’s display.
By carefully fine-tuning the brightness and contrast settings, you can optimize your display for maximum visual comfort, accurate color reproduction, and an enhanced viewing experience for all your creative endeavors.
Step 6: Saving and Applying the Calibration Profile
After adjusting the brightness and contrast to your satisfaction in the Display Calibrator Assistant, it’s time to save and apply the calibration profile to ensure that your preferred display settings are maintained.
Here’s how you can save and apply the calibration profile:
1. Save the Calibration Profile: The Display Calibrator Assistant will prompt you to save the calibration profile after completing the adjustment process. Give the profile a descriptive name that helps you identify it later. This allows you to easily select and apply the calibration settings whenever needed.
2. Consider Multiple Profiles: If you have multiple displays connected to your Mac or if you frequently switch between different calibration requirements, consider saving multiple calibration profiles. This allows you to quickly switch between different settings based on specific displays or work scenarios.
3. Apply the Calibration Profile: Once the calibration profile is saved, the Display Calibrator Assistant usually gives you the option to apply the profile immediately. Click on the “Apply” or “Continue” button to have the calibration settings take effect on your Mac’s display.
4. Check the Applied Profile: After applying the calibration profile, it’s a good practice to double-check that the desired settings have been properly applied to the display. Assess the visual appearance of content and compare it to your expectations and previous visualization experiences to validate the effectiveness of the calibration.
5. Revisit Calibration if Necessary: If you’re unsatisfied with the applied calibration profile, you can always return to the Display Calibrator Assistant and make further adjustments. Simply follow the same steps as before to access the Assistant and modify the settings as needed.
By saving and applying the calibration profile, you ensure that your preferred display settings are consistently maintained. This makes it convenient to switch between different calibration profiles and ensures that you can recreate the desired visual experience whenever you need it.
Remember to periodically review and reassess your calibration settings, as lighting conditions, display characteristics, and personal preferences may change over time. Regularly calibrating and updating the profiles will help maintain accurate color representation on your Mac’s display.
With the calibration profile saved and applied, you can enjoy an enhanced visual experience where colors are accurately represented, details are visible, and your creative work shines with precision.
Additional Tips for Calibrating Your Mac’s Display
Calibrating your Mac’s display is an essential step in ensuring accurate color representation and optimal visual experience. While following the steps provided in the Display Calibrator Assistant is crucial, here are some additional tips to further enhance your calibration process:
1. Calibrate Regularly: Display characteristics can change over time, so it’s important to calibrate your Mac’s display regularly. Schedule calibration sessions at regular intervals, such as every 1-3 months, to maintain consistent and accurate color representation.
2. Control Ambient Lighting: Ambient lighting significantly affects the perception of colors on your screen. Whenever possible, calibrate your display in a well-lit room with consistent lighting conditions. Avoid excessive glare or reflections on the screen to ensure accurate color evaluation during the calibration process.
3. Use a Colorimeter: Consider using a hardware colorimeter for display calibration. A colorimeter is a specialized device that measures color accurately and provides precise calibration results. It takes into account the unique characteristics of your display and can offer more accurate and granular adjustments compared to subjective visual evaluations.
4. Test Your Calibration: After applying the calibration profile, test it with various applications and content types to ensure compatibility and accuracy. View images, videos, and other media that require color accuracy, and check for any deviations or inconsistencies in color reproduction.
5. Consider External Factors: Keep in mind that the accuracy of color representation may vary across different devices and platforms. Consider the target audience of your work and the typical devices they use to ensure your calibration results in a consistent visual experience across different devices.
6. Document Your Calibration Settings: Keep a record of your calibration settings, including the target gamma level, white point, and any additional adjustments made. This documentation will serve as a reference for future sessions and help maintain consistency in your calibration process.
7. Update macOS and Display Drivers: Regularly update macOS and your display drivers to ensure compatibility and access to the latest calibration features and improvements. Updates can also address any potential bugs or issues that may affect color accuracy.
8. Seek Professional Assistance: If you require highly precise color calibration or work in industries where color accuracy is paramount, consider consulting with a professional color management specialist. They can provide expert guidance and ensure the highest level of accuracy in your display calibration.
By following these additional tips, you can further enhance your display calibration process and achieve more accurate and consistent color representation on your Mac’s display. Take the time to understand your specific calibration needs and make adjustments accordingly, resulting in a more visually pleasing and accurate representation of your creative work.