
What is Slide Sorter View in PowerPoint?
Slide Sorter View is one of the many viewing options available in Microsoft PowerPoint. It provides users with a convenient way to manage and organize their presentation slides. In this view, all the slides in a presentation are displayed as thumbnails, allowing users to easily rearrange them, apply transitions, and make other changes.
Unlike the default Normal View, where you can only see one slide at a time, Slide Sorter View provides a bird’s-eye view of your entire presentation. This makes it easier to get an overview of the structure and flow of your slides, and quickly identify any gaps or inconsistencies in your content.
Slide Sorter View is especially useful when working on larger presentations with many slides. It allows you to easily navigate through the slides, make bulk changes, and maintain a consistent visual theme throughout your presentation.
One of the key advantages of using Slide Sorter View is its versatility. It can be used for various tasks, including rearranging slides, selecting multiple slides, deleting slides, applying transitions, adding animation, and more. Whether you’re a student, a professional, or a speaker, Slide Sorter View can help you streamline your presentation creation process and create a visually appealing and engaging slideshow.
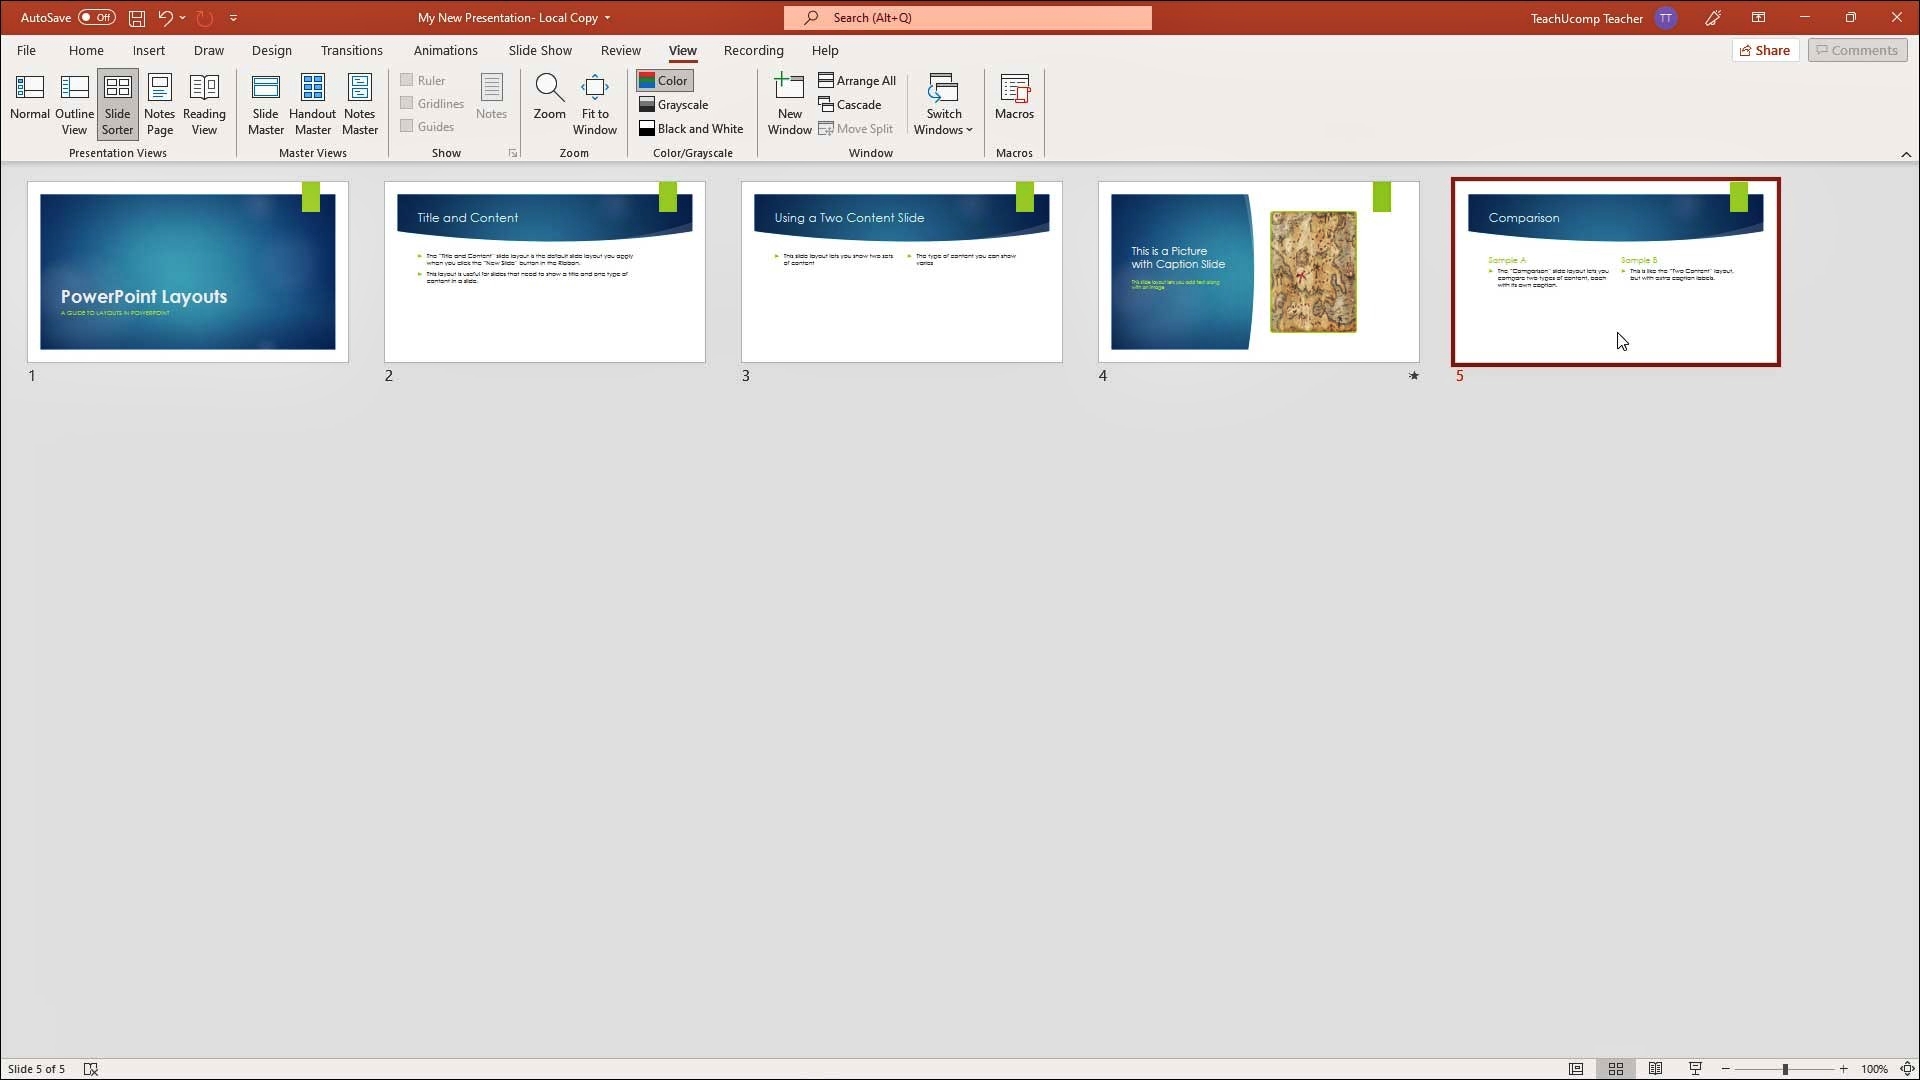
To access Slide Sorter View in PowerPoint, simply click on the “Slide Sorter” button located at the bottom of the screen, next to the Normal View and Outline View buttons. Alternatively, you can use the shortcut key “Alt + Shift + View” to switch to Slide Sorter View.
In the next sections, we will explore how to effectively navigate and utilize the various features of Slide Sorter View to optimize your PowerPoint presentations.
How to Access the Slide Sorter View
Accessing the Slide Sorter View in PowerPoint is a simple process. Follow the steps below to switch to Slide Sorter View and start managing your presentation slides.
- Open your PowerPoint presentation.
- Locate the navigation bar at the bottom of the PowerPoint window.
- Click on the “Slide Sorter” button, which is the middle button in the navigation bar. Alternatively, you can use the shortcut key “Alt + Shift + View” to switch to Slide Sorter View.
Once you have successfully accessed the Slide Sorter View, you will see all your slides displayed as thumbnails in a grid layout. Each thumbnail represents a slide in your presentation, allowing you to have a comprehensive overview of the entire presentation’s structure.
By default, PowerPoint displays a maximum of nine slides per row in the Slide Sorter View. If you have more slides than can fit in a single row, you can scroll horizontally to view the remaining slides.
The Slide Sorter View provides a wealth of options for managing and arranging your presentation slides. You can easily move slides around, duplicate them, delete unnecessary slides, and apply transitions or animations to individual slides or groups of slides.
Switching back to Normal View or any other view in PowerPoint is also a breeze. Just click on the corresponding view button in the navigation bar at the bottom of the PowerPoint window or use the appropriate keyboard shortcut.
Now that you know how to access the Slide Sorter View in PowerPoint, you can take full advantage of this powerful feature to better organize and enhance your presentations.
Navigating the Slide Sorter View
Navigating through the Slide Sorter View in PowerPoint is essential for efficiently managing and organizing your presentation slides. Here are some key techniques to help you navigate effortlessly in this view:
1. Scrolling: If you have more slides than can fit in the current view, PowerPoint allows you to scroll horizontally to see the additional slides. Use the scrollbar at the bottom or simply click and drag on the slide thumbnails to navigate through them.
2. Zooming: PowerPoint provides a zoom feature that allows you to adjust the size of the slide thumbnails in the Slide Sorter View. You can zoom in to get a closer look at individual slides or zoom out to see more slides on the screen. To zoom, go to the “View” tab, click on the “Zoom” button, and select the desired zoom level.
3. Slide Selection: As you navigate through the Slide Sorter View, you can select individual slides by clicking on their respective thumbnails. This allows you to make changes to specific slides or perform actions on selected slides, such as copying, deleting, or applying transitions.
4. Keyboard Shortcuts: Keyboard shortcuts can significantly speed up your navigation in the Slide Sorter View. For example, you can use the arrow keys to move between slides, the Ctrl key along with the arrow keys to extend the selection, and the Delete key to remove selected slides.
5. Slide Thumbnails: PowerPoint offers several options to enhance the visibility and organization of slide thumbnails. You can change the size of the thumbnails, add slide numbers, and even display additional slide information, such as slide titles or slide timings, to facilitate navigation.
6. Slide Sorting: The Slide Sorter View allows you to easily rearrange your slides by dragging and dropping the slide thumbnails to the desired position. This feature is particularly useful when you want to change the order of your slides or group related slides together.
By mastering these navigation techniques, you can efficiently move through your slides, make changes, and ensure a smooth flow for your presentation. Take advantage of these tools to create a visually appealing and well-organized slide deck.
Rearranging Slides in Slide Sorter View
The ability to rearrange slides is one of the key advantages of using Slide Sorter View in PowerPoint. This feature allows you to easily change the order of slides, group related slides together, and create a cohesive flow for your presentation. Here’s how you can rearrange slides in Slide Sorter View:
- Access the Slide Sorter View by clicking on the “Slide Sorter” button in the navigation bar at the bottom of the PowerPoint window.
- Once in Slide Sorter View, locate the slide thumbnails representing your presentation slides.
- To rearrange a slide, click and hold on its thumbnail and then drag it to the desired position. As you move the slide, you will see a preview of its new location highlighted in the slide grid.
- Release the mouse button to drop the slide into the new position. The other slide thumbnails will automatically adjust to accommodate the change.
- If you want to move multiple slides together, you can select them by holding down the Ctrl key and clicking on their respective thumbnails. Once selected, drag any of the selected slide thumbnails to move the entire group.
- You can also use the shortcut key combination Shift + Left-click to select a range of slides. This is particularly useful when you want to select a continuous range of slides for rearrangement.
By rearranging slides in Slide Sorter View, you can easily experiment with different sequencing options, test the flow of your presentation, and make adjustments as needed. This feature is particularly helpful when organizing complex presentations or when you need to adapt your slide order during a live presentation based on audience feedback or time constraints.
Remember to save your changes periodically to ensure that your slide arrangement is preserved. It’s also a good practice to review your slide order in Normal View to ensure a smooth and logical transition between slides.
Rearranging slides in Slide Sorter View provides you with the flexibility and control to create a compelling visual narrative for your presentation. Don’t be afraid to experiment and iterate until you find the perfect slide sequence that effectively conveys your message and engages your audience.
Selecting Multiple Slides in Slide Sorter View
Selecting multiple slides in Slide Sorter View allows you to perform actions on a group of slides simultaneously, such as applying transitions, changing slide layouts, or deleting slides. Here’s how you can easily select multiple slides in Slide Sorter View:
- Access the Slide Sorter View by clicking on the “Slide Sorter” button in the navigation bar at the bottom of the PowerPoint window.
- To select individual slides, hold down the Ctrl key on your keyboard and click on the thumbnails of the slides you want to select. The selected slides will be highlighted.
- If you want to select a continuous range of slides, click on the first slide thumbnail, hold down the Shift key, and click on the last slide thumbnail in the range. All the slides between the first and last selection will be included in the range selection.
- To select all slides in the presentation at once, use the shortcut Ctrl + A. This will automatically select all slide thumbnails in the Slide Sorter View.
Once you have selected multiple slides, you can perform various actions on them simultaneously. Here are some examples:
- Apply Transitions: With the selected slides, you can easily apply transitions to all of them simultaneously. Go to the “Transitions” tab, choose the desired transition effect, and it will be applied to all selected slides.
- Change Slide Layouts: If you want to change the layout of multiple slides, select them and go to the “Home” tab. In the “Slides” group, click the “Layout” button, and choose a new layout. The selected slides will then adopt the new layout.
- Delete Slides: To remove multiple slides from your presentation, select them in Slide Sorter View and press the Delete key on your keyboard. Confirm the deletion in the dialog box that appears.
Selecting multiple slides in Slide Sorter View offers a quick and efficient way to manage and modify specific sets of slides in your presentation. It saves time and makes it easier to maintain consistency across your slides.
Remember to save your presentation after making changes to ensure that your modifications are preserved. Regularly reviewing the selected slides in Normal View or in the Slide Pane will help you to verify the changes you have made and ensure that the flow of your presentation remains intact.
Utilize the ability to select multiple slides in Slide Sorter View to streamline your editing process and create a cohesive and visually appealing presentation.
Deleting Slides in Slide Sorter View
Deleting slides is a common task when creating and refining PowerPoint presentations. In Slide Sorter View, you can quickly and easily delete slides to remove unnecessary or unwanted content. Here’s how you can delete slides in Slide Sorter View:
- Access the Slide Sorter View by clicking on the “Slide Sorter” button in the navigation bar at the bottom of the PowerPoint window.
- Locate the slide thumbnail of the slide you want to delete.
- To delete a single slide, right-click on the slide thumbnail and select “Delete Slide” from the context menu. Alternatively, you can select the slide thumbnail and press the Delete key on your keyboard.
- If you want to delete multiple slides, hold down the Ctrl key on your keyboard and click on the thumbnails of the slides you want to delete. With the slides selected, right-click on any of the selected slides and choose “Delete Slide” from the context menu. Or, simply press the Delete key on your keyboard.
- A confirmation dialog will appear asking if you want to delete the selected slides. Click “Delete” to proceed with the deletion. Be cautious, as this action cannot be undone.
Deleting slides in Slide Sorter View provides a visual and efficient way to remove unnecessary content from your presentation. It is particularly useful when you want to remove slides that are repetitive, off-topic, or no longer relevant.
When deleting slides, be mindful of their impact on the overall flow and coherence of your presentation. Make sure that the deleted slides do not leave any gaps or result in a disjointed narrative. Reviewing your presentation in both Slide Sorter View and Normal View can help you assess the impact of deleting slides and make any necessary adjustments to maintain a seamless flow.
Remember to save your presentation after deleting slides to ensure that the changes are permanently applied. Regularly saving your work helps protect against any accidental deletions or modifications.
Deleting slides in Slide Sorter View is a simple and effective way to refine and streamline your PowerPoint presentation. Use this feature judiciously to create a clear and impactful message for your audience.
Applying Transitions in Slide Sorter View
Adding transitions to your PowerPoint slides can enhance the visual appeal and smoothness of your presentation. In the Slide Sorter View, you can conveniently apply transitions to individual slides or groups of slides. Here’s how you can apply transitions in Slide Sorter View:
- Access the Slide Sorter View by clicking on the “Slide Sorter” button in the navigation bar at the bottom of the PowerPoint window.
- Select the slide or slides to which you want to apply a transition. You can do this by clicking on the slide thumbnails. To select multiple slides, hold down the Ctrl key and click on the desired slide thumbnails.
- With the slide(s) selected, go to the “Transitions” tab on the PowerPoint ribbon. Here you will find a wide variety of transition effects to choose from.
- Click on the transition effect that you want to apply. A preview of the selected transition will be shown on the selected slide(s) in Slide Sorter View.
- To further customize the transition, you can set options such as duration, sound, and behavior by clicking on the “Effect Options” button in the “Transitions” tab.
- By default, the transition will be applied to the selected slides. If you want to apply the same transition to all slides in your presentation, click on the “Apply to All” button in the “Transitions” tab.
Transitions in Slide Sorter View provide you with a quick and efficient way to add professional and engaging effects to your presentation. It is important to use transitions strategically and sparingly to avoid distracting the audience from the actual content of your slides.
When applying transitions, keep in mind the overall theme and tone of your presentation. Choose transitions that align with your message and enhance the visual storytelling aspect of your slides. It is also advisable to maintain consistency in the choice of transition effects throughout your presentation to ensure a cohesive experience for your audience.
Remember to save your presentation after applying transitions to ensure that your modifications are preserved. Regularly reviewing and editing the slide transitions in Slide Sorter View will help you fine-tune the timing and flow of your presentation.
By judiciously adding transitions in Slide Sorter View, you can elevate the visual impact of your PowerPoint presentation and captivate your audience with smooth and professional slide transitions.
Adding Animation to Slides in Slide Sorter View
Adding animation to your slides can bring them to life and make your PowerPoint presentation more engaging and dynamic. In Slide Sorter View, you can easily apply animation effects to individual slides or groups of slides. Here’s how you can add animation to slides in Slide Sorter View:
- Access the Slide Sorter View by clicking on the “Slide Sorter” button in the navigation bar at the bottom of the PowerPoint window.
- Select the slide or slides to which you want to add animation. You can do this by clicking on the slide thumbnails. To select multiple slides, hold down the Ctrl key and click on the desired slide thumbnails.
- With the slide(s) selected, go to the “Animations” tab on the PowerPoint ribbon. Here you will find a wide range of animation effects to choose from.
- Click on the animation effect that you want to apply. A preview of the selected animation will be shown on the selected slide(s) in Slide Sorter View.
- To further customize the animation, you can set options such as timing, duration, and behavior by clicking on the “Animation Pane” button in the “Animations” tab.
- By default, the animation will be applied to the selected slides. If you want to apply the same animation to all slides in your presentation, click on the “Apply to All” button in the “Animations” tab.
Adding animation to slides in Slide Sorter View allows you to create impressive visual effects and capture your audience’s attention. However, it’s essential to use animation tastefully and purposefully to enhance your message rather than distract from it.
Consider the content and purpose of each slide when choosing the appropriate animation effects. Use animations to highlight key points, reveal information gradually, or add emphasis to specific elements on your slides. Avoid overusing animations, as it may result in a cluttered and distracting presentation.
Remember to save your presentation after adding animations to ensure that your changes are preserved. Regularly reviewing and editing the animations in Slide Sorter View will help you fine-tune the timing and synchronization of your presentation.
By strategically incorporating animation effects in Slide Sorter View, you can create a visually captivating PowerPoint presentation that engages your audience and effectively conveys your message.
Applying Slide Layouts in Slide Sorter View
Slide layouts play a crucial role in organizing the content and visual elements of your PowerPoint presentation. In Slide Sorter View, you can easily apply different slide layouts to individual slides or groups of slides. Here’s how you can apply slide layouts in Slide Sorter View:
- Access the Slide Sorter View by clicking on the “Slide Sorter” button in the navigation bar at the bottom of the PowerPoint window.
- Select the slide or slides to which you want to apply a new layout. You can do this by clicking on the slide thumbnails. To select multiple slides, hold down the Ctrl key and click on the desired slide thumbnails.
- With the slide(s) selected, go to the “Home” tab on the PowerPoint ribbon. Here you will find various options for slide layouts.
- Click on the “Layout” button in the “Slides” group. A drop-down menu with different slide layout options will appear.
- Select the desired slide layout from the available options. The selected slide(s) will automatically adopt the new layout, updating the positioning of placeholders, text boxes, and other content elements.
Applying slide layouts in Slide Sorter View allows you to quickly modify the structure and design of your slides. Each slide layout is designed to accommodate specific types of content, such as titles, bullet points, images, or charts, ensuring consistency and ease of editing throughout your presentation.
When applying slide layouts, consider the content and purpose of each slide. Choose a layout that best suits the type of information you want to present on that particular slide. It’s also a good idea to maintain a consistent layout scheme throughout your presentation to establish a cohesive visual identity.
Remember to save your presentation after applying slide layouts to ensure that your changes are preserved. Regularly reviewing and adjusting the slide layouts in Slide Sorter View will help you maintain a clear and organized structure for your presentation.
By utilizing the slide layout features in Slide Sorter View, you can efficiently create and customize the structure and design of your PowerPoint slides, ensuring a visually appealing and well-organized presentation.
Changing Slide Orientation in Slide Sorter View
Changing the slide orientation can be necessary when you want to switch between portrait and landscape layouts for specific slides in your PowerPoint presentation. In Slide Sorter View, you can easily modify the slide orientation for individual slides or groups of slides. Here’s how you can change slide orientation in Slide Sorter View:
- Access the Slide Sorter View by clicking on the “Slide Sorter” button in the navigation bar at the bottom of the PowerPoint window.
- Select the slide or slides for which you want to change the orientation. You can do this by clicking on the slide thumbnails. To select multiple slides, hold down the Ctrl key and click on the desired slide thumbnails.
- With the slide(s) selected, go to the “Slide Size” button in the “Design” tab on the PowerPoint ribbon.
- Click on the “Slide Size” button to open a drop-down menu with different slide size options.
- From the drop-down menu, select either “Standard (4:3)” or “Widescreen (16:9)” to set the slide orientation accordingly.
- The selected slide(s) will automatically adjust to the new slide orientation, resizing and repositioning elements as needed.
Changing slide orientation in Slide Sorter View allows you to accommodate different types of content and formats within your PowerPoint presentation. It provides flexibility in adapting your presentation to different display devices or aligning with specific design requirements.
When changing slide orientation, be mindful of the content and layout of each slide. Consider the visuals, text, and overall design, ensuring that they are optimized for the chosen orientation. Make any necessary adjustments to maintain a visually appealing and cohesive presentation.
Remember to save your presentation after changing the slide orientation to ensure that your modifications are preserved. Regularly reviewing and editing the slide orientation in Slide Sorter View will help you maintain a consistent and professional look for your slides.
By utilizing the slide orientation feature in Slide Sorter View, you can easily adapt your PowerPoint presentation to different layout requirements and create customized slides to suit your specific needs.
Using Slide Sorter View with Multiple Monitors
Using multiple monitors can significantly enhance your PowerPoint experience, providing extra space and flexibility for designing and delivering presentations. In Slide Sorter View, you can take advantage of multiple monitors to improve your workflow and deliver a seamless presentation. Here’s how you can utilize Slide Sorter View with multiple monitors:
Prepare your setup:
1. Connect the additional monitor(s) to your computer or laptop. Ensure that the monitors are properly detected and set up as an extended display.
2. Open your PowerPoint presentation and enter Slide Show mode.
3. In the Slide Show tab, click on the “Set Up Slide Show” button. In the dialogue box that appears, select “Browsed by an Individual (Window)” and choose “Use Slide Show on Monitor X” where X represents the number of the monitor you want to use for the Slide Show.
4. Click on the “OK” button to save and apply the changes.
Using Slide Sorter View on the second monitor:
1. With the extended display set up, enter Slide Sorter View by clicking on the “Slide Sorter” button in the navigation bar at the bottom of the PowerPoint window.
2. Drag the Slide Sorter window onto the second monitor. You can do this by clicking on the title bar of the Slide Sorter window and dragging it to the desired monitor.
3. In Slide Sorter View, you can now navigate and manage your slides on the second monitor. This allows you to have a dedicated space for organizing your slides, while keeping the active slide visible on the primary monitor during the presentation.
Performing actions on the second monitor:
1. In Slide Sorter View, you can make changes to your slides, such as rearranging the slide order, selecting multiple slides, applying transitions, or adding animations, directly on the second monitor.
2. Utilize the additional screen space to have a comprehensive view of your entire presentation and make adjustments as needed.
3. You can also use the second monitor to preview your presentation, ensuring that the slides are displayed as intended and any animations or transitions are seamlessly executed.
By using Slide Sorter View with multiple monitors, you can optimize your workflow, increase productivity, and deliver a polished and well-organized presentation. Having a separate monitor dedicated to Slide Sorter View allows for efficient slide management and a smoother presentation experience.
Using Slide Sorter View for Presentation Rehearsal
Slide Sorter View is a valuable tool for rehearsing your PowerPoint presentation and ensuring a smooth and well-timed delivery. It allows you to have a comprehensive overview of your slides, practice the flow of your presentation, and make necessary adjustments. Here’s how you can effectively use Slide Sorter View for presentation rehearsal:
Preparing for rehearsal:
1. Access Slide Sorter View by clicking on the “Slide Sorter” button in the navigation bar at the bottom of the PowerPoint window.
2. Familiarize yourself with the content and sequence of your slides. Take note of any crucial points, transitions, or animations that require special attention during the rehearsal.
Navigating and rehearsing in Slide Sorter View:
1. Start the presentation by clicking on the “From Beginning” button in the Slide Show tab or pressing the shortcut key “F5”.
2. As you go through each slide in the Slide Show mode, follow along in Slide Sorter View. Use the navigation tools, such as arrow keys or mouse clicks, to move forward or backward through the slides.
3. Observe the timing and pacing of your presentation. Pay attention to any slides that require more explanation or slides that need to be shown for a shorter duration.
4. Take note of any necessary adjustments, such as reordering slides, modifying animations, or refining transitions, that you identify during the rehearsal. You can make these changes directly in Slide Sorter View.
Gauging the overall timing:
1. After completing the rehearsal, review the timing of your presentation as shown in Slide Sorter View. Pay attention to the total duration, and assess whether it aligns with your intended time frame.
2. Identify any areas where you may need to speed up or slow down your delivery to ensure that you stay within the allotted time for your presentation.
3. Use Slide Sorter View to make necessary adjustments to the duration of slides, transitions, or animations to achieve a balanced and well-paced presentation.
Using Slide Sorter View for presentation rehearsal allows you to gain a deeper understanding of the flow and timing of your presentation. It helps you identify areas for improvement, refine your delivery, and ensure that your message is effectively conveyed to your audience.
Remember to save your presentation after making any adjustments in Slide Sorter View to ensure that your changes are preserved for future rehearsals or actual presentations.
By utilizing Slide Sorter View during presentation rehearsal, you can refine your delivery, improve timing, and deliver a polished and confident presentation that engages and captivates your audience.
Tips and Tricks for Using Slide Sorter View
Slide Sorter View in PowerPoint is a powerful tool that offers a range of features to enhance your presentation creation process. Here are some useful tips and tricks to make the most out of Slide Sorter View:
- Keyboard Shortcuts: Familiarize yourself with keyboard shortcuts to navigate and perform actions more efficiently in Slide Sorter View. For example, use the arrow keys to move between slides, Ctrl+click to select multiple slides, and Ctrl+A to select all slides.
- Drag and Drop: Take advantage of the drag and drop functionality in Slide Sorter View. You can easily rearrange slides by clicking and dragging the thumbnails to the desired position. This provides a quick and intuitive way to adjust the order of your slides.
- Thumbnail Zoom: Zooming in on slide thumbnails can help you get a closer look at the content and details. Use the zoom feature in Slide Sorter View to closely examine slides, especially when making adjustments to alignment, content placement, or fine-tuning animations.
- Slide Organizer: Utilize Slide Sorter View as a slide organizer. It allows you to see the flow and structure of your presentation at a glance. By visually analyzing the arrangement, you can identify any gaps, redundancies, or areas for improvement in your content.
- Grouping Slides: Group related slides together in Slide Sorter View. This can make it easier to manage and apply changes to specific sections of your presentation. Select and drag a group of slides to reposition them together or to apply transitions and animations to the entire group.
- Collaboration: Slide Sorter View is a useful mode for collaborating with others in a presentation workflow. It allows team members to easily review and provide feedback on slide order, content, and overall presentation flow. Share your Slide Sorter View with colleagues or stakeholders to gather valuable insights.
- Preview Transitions and Animations: Take advantage of Slide Sorter View to preview transitions and animations. This helps you fine-tune the timing and effects of each animation, ensuring they are visually appealing and seamlessly integrated into your presentation.
- Review Slide Content: Use Slide Sorter View as an opportunity to review and proofread your slide content. Seeing the content in a different layout can help you catch typos, formatting errors, or inconsistencies that may have been overlooked in other views.
Experiment and explore the various functionalities and features available in Slide Sorter View to discover your own tips and tricks that align with your presentation needs. Remember to save your presentation periodically to preserve any changes made in Slide Sorter View.
By leveraging these tips and tricks in Slide Sorter View, you can improve your workflow, enhance collaboration, and create visually compelling and well-organized presentations that leave a lasting impact on your audience.