
Running Chkdsk from the Command Prompt
The Chkdsk command, short for “Check Disk,” is a powerful tool in Windows that allows you to scan and repair errors on your hard drive. By using the Command Prompt, you can easily run Chkdsk and take advantage of its various options and parameters. Here’s how to do it.
First, open the Command Prompt by pressing the Windows key + R to open the Run dialog box, then type “cmd” and hit Enter. Alternatively, you can search for “Command Prompt” in the Start menu or click on the Command Prompt shortcut in the Windows System folder.
Once the Command Prompt window is open, you can run Chkdsk by typing the command “chkdsk” followed by the drive letter of the disk you want to scan. For example, if you want to check the C: drive, you would type “chkdsk C:”. Press Enter to run the command.
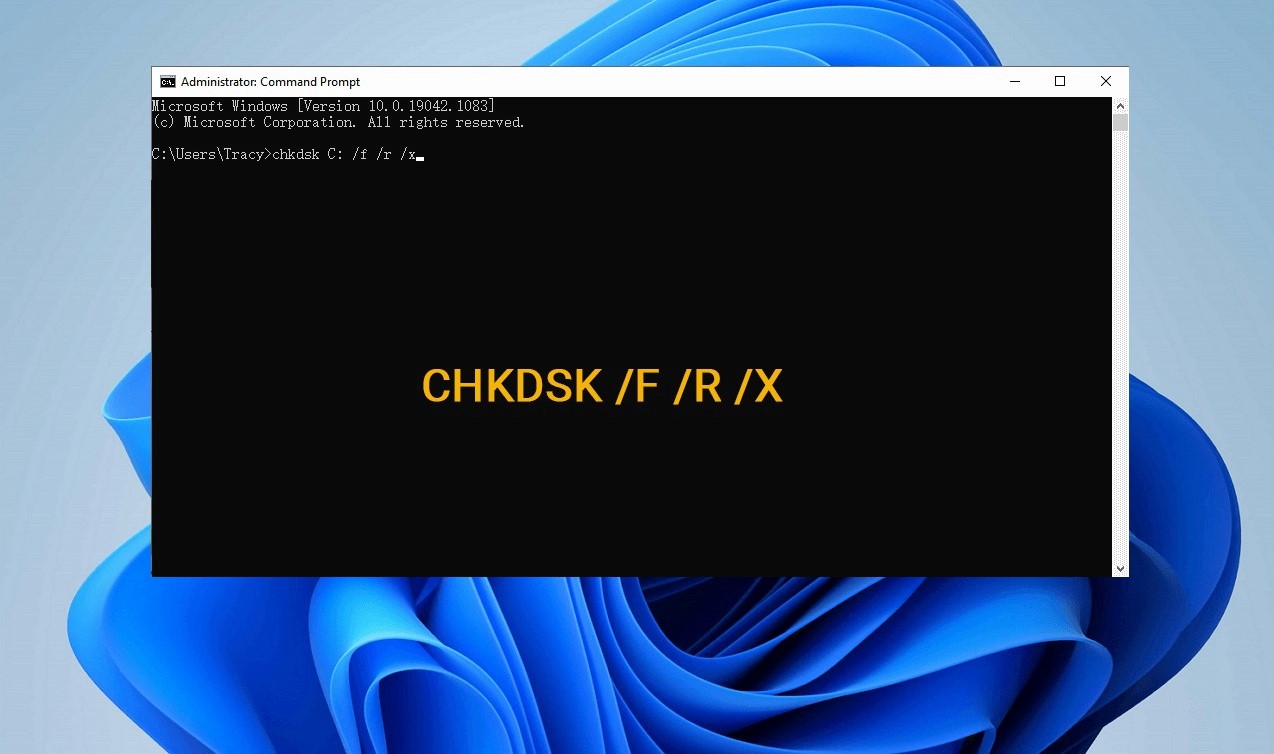
By default, Chkdsk will scan the drive and display a summary of the results, including any errors or issues it finds. If you want Chkdsk to fix any errors it detects, you can add the “/f” parameter to the command. This will automatically repair any problems on the drive.
For more advanced options, you can use additional parameters with the Chkdsk command. For example, the “/r” parameter tells Chkdsk to locate bad sectors on the drive and recover any readable information from them. The “/x” parameter forces the drive to dismount before the scan begins, allowing Chkdsk to fix errors that are otherwise inaccessible.
It’s worth noting that running Chkdsk can take a significant amount of time, especially if you have a large hard drive or if there are many errors to fix. It’s recommended to let the scan complete uninterrupted and avoid using your computer during the process.
In summary, using the Chkdsk command from the Command Prompt is a simple yet effective way to scan and repair errors on your hard drive. Whether you need to fix file system errors, recover lost data, or repair bad sectors, Chkdsk can help ensure the health and integrity of your storage devices.
Checking a Specific Drive with Chkdsk
When using the Chkdsk command, you have the option to check and repair a specific drive on your computer. This is particularly useful if you suspect that a particular drive is experiencing issues or if you want to avoid scanning the entire system. Here’s how you can check a specific drive using Chkdsk.
To get started, open the Command Prompt as an administrator. You can do this by right-clicking on the Start button and selecting “Command Prompt (Admin)” from the menu. Alternatively, you can search for “Command Prompt” in the Start menu, right-click on it, and choose “Run as administrator.”
Once the Command Prompt window is open, you can run Chkdsk on a specific drive by typing the command “chkdsk” followed by the drive letter of the disk you want to check. For instance, if you want to check the D: drive, you would type “chkdsk D:”. Press Enter to initiate the scan.
Chkdsk will start examining the specified drive for any errors or issues. It will display a detailed report, including information about the file system, the total disk space, and the number of bad sectors, if any. Additionally, Chkdsk will highlight any errors it discovers and attempt to fix them if you’ve used the “/f” parameter.
Keep in mind that running Chkdsk on a drive may require the disk to be dismounted, meaning that it will not be accessible until the scan is complete. If you receive a message asking whether you want to schedule a scan for the next system restart, type “Y” and press Enter. This will prompt Chkdsk to run the next time you restart your computer.
It’s important to note that Chkdsk should be used with caution, especially if you’re not experiencing any specific issues with the drive. Running Chkdsk unnecessarily or interrupting the scan process can potentially result in data loss or further drive damage. If you’re unsure, it’s always a good idea to consult with a professional or seek guidance from the drive’s manufacturer.
To sum up, checking a specific drive with Chkdsk allows you to focus on diagnosing and fixing issues with a particular disk. By using the appropriate drive letter in the Chkdsk command, you can efficiently scan and repair errors, ensuring the optimal functioning of your storage devices.
Using the Chkdsk Command with Special Parameters
In addition to the basic functionality of scanning and repairing errors on your hard drive, the Chkdsk command in Windows offers several special parameters that allow you to customize and enhance its capabilities. These parameters provide more control over the scanning and repair process, allowing you to address specific issues or optimize the results. Here are some of the most useful special parameters you can use with Chkdsk.
One of the most commonly used parameters is “/f,” which stands for “fix.” Adding this parameter to the Chkdsk command instructs the tool to automatically fix any errors it finds during the scan. This can be particularly helpful if you want to avoid manual intervention and let Chkdsk handle the repairs on its own.
Another useful parameter is “/r,” which stands for “recover.” When used with Chkdsk, this parameter tells the tool to locate and recover readable information from bad sectors on the hard drive. Bad sectors are areas on the disk that can’t be written to or read from, and recovering data from them helps prevent potential data loss.
For advanced users, the “/x” parameter can be valuable. This parameter is specifically designed to dismount the drive before running Chkdsk, enabling the tool to fix errors that are otherwise inaccessible. Keep in mind that using this parameter will force a restart of the computer to complete the scan and repair process.
If you suspect that your hard drive may have physical issues, such as mechanical problems or impending failure, the “/b” parameter can be beneficial. This parameter directs Chkdsk to re-evaluate the allocation table entries and fix any corrupt entries, improving the overall stability and performance of the drive.
Additionally, the “/scan” parameter allows Chkdsk to scan for and repair file system errors on a volume without any changes. This parameter is typically used in conjunction with other parameters to gather information about the drive and its file system without making any modifications.
It’s essential to remember that using these special parameters requires administrative privileges. Therefore, it’s recommended to run Chkdsk from an elevated Command Prompt by right-clicking on the Command Prompt shortcut and selecting “Run as administrator.”
To summarize, by using special parameters with the Chkdsk command, you can customize and optimize the scanning and repair process for your hard drive. Whether you need to fix errors, recover data from bad sectors, or evaluate the overall health of your drive, these parameters offer additional control and functionality to address specific issues effectively.
Fixing File System Errors with Chkdsk
File system errors can occur on your hard drive due to various reasons, such as improper shutdowns, power outages, or hardware issues. These errors can lead to data corruption and system instability. Fortunately, the Chkdsk command in Windows is a powerful tool that can help you fix these file system errors and restore the integrity of your storage device. Here’s how you can use Chkdsk to fix file system errors.
To begin, open an elevated Command Prompt by right-clicking on the Start button and selecting “Command Prompt (Admin)” from the menu. Alternatively, you can search for “Command Prompt” in the Start menu, right-click on it, and choose “Run as administrator.”
Once the Command Prompt is open, type the command “chkdsk” followed by the drive letter of the disk you want to scan and repair. For example, to fix errors on the C: drive, you would type “chkdsk C:” and press Enter. Chkdsk will then start analyzing the drive for file system errors.
During the scan, Chkdsk will examine the disk’s file structure and identify any inconsistencies or errors. It will display a detailed report, including the number of file records processed, the total disk space, and the number of errors found. If Chkdsk detects any errors, it will automatically attempt to repair them.
If you want Chkdsk to fix the file system errors it encounters, you can add the “/f” parameter to the command. For example, the command “chkdsk C: /f” will not only scan the C: drive for errors but also automatically fix them. Chkdsk may prompt you to restart your computer to initiate the repair process.
During the repair process, Chkdsk may move corrupted files to a separate folder called Found.000 on the root of the drive. It’s worth noting that you should review the contents of this folder after the repair to ensure that no critical files have been lost or damaged. If necessary, you can attempt to recover files from this folder by moving them back to their original locations.
Once Chkdsk has completed the repair process, it’s a good idea to restart your computer to ensure that any changes made by the tool take effect. After the restart, the file system errors should be fixed, and your storage device should be in a stable and healthy state.
To conclude, using Chkdsk to fix file system errors is a straightforward and effective way to ensure the integrity of your hard drive. By running Chkdsk with the appropriate parameters, you can identify and fix file system errors, preventing data corruption and maintaining the overall stability of your computer system.
Repairing Bad Sectors on a Hard Drive with Chkdsk
Bad sectors are areas on a hard drive that cannot be read from or written to, potentially leading to data loss or system instability. Detecting and repairing these bad sectors is crucial to maintain the health and functionality of your storage device. Fortunately, the Chkdsk command in Windows provides a way to address this issue. Here’s how you can use Chkdsk to repair bad sectors on a hard drive.
To begin, open an elevated Command Prompt by right-clicking on the Start button and selecting “Command Prompt (Admin)” from the menu. Alternatively, you can search for “Command Prompt” in the Start menu, right-click on it, and choose “Run as administrator.”
Once the Command Prompt window is open, type the command “chkdsk” followed by the drive letter of the disk you want to scan and repair. For example, to repair bad sectors on the C: drive, you would type “chkdsk C:” and press Enter. Chkdsk will then start analyzing the drive for bad sectors.
During the scan, Chkdsk will identify any bad sectors on the hard drive and attempt to recover any readable information from them. This process may take some time, especially if there are many bad sectors or if the drive is large.
If Chkdsk detects bad sectors on the drive, it will automatically mark those sectors as unusable and attempt to move any affected files to healthy areas of the drive. By doing so, Chkdsk helps prevent further data loss and allows you to continue using the drive with improved stability.
It’s worth noting that Chkdsk may not be able to repair all bad sectors on a hard drive. If the drive has a significant number of bad sectors or if the damage is severe, professional data recovery services or drive replacement may be necessary.
To enhance the chances of repairing bad sectors, you can add the “/r” parameter to the Chkdsk command. For example, the command “chkdsk C: /r” will not only scan the C: drive but also attempt to recover readable information from bad sectors. Keep in mind that this parameter will increase the overall scanning and repair time.
After Chkdsk has completed the repair process for bad sectors, it’s recommended to restart your computer to ensure that any changes made by the tool take effect. Once the system boots up again, you should notice improved stability and functionality on the repaired hard drive.
In summary, using the Chkdsk command to repair bad sectors on a hard drive is an effective method to maintain the health and integrity of your storage device. By allowing Chkdsk to detect and recover readable information from bad sectors, you can minimize the risk of data loss and ensure the continued performance of your hard drive.
Recovering Lost Data with Chkdsk and Data Recovery Software
Losing important data due to accidental deletion or hard drive errors can be a distressing experience. However, if you’ve run the Chkdsk command in Windows and it has repaired errors on your hard drive, there is still a chance to recover some of the lost data. In combination with data recovery software, Chkdsk can help you retrieve files that have been marked as inaccessible or moved during the repair process. Here’s how you can attempt to recover lost data using Chkdsk and data recovery software.
After running Chkdsk and allowing it to repair errors on your hard drive, open File Explorer and navigate to the drive or folder where the lost files were originally located. Look for a folder named “Found.000” or “Found.001” on the root of the drive. These folders are typically created by Chkdsk during the repair process and contain recovered files and fragments.
Open the “Found.000” or “Found.001” folder and review its contents. Chkdsk may have renamed the recovered files, giving them unique numerical names. Sort the files by date modified to identify the most recently recovered files, which are likely the ones you are looking for. Copy these files to a different location to prevent any potential data loss or overwriting.
However, keep in mind that the files recovered by Chkdsk may be incomplete or corrupted, depending on the extent of the damage to the hard drive. To increase the chances of successful data recovery, it is recommended to use professional data recovery software. These tools are specifically designed to scan for lost or deleted files and have advanced algorithms to recover and reconstruct the data.
There are various data recovery software options available, both free and paid. Research and choose a reputable data recovery program that suits your needs and supports the file systems and formats of the lost files. Follow the instructions provided by the software to scan the affected drive and recover the lost data. Avoid installing the software on the same drive from which you are attempting to recover the files to prevent overwriting or further damage to the data.
It’s important to note that the success rate of data recovery depends on various factors, including the extent of damage to the hard drive and how much data has been overwritten. In some cases, professional data recovery services may be necessary if the drive is physically damaged or the data is highly valuable.
In summary, if you’ve lost data due to hard drive errors and have run the Chkdsk command to repair the drive, there is a possibility of recovering some of the lost files. By accessing the “Found.000” or “Found.001” folder and using data recovery software, you can maximize your chances of retrieving the lost data. However, it is important to act quickly, as further usage of the affected drive may overwrite the lost files and make recovery more difficult or impossible.
Schedule Chkdsk to Run Automatically on Windows Startup
Regularly running Chkdsk on your computer’s hard drive is essential to maintain its health and prevent potential issues. One way to ensure that Chkdsk is performed regularly is by scheduling it to run automatically every time Windows starts up. This saves you the hassle of manually running the command and helps in detecting and fixing errors promptly. Here’s how you can schedule Chkdsk to run automatically on Windows startup.
To begin, open an elevated Command Prompt by right-clicking on the Start button and selecting “Command Prompt (Admin)” from the menu. Alternatively, you can search for “Command Prompt” in the Start menu, right-click on it, and choose “Run as administrator.”
Next, type the command “chkntfs /x C:” and press Enter. This command ensures that Chkdsk doesn’t run during every startup, as it can be time-consuming. Replace the “C:” with the drive letter of the hard drive you want to schedule Chkdsk for.
Once you’ve disabled the automatic Chkdsk on startup, you can proceed to schedule it. Enter the command “chkdsk /f C:” and press Enter. This command initiates a Chkdsk scan and fixes any errors it detects on the specified drive.
If the drive you want to schedule Chkdsk for is the system drive (usually C:), Command Prompt will display a message stating that the operation cannot be performed because the volume is in use. Press the “Y” key and hit Enter to schedule Chkdsk to run on the next restart.
Once scheduled, restart your computer. Windows will begin the Chkdsk scan and repair process during the startup. It may take several minutes, depending on the size of your hard drive and the number of errors detected. It’s important to allow the scan to complete without interruption.
After the Chkdsk scan finishes, your computer will restart normally, and any errors found during the scan will be corrected. The automatic Chkdsk scan on startup ensures the ongoing health and stability of your hard drive.
It’s worth noting that scheduling Chkdsk to run on startup can be particularly useful for system drives that are used regularly and are prone to errors. However, if you have secondary drives or external storage devices, you can also schedule Chkdsk for those drives by replacing the “C:” in the command with their respective drive letters.
To summarize, scheduling Chkdsk to run automatically on Windows startup is a convenient way to ensure regular and timely error checking and repair for your hard drive. By following the steps outlined above, you can set up Chkdsk to scan and fix any issues during the startup process, contributing to the overall health and performance of your computer system.
Using Chkdsk to Repair Errors on External Hard Drives or USB Drives
External hard drives and USB drives are susceptible to errors just like internal hard drives. These errors can impact data integrity and cause performance issues. Thankfully, Windows provides the Chkdsk command to help identify and repair errors on external drives. Here’s how you can use Chkdsk to repair errors on external hard drives or USB drives.
Connect the external hard drive or USB drive to your computer. Ensure that it is properly recognized and accessible in Windows File Explorer before proceeding with the Chkdsk command. Also, make sure you have the necessary administrative privileges to execute Chkdsk.
To begin, open an elevated Command Prompt by right-clicking on the Start button and selecting “Command Prompt (Admin)” from the menu. Alternatively, you can search for “Command Prompt” in the Start menu, right-click on it, and choose “Run as administrator.”
Once the Command Prompt is open, type the command “chkdsk” followed by the drive letter assigned to the external or USB drive. For example, if the drive appears as E:, you would type “chkdsk E:” and press Enter. Chkdsk will start scanning the drive for errors.
During the scan, Chkdsk will examine the file system and detect any issues or inconsistencies. It will provide a detailed report showing the number of file records processed, free space, and any issues found. It will also automatically attempt to repair any errors it encounters.
If Chkdsk finds any errors on the external or USB drive, it will prompt you to fix them. Press “Y” and hit Enter to allow Chkdsk to repair the errors. If requested, restart your computer to complete the repair process. It’s crucial to let Chkdsk finish the repair without interruption.
After Chkdsk completes its repairs, reconnect the external or USB drive to your computer and verify if the errors have been resolved. The drive should now function properly, with improved data integrity and performance.
It’s important to note that Chkdsk repairs file system errors on external drives and USB drives. However, if the errors are related to physical damage or faulty hardware, additional measures such as professional data recovery services or drive replacement may be necessary.
To ensure ongoing health and stability, it’s good practice to periodically run Chkdsk on external hard drives and USB drives. Regular scans can help detect and repair errors, thereby prolonging the lifespan of your storage devices and protecting your valuable data.
To summarize, using the Chkdsk command to repair errors on external hard drives or USB drives is a straightforward process. By running Chkdsk on these devices, you can identify and repair file system errors, leading to improved data integrity and performance. Regular scans are recommended to maintain the health and functionality of your external storage devices.
Understanding the Output of Chkdsk and Interpreting Error Messages
When running the Chkdsk command, it provides you with valuable information through its output and error messages. Understanding this output is important as it can help you identify issues with your hard drive and take appropriate actions. Here’s a guide to understanding the output of Chkdsk and interpreting error messages.
When you run Chkdsk, it displays a summary of the scan at the end, indicating whether any errors were found and fixed. If Chkdsk completes without displaying any error messages, it generally means that the scan was successful, and no issues were detected.
However, if Chkdsk encounters errors during the scan, it will provide detailed information in the output, listing any issues found and the actions taken to resolve them. You may see error messages such as “File record segment _ is unreadable” or “The volume bitmap is incorrect.”
The error message “File record segment _ is unreadable” typically indicates that Chkdsk has encountered a corrupt or damaged file on the hard drive. In such cases, Chkdsk will attempt to recover any available data and mark the file as unreadable. It’s important to note that data recovery software may be required to salvage any valuable information from this corrupt file.
On the other hand, the error message “The volume bitmap is incorrect” suggests that Chkdsk has detected issues with the file allocation table (FAT) on the hard drive. The FAT is responsible for tracking the location of files on the disk. Chkdsk will attempt to repair the FAT and restore its correct state to ensure proper file access and management.
In addition to error messages, Chkdsk’s output provides other valuable information. It displays the total disk space, the size of files processed, the number of file records scanned, and the number of free clusters on the drive. These details can help you understand the structure and utilization of your disk.
When interpreting Chkdsk’s output, it’s crucial to pay attention to any error messages, as they indicate potential issues that require your attention. If errors are detected and repaired by Chkdsk, it’s recommended to monitor the drive’s performance and use additional tools or professional services if further problems persist.
Keep in mind that Chkdsk’s output can sometimes be technical and difficult to understand for non-experts. If you are unsure about any aspects of the output or error messages, it’s advisable to seek guidance from a professional or consult with the manufacturer of your hard drive.
To sum up, understanding the output of Chkdsk and interpreting the error messages it provides is essential for effective troubleshooting and maintenance of your hard drive. By examining the output and taking appropriate actions, you can address issues promptly, ensure data integrity, and improve the overall performance and longevity of your storage device.
Common Issues with Chkdsk and How to Troubleshoot Them
While the Chkdsk command is a reliable tool for checking and repairing errors on your hard drive, it is not without its own set of issues. Understanding and troubleshooting these common issues can help you make the most out of Chkdsk and ensure the effective maintenance of your storage device. Here are some of the common issues with Chkdsk and how to troubleshoot them.
One common issue is Chkdsk getting stuck at a certain percentage or appearing to be taking an unusually long time to complete. This can happen due to various reasons, such as the presence of a large number of errors, bad sectors, or hardware issues. In such cases, it’s recommended to let Chkdsk continue running, as it may eventually complete the scan and repair. However, if Chkdsk remains stuck for an extended period, it may be necessary to forcefully restart the computer and try running Chkdsk again.
Another issue is Chkdsk reporting false positives or falsely identifying problems that do not exist. This can occur if the file system is not properly mounted or if there are inconsistencies with the drive’s metadata. To troubleshoot this issue, try running Chkdsk with the “/scan” parameter. This will allow Chkdsk to scan for errors without making any modifications. If the false positives persist, consider using alternative tools or seeking assistance from professionals to validate the results.
Sometimes, Chkdsk might report errors but fail to fix them. This can be due to various factors, such as the severity of the errors, damage to the hard drive, or file system corruption. In such cases, running Chkdsk in a more aggressive mode may help. Use the “/r” parameter to scan for and attempt recovery of readable information from bad sectors. You can also try running Chkdsk from a different environment, such as the Windows Recovery Environment, to bypass any issues with the currently running system.
In the event that Chkdsk encounters errors that it cannot repair, it may be an indication of severe hardware failure or physical damage to the hard drive. At this point, it’s crucial to back up your data immediately if you haven’t already done so. Reach out to professional data recovery services for further assistance, as they have specialized tools and expertise to recover data from physically damaged drives.
It’s important to remember that Chkdsk modifies the file system and should be used with caution. Interruptions during the repair process can lead to data corruption or further drive damage. Therefore, it’s essential to avoid unnecessary disruptions and let Chkdsk complete its scan and repair without interruption.
If you encounter any persistent issues or are unsure how to proceed with troubleshooting Chkdsk, seeking guidance from a professional or contacting the manufacturer of your hard drive can provide valuable insights and tailored solutions to address your specific situation.
To sum up, understanding the common issues with Chkdsk and troubleshooting them effectively is crucial for maintaining an error-free hard drive. By being aware of these potential obstacles and employing the appropriate troubleshooting steps, you can maximize the effectiveness of Chkdsk and ensure the reliability and functionality of your storage device.