
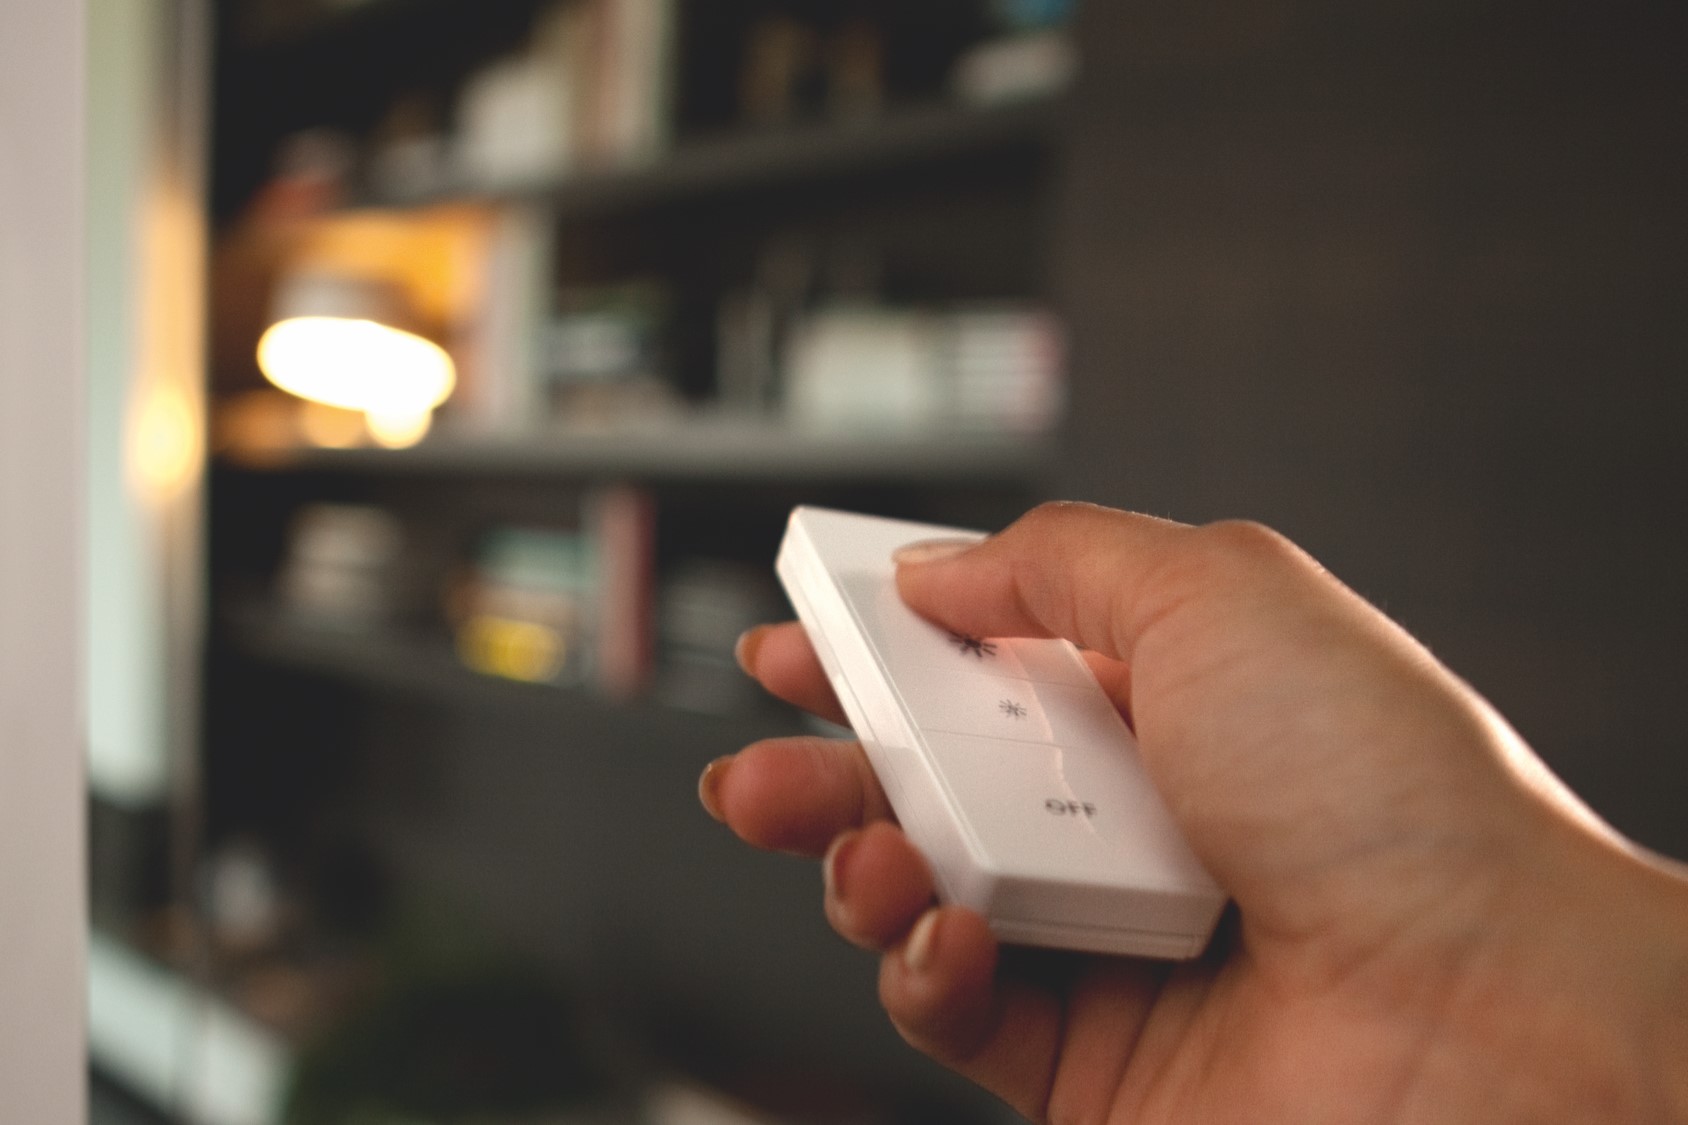
Set up your Philips Hue remote
The Philips Hue remote is a convenient and versatile device that allows you to control your Philips Hue lights with ease. To start using the remote, follow the simple steps below to set it up:
- Ensure that your Philips Hue Bridge is properly connected to your Wi-Fi network and that your Philips Hue lights are powered on
- Open the Philips Hue app on your smartphone or tablet and make sure you are connected to the same Wi-Fi network as your Bridge
- Navigate to the settings menu in the app and select “Accessory Setup”
- Choose “Add Accessory” and select the Philips Hue remote from the list of available devices
- Follow the on-screen instructions to pair the remote with your Bridge
Once the pairing process is complete, you can start using your Philips Hue remote to control your lights. It’s important to note that the remote has a range of up to 15 meters, so make sure you’re within range when using it.
Additionally, the remote requires a small amount of power to operate, which is provided by a replaceable battery. You can easily access the battery compartment by sliding the back cover off the remote and inserting the battery.
By setting up your Philips Hue remote, you’re taking the first step towards enhancing your lighting experience. Whether you want to adjust the brightness, change the color, or create customized lighting scenes, the remote gives you the freedom and flexibility to control your lights effortlessly.
Connect the remote to the Philips Hue Bridge
The next step after setting up your Philips Hue remote is to connect it to the Philips Hue Bridge. The Bridge acts as the central hub that allows you to control your Philips Hue lights and accessories.
Here’s how you can connect your remote to the Bridge:
- Make sure your Philips Hue Bridge is plugged into a power source and connected to your Wi-Fi network.
- Open the Philips Hue app on your device and ensure that you are connected to the same Wi-Fi network as your Bridge.
- Navigate to the settings menu in the app and select “Accessory Setup.”
- Tap on “Add Accessory” and choose the Philips Hue remote from the list of available devices.
- Follow the instructions on the app to connect the remote to the Bridge. This may involve pressing specific buttons on the remote or entering a code.
- Once connected, the app will confirm the successful pairing of the remote and the Bridge.
When the remote is connected to the Bridge, it establishes a secure and reliable connection that enables seamless control of your Philips Hue lights.
It’s important to note that in some cases, you might need to reset the remote before connecting it to the Bridge. To do this, remove the battery from the remote for a few seconds, reinsert it, and repeat the connection process.
By connecting your Philips Hue remote to the Bridge, you expand your control capabilities beyond just using the app on your device. With the remote in hand, you can conveniently adjust your lights, switch between scenes, and create the perfect ambiance with a simple press of a button.
Pair the remote with your Philips Hue lights
After setting up your Philips Hue remote and connecting it to the Philips Hue Bridge, the next step is to pair the remote with your Philips Hue lights. This allows you to control your lights directly from the remote, without needing to use the app.
Here’s how you can pair the remote with your lights:
- Ensure that your Philips Hue lights are powered on and within range of the remote.
- Press and hold the “On” button on the remote for a few seconds until the lights in the room start to blink.
- Release the button and wait for the remote to establish a connection with the lights.
- Once the remote is successfully paired with the lights, the lights will stop blinking and you can start controlling them using the remote.
If you have multiple rooms or zones set up with Philips Hue lights, you can pair the remote with each individual room or zone separately. Simply follow the same steps for each room or zone you want to control with the remote.
It’s worth noting that the remote allows you to perform different actions with the buttons, such as turning the lights on or off, adjusting the brightness, or changing the color. Familiarize yourself with the different functions of the remote to make the most out of your lighting experience.
By pairing the remote with your Philips Hue lights, you gain the convenience of controlling your lights without needing to rely on the app or voice commands. Whether you want to create a cozy ambiance for movie night or set the perfect lighting for a dinner party, the remote puts the power to customize your lighting right at your fingertips.
Customize button functions using the Philips Hue app
One of the great features of the Philips Hue remote is the ability to customize the button functions according to your preferences. This allows you to personalize the remote to suit your specific needs and control your Philips Hue lights in the way that works best for you.
Here’s how you can customize the button functions using the Philips Hue app:
- Open the Philips Hue app on your smartphone or tablet and ensure that you are connected to the same Wi-Fi network as your Philips Hue Bridge.
- Navigate to the settings menu and select “Accessory Setup.”
- Choose the Philips Hue remote from the list of accessories.
- Select the button you wish to customize and choose the desired function from the available options. For example, you can set a button to turn on a specific scene, adjust brightness, or change the color of the lights.
- Save your changes and test the customized button to ensure it performs the desired function.
By customizing the button functions, you can streamline your lighting control and make it even easier to achieve the desired lighting effects. Whether you want to create a relaxing ambiance in the evening or energize your space with vibrant colors, you can assign specific functions to the buttons that suit your lighting preferences.
It’s worth experimenting with different button functions to find the setup that works best for you. Don’t hesitate to revisit the app’s settings and make adjustments if needed. The customization options empower you to have complete control over your Philips Hue lights and create the perfect lighting experience tailored to your preferences.
Adjust the brightness and color using the remote
With your Philips Hue remote, you have the ability to easily adjust the brightness and color of your Philips Hue lights right from the palm of your hand. This allows you to create the perfect ambiance for any occasion or mood.
Here’s how you can adjust the brightness and color using the remote:
- To control the brightness, use the up and down buttons on the remote. Press the up button to increase the brightness and the down button to decrease it. You can gradually adjust the brightness to your desired level.
- To change the color of your Philips Hue lights, use the color buttons on the remote. There are often preset color options available, such as white light, warm light, or vibrant colors. Simply press the corresponding color button to achieve the desired lighting effect.
- If you have Philips Hue lights that offer color temperature adjustment, you can also use the remote to toggle between different color temperatures, such as cool white and warm white, for a more customized lighting experience.
By adjusting the brightness and color using the remote, you can easily set the mood in your space, whether it’s for relaxation, concentration, or entertainment. Want a cozy, dimly-lit atmosphere for a movie night? Simply lower the brightness. Craving a vibrant, colorful setting for a party? Explore the various color options available on the remote.
Remember, the exact functions and capabilities of the remote may vary depending on the specific model you have. Consult the user manual or the Philips Hue app for detailed instructions on how to make the most out of your remote’s features.
With the ability to fine-tune the brightness and color of your Philips Hue lights using the remote, you have complete control over your lighting environment. This allows you to effortlessly create the perfect ambiance for any occasion, whether it’s a cozy night in or a lively gathering with friends.
Control multiple Philips Hue lights with one remote
The Philips Hue remote offers the convenience of controlling multiple Philips Hue lights with just one device. This feature allows you to create synchronized lighting effects and easily manage all the lights in a room or throughout your home using a single remote.
Here’s how you can control multiple Philips Hue lights with one remote:
- Ensure that all the Philips Hue lights you want to control with the remote are connected to the same Philips Hue Bridge.
- Pair the remote with the Bridge and follow the instructions for pairing it with individual lights, as mentioned in the previous section.
- Once the remote is paired with the Bridge and individual lights, it can control all the connected lights simultaneously.
- Use the buttons on the remote to adjust the brightness, change the color, or switch between preset scenes for all the connected lights at once.
With the ability to control multiple lights with one remote, you can easily create cohesive lighting scenes and ambiance throughout your space. Whether you want to illuminate a single room or synchronize the lighting in multiple areas, the remote simplifies the process and enhances the overall lighting experience.
Additionally, some Philips Hue remotes offer the option to group lights together. This allows you to create custom lighting zones or groups, which can be controlled simultaneously with a single press of a button on the remote.
Remember to assign the desired button functions to control multiple lights in the Philips Hue app. This enables you to seamlessly switch between different lighting setups with just a touch of a button.
By effortlessly controlling multiple Philips Hue lights with one remote, you have the power to transform your entire space with just a few simple button presses. Whether you want to create a cozy, intimate atmosphere or set the stage for a bright, energetic environment, the remote puts the control at your fingertips.
Use the remote as a standalone switch
In addition to being able to control your Philips Hue lights through the app or bridge, you can also use the Philips Hue remote as a standalone switch. This means that you can use the remote to turn your lights on or off without needing to rely on any other devices or connections.
Here’s how you can use the remote as a standalone switch:
- Ensure that your Philips Hue lights are connected to the Philips Hue Bridge and that the remote is properly paired with the Bridge, as mentioned in the previous sections.
- Place the remote in a convenient location where you would like to control your lights.
- With the remote in hand, press the “On” button to turn on the lights, and press the “Off” button to turn them off. This provides you with a simple and efficient way to control your lights without needing to use the app or voice commands.
- The remote may also have additional buttons that can be used to adjust the brightness or change the color of the lights, depending on the specific model.
Using the remote as a standalone switch is especially useful when you want to quickly control the lights in a room, without having to deal with any apps or smart devices. It provides a convenient and immediate way to control your lighting with just the touch of a button.
Furthermore, the portable nature of the remote allows you to easily move around your space and control the lights from wherever you are. Whether you’re in the living room, bedroom, or kitchen, having the remote nearby ensures that you have instant control over the lighting, making it effortless to create the desired atmosphere in every room.
By using the Philips Hue remote as a standalone switch, you have a simple and accessible solution for controlling your lights. Whether you need to quickly turn the lights on or off, adjust the brightness, or change the color, the remote provides a standalone option that enhances your lighting experience with ease and convenience.
Routines and scenes with the Philips Hue remote
The Philips Hue remote not only allows you to control your lights manually but also provides the capability to create and activate pre-set routines and scenes. These routines and scenes make it effortless to set the perfect lighting for different activities or times of day, all with a single press of a button on the remote.
Here’s how you can use routines and scenes with the Philips Hue remote:
- Create customized routines in the Philips Hue app that align with your daily routine. For example, you can set a routine to gradually increase the brightness of your lights in the morning to simulate a sunrise or create a relaxing evening routine that dims the lights for bedtime.
- Assign these routines to specific buttons on the remote using the Philips Hue app. This allows you to easily activate the routines by pressing the corresponding button on the remote.
- In addition to routines, you can also create and save scenes in the Philips Hue app. Scenes are predetermined light settings that can be activated with a single button press. For instance, you can create a scene for movie nights with dimmed lights or a vibrant scene for parties.
- Assign these scenes to buttons on the remote to quickly switch between different lighting setups based on your mood or activity.
- With the remote in hand, simply press the assigned button to activate the desired routine or scene. This allows you to effortlessly set the perfect lighting ambiance without having to manually adjust the brightness or color of the lights.
With routines and scenes, the Philips Hue remote enhances your lighting experience by providing quick access to different lighting settings for various occasions. Whether you’re relaxing, working, or entertaining guests, the remote simplifies the process of creating the desired atmosphere.
Additionally, the ability to assign routines and scenes to buttons on the remote gives you the freedom to customize the remote to suit your needs. Make sure to regularly update and modify the routines and scenes in the Philips Hue app so that the remote remains aligned with your preferences.
By utilizing routines and scenes with the Philips Hue remote, you can effortlessly set the mood in your space and enhance your daily routines. From energizing morning lighting to winding down in the evening, the remote ensures that the perfect lighting for any activity is just a button press away.
Troubleshooting common issues with the Philips Hue remote
While the Philips Hue remote is designed to provide a seamless lighting control experience, you may encounter some common issues along the way. Fortunately, most issues can be easily resolved with a few troubleshooting steps. Here are some common problems you may come across with the remote and how to troubleshoot them:
- If the remote is not responding or is intermittently working, check the battery level. A low battery may cause the remote to malfunction. Replace the battery with a fresh one and retest.
- Ensure that the remote is within range of the Philips Hue Bridge. The remote typically has a range of up to 15 meters. If the remote is too far away, it may not be able to communicate with the Bridge reliably. Bring the remote closer to the Bridge and test its functionality.
- If you’re having trouble pairing the remote with the Philips Hue Bridge, check if the Bridge is properly connected to the Wi-Fi network. Restarting the Bridge and your Wi-Fi router can often resolve connectivity issues.
- Make sure that the remote and the Philips Hue Bridge are using the same Zigbee channel. You can change the Zigbee channel in the Philips Hue app under the Bridge settings. By keeping both the remote and the Bridge on the same channel, you ensure a strong and stable connection.
- In cases where the remote is not controlling specific lights or groups, verify if those lights or groups are properly connected to the Bridge and paired with the remote. Follow the pairing instructions mentioned earlier to establish the connection.
- If you have recently added new lights or made changes to your Philips Hue setup, it may be necessary to manually reconnect or re-pair the remote. Refer to the user manual or the Philips Hue app for specific instructions on how to perform this process.
If you have followed the troubleshooting steps above and are still experiencing issues with your Philips Hue remote, consider reaching out to the Philips Hue customer support team for further assistance. They can provide specific troubleshooting steps based on your situation and help resolve any lingering problems.
Remember, taking good care of your remote by keeping it clean and ensuring the battery is fresh will also help maintain its optimal performance. Regularly check for software updates in the Philips Hue app to keep your remote and Bridge up to date with any bug fixes or improvements.
By troubleshooting common issues with the Philips Hue remote, you can ensure a smooth and enjoyable lighting control experience. With a little troubleshooting know-how, you’ll be able to overcome any obstacles that may arise and continue to enjoy the convenience and flexibility that the remote brings to your lighting setup.
Tips and tricks for maximizing your Philips Hue remote experience
The Philips Hue remote offers a range of features to enhance your lighting control experience. By following these tips and tricks, you can make the most out of your Philips Hue remote, creating the perfect ambiance and maximizing its functionality:
- Organize your lights into rooms or zones within the Philips Hue app. This will allow you to customize the remote’s button functions on a per-room basis and easily navigate through different areas of your home.
- Experiment with different button assignments for routines and scenes. Tailor the remote to your specific preferences and daily routines by assigning the most frequently used functions to the buttons that are most comfortable and intuitive for you to press.
- Utilize voice control integration if available. Pair your Philips Hue remote with voice assistants such as Amazon Alexa or Google Assistant to control your lights using voice commands, allowing for hands-free convenience.
- Take advantage of additional features, such as long-press actions. Some models of the Philips Hue remote allow you to assign different functions to buttons based on whether you press them briefly or hold them down. Explore these options to access more advanced controls.
- Consider using third-party apps and integrations. There are numerous third-party apps available that offer additional features and customization options for your Philips Hue lights. Explore these apps to expand the capabilities of your remote and discover new lighting possibilities.
- Regularly update the firmware of your Philips Hue devices. Keeping your Bridge, remote, and lights up to date ensures that you have access to the latest features and performance improvements. Check for updates within the Philips Hue app and follow the instructions for updating.
- Explore the Philips Hue community for inspiration and ideas. Join online forums and communities dedicated to Philips Hue to discover creative lighting scenes and tips from other enthusiasts. Share your own experiences and get inspired by the endless possibilities.
- Consider using the Philips Hue remote as a dedicated remote for specific activities. For example, assign buttons to control your home theater lighting or create a unique lighting scene for gaming. Having a dedicated remote for these activities can enhance the immersive experience.
By implementing these tips and tricks, you can unlock the full potential of your Philips Hue remote and create a truly personalized lighting experience. Whether you want to simplify your daily routines, explore new lighting possibilities, or take advantage of advanced controls, these strategies will maximize your enjoyment and convenience.
Remember, the key is to experiment and tailor the remote’s functionality to your specific needs and preferences. With a little creativity and exploration, your Philips Hue remote can transform and elevate your lighting experience to new heights.