
What is Google Docs Brochure Template?
Google Docs Brochure Template is a pre-designed, customizable document layout that allows users to create professional-looking brochures using Google Docs, a free online word processing tool. Brochures are commonly used for marketing, promotions, information sharing, or any other purpose that requires presenting information in a visually appealing and organized manner.
Google Docs Brochure Template offers a range of layouts, designs, and styles to choose from, making it easy for users to create brochures that suit their specific needs. Whether you’re designing a travel brochure, business brochure, event brochure, or any other type of brochure, Google Docs provides a variety of template options to choose from.
One of the main advantages of using Google Docs Brochure Template is its accessibility. Since it is an online tool, you can access it from any device with an internet connection. This makes it convenient for users to create brochures on the go or collaborate with others in real-time.
Additionally, Google Docs Brochure Template offers a user-friendly interface, making it easy for both beginners and experienced users to navigate and customize their brochures. With its drag-and-drop functionality and formatting options, you can easily add text, images, charts, tables, and other elements to your brochure, creating a visually stunning and informative document.
Furthermore, Google Docs offers a seamless integration with other Google tools, such as Google Drive and Google Photos. This integration allows you to easily insert images or access files from your Google Drive directly into your brochure.
By utilizing Google Docs Brochure Template, you can save time and effort in designing brochures from scratch. The pre-designed templates provide a solid foundation, allowing you to focus on customizing the content and visuals to fit your specific needs.
In the following sections, we’ll explore how to access Google Docs Brochure Template, choose a template, customize the content, format the text, add images and graphics, and more.
How to Access Google Docs Brochure Template?
Accessing Google Docs Brochure Template is a quick and simple process that allows you to begin creating your brochure in no time. Follow these steps to access the template:
- Open your web browser and go to docs.google.com.
- Sign in to your Google account. If you don’t have one, you can create a new account for free.
- Once signed in, you’ll be redirected to the Google Docs homepage. If you’re not automatically directed, click on the “Docs” tab at the top of the page.
- On the left-hand side of the Google Docs homepage, you’ll find a menu with different options. Click on the “Template Gallery” option, which is represented by a square icon with a compass.
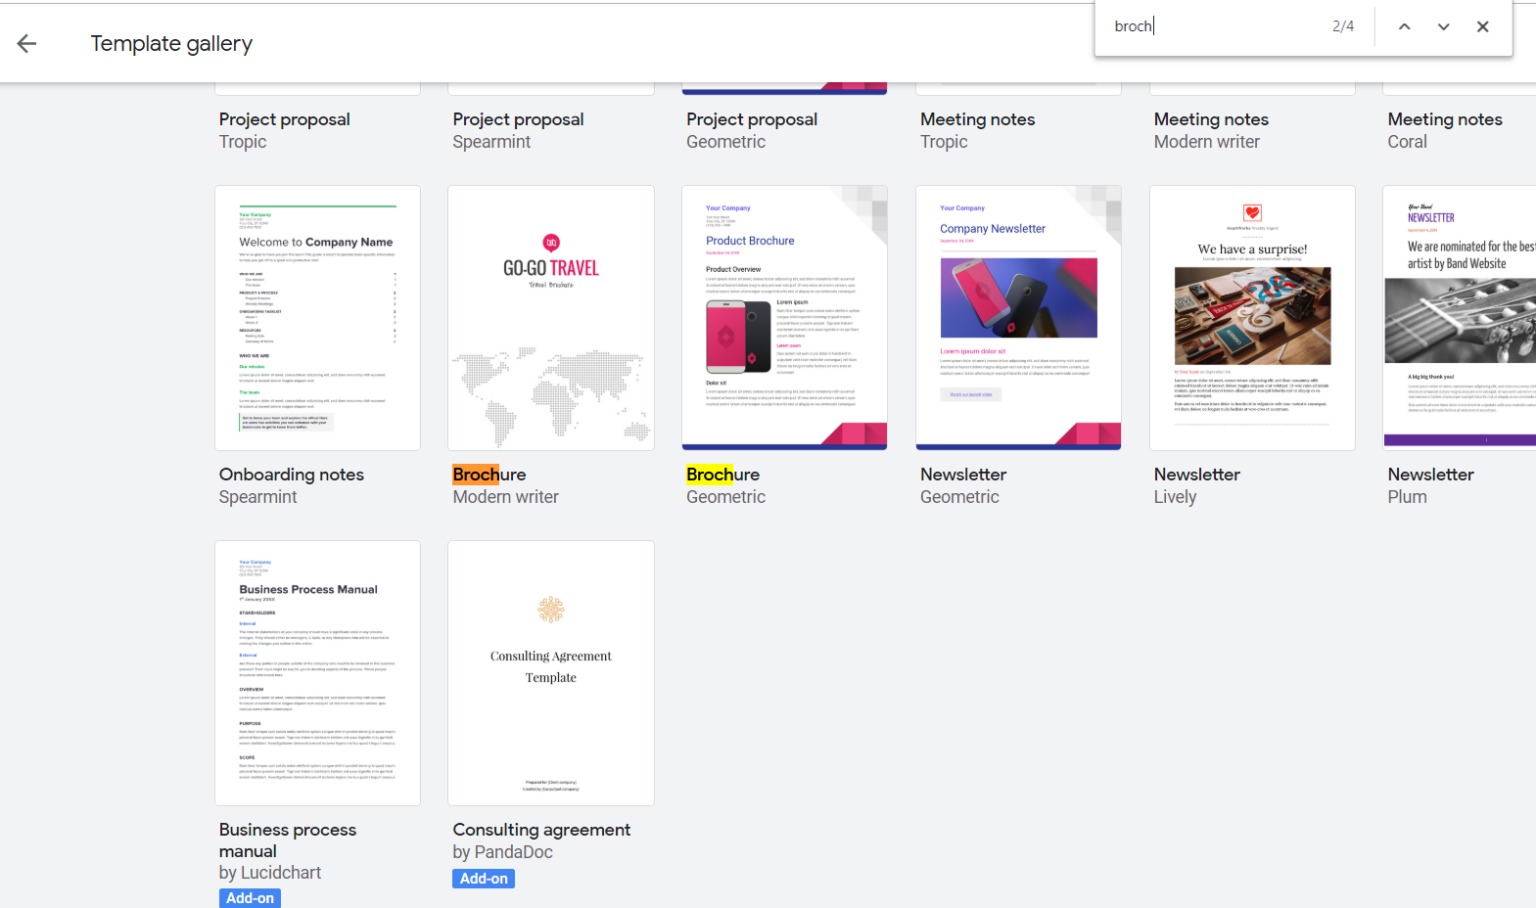
- In the Template Gallery, you’ll see a search bar at the top. Type “brochure” or specific keywords related to the type of brochure you want to create.
- As you type, Google Docs will display a range of brochure templates that match your search query. Browse through the templates to find one that suits your needs.
- When you find a template you like, click on it to open a preview and read a brief description. To use the template, click on the “Use Template” button located at the top-right corner of the preview window.
- A new Google Docs document will open, based on the selected template. You can now start customizing and editing the brochure to fit your requirements.
That’s it! You’ve successfully accessed the Google Docs Brochure Template and are ready to create an impressive brochure. Remember to save your progress as you work by clicking on the “File” tab and selecting “Save” or by using the keyboard shortcut Ctrl + S (Windows) or Command + S (Mac).
In the next section, we’ll delve into how to choose the right brochure template for your needs and preferences.
How to Choose a Brochure Template?
Choosing the right brochure template is essential for creating an impactful and visually appealing document. Follow these steps to select the perfect template for your needs:
- Consider your goal: Determine the purpose of your brochure. Are you creating a brochure for a business, event, travel, or any other specific purpose? This will help you narrow down your options and choose a template that aligns with your goal.
- Browse the template gallery: Open the Google Docs Template Gallery and search for “brochure” or specific keywords related to your topic. You will find a wide range of options to choose from.
- Preview the templates: Click on the templates that catch your eye to open a preview. Take a closer look at the layout, design, colors, and overall aesthetic. Consider whether it matches the tone and style you want to convey in your brochure.
- Consider your content: Think about the type and amount of content you want to include in your brochure. Some templates are more suitable for minimalistic content, while others offer more space for text and images. Ensure the template you choose accommodates your content requirements.
- Customization options: Assess the level of customization offered by the template. Determine if it allows you to easily modify the colors, fonts, or layout to reflect your branding or personal preference.
- Read reviews and ratings: If available, check the reviews and ratings provided by other users who have used the template. Their feedback can provide insights into the template’s usability, practicality, and overall quality.
- Try multiple templates: If you’re unsure which template to choose, don’t hesitate to try a few different options. This will allow you to compare layouts and designs and find the one that best suits your vision.
Remember, the right brochure template should not only visually appeal to your target audience but also effectively communicate your message. By carefully considering your goals, content, customization options, and user feedback, you will be able to choose a template that exceeds your expectations.
Now that you’ve selected your template, it’s time to customize and fill it with your content. The next section will guide you through the process of customizing the content in the brochure.
How to Customize the Content of the Brochure?
Customizing the content of your brochure is a crucial step to make it unique and tailored to your specific needs. Here’s a step-by-step guide on how to customize the content:
- Replace sample text: Begin by replacing the sample text in the template with your own content. Simply click on the text boxes and start typing. Adjust the font style, size, and color as needed to match your branding or desired design.
- Add your own images: To replace the placeholder images, click on them and select “Replace image.” You can either upload an image from your device or choose one from your Google Drive or Google Photos. Adjust the size and position of the image to fit the layout.
- Modify existing sections: Rearrange or delete sections that are not relevant to your content. You may also add new sections by copying and pasting existing ones or creating them from scratch. Use the toolbar at the top of the Google Docs window to format the sections and make them visually appealing.
- Insert links: If you want to include links in your brochure, highlight the text you want to turn into a link and click on the “Insert link” icon in the toolbar. Paste the URL you want to link to and customize the text color or style if desired.
- Include contact information: Depending on the purpose of your brochure, you may want to include contact details such as a phone number, email address, or website. Enter this information in a prominent location where it is easily visible to readers.
- Formatting and styling: Use the formatting options provided by Google Docs to enhance the appearance of your content. Bold key points, italicize important ideas, and use bullet points or numbering for lists. Experiment with different font styles, sizes, and colors to highlight essential information.
- Proofread and edit: Before finalizing your brochure, thoroughly proofread the content for grammar, spelling, and formatting errors. Make any necessary revisions to ensure that the text is clear, concise, and free of mistakes.
Remember, the customization process is where you can truly make the brochure your own. Take the time to align the content, images, and style with your brand identity, message, and target audience.
In the next section, we’ll explore how to format the text in the brochure to create a visually engaging and professional look.
How to Format the Text in the Brochure?
The way you format the text in your brochure plays a significant role in its overall appearance and readability. Follow these steps to effectively format the text:
- Choose the right font: Select a font that matches the tone and style of your brochure. Consider using a professional and easily readable font such as Arial, Times New Roman, or Calibri. Avoid using ornate or overly decorative fonts that may hinder readability.
- Adjust the font size: Use different font sizes to create visual hierarchy and emphasis in your text. For titles and headings, opt for larger font sizes to make them stand out, while using smaller font sizes for body text and captions.
- Apply font styles: Utilize bold, italic, underline, and other font styles to highlight important phrases or key points. However, use these styles sparingly to avoid overwhelming the reader or diminishing their impact.
- Align the text: Choose a consistent alignment for your text, such as left-aligned, right-aligned, centered, or justified. Consider the layout of your brochure and aim for a clean and organized appearance.
- Use proper spacing: Ensure there is enough space between lines and paragraphs to improve readability. Use line spacing options provided in Google Docs, such as single-spacing or double-spacing, depending on your preference and the amount of text.
- Implement bullet points and numbering: When presenting lists or key information, use bullet points or numbering to make the content more digestible and visually appealing. This formatting style helps readers quickly scan and grasp important details.
- Control line breaks: Ensure that lines break at appropriate places to avoid awkward breaks within words or sentences. Manually adjust the text or utilize the automatic line break options in Google Docs to maintain optimal readability.
- Proofread for consistency: After formatting the text, carefully proofread it for any inconsistencies in font styles, sizes, or alignments. Ensuring consistent formatting throughout the brochure enhances its professional look.
By paying attention to font choice, size, style, alignment, spacing, and consistency, you can effectively format the text in your brochure to create an appealing and easy-to-read document.
In the next section, we’ll explore how to add images and graphics to enhance the visual appeal of your brochure.
How to Add Images and Graphics to the Brochure?
Adding images and graphics to your brochure can greatly enhance its visual appeal and convey your message effectively. Follow these steps to incorporate images and graphics into your brochure:
- Click on the location in the template where you want to insert an image or graphic. Ensure there is enough space for the element without disrupting the overall design.
- Go to the “Insert” tab in the menu bar of Google Docs and select “Image.” Choose the image source from options such as “Upload from computer,” “Take a snapshot,” “By URL,” or “From Google Drive.” Select the desired image and click “Insert” or “Open.”
- Position and resize the image as needed by clicking and dragging on the image’s corners. Maintain the aspect ratio of the image by holding down the “Shift” key while resizing.
- Adjust the image alignment by selecting it and clicking on the “Align” option in the toolbar. Choose from options like “Align left,” “Align center,” or “Align right” to make the image fit seamlessly with the text and other elements in the brochure.
- For additional graphics, such as icons or illustrations, consider using the “Insert” tab to access Google’s library of icons or search for free graphic resources online.
- To add shapes or lines, go to the “Insert” tab and select “Drawing.” Here, you can create or insert custom shapes, lines, arrows, or other graphical elements. Customize the color, size, and position of the shape to match your brochure’s design.
- Remember to maintain a visually balanced layout by not overcrowding the brochure with too many images or graphics. Use them strategically to highlight key points or enhance the overall message.
- Ensure that all images and graphics used are relevant, high-quality, and properly cited if required. Avoid using copyrighted material without permission.
By incorporating visually appealing images and graphics, you can capture the reader’s attention and effectively convey the content of your brochure. Keep in mind that a well-designed brochure strikes a balance between text and visual elements.
In the next section, we’ll explore how to resize and position images in your brochure to create a polished and professional look.
How to Resize and Position Images in the Brochure?
Resizing and positioning images in your brochure is crucial for achieving a visually balanced and professional look. Follow these steps to effectively resize and position images:
- Click on the image you want to resize or reposition in the brochure.
- Hover your cursor over one of the corners of the image until the resize cursor appears. Click and drag the corner inward or outward to make the image smaller or larger. Maintain the aspect ratio by holding down the “Shift” key while resizing.
- To maintain consistent proportions, resize images proportionally across the entire brochure. This creates a cohesive and visually appealing layout.
- To reposition the image, click on it and drag it to the desired location within the brochure. Ensure that the image is aligned with the text or other elements to create a harmonious visual flow.
- Consider overlapping images with text or other graphics to add depth and visual interest to your brochure. Experiment with different layering techniques to achieve the desired effect.
- Pay attention to the image’s aspect ratio and resolution. If an image appears stretched or pixelated after resizing, consider finding a higher-resolution version or adjusting its proportions in an image editing software before inserting it into your brochure.
- Be mindful of the surrounding whitespace and other elements in the template. Allow enough space around the image to prevent overcrowding and maintain a clean design.
- Preview the brochure to ensure that the resized and positioned images complement the overall layout and convey your intended message effectively.
By carefully resizing and strategically positioning the images in your brochure, you can create a visually appealing document that engages and captivates the reader. Remember to maintain the proper aspect ratio, consider the surrounding elements, and strive for a balanced layout.
In the next section, we’ll explore how to add and format shapes in your brochure to enhance visual elements and emphasize key information.
How to Add and Format Shapes in the Brochure?
Adding shapes to your brochure can help enhance visual elements, emphasize key information, and create a more engaging design. Follow these steps to effectively add and format shapes:
- Go to the “Insert” tab in the menu bar of Google Docs and select “Drawing.”
- A drawing canvas will open, providing a range of shape and line tools in the toolbar.
- Select the desired shape tool, such as rectangle, circle, arrow, or speech bubble, and click and drag on the canvas to create the shape.
- Use the resizing handles on the shape to adjust its size and proportions according to your brochure’s design.
- To format the shape, select it and utilize the formatting options available in the toolbar. You can change the fill color, outline color, line weight, transparency, or add effects like shadow or reflection.
- To add text to the shape, double-click inside the shape and start typing. Adjust the font style, size, color, and alignment according to your preferences.
- To customize the shape further, you can right-click on it and select “Edit” to access more advanced options. This allows you to modify the shape’s properties, add gradients or images as the fill, and more.
- To position the shape within the brochure, click and drag it to the desired location. Ensure it aligns well with the text and other elements for a balanced layout.
- You can also duplicate shapes by copying and pasting them within the drawing canvas or between different parts of the brochure. This helps create consistency and repetition within your design.
- Once you are satisfied with the shape’s size, position, and formatting, you can close the drawing canvas and the shape will appear in your brochure.
By adding and formatting shapes, you can create visually engaging elements such as labels, callouts, diagrams, or highlights that enhance the overall impact of your brochure. Be mindful of the shapes’ placement, color choices, and the message or information they convey.
In the next section, we’ll explore how to add and format tables in your brochure to organize and present data in a structured manner.
How to Add and Format Tables in the Brochure?
Adding tables to your brochure is a practical way to organize and present data in a structured manner. Follow these steps to effectively add and format tables:
- Position your cursor in the area of the brochure where you want to insert the table.
- Go to the “Insert” tab in the Google Docs menu bar and select “Table.”
- In the dropdown menu, choose the desired number of rows and columns for your table, or select “Insert table” to manually create a custom-sized table.
- A table will be inserted into your brochure, and you can start populating the cells with content.
- Click inside a cell to enter text, numbers, or other data. You can also copy and paste content from other sources directly into the table cells.
- To resize the table or individual cells, click and drag the table’s edges or the cell’s boundaries to adjust their dimensions. Maintain consistency in cell sizes for a visually pleasing layout.
- Format the table by selecting it and using the formatting options available in the toolbar. You can change the font style, size, alignment, and apply cell shading or borders.
- Customize the table’s appearance by selecting specific rows, columns, or cells and applying different formatting styles or colors.
- To add more rows or columns to the table, right-click on a row or column and select the “Insert row above,” “Insert row below,” “Insert column left,” or “Insert column right” option.
- Ensure that the table is aligned properly within the brochure and integrates smoothly with other design elements and content.
- Proofread the table’s content for accuracy and ensure that it effectively presents the data or information you want to convey.
By adding and formatting tables, you can present data, comparisons, or lists in an organized and visually appealing manner within your brochure. Keep in mind the readability of the table, ensure clarity in the data presented, and maintain a consistent style throughout the brochure.
In the next section, we’ll explore how to add and format charts in your brochure to visually represent data or trends.
How to Add and Format Charts in the Brochure?
Adding charts to your brochure is an effective way to visually represent data or trends. Follow these steps to add and format charts in your brochure:
- Position your cursor in the area of the brochure where you want to insert the chart.
- Go to the “Insert” tab in the Google Docs menu bar and select “Chart.”
- A chart editor will open on the right side of the window, presenting you with different chart types to choose from, such as bar, line, pie, or scatter plot.
- Select the chart type that best suits your data and click on it. The chart will be inserted into your brochure.
- To input data into the chart, click on the “Edit Chart Data” button in the chart editor. A spreadsheet-like interface will appear, allowing you to enter or import your data.
- Replace the sample data in the spreadsheet with your actual data. You can add more rows or columns as needed.
- The chart will automatically update as you input the data. You can customize the chart by modifying its title, axis labels, colors, and other formatting options available in the chart editor.
- Resize and reposition the chart within the brochure by clicking and dragging it to the desired location. Ensure that it aligns well with the text and other design elements for a cohesive layout.
- Proofread and double-check the accuracy of the data in the chart before finalizing the brochure.
- Consider adding a caption or explanation near the chart to provide context or highlight key insights.
- Experiment with different chart types, styles, and formatting options to find the most suitable representation for your data and make it visually appealing.
By incorporating and formatting charts in your brochure, you can effectively present complex data or trends in a clear and visually engaging manner. Ensure that the chart is easily understandable, properly labeled, and complements the overall design of your brochure.
In the next section, we’ll explore how to add and format headers and footers in the brochure to provide consistency and additional information.
How to Add and Format Headers and Footers in the Brochure?
Headers and footers in your brochure provide additional context, branding, and consistency. Follow these steps to add and format headers and footers:
- Go to the “Insert” tab in the menu bar of Google Docs and select “Header & Page Number” or “Footer & Page Number.”
- A dropdown menu will appear, offering pre-designed header and footer templates. Select the one that best fits your brochure’s style or choose “Edit Header” or “Edit Footer” to customize your own.
- The header or footer area will appear on your document, indicating where you can enter text or insert images.
- Click inside the header or footer area and start typing to add text. This is where you can include important information like the brochure title, your company name, a logo, or contact details.
- Use the formatting options in the toolbar to customize the font style, size, color, and alignment of the header or footer text. You can also insert images by clicking on the “Insert” tab and selecting “Image.”
- To differentiate the header and footer content on different pages, consider using different formats or styles for each section.
- Adjust the spacing and positioning of the header and footer by clicking and dragging them within the designated area.
- Ensure that the header and footer elements don’t interfere with the main content of your brochure. Leave enough space to maintain a clean and balanced design.
- Preview your brochure to verify that the headers and footers appear consistently throughout the document and convey the desired information.
- Make any necessary adjustments or edits to the headers and footers before finalizing your brochure.
By adding and formatting headers and footers, you can enhance the overall professionalism and branding of your brochure. Utilize these areas to include important information, maintain consistency across pages, and reinforce your message or identity.
In the next section, we’ll explore how to save and share the finished brochure, so you can distribute it to your intended audience.
How to Save and Share the Finished Brochure?
Once you have completed designing your brochure in Google Docs, it’s important to save and share the final product. Follow these steps to save and share your finished brochure:
- Click on the “File” tab in the menu bar and select “Save” to ensure your changes are saved.
- Choose a relevant and descriptive name for your brochure in the “Save As” field.
- Select the folder location where you want to save the brochure in your Google Drive, or create a new folder specifically for brochures.
- Click on the “Save” button to save your brochure.
- To share the brochure with others, click on the “Share” button in the top-right corner of the Google Docs window.
- In the sharing options menu, enter the email addresses of the individuals or groups you want to share the brochure with.
- Select the level of access you want to grant to your recipients, such as “Can edit,” “Can comment,” or “Can view.” You can also choose whether to notify the recipients via email.
- Customize the advanced sharing options, such as preventing others from downloading, copying, or printing the brochure.
- Click on the “Send” button to share the brochure with the specified recipients.
- If you want to generate a link to share your brochure, you can click on the “Get shareable link” option and choose the desired sharing settings.
- Copy the generated link and share it with recipients via email, social media, or any other communication channels.
- Remember to make any necessary updates or revisions to the brochure, and save and share the updated version as needed.
By saving and sharing your finished brochure, you can distribute it to your intended audience, collaborate with others, and gather feedback to improve your document.
Now that you know how to save and share your brochure, you’re ready to showcase your work and effectively communicate your message.