
Signing Up for DocuSign
Are you ready to streamline your document signing process? Look no further than DocuSign, the leading electronic signature solution. Signing up for DocuSign is quick and easy, and in just a few steps, you’ll be ready to start sending and receiving electronic signatures.
To get started, simply visit the DocuSign website and click on the “Sign Up” button. You’ll be prompted to provide some basic information, such as your name, email address, and a password. Make sure to choose a strong password to ensure the security of your account.
Once you’ve provided your information, you’ll need to verify your email address. DocuSign will send you an email with a verification link. Simply click on the link to confirm your email address and complete the sign-up process.
After verifying your email, you’ll be directed to the DocuSign dashboard, where you can start creating and sending your documents for signature. DocuSign offers a user-friendly interface that makes it easy to navigate and upload your documents.
Before you can send a document for signature, you’ll need to add the recipient’s information. This includes their name, email address, and any other necessary details. DocuSign allows you to add multiple recipients and specify the signing order, making it ideal for documents that require multiple signatures.
Once the recipient information is added, you can upload the document you want to be signed. DocuSign supports a variety of file formats, including PDF, Word, and Excel. You can upload a document from your computer or cloud storage platforms, such as Google Drive or Dropbox.
After uploading your document, you have the option to customize the signing experience. You can add fields for the recipient to fill out, such as checkboxes, text boxes, or signature fields. DocuSign also offers advanced options like conditional fields, allowing you to tailor the signing process based on specific criteria.
Once you’re satisfied with the document and recipient settings, simply click the “Send” button. DocuSign will email the document to the recipient, who can then review, sign, and return it in just a few clicks. As the sender, you’ll be notified via email when the recipient has completed the signing process.
Signing up for DocuSign is your first step towards efficient and secure document signing. With its user-friendly interface and robust features, DocuSign is a trusted solution for businesses and individuals alike. Start your free trial today and experience the convenience of electronic signatures.
Creating and Sending a Document for Signature
With DocuSign, creating and sending a document for signature is fast and straightforward. Whether you need to obtain signatures on contracts, agreements, or other legal documents, DocuSign provides a seamless solution. Here’s how you can create and send a document for signature:
1. Log in to your DocuSign account and navigate to the dashboard.
2. Click on the “New” button to start creating a new document for signature.
3. You have multiple options for creating your document. You can either upload an existing document from your computer or select a template from your account. If you choose to upload a document, make sure it is in a supported file format, such as PDF, Word, or Excel.
4. Once your document is uploaded, you can personalize it by adding fields. DocuSign offers a wide range of fields, including signature boxes, initials, checkboxes, date fields, and text fields. Simply drag and drop the desired field onto the document and position it where you want the signer to fill in the information.
5. After adding the necessary fields, you can specify who needs to sign the document. Enter the recipient’s name and email address, and if needed, set the signing order for multiple recipients. You can also include a message to provide instructions or additional context to the signer.
6. Optional: If you want to streamline the signing process or add specific instructions, you can create signing tags. These tags act as visual indicators for the signer, guiding them where to sign, initial, or fill out the document.
7. Once you have customized your document and recipient settings, click on the “Send” button. DocuSign will instantly send an email notification to the recipient, alerting them that they need to sign the document.
8. As the sender, you can track the progress of the document from your dashboard. DocuSign provides real-time updates on when the document is viewed, signed, or declined. You will also receive email notifications with each milestone achieved by the recipient.
9. After the signer completes the document, DocuSign will automatically store a copy of the signed document in your account. You can access and download these signed documents at any time, ensuring you have a secure record of the completed agreements.
Creating and sending a document for signature with DocuSign eliminates the need for lengthy paper trails and physical signatures. By digitizing your document signing process, you save time, reduce errors, and enhance productivity. Try DocuSign today and experience the convenience of electronic signatures.
Using Templates to Streamline Your Workflow
One of the most powerful features of DocuSign is its ability to create and use templates, helping you streamline your document signing process and save time. Templates allow you to create reusable document formats with predefined fields, recipients, and signing order. Here’s how you can leverage templates to streamline your workflow:
1. Login to your DocuSign account and navigate to the templates section.
2. Click on the “Create Template” button to start designing your template.
3. Begin by uploading a document or selecting an existing template from your account to serve as the base for your new template.
4. Customize the template by adding fields, just like you would when creating a document for signature. These fields can include signature boxes, checkboxes, text fields, and more. Place the fields in appropriate locations within the document to guide the signers.
5. Once you’ve added the necessary fields, you can specify the recipients and their signing order. By defining the recipient roles (such as signer, approver, or observer), you can ensure that each person receives the document at the right time for their action.
6. Optional: You can also add tags or instructions to provide further guidance to the signers. These tags can include signing notes, highlighted areas, or specific instructions for each recipient.
7. Save the template, and it will be available for future use. You can access your templates from the dashboard and easily retrieve them when needed.
8. To use a template, simply select it when creating a new document. The template will automatically populate with the predefined fields and recipient information, saving you time and ensuring consistency across your documents.
9. Customize the document as required, making any necessary edits specific to the current situation. Once you’re done, send it to the recipients for their signatures.
Using templates with DocuSign streamlines your workflow by eliminating the need to recreate frequently used documents. Templates ensure consistency in formatting and field placement, while simplifying the process of adding recipients and defining their roles. By leveraging templates, you can quickly prepare documents for signature and enhance efficiency in your document signing process.
Sending Reminders and Notifications to Signers
With DocuSign, you have the ability to send reminders and notifications to signers, ensuring that important documents are not overlooked or forgotten. These features help to keep the signing process on track and increase the chances of timely completion. Here’s how you can make the most of reminders and notifications:
1. After you have sent a document for signature, you can track its progress from your DocuSign dashboard. This allows you to see when the signer has viewed or signed the document.
2. If you notice that a signer has not taken any action within a specific timeframe, you can send a gentle reminder to prompt their attention. DocuSign offers the option to send automated reminders at predetermined intervals or send a manual reminder at any time.
3. To send an automated reminder, access the document’s status from your dashboard and select the “Remind” option. Choose the frequency and timing of the reminders, such as every few days or every week, depending on the urgency of the document.
4. If you prefer to send a personal reminder, you can compose a custom email within DocuSign and send it directly to the signer. This allows for a more personalized approach and can convey the importance of the document or any specific instructions.
5. In addition to reminders, DocuSign also sends notifications to both the sender and the signer at each step of the signing process. These notifications can include alerts for when the document has been viewed, signed, or declined.
6. As the sender, you can choose to receive notifications via email, or you can simply check the status of your documents from the DocuSign dashboard. This helps you stay informed and proactively address any issues or delays that may arise.
7. Signers also receive notifications via email, making it convenient for them to access the document and complete the signing process. DocuSign’s notifications provide clear instructions and a user-friendly interface, ensuring a seamless experience for all parties involved.
By utilizing reminders and notifications, you can effectively manage the signing process and keep all parties engaged and informed. This helps to avoid delays, improve response times, and ultimately increase the efficiency of your document workflows. Stay on top of your documents with DocuSign’s convenient reminders and notifications.
Signing a Document as a Recipient
As a recipient of a document in DocuSign, signing is a simple and user-friendly process. Whether you’re signing a contract, agreement, or any other document, DocuSign makes it easy to review and provide your electronic signature. Here’s how you can sign a document as a recipient:
1. Check your email for a notification from DocuSign indicating that a document requires your signature.
2. Open the email and click the “Review Document” button or link provided. This will take you to the DocuSign signing interface.
3. The document will open in a secure online viewer, allowing you to review its contents. Take the time to carefully read through the document to ensure you understand all the terms and conditions.
4. As you review the document, you may come across fields that require your input or signature. These fields could include checkboxes, text boxes, or signature boxes.
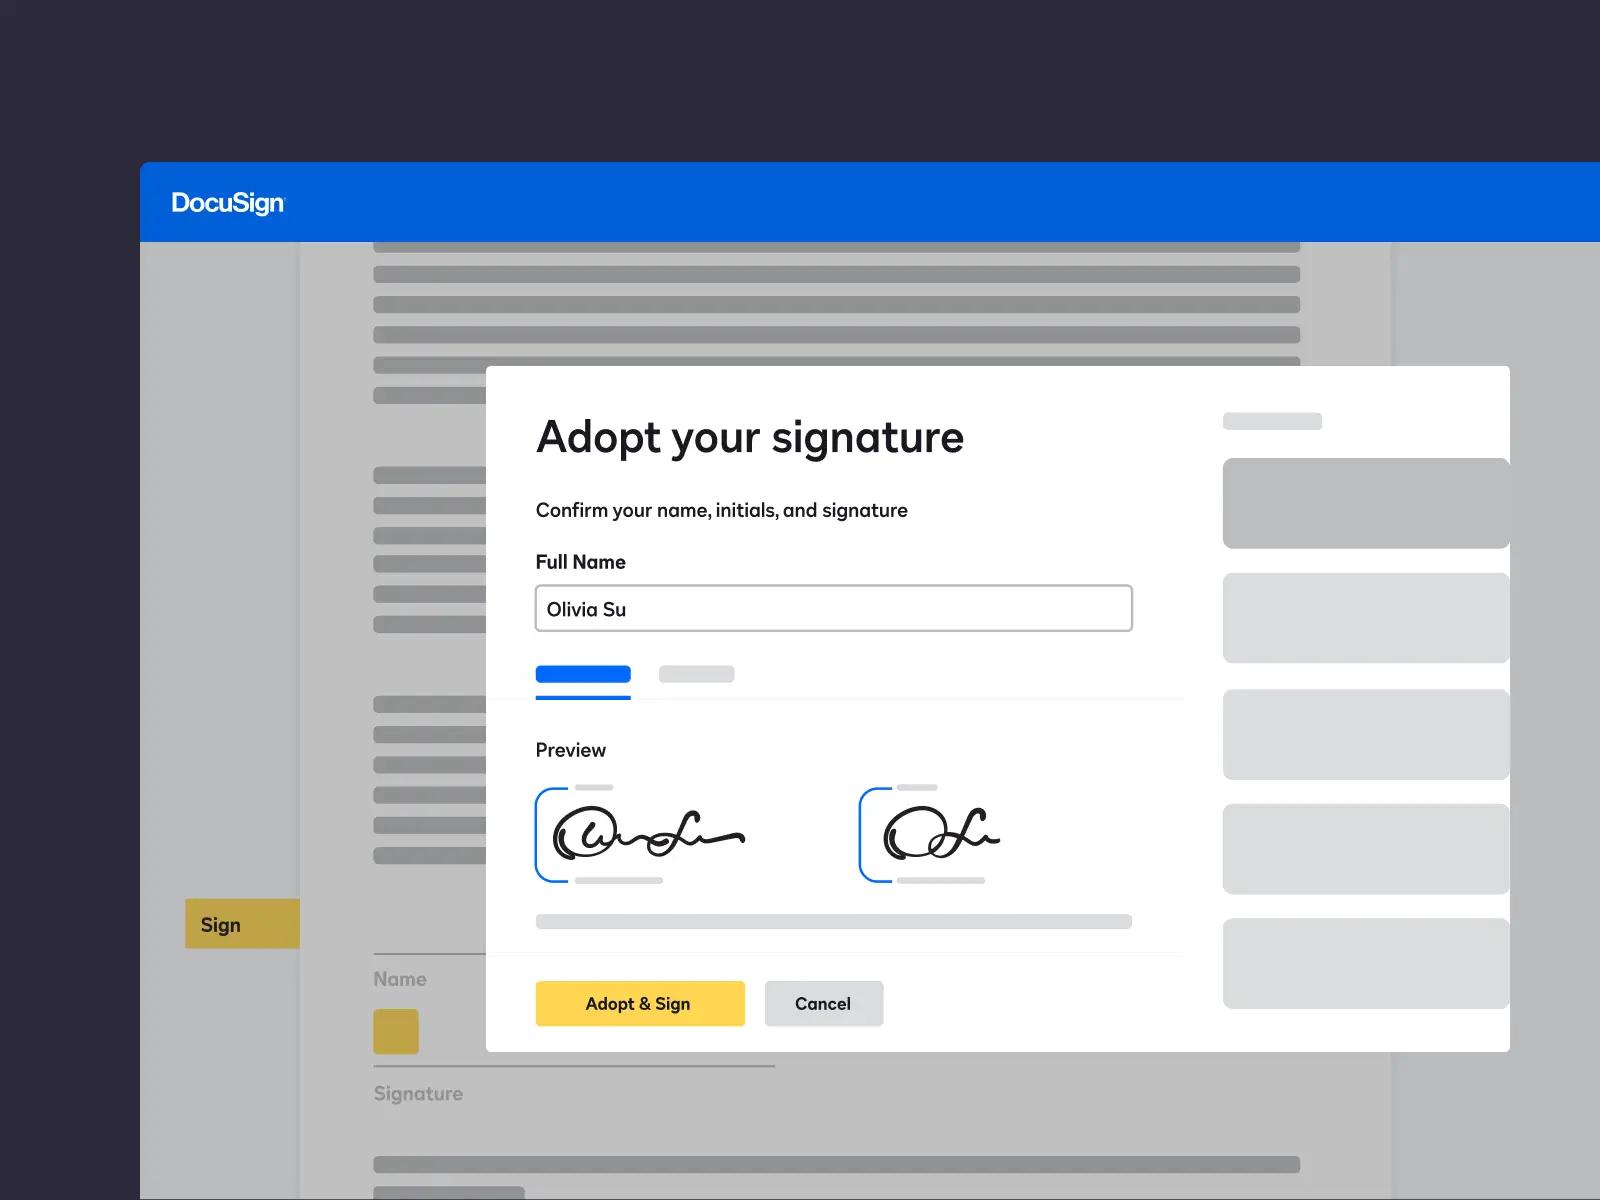
5. To sign the document, locate the signature field and click on it. Depending on your preference and device, you can choose to type your name, draw your signature, or upload an image of your signature.
6. If there are additional fields, such as checkboxes or text boxes, that require your input, simply click on the field to enter the necessary information.
7. Once you have completed all the required fields, carefully review the document one final time to ensure everything is correct and accurate.
8. In some cases, you may have the option to add comments or annotations to the document. This allows you to provide additional context or clarification regarding certain sections of the document.
9. After confirming that everything is in order, click on the “Finish” or “Complete” button to submit your signed document.
10. You will receive a confirmation notification from DocuSign, indicating that your signature has been successfully applied to the document.
Signing a document as a recipient with DocuSign offers a convenient and secure alternative to traditional paper-based signatures. With its intuitive interface and flexible signing options, DocuSign ensures a smooth signing experience for both recipients and senders.
Remember, when using DocuSign, it’s crucial to carefully review the document and ensure that you fully understand its contents before providing your electronic signature. This guarantees that you are entering into agreements with confidence and clarity.
Adding Comments and Annotations to Documents
DocuSign not only allows you to sign documents electronically but also provides a feature that enables you to add comments and annotations to documents. This functionality proves to be invaluable when it comes to collaboration, review, and feedback on important documents. Here’s how you can easily add comments and annotations to your documents:
1. Open the document in the DocuSign viewer by clicking on the link in the email notification or accessing it from your DocuSign account.
2. Once the document is open, you will see various tools and options in the toolbar at the top of the screen. Look for the “Comment” or “Annotate” button and click on it to activate the annotation features.
3. Depending on the document type and your preferences, you will have access to different annotation options. These can include the ability to insert text, draw freehand annotations, highlight text, underline or strike through sections, or add shapes.
4. Select the annotation tool you want to use, then click and drag your mouse on the document to create the desired annotation. For example, if you choose the text tool, you can click on the document to add a text box and type in your comment or note.
5. If you need to highlight or underline specific parts of the document, select the corresponding tool and then click and drag your mouse over the desired text or section. The chosen annotation will appear as an overlay on the document.
6. In addition to adding comments and annotations, you can also reply to existing comments made by other collaborators. Simply click on the comment and type your response under it.
7. If you want to resolve a comment or annotation and remove it from the document, you can do so by clicking on the comment and selecting the “Resolve” or “Delete” option.
8. You can continue adding comments and annotations throughout the document as needed. This feature helps facilitate discussions, provide feedback, and make necessary revisions without the need for printing or physical markups.
9. Once you have finished adding comments and annotations, you can save the annotated document or share it with others for further collaboration.
By leveraging the comments and annotations feature in DocuSign, you can streamline communication, share feedback, and ensure that all stakeholders are on the same page when reviewing important documents. This collaborative approach eliminates the need for manual markups and allows for efficient document review and revision.
Managing and Storing Signed Documents
Once your documents have been signed using DocuSign, you can easily manage and store them in a secure and organized manner. DocuSign offers robust features that allow you to efficiently manage your signed documents, giving you peace of mind and ensuring easy access to your important agreements. Here’s how you can effectively manage and store your signed documents:
1. Upon completion of the signing process, DocuSign automatically stores a copy of the signed document in your account. This ensures that you have a secure and easily accessible record of all your agreements.
2. To manage your signed documents, navigate to your DocuSign dashboard and locate the “Completed” or “Signed” tab. This tab will display all the documents that have been fully executed and are ready for review and storage.
3. DocuSign allows you to organize your signed documents into folders or categories. You can create customized folders based on your specific needs, such as client agreements, legal contracts, or vendor agreements. This helps to keep your documents organized and easily searchable.
4. If you need to find a specific document, you can use the search bar within the DocuSign interface. Simply enter relevant keywords, such as the recipient’s name or the document title, to quickly locate the desired document.
5. In addition to organizing and searching for documents, you can also download and print copies of your signed agreements. DocuSign provides options for downloading documents in various formats, such as PDF, ensuring compatibility across different systems and applications.
6. For added convenience, DocuSign integrates with popular cloud storage platforms, such as Google Drive, Dropbox, and OneDrive. This allows you to automatically sync your signed documents to your preferred cloud storage service, providing an extra layer of backup and accessibility.
7. DocuSign also offers advanced features for document retention and compliance, such as the ability to set document retention policies and apply encryption to your stored documents. This ensures the security and integrity of your signed agreements while adhering to regulatory requirements.
8. As your document library grows, it’s important to periodically review and organize your signed documents. Remove any outdated or expired agreements to keep your storage space optimized and your files relevant and up to date.
By effectively managing and storing your signed documents with DocuSign, you can maintain a seamless and organized record of your agreements. This not only saves time and improves productivity but also provides peace of mind knowing that your important documents are safe, secure, and easily accessible whenever you need them.
Integrating DocuSign with Other Apps and Platforms
DocuSign offers seamless integration with various apps and platforms, allowing you to streamline your workflow and enhance productivity. By integrating DocuSign with your preferred applications, you can easily access and send documents for signature without the need for manual transfers or switching between different platforms. Here’s how you can leverage the power of integration with DocuSign:
1. Collaboration Tools: DocuSign integrates with popular collaboration tools like Microsoft Teams, Slack, and Google Workspace. This enables you to share and send documents for signature directly within these platforms, eliminating the need for separate email exchanges or document uploads.
2. CRM Systems: Integration with Customer Relationship Management (CRM) systems, such as Salesforce or HubSpot, allows you to automate and manage the document signing process seamlessly. You can send contracts, agreements, or quotes for signature directly from your CRM system, ensuring efficient sales and customer management workflows.
3. Cloud Storage: DocuSign integrates seamlessly with cloud storage platforms like Google Drive, Dropbox, and OneDrive. This integration enables you to store your signed documents directly in your preferred cloud storage provider, ensuring easy access and secure document storage.
4. Document Management Systems: Integration with document management systems like SharePoint or Box allows for centralized document storage and management. You can easily upload, send for signature, and retrieve signed documents from within your document management platform, ensuring a smooth and efficient document workflow.
5. Accounting and Financial Software: DocuSign integrates with accounting and financial software platforms like QuickBooks and Xero, streamlining the signing process for invoices, purchase orders, and other financial documents. This integration ensures accurate records, reduces manual data entry, and improves overall financial efficiency.
6. HR and Talent Management Systems: Integration with HR and talent management systems, such as Workday or BambooHR, simplifies the process of obtaining employee signatures on important HR documents like contracts, offer letters, or performance reviews. This integration improves compliance and enhances the employee onboarding experience.
7. Identity Verification Services: Integration with identity verification services like ID.me or Okta adds an extra layer of security to the signing process. This ensures that the signer’s identity is authenticated before they can access and sign the document, reducing the risk of fraud or unauthorized access.
By integrating DocuSign with other apps and platforms, you can seamlessly incorporate electronic signatures into your existing workflows. This reduces manual tasks, streamlines communication, and increases efficiency across various aspects of your business processes. Take advantage of the available integrations to enhance your document management and streamline your day-to-day operations.
Best Practices for Using DocuSign
To make the most of your experience with DocuSign, it’s important to follow best practices that ensure smooth document signing, enhance security, and improve efficiency. By implementing these best practices, you can optimize your workflow and maximize the benefits of using DocuSign. Here are some key best practices to consider:
1. Review Documents Thoroughly: Before sending a document for signature, carefully review it to ensure accuracy and completeness. Verify that all necessary fields are present, and double-check the recipient information to avoid any errors or delays in the signing process.
2. Use Templates: Leverage the power of templates to create consistent document formats and streamline the signing process. Templates save time by predefining recipients, roles, and the placement of signature fields, reducing manual input for each new document.
3. Personalize Email Messages: When sending documents for signature, add a personal touch to the email message. Clearly communicate the purpose of the document, provide any necessary instructions, and express appreciation for the recipient’s time and attention. Customizing your email messages helps to establish a professional and collaborative relationship.
4. Educate Signers: If you’re sending documents to recipients who may be unfamiliar with electronic signatures, provide them with clear instructions and guidance. Explain the security measures of DocuSign and reassure them of the legality and convenience of electronic signatures. Addressing any concerns upfront can help facilitate a smoother signing process.
5. Utilize Notifications and Reminders: Take advantage of the notification and reminder features in DocuSign to keep track of the signing process and prompt signers when needed. Use both automated reminders and personal notifications to ensure timely completion of documents and reduce the risk of delays.
6. Secure Your Account: Take appropriate measures to secure your DocuSign account. Use a strong and unique password and enable two-factor authentication for an additional layer of security. Regularly monitor your account activity and notify DocuSign immediately of any suspicious or unauthorized access.
7. Maintain Document Integrity: DocuSign provides an audit trail that records all activities related to the signing process. Keep the audit trail for each document, as it serves as a comprehensive record of the document’s lifecycle and can be crucial for compliance or dispute resolution purposes.
8. Regularly Update Contact Information: Ensure that your contact information, including email addresses and phone numbers, is up to date in your DocuSign account. This helps to avoid any communication delays or miscommunication during the signing process.
9. Provide Adequate Training: If you have multiple users in your organization utilizing DocuSign, provide training on best practices and usage guidelines. This ensures consistent adoption and usage across your organization and avoids any confusion or errors in the signing process.
By following these best practices, you can leverage DocuSign to its full potential and optimize your document signing process. These practices help ensure accuracy, security, and efficiency while fostering a positive experience for all parties involved in the document signing workflow.