
Connecting the Keyboard to HTC Vive
One of the key advantages of the HTC Vive is the ability to use a physical keyboard within the virtual reality environment. This feature allows for easier navigation and text input, making tasks such as browsing the web or typing messages more convenient. To connect your keyboard to the HTC Vive, follow the steps below:
- Ensure that your keyboard is compatible with the HTC Vive. Most standard USB keyboards should work without any issues.
- Locate the USB port on the HTC Vive headset. It is usually located on the side or back of the device.
- Plug one end of the USB cable into the USB port on the HTC Vive headset.
- Connect the other end of the USB cable to the USB port on your keyboard.
- Once the keyboard is connected, the HTC Vive should recognize it automatically.
It’s important to note that not all HTC Vive applications support the use of a physical keyboard, so the availability of keyboard input may vary depending on the specific application or game you’re using. However, many popular VR apps and experiences do offer keyboard support, so you’ll likely find plenty of opportunities to utilize your keyboard within the virtual reality environment.
Connecting a keyboard to the HTC Vive can greatly enhance the user experience by providing a more natural, familiar input method. Whether you’re typing in VR chat rooms, searching the web, or using productivity apps, having a physical keyboard makes these tasks significantly easier and more intuitive.
Adjusting the Keyboard Settings on HTC Vive
Once you have successfully connected your keyboard to the HTC Vive, you may want to adjust the keyboard settings to optimize your experience. Here are some key settings you can modify:
- Keyboard layout: By default, the HTC Vive provides a standard QWERTY keyboard layout. However, if you prefer a different layout such as AZERTY or Dvorak, you can change it in the system settings. Simply navigate to the “Keyboard Settings” section and select your preferred layout.
- Keyboard size and position: Depending on your personal preference and the size of your physical keyboard, you may need to adjust the virtual representation of the keyboard in the VR environment. The Vive allows you to resize and reposition the keyboard to best match the physical keyboard you are using. This can be done from the settings menu by selecting “Keyboard Options” and making the necessary adjustments.
- Key mapping: Some applications or games may have specific key mappings or shortcuts that are different from the standard keyboard layout. To accommodate this, the HTC Vive offers the ability to remap keys. From the settings menu, navigate to “Key Mapping” and customize the key assignments according to your preferences or the requirements of the application you are using.
By adjusting these keyboard settings on the HTC Vive, you can ensure a comfortable and personalized typing experience within the virtual reality environment. Take some time to explore the settings and find the configuration that works best for you.
Remember, not all applications or games may offer extensive keyboard customization options, and the available settings may vary. However, the majority of VR experiences include basic keyboard settings that allow for adjustments to enhance your typing experience in the virtual world.
Navigating the VR Environment with the Keyboard
Using a keyboard in the VR environment of the HTC Vive extends beyond just typing. It also enables you to navigate and interact with the virtual world more seamlessly. Here are some ways you can use the keyboard to navigate the VR environment:
- Movement: Many VR applications and games support keyboard inputs for movement. The WASD keys are commonly used to control forward, backward, left, and right movement. The arrow keys can also be utilized for navigating in some cases. Check the instructions or settings of the specific VR experience you’re using to determine the keyboard input for movement.
- Camera control: In certain VR applications, you can use the mouse in combination with the keyboard to control the direction and orientation of the virtual camera. This allows you to look around and explore the VR environment more freely.
- Menu navigation: Virtual menus and interfaces often require navigation. The keyboard can act as a convenient input method for selecting options, scrolling through menus, and interacting with various elements.
- Hotkeys and shortcuts: Like traditional computing, VR applications may have hotkeys and shortcuts that perform specific actions. These shortcuts are often customizable and can provide quick access to frequently used commands or functions.
With the keyboard as a versatile input device, navigating the VR environment becomes more intuitive and seamless. The combination of keyboard inputs with other VR controllers, such as motion controllers or the VR headset, allows for a more immersive and interactive experience.
It’s worth noting that not all VR experiences fully support keyboard navigation, as some may prioritize other input methods for movement and interaction. Nevertheless, the keyboard remains a powerful tool for navigating and augmenting your virtual reality experience on the HTC Vive.
Using the Keyboard for Text Entry in VR
Text entry in virtual reality can be a challenging task, but with the help of a physical keyboard, it becomes much easier and more efficient. Here’s how you can use the keyboard for text entry in the VR environment of the HTC Vive:
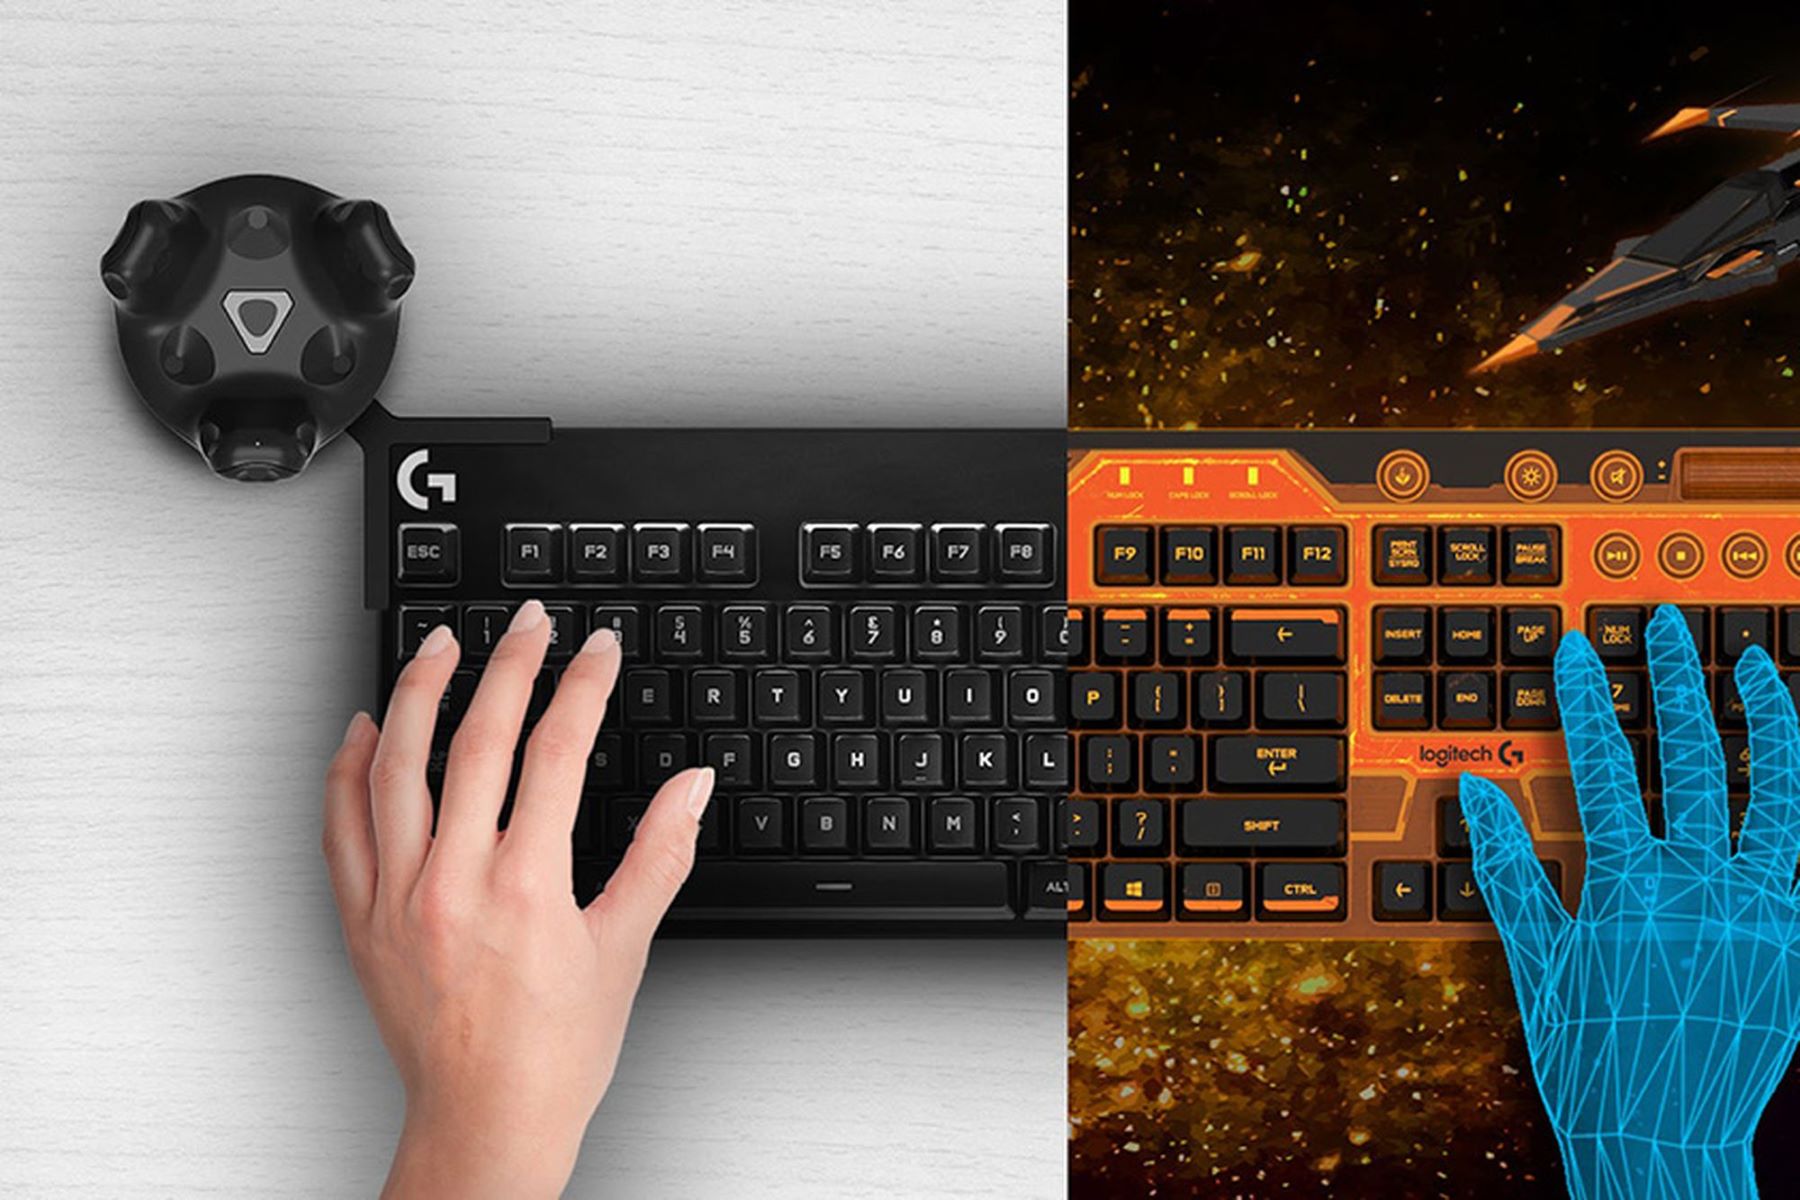
- Virtual keyboard: Many VR applications offer a virtual representation of the keyboard in the VR space. When you need to input text, the virtual keyboard will appear in front of you, mimicking the layout and design of your physical keyboard. You can then use the physical keyboard to type just as you would in the real world, with each key press correspondingly reflected in the virtual environment.
- Cursor-based input: In some VR apps, a cursor or pointer is used for text entry. You can control the cursor’s movement and position with the keyboard, enabling you to select on-screen keys or buttons and input text by pressing the corresponding keys on the physical keyboard.
- Voice-to-text: While not directly related to the physical keyboard, many VR applications support voice-to-text input. Instead of manually typing, you can use your voice to dictate text, and the VR system will transcribe it into the virtual environment. This feature can be particularly useful for longer passages of text or when your hands are otherwise occupied.
Whether you’re chatting with other VR users, browsing the web, or entering text in productivity apps, using a physical keyboard greatly simplifies the text input process in the virtual reality environment. It offers familiar tactile feedback, speeds up typing, and reduces the chances of errors compared to using virtual keyboards or other alternative input methods.
Keep in mind that text entry options may vary depending on the specific VR application or game you’re using. It’s recommended to explore the settings and options within each app to fully understand and utilize the available text input methods.
Customizing Keyboard Controls on HTC Vive
The HTC Vive provides flexibility when it comes to customizing keyboard controls, allowing you to tailor the input settings to your preferences and needs. Here are some ways you can customize keyboard controls on the HTC Vive:
- Rebinding keys: The ability to rebind or remap keys is a valuable feature that lets you assign specific actions or functions to different keys. This can be especially useful if you prefer a different layout or want to optimize the controls for specific applications or games. Check the settings menu or options within individual VR experiences to find keybinding customization options.
- Adjusting sensitivity: Some VR applications allow you to adjust the sensitivity of keyboard inputs, such as the speed of character movement or camera control. This customization can help you find the right balance and responsiveness for your comfort and playstyle.
- Creating macros: Macros are sequences of commands or actions that can be executed with a single keystroke. If supported, you can create and assign macros to specific keys to streamline complex tasks or execute multiple actions simultaneously. This can be particularly beneficial in games or productivity applications that involve repetitive actions.
- Application-specific profiles: Certain VR applications may offer the ability to create or load application-specific profiles, where you can configure and save customized keyboard controls for individual apps or games. This allows you to switch between different control setups effortlessly, maximizing efficiency and convenience.
Customizing keyboard controls on the HTC Vive empowers you to tailor the VR experience to your liking, optimizing comfort and efficiency. It’s important to note that not all VR applications may have extensive customization options, and the availability of advanced features like macro creation may vary.
Take the time to explore the settings and options within each application or game to discover the extent of keyboard control customization available. Experimenting with different configurations can lead to a more personalized and enjoyable virtual reality experience on the HTC Vive.
Troubleshooting Keyboard Issues on HTC Vive
While using a keyboard in the virtual reality environment of the HTC Vive can greatly enhance the user experience, it’s possible to encounter some issues along the way. Here are a few common keyboard issues that you might encounter and some troubleshooting steps to resolve them:
- Unresponsive keyboard: If your keyboard is not responding or not recognized by the HTC Vive, first check the USB connection. Ensure that the keyboard is securely connected to the VR headset. If the issue persists, try connecting the keyboard directly to your computer’s USB port instead of the VR headset, as intermittent connectivity issues can occur when using USB extension cables or hubs.
- Misalignment or incorrect positioning: The virtual representation of the keyboard in the VR environment may not align perfectly with the physical keyboard you’re using. In such cases, you can adjust the size, position, and rotation of the virtual keyboard through the in-app settings or options to ensure accurate tracking and alignment.
- Inconsistent or delayed keystrokes: If you experience delays or inconsistencies in key input, make sure that you’re using a compatible keyboard and that your computer meets the recommended system requirements for the HTC Vive. Additionally, ensure that there are no conflicting software or hardware drivers that may be causing input lag or keyboard issues. Updating drivers and firmware for both your VR headset and keyboard can also help resolve this problem.
- Compatibility issues: Not all VR applications or games fully support keyboard input. Make sure to check the documentation or support pages for the specific application or game you’re having trouble with to see if keyboard input is supported and if there are any specific troubleshooting steps for that particular title.
If you’re still experiencing keyboard issues after trying the troubleshooting steps mentioned above, it may be helpful to reach out to the support or community forums of the VR application or HTC Vive for further assistance. They can provide more specific guidance depending on the issue you’re facing.
By addressing these common keyboard issues, you can ensure smooth and uninterrupted usage of the keyboard in the VR environment of the HTC Vive, enhancing your overall virtual reality experience.